Advertisement
Close your eyes and imagine the tangy-sweet flavor of a creamsicle melting in your mouth. Now, envision that same irresistible flavor in a smooth, bite-sized truffle. These No-Bake Orange Creamsicle Truffles bring you the nostalgia of your favorite frozen treat, transformed into an elegant and easy dessert. Whether you’re hosting a party, gifting a friend, or treating yourself, this recipe is guaranteed to delight.
Why You’ll Love These Orange Creamsicle Truffles
- No-Bake Simplicity: Perfect for quick preparation without the hassle of baking.
- Creamy and Tangy: A balanced combination of rich cream cheese and bright citrus flavors.
- Customizable: Easily adjust sweetness or create a dairy-free version.
- Perfect for Any Occasion: These truffles make an excellent addition to dessert platters, gift boxes, or holiday celebrations.
Ingredients for No-Bake Orange Creamsicle Truffles
Main Ingredients
- 1 package (8 ounces) cream cheese, softened
- 1 cup powdered sugar
- 1 teaspoon vanilla extract
- 1 tablespoon orange zest
- ¼ cup fresh orange juice
- 2 cups white chocolate chips
- Orange sprinkles or additional orange zest for garnish
Optional Substitutions
- Dairy-Free Option: Use a dairy-free cream cheese alternative for a vegan-friendly version.
- Less Sweet Version: Reduce the powdered sugar by ¼ cup for a milder sweetness.
- Dark Chocolate Variation: Swap white chocolate chips for dark chocolate for a richer flavor.
Step-by-Step Instructions for No-Bake Orange Creamsicle Truffles
Step 1: Prepare the Cream Cheese Mixture
- In a large mixing bowl, beat the softened cream cheese until smooth and creamy.
- Take your time to ensure the cream cheese is well-softened for a silky texture.
Step 2: Incorporate the Dry Ingredients
- Gradually add the powdered sugar to the cream cheese, beating until fully incorporated.
- The powdered sugar balances the tanginess of the cream cheese, creating the perfect base.
Step 3: Add the Orange Flavors
- Mix in the vanilla extract, orange zest, and fresh orange juice.
- These ingredients provide the signature creamsicle flavor, with the zest adding brightness and the juice enhancing tanginess.
Step 4: Chill the Mixture
- Cover the bowl with plastic wrap and refrigerate the mixture for about 1 hour.
- This chilling time allows the mixture to firm up, making it easier to shape into truffles.
Step 5: Shape the Truffles
- Using a small cookie scoop or spoon, form the mixture into 1-inch balls.
- Place them on a baking sheet lined with parchment paper.
- Consistent sizing ensures even coating and a professional appearance.
Step 6: Freeze the Truffles
- Freeze the truffles for at least 30 minutes.
- Freezing ensures the truffles hold their shape during the chocolate-dipping process.
Step 7: Melt the Chocolate
- Melt the white chocolate chips in a microwave-safe bowl.
- Heat in 30-second intervals, stirring in between to prevent overheating.
- Stir until the chocolate is smooth and glossy.
Step 8: Coat the Truffles
- Dip each frozen truffle into the melted white chocolate, using a fork or skewer to coat evenly.
- Allow excess chocolate to drip off before placing the truffle back onto the parchment-lined sheet.
Step 9: Garnish the Truffles
- While the chocolate is still wet, sprinkle each truffle with orange sprinkles or additional orange zest.
- This adds a pop of color and enhances the orange flavor.
Step 10: Final Chill
- Refrigerate the coated truffles for about 10 minutes or until the chocolate is set.
- Once firm, the truffles are ready to enjoy!
Tips for Perfect Orange Creamsicle Truffles
- Room Temperature Ingredients: Ensure the cream cheese is softened for a smooth mixture.
- Work Quickly: Dip the truffles while the chocolate is warm for an even coating.
- Double Dipping: For a thicker chocolate shell, dip the truffles a second time after the first layer sets.
- Storage: Store the truffles in an airtight container in the refrigerator for up to 5 days.
Nutritional Information (Per Truffle)
| Nutrient | Amount |
|---|---|
| Calories | 120 |
| Protein | 1g |
| Fat | 7g |
| Carbohydrates | 15g |
| Sugar | 12g |
FAQs About No-Bake Orange Creamsicle Truffles
1. Can I use store-bought orange juice?
Yes, but fresh orange juice provides a brighter, more natural flavor.
2. What can I use if I don’t have white chocolate chips?
You can use white chocolate bars or candy melts as a substitute.
3. How do I prevent the truffles from sticking to my hands when shaping them?
Lightly coat your hands with powdered sugar or wear disposable gloves.
Advertisement
4. Can I freeze the truffles after they’re coated?
Yes! Freeze the truffles in an airtight container for up to 2 months. Thaw in the refrigerator before serving.
5. What’s the best way to make them vegan?
Use dairy-free cream cheese and coconut-based white chocolate for a completely vegan treat.
6. Can I add food coloring for a more vibrant look?
Absolutely! Add a drop of orange food coloring to the mixture for an extra pop of color.
Why These Truffles Are Perfect for Any Occasion
No-Bake Orange Creamsicle Truffles are versatile and elegant. They’re easy to make, require no oven time, and offer a nostalgic creamsicle flavor with a modern twist. These truffles are ideal for summer parties, holiday gifts, or as a unique dessert for your next gathering.
Conclusion: Your New Favorite Treat
Now that you know how to make No-Bake Orange Creamsicle Truffles Recipe – Easy Treats, it’s time to bring a little sunshine to your dessert table. With their creamy texture, vibrant flavor, and beautiful presentation, these truffles are bound to impress everyone who tries them. Gather your ingredients, follow the steps, and enjoy creating a dessert that’s as fun to make as it is to eat!
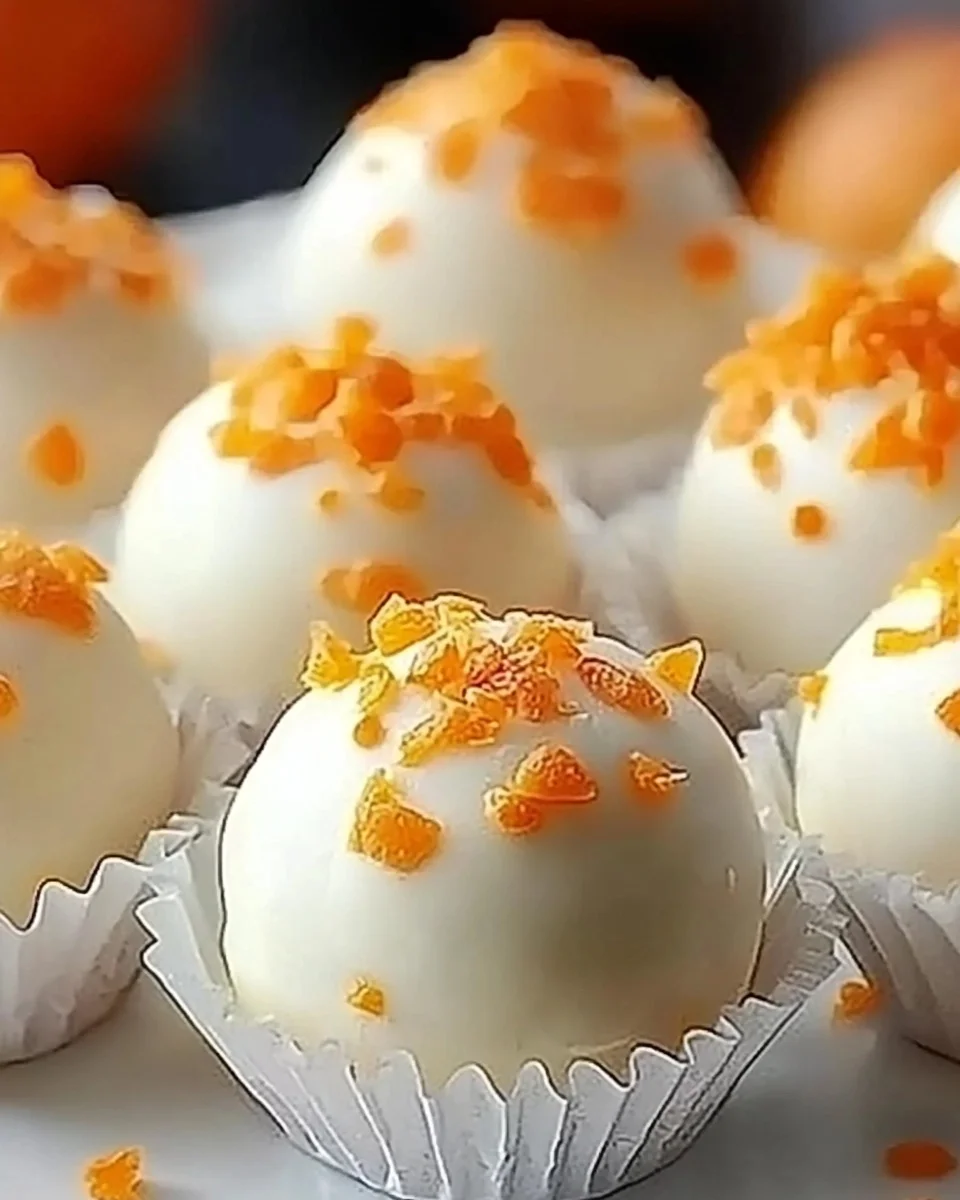
No-Bake Orange Creamsicle Truffles
Ingredients
Method
- Prepare the Cream Cheese Mixture
- In a large mixing bowl, beat the softened cream cheese until smooth and creamy.
- Gradually add the powdered sugar and mix until fully incorporated.
- Add Orange Flavors
- Mix in the vanilla extract, orange zest, and orange juice. Combine thoroughly for a creamy, tangy base.
- Chill the Mixture
- Cover the bowl and refrigerate for 1 hour, or until the mixture is firm enough to shape into balls.
- Shape the Truffles
- Use a small cookie scoop or spoon to form 1-inch balls from the mixture. Roll them between your hands for an even shape.
- Place the truffles on a parchment-lined baking sheet.
- Freeze the Truffles
- Freeze the shaped truffles for at least 30 minutes. This ensures they hold their shape during coating.
- Melt the White Chocolate
- Melt the white chocolate chips in a microwave-safe bowl. Heat in 30-second intervals, stirring after each until smooth.
- Coat the Truffles
- Dip each frozen truffle into the melted chocolate, letting the excess drip off.
- Place the coated truffles back on the parchment-lined baking sheet.
- Garnish
- While the chocolate is still wet, sprinkle the truffles with orange sprinkles or extra zest for a decorative finish.
- Final Chill
- Refrigerate the coated truffles for 10 minutes or until the chocolate is firm.
- Serve and Enjoy
- Once set, serve the truffles immediately or store them for later.
Notes
- Storage: Keep the truffles in an airtight container in the refrigerator for up to 5 days.
- Freezing: Truffles can be frozen for up to 2 months. Thaw in the refrigerator before serving.
- Customizations: Add a drop of orange food coloring for vibrant truffles, or substitute white chocolate with dark chocolate for a twist.
- Dairy-Free Version: Use dairy-free cream cheese and coconut-based white chocolate.


