Advertisement
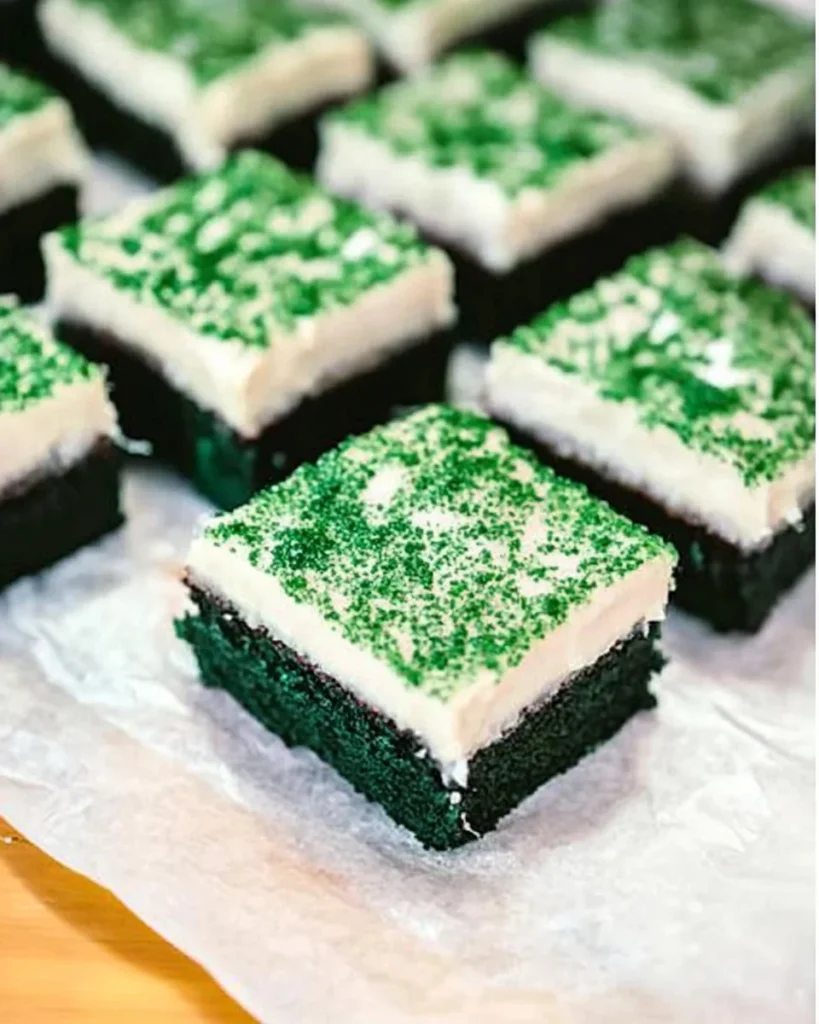
If you love red velvet but want to try something new, Green Velvet Brownies with Cream Cheese Frosting are a bold and delicious alternative. These fudgy, chocolate-infused brownies bring a vibrant emerald green color to your dessert table, making them perfect for St. Patrick’s Day, Christmas, or any festive occasion. Topped with a smooth, tangy cream cheese frosting, these brownies strike the perfect balance between rich, chocolatey goodness and creamy sweetness.
Whether you’re an experienced baker or a beginner looking for a show-stopping dessert, these brownies are simple to make yet impressive in both taste and appearance. In this guide, we’ll explore the origins of velvet cakes, tips for achieving the perfect texture, and answers to commonly asked questions.
What Makes Green Velvet Brownies Special?
1. A Unique and Eye-Catching Dessert
The vibrant green hue makes these brownies stand out on any dessert table. Whether you’re celebrating a holiday or just want to make something fun and different, this recipe is guaranteed to impress.
2. The Perfect Blend of Fudgy and Chewy
Unlike traditional brownies that rely solely on cocoa for their deep flavor, green velvet brownies use a touch of chocolate while maintaining a soft, slightly chewy texture. This gives them a richer, more decadent bite.
Advertisement
3. Tangy Cream Cheese Frosting Complements the Sweetness
The thick, velvety layer of cream cheese frosting balances the chocolate base with its smooth, slightly tangy flavor. If you love classic red velvet cake, you’ll adore this variation.
4. Perfect for Any Occasion
- St. Patrick’s Day: The bold green color makes them a festive must-have.
- Christmas: Pair them with red sprinkles or holiday decorations for a seasonal twist.
- Birthdays & Parties: A fun, unexpected dessert that stands out from typical brownies.
A Brief History of Velvet Cakes
The term “velvet cake” originated in the 19th century, describing cakes with a softer, more delicate crumb than traditional sponge cakes. These cakes typically included cocoa powder, which helped break down flour proteins and create a smoother texture.
The most famous variation, red velvet cake, gained popularity in the early 20th century, particularly in the Southern United States. Its red hue originally came from natural cocoa reacting with acidic ingredients, though modern recipes now rely on food coloring.
Green velvet brownies take inspiration from this classic, using a touch of chocolate, food coloring, and a signature cream cheese frosting to create a new take on the timeless recipe.
Why You’ll Love This Recipe
1. Simple to Make, Yet Impressive
With just a few simple ingredients and easy steps, these brownies look like they took hours to create but are actually beginner-friendly.
2. Moist and Fudgy Every Time
Unlike cakier brownies, this recipe delivers a rich, slightly dense texture while still feeling soft and indulgent.
3. Customizable for Different Flavors
While green velvet brownies have a mild chocolate taste, you can adjust the cocoa level or even try different extracts, like almond or peppermint, for a unique twist.
4. Pairs Well with Many Toppings
- Crushed Oreos or chocolate chips for extra texture
- Festive sprinkles to match different holidays
- Drizzled white or dark chocolate for an elegant touch
Pro Tips for the Best Green Velvet Brownies
1. Use Quality Food Coloring
For the most vibrant green shade, use gel food coloring rather than liquid. Gel is more concentrated, giving you a deeper color without affecting the batter’s consistency.
2. Don’t Overmix the Batter
Overmixing can lead to dense, tough brownies. Stir until just combined to keep them soft and moist.
3. Line Your Baking Pan with Foil
This makes it easier to lift the brownies out for slicing without them sticking to the pan.
4. Let the Brownies Cool Completely Before Frosting
If the brownies are even slightly warm, the cream cheese frosting will melt and become runny. Be patient and let them cool for at least 2 hours.
5. Store Properly for Maximum Freshness
Since the frosting contains cream cheese, store the brownies in an airtight container in the refrigerator for up to 5 days. Let them sit at room temperature for 10-15 minutes before serving for the best texture.
Emerald Velvet Brownies with Luscious Cream Cheese Frosting
Ingredients:
- ¾ cup semi-sweet chocolate chips
- ¾ cup unsalted butter
- 2 cups granulated sugar
- 4 large eggs
- 1½ cups all-purpose flour
- 1 (1-ounce) bottle green liquid food coloring
- 1½ teaspoons baking powder
- 1 teaspoon vanilla extract
- ⅛ teaspoon salt
For the Cream Cheese Frosting:
- 1 (8-ounce) package cream cheese, softened
- 3 tablespoons unsalted butter, softened
- 1½ cups powdered sugar
- ⅛ teaspoon salt
- 1 teaspoon vanilla extract
Directions:
- Prepare the Baking Pan:
- Preheat your oven to 350°F (175°C).
- Line a 9-inch square baking pan with aluminum foil, extending the foil over the edges for easy removal. Lightly grease the foil.
- Melt Chocolate and Butter:
- In a large microwave-safe bowl, combine the semi-sweet chocolate chips and unsalted butter.
- Microwave on high for 1½ to 2 minutes, stirring every 30 seconds, until melted and smooth.
- Mix in Sugar and Eggs:
- Allow the chocolate mixture to cool slightly.
- Whisk in the granulated sugar until well combined.
- Add the eggs one at a time, whisking just until each is incorporated.
- Incorporate Dry Ingredients and Coloring:
- Gently stir in the all-purpose flour, baking powder, vanilla extract, green food coloring, and salt until the batter is smooth and uniformly green.
- Bake the Brownies:
- Pour the batter into the prepared pan, spreading it evenly.
- Bake for 44 to 48 minutes, or until a toothpick inserted into the center comes out with a few moist crumbs.
- Let the brownies cool completely in the pan on a wire rack, approximately 2 hours.
- Prepare the Cream Cheese Frosting:
- In a medium bowl, beat the softened cream cheese and butter with an electric mixer on medium speed until creamy.
- Gradually add the powdered sugar and salt, beating until smooth and well combined.
- Stir in the vanilla extract.
- Frost and Serve:
- Using the foil overhang, lift the cooled brownies from the pan and remove the foil.
- Spread the cream cheese frosting evenly over the brownies.
- Cut into 16 squares and serve.
Nutritional Information (per serving):
- Calories: 320
- Total Fat: 16g
- Saturated Fat: 10g
- Cholesterol: 85mg
- Sodium: 150mg
- Total Carbohydrates: 44g
- Dietary Fiber: 1g
- Sugars: 33g
- Protein: 4g
Note: Nutritional values are approximate and may vary based on ingredient brands and measurements.
Variations and Fun Additions
1. Mint Chocolate Green Velvet Brownies
Add ½ teaspoon of peppermint extract to the batter for a cool, minty twist. Top with chopped Andes mints for extra flavor.
2. Dark Chocolate Drizzle
For a richer, more chocolatey taste, drizzle melted dark chocolate over the cream cheese frosting before serving.
3. Gluten-Free Green Velvet Brownies
Substitute the all-purpose flour with a 1:1 gluten-free flour blend, ensuring all other ingredients are also gluten-free.
4. Holiday-Themed Brownies
- For St. Patrick’s Day: Add gold sprinkles or shamrock decorations.
- For Christmas: Mix in red and green chocolate chips for a festive look.
- For Halloween: Top with black and orange sprinkles or candy eyes for a spooky effect.
Frequently Asked Questions (FAQs)
1. Can I Make These Brownies Without Food Coloring?
Yes! The green color is purely for fun and aesthetics. If you prefer, simply omit the food coloring, and you’ll have delicious chocolate velvet brownies with cream cheese frosting.
2. How Do I Make the Brownies Extra Fudgy?
For an extra fudgy texture, reduce the flour by ¼ cup and slightly underbake the brownies, removing them when the center is still slightly soft.
3. Can I Use a Boxed Brownie Mix Instead?
Yes, but you’ll lose the classic velvet texture. If using a brownie mix, add 1 teaspoon of vanilla extract and a few drops of green food coloring to maintain some of the original flavors.
4. What’s the Best Way to Cut Clean Slices?
For clean, sharp edges, chill the brownies in the fridge for 30 minutes before slicing and use a sharp knife cleaned between each cut.
5. Can I Freeze These Brownies?
Yes! Wrap the unfrosted brownies in plastic wrap and freeze for up to 3 months. When ready to eat, thaw them in the refrigerator and frost before serving.
Conclusion: A Must-Try Dessert for Any Occasion
Green Velvet Brownies with Cream Cheese Frosting are a fun, colorful, and delicious twist on traditional brownies. With their soft texture, mild chocolate flavor, and tangy-sweet frosting, they offer a perfect balance of richness and creaminess.
Whether you’re celebrating a holiday, hosting a party, or just want to bake something unique, these brownies will quickly become a go-to favorite. They’re easy to make, visually stunning, and guaranteed to impress anyone who takes a bite.
So why not try something new and bake a batch of these emerald-hued brownies? Once you do, they might just become a permanent addition to your dessert rotation!
St. Patrick’s Day Green Velvet Brownies
Ingredients
Method
- Preheat the oven to 350°F (175°C) and line a 9-inch square baking pan with foil, greasing it lightly.
- Melt the butter and chocolate chips together in a microwave-safe bowl, stirring until smooth.
- Mix in sugar, then add eggs one at a time, whisking after each. Stir in vanilla extract.
- Combine dry ingredients (flour, baking powder, salt) in a separate bowl, then slowly mix them into the wet ingredients.
- Add green food coloring and mix until the batter is evenly colored.
- Pour the batter into the pan and bake for 44-48 minutes, until a toothpick inserted comes out with a few moist crumbs.
- Let the brownies cool completely in the pan before frosting.
- Make the frosting by beating together cream cheese, butter, powdered sugar, salt, and vanilla extract until smooth.
- Spread frosting evenly over the brownies, slice into squares, and serve!
Notes
-
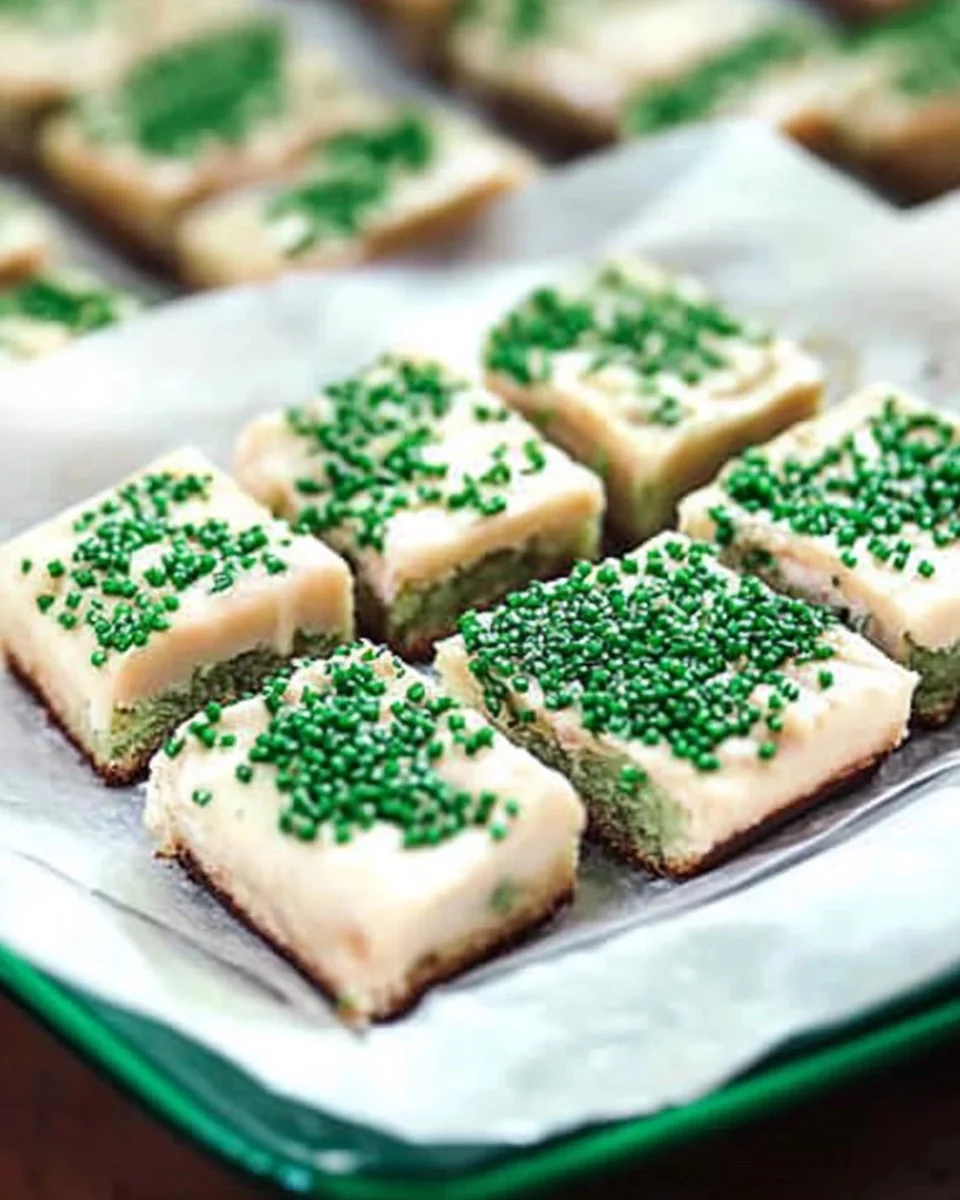
- For a deeper green color, use gel food coloring instead of liquid.
- Chill the brownies before slicing for clean, sharp edges.
- Store in the refrigerator for up to 5 days in an airtight container.
- For a festive touch, top with green sprinkles or drizzle melted chocolate over the frosting.