
Advertisement
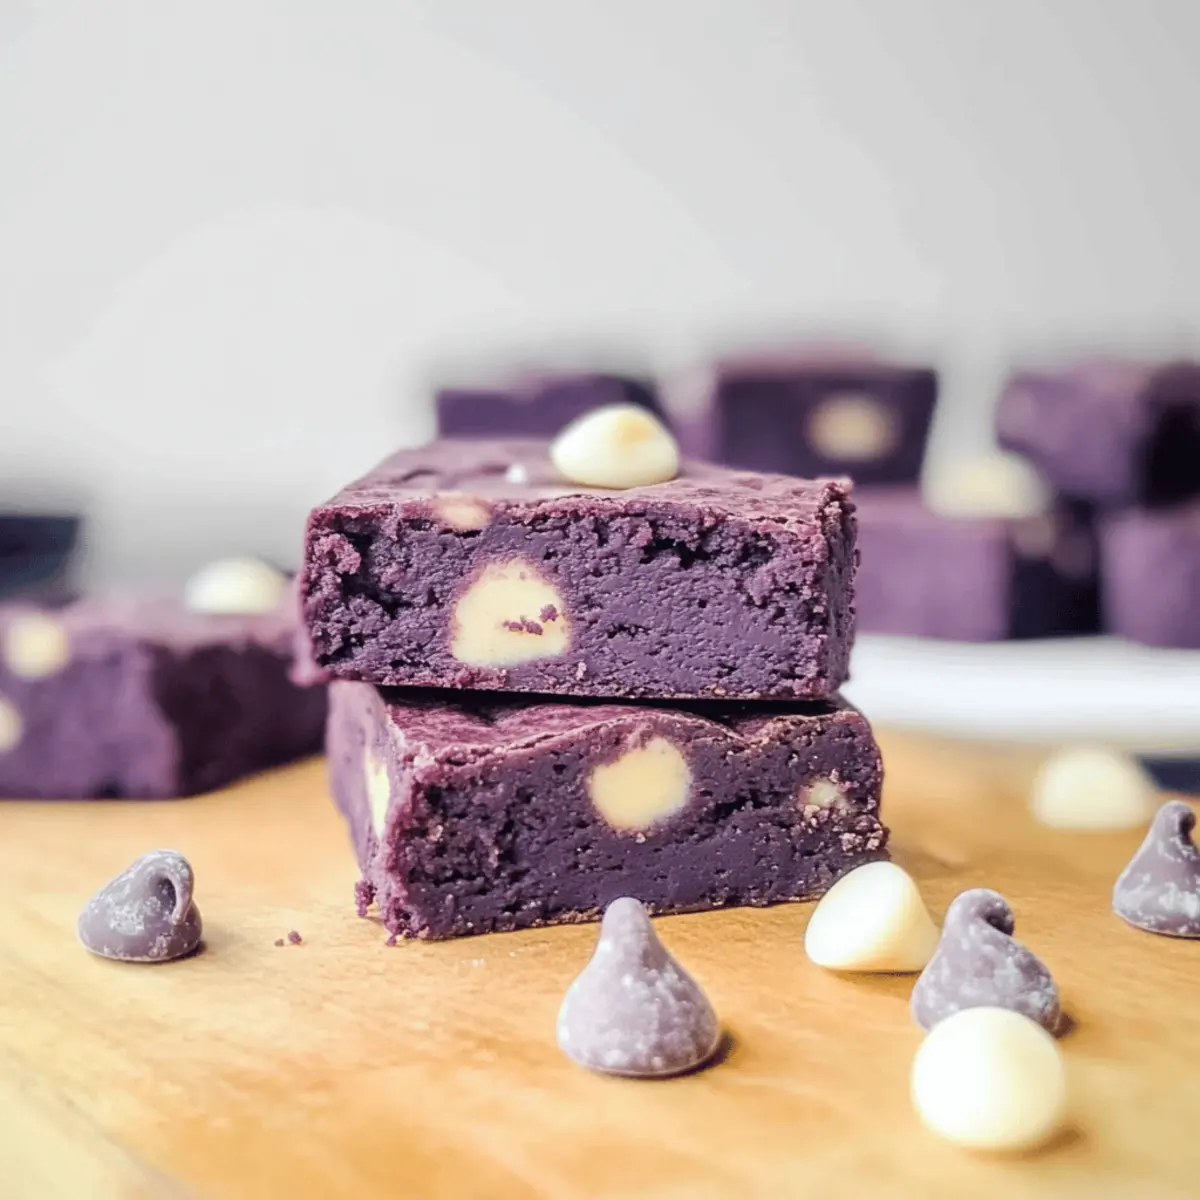
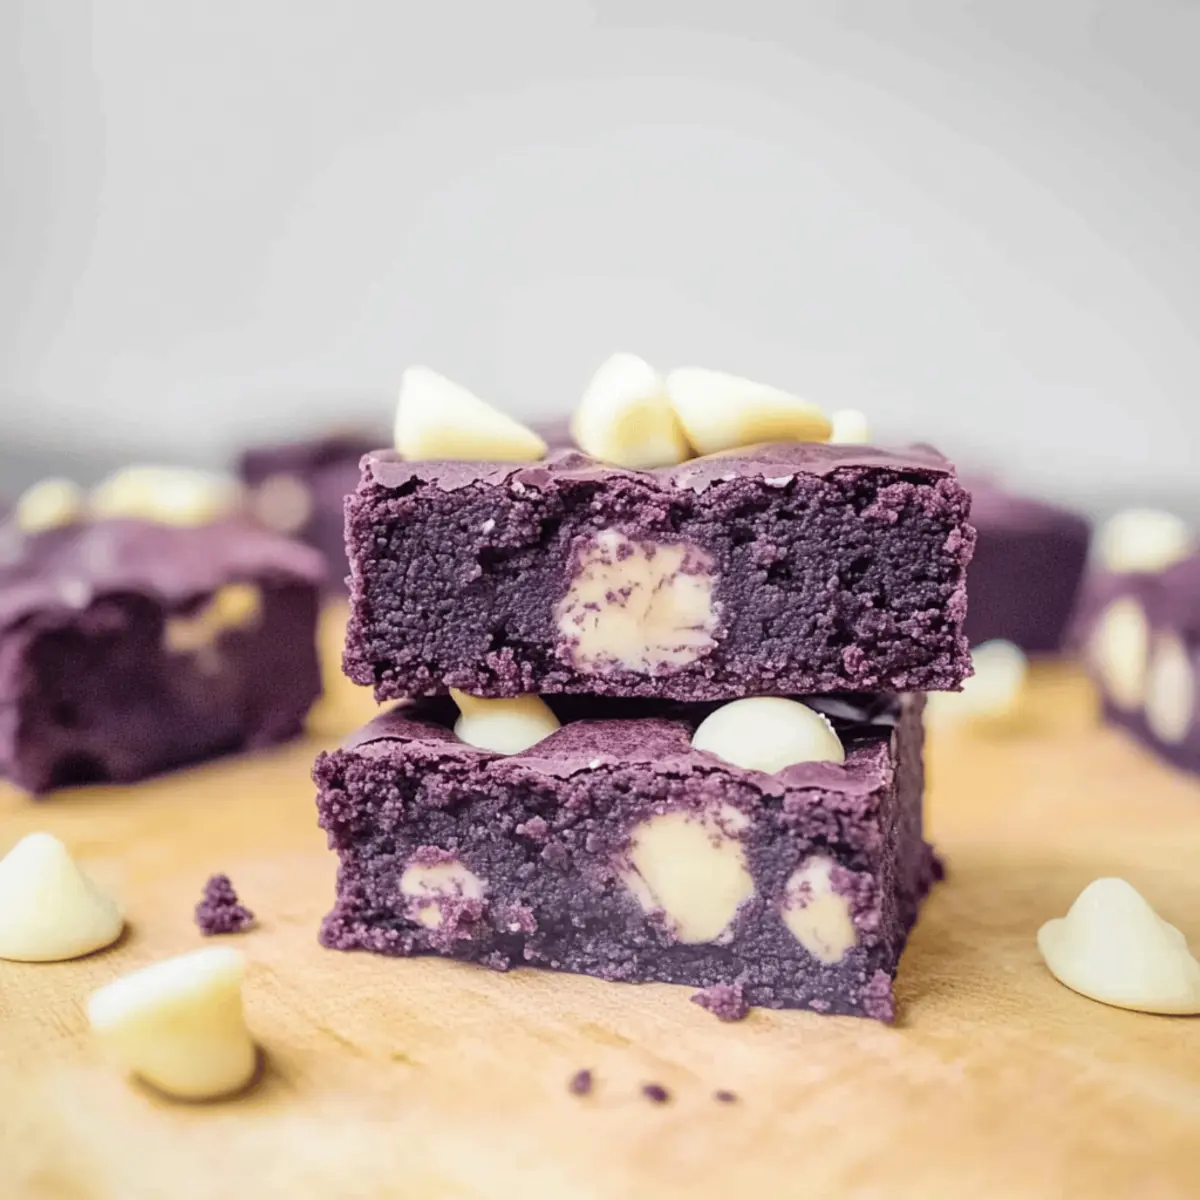
As I stirred the vibrant purple batter, the air filled with the sweet scent of ube that whisked me back to sunny days spent at family gatherings. These easy one-bowl Ube Brownies with White Chocolate Chips are the perfect fusion of comfort and a twist on tradition. Not only do they come together in a snap, making them an ideal choice for both busy weeknights and festive celebrations, but they also pack in the rich, unique flavor of ube, a beloved Filipino ingredient. The addition of creamy white chocolate chips creates a truly irresistible treat that will have everyone reaching for seconds. Are you ready to explore a delightful dessert that’s as fun to make as it is to eat? Let’s dive in!
Why are Ube Brownies a must-try?
Unique Flavor Experience: The captivating taste of ube sets these brownies apart, offering a delightful twist on traditional recipes.
One-Bowl Convenience: Say goodbye to messy kitchens; this easy one-bowl recipe minimizes clean-up while maximizing taste!
Crowd-Pleasing Treat: These colorful brownies are perfect for gatherings, luring even the pickiest eaters to indulge in their whimsical purple hue.
Versatile Variations: Feel free to customize by adding cheesecake swirls or swapping in different chocolate chips for a personal touch.
Guilt-Free Delights: With around 214 calories per brownie, you can indulge without worry, making them a perfect dessert for any occasion.
Ube Brownie Ingredients
For the Brownie Batter
- Unsalted Butter – Adds moisture and richness; can use salted butter, but reduce added salt.
- Light Brown Sugar – Provides sweetness and hints of caramel flavor; swap for all white sugar for a lighter taste.
- Granulated Sugar – Sweetens the brownies; can use all light brown sugar for different texture and flavor.
- Egg – Binds ingredients and adds richness; no direct substitutions recommended for structure.
- Ube Extract – Offers distinct ube flavor without needing halaya or powder; rare substitution with vanilla for a different flavor.
- Plain All-Purpose Flour – Provides structure; no specific substitutions recommended.
- Cornstarch – Aids in achieving a chewy texture; can use equal amount of flour if unavailable.
- Salt (optional) – Enhances flavor balance; can omit for a sweeter profile.
- White Chocolate Chips – Adds sweetness and contrasting texture; swap for dark or milk chocolate chips, or nuts for a crunch.
For Serving (Optional)
- Ice Cream – A scoop of your favorite flavor creates a decadent dessert experience.
- Fresh Berries – Add a tart contrast to the sweet brownies; blueberries or raspberries work beautifully.
These Ube Brownies are not just a treat; they’re an experience waiting to unfold!
Advertisement
Step‑by‑Step Instructions for Ube Brownies
Step 1: Preheat the Oven
Begin by preheating your oven to 180°C (350°F). This temperature ensures your Ube Brownies bake evenly, developing a beautifully soft and fudgy texture. While the oven warms up, gather your ingredients and prepare an 8-inch square baking pan by greasing it lightly for easy removal later.
Step 2: Melt the Butter
In a heatproof bowl, add the unsalted butter and place it in the microwave. Heat the butter for 30-50 seconds, or until fully melted but not bubbling. This step creates a rich foundation for your brownies, allowing for a smooth and creamy batter. Let it cool slightly before proceeding to the next step.
Step 3: Mix in the Sugars
Using a whisk or a spatula, incorporate the light brown sugar and granulated sugar into the melted butter. Stir vigorously for 1-2 minutes until the mixture reaches a smooth, thick consistency. The sugars should dissolve completely, resulting in a shiny, cohesive base that enhances the sweetness of your Ube Brownies.
Step 4: Add the Egg and Ube Extract
Crack in one egg and pour in the ube extract, mixing until everything is well combined. This step brings the delicious ube flavor alive, creating a vibrant purple hue. Beat the mixture for another minute, ensuring the egg binds everything together beautifully and adds richness to the batter.
Step 5: Combine Dry Ingredients
Sift the all-purpose flour and cornstarch directly into the wet mixture. With a spatula, gently fold the dry ingredients in until just combined, taking care not to overmix. You’ll want to see a few flour streaks remaining for the best texture in your Ube Brownies. This creates a tender, chewy result as the brownies bake.
Step 6: Stir in the Salt and Chocolate Chips
If desired, add a pinch of salt to enhance flavor balance and stir in the white chocolate chips. These creamy chips will create delightful pockets of sweetness throughout. Give it a few gentle folds, ensuring the chips are well-distributed without overworking the batter.
Step 7: Pour and Smooth the Batter
Pour the vibrant batter into your prepared square baking pan, using a spatula to spread it out evenly. This ensures that your Ube Brownies bake uniformly, resulting in a lovely texture. Smooth the top with the spatula, and this extra step will enhance the visual appeal of the finished brownies.
Step 8: Bake to Perfection
Place the pan in the preheated oven and bake for 20-25 minutes. Look for a slight wobble in the center when you gently shake the pan, indicating they are still perfectly fudgy. Keep an eye on them to avoid overbaking, as you want a chewy texture that complements the flavor of the ube.
Step 9: Cool and Slice
Once baked, remove the pan from the oven and allow the brownies to cool completely in the tin. This step is crucial for achieving clean cuts when slicing into squares. After about 30 minutes, you can lift them out using the parchment liner, slice them up, and enjoy your delicious Ube Brownies!
Ube Brownies Variations & Substitutions
Customize your ube brownies to match your taste and dietary preferences while exploring new flavor dimensions!
- Dairy-Free: Substitute the unsalted butter with coconut oil or vegan butter for a deliciously rich, dairy-free version.
- Gluten-Free: Replace regular flour with a gluten-free all-purpose flour blend for an equally scrumptious treat that everyone can enjoy.
- Nutty Crunch: Add 1/2 cup of chopped walnuts or pecans for a delightful crunchy texture that contrasts beautifully with the chewy brownies.
- Chocolate Lovers: Mix in dark chocolate chips for a more intense chocolate flavor that’ll satisfy every chocolate craving.
- Fruity Twist: Incorporate dried or fresh fruits like raspberries or shredded coconut for an enticing flavor combination that brightens up each bite.
- Cheesecake Swirls: For a creamy variation, mix softened cream cheese with a bit of sugar and vanilla, and swirl it into the brownie batter before baking.
- Mochi Brownies: Substitute half of the regular flour with glutinous rice flour for a chewy mochi-inspired twist that brings unique flavors to each bite.
- Spiced Ube: Add a pinch of cinnamon or nutmeg to the batter for a warm, aromatic touch that enhances the richness of the ube.
With these delicious options, feel free to make your ube brownies an unforgettable experience! For even more fun, you can learn how to serve them with a dollop of ice cream or fresh berries, turning them into a stunning dessert centerpiece.
Make Ahead Options
These delightful Ube Brownies are perfect for meal prep enthusiasts! You can mix the batter and refrigerate it for up to 24 hours before baking, which allows the flavors to meld beautifully. Just be sure to store it in an airtight container to maintain freshness and prevent any browning of the ingredients. Alternatively, you can bake the Ube Brownies in advance; they will stay fresh in an airtight container at room temperature for up to 4 days. For longer storage, freeze them wrapped tightly in cling film and foil for up to 3 months. When ready to serve, simply thaw overnight in the fridge and enjoy your indulgent treat!
How to Store and Freeze Ube Brownies
Airtight Container: Store the Ube Brownies in an airtight container at room temperature for up to 4 days to maintain their soft, gooey texture.
Refrigeration: If you prefer a chilled treat, the brownies can be placed in the fridge, where they will last for about a week. Just ensure they are tightly wrapped.
Freezer: For longer storage, individually wrap the brownies in cling film and then foil. Freeze for up to 3 months for a delectable dessert ready whenever you crave it.
Defrosting: To enjoy your frozen Ube Brownies, simply transfer them to the fridge overnight before serving, ensuring they remain moist and flavorful.
Expert Tips for Ube Brownies
- Precise Measurements: Weigh your ingredients for accuracy; even small variations can affect the texture of your Ube Brownies.
- Mixing Techniques: Stir the butter, sugars, and egg thoroughly for a smooth batter, avoiding lumps for a fudgy brownie consistency.
- Cooling Time: Allow the brownies to cool completely in the pan before slicing. This prevents crumbling and keeps their chewy texture intact.
- Watch the Bake: Keep a close eye during the last few minutes of baking; a slight wobble in the center indicates perfect fudginess in your Ube Brownies.
- Experiment with Swirls: Try incorporating cheesecake swirls by mixing cream cheese with a bit of sugar and vanilla before adding it to the batter.
What to Serve with Easy One-Bowl Ube Brownies?
Indulging in these delightful ube brownies opens the door to a world of flavors that perfectly complement their unique taste.
-
Vanilla Ice Cream: A scoop of creamy vanilla contrasts beautifully with the rich ube flavor, creating a luscious dessert experience.
-
Fresh Berries: Add a burst of tartness with strawberries or blueberries, enhancing the sweetness of the brownies while adding a vibrant color contrast.
-
Chocolate Ganache: Drizzle warm chocolate ganache over your brownies for an extra layer of decadence that melds perfectly with the ube.
-
Coconut Whipped Cream: Light and fluffy, coconut whipped cream offers a tropical touch that echoes the flavors of the ube beautifully.
-
Coffee: A hot cup of coffee or espresso pairs wonderfully, balancing the sweetness of the brownies while enhancing their rich flavors.
-
Chopped Nuts: Sprinkling toasted walnuts or pecans adds a crunchy texture, creating a delightful contrast to the chewy interior of the brownies.
-
Matcha Latte: For a unique twist, serve these brownies with a soothing matcha latte, where earthy green tea flavors complement the sweetness of ube.
-
Cheesecake Swirls: Serve with a side of creamy cheesecake swirl for an indulgent option that adds a rich, tangy flavor to the experience.
Enjoy these pairings to turn your ube brownies into an unforgettable dessert masterpiece!
Ube Brownies Recipe FAQs
What kind of ube should I use for Ube Brownies?
Absolutely! For these Ube Brownies, you should use ube extract, which is a concentrated flavoring that delivers that signature ube taste without the need for fresh ube or halaya. Fresh ube can be used, but it requires extra processing, so the extract is more convenient and ensures consistent flavor throughout your brownies.
How should I store my Ube Brownies to keep them fresh?
To keep your Ube Brownies fresh, store them in an airtight container at room temperature for up to 4 days. If they last longer (and I hope they do!), you can refrigerate them, where they’ll stay good for about a week. Just be sure they are covered well to avoid drying out!
Can I freeze Ube Brownies, and what’s the best way to do it?
Yes, you can definitely freeze Ube Brownies! For the best results, individually wrap each brownie in cling film, then place them in a freezer-safe bag or container. They can be frozen for up to 3 months. When you’re ready to enjoy them, simply defrost in the refrigerator overnight, and they will maintain their delicious taste and texture.
What do I do if my Ube Brownies turn out too dry?
Very! If your Ube Brownies come out dry, it might be due to overbaking. Always set a timer for the lower end of the baking time and check for a slight wobble in the center before removing them from the oven. If they’re still a bit dry, try adding a scoop of ice cream or a drizzle of chocolate sauce on top to enhance moisture and decadence.
Are Ube Brownies suitable for people with nut allergies?
The base recipe for Ube Brownies is nut-free, making it a great option for those with nut allergies. However, always double-check your chocolate chip ingredients, as some brands could have cross-contamination. To be extra safe, you might consider using allergy-friendly chocolate chips if you’re sharing them with guests!
What can I do if I can’t find ube extract?
If you can’t find ube extract, which is rare but understandable, you can substitute it with vanilla extract for a different flavor profile. However, the taste will be different from the vibrant ube flavor that makes these brownies special. Alternatively, you can try using store-bought ube halaya, but this may require adjustments in the moisture content of other ingredients.
Deliciously Soft Ube Brownies: Your New Favorite Treat!
Ingredients
Equipment
Method
- Preheat your oven to 180°C (350°F) and grease an 8-inch square baking pan.
- Melt the unsalted butter in a bowl in the microwave for 30-50 seconds.
- Stir in the light brown sugar and granulated sugar into the melted butter until smooth.
- Add the egg and ube extract, mixing until combined and vibrant purple.
- Sift the flour and cornstarch into the wet mixture and fold gently until just combined.
- If desired, add salt and stir in white chocolate chips.
- Pour the batter into the prepared baking pan and smooth the top evenly.
- Bake for 20-25 minutes, looking for a slight wobble in the center.
- Allow the brownies to cool completely in the pan before slicing.


