Advertisement
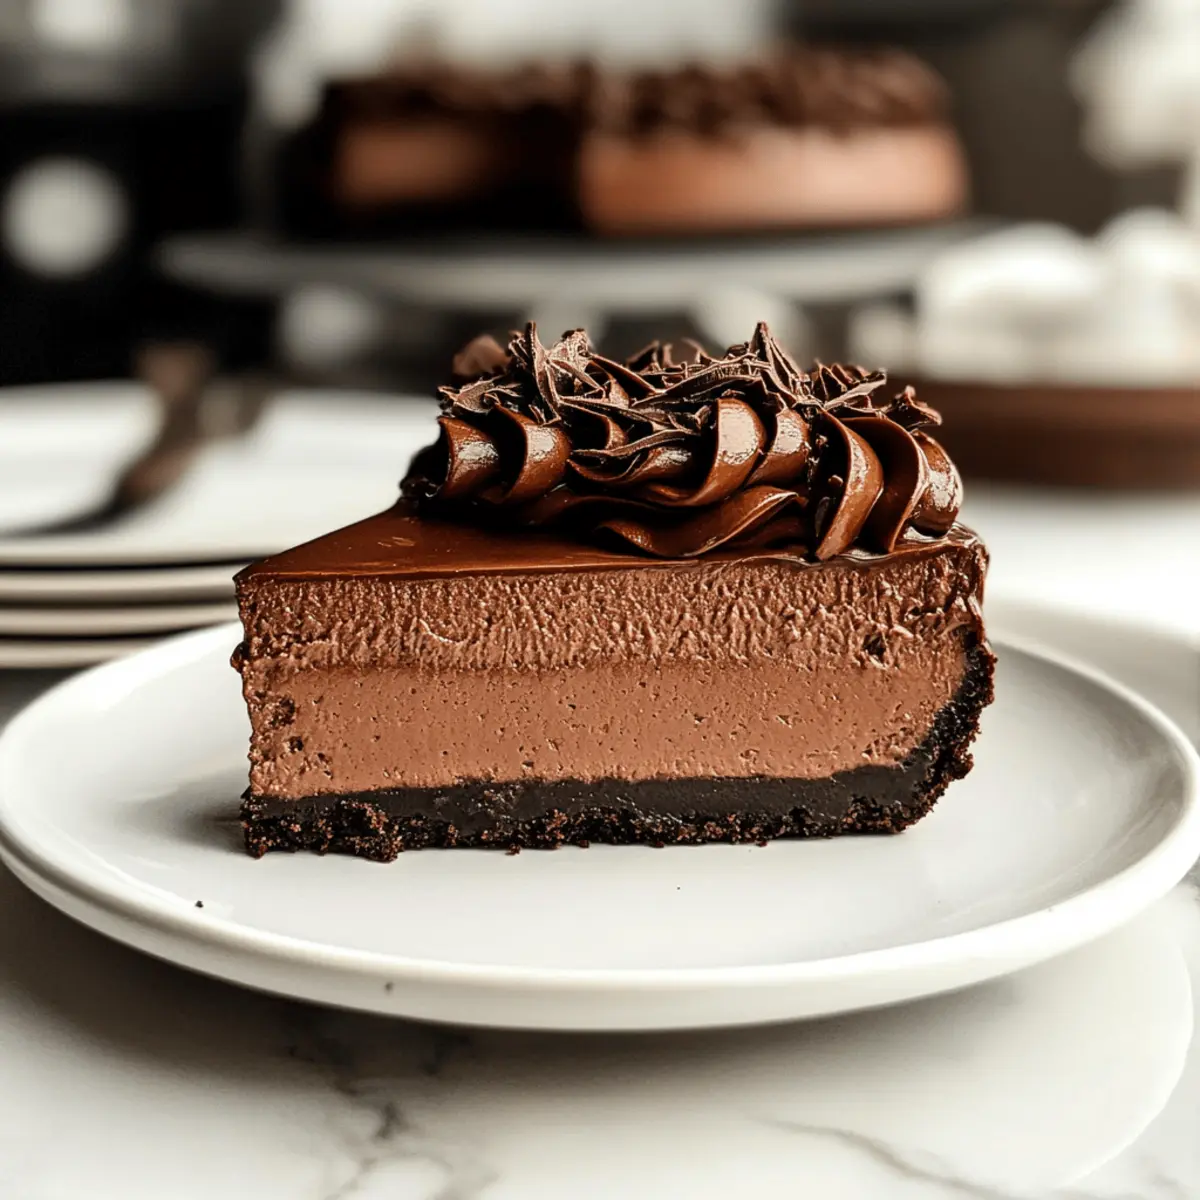
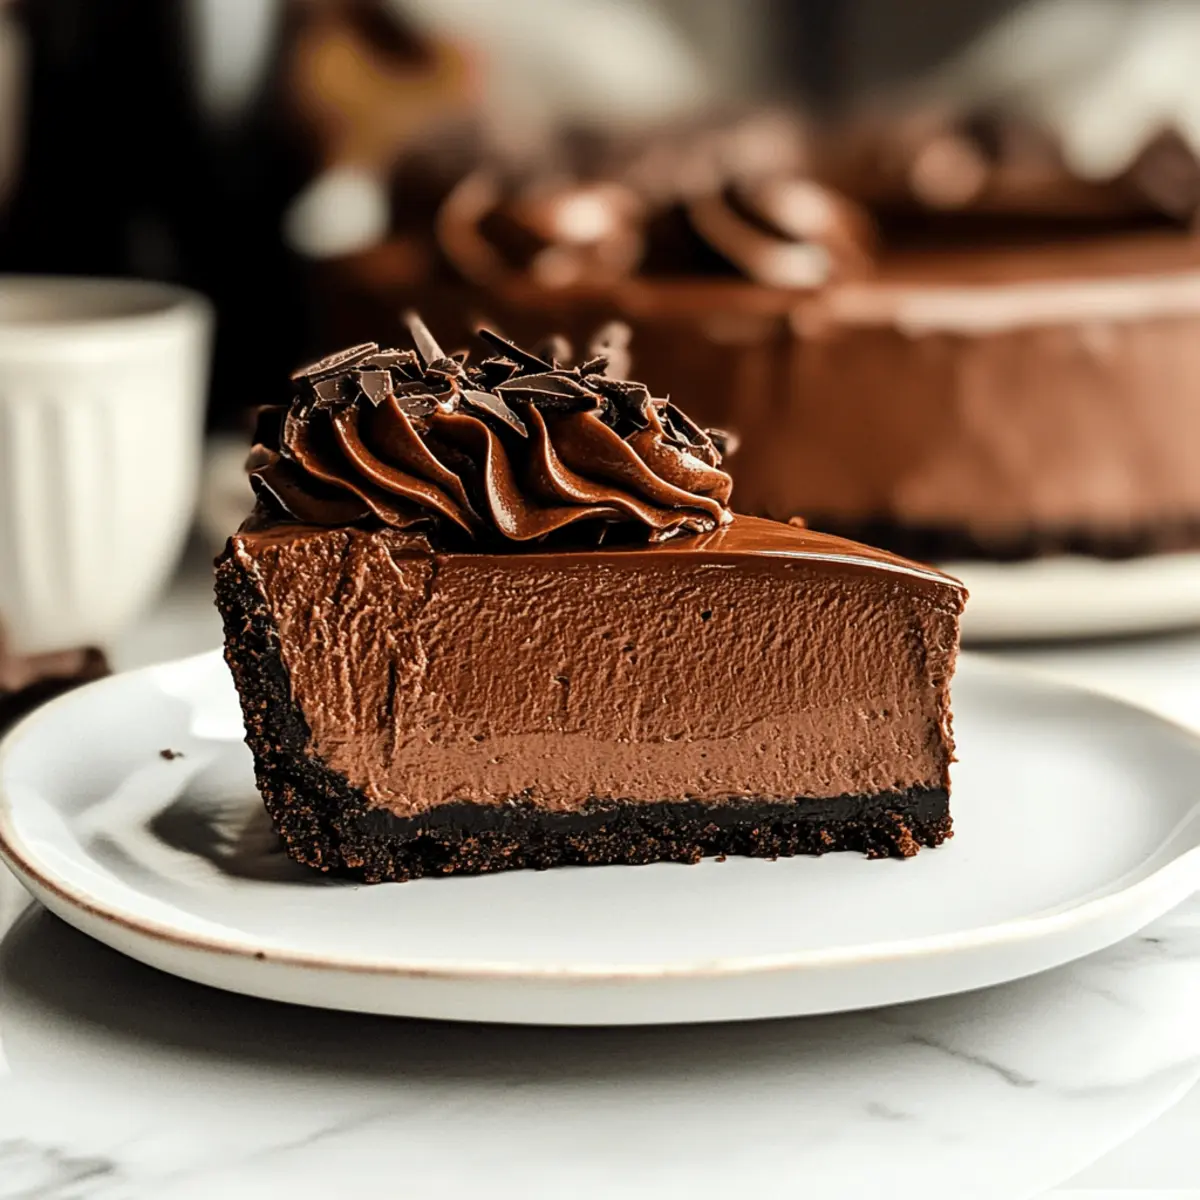
The moment I laid eyes on that velvety slice of rich and creamy chocolate cheesecake, I knew I had stumbled upon something extraordinary. This no-bake delight is a dream come true for chocolate lovers and busy home chefs alike. Imagine indulging in a luscious dessert with zero baking drama—a simple mix, chill, and savor process! With a delightful Oreo crust providing that perfect crunch, your guests will be raving about this easy chocolate cheesecake long after the last crumb disappears. Plus, it can be made ahead of time, making it the ultimate stress-free dessert for any occasion. Are you ready to uncover how to create this showstopper? Let’s dive in!
Why Is This Cheesecake So Irresistible?
Indulgent Flavor: Each bite of this rich & creamy chocolate cheesecake will take you to dessert paradise, tantalizing your taste buds with deeply satisfying chocolate notes.
Effortlessly Simple: No-bake means no fuss—just mix, chill, and enjoy! Perfect for busy days or last-minute gatherings.
Versatile Base: Switch up the crust! Use graham crackers or nut-based alternatives for a delicious twist.
Impressive Presentation: A glossy ganache topping not only adds sweetness but also a stunning finish that you’ll be proud to serve at parties.
Make Ahead: Prep it ahead of time! With a chill time of 6 hours or overnight, this cheesecake is stress-free for any occasion. Try pairing it with some fresh berries or chocolate shavings for an elegant touch!
Rich & Creamy Chocolate Cheesecake Ingredients
Get ready to create an indulgent dessert without any baking!
Advertisement
For the Crust
- Oreo Cookies – A decadent base that adds a crunchy texture; substitute with any favorite chocolate cookie if desired.
- Melted Butter – It binds the crust together beautifully; margarine can be used as a substitute.
For the Filling
- Cream Cheese – The creamy backbone of the cheesecake; mascarpone can be used as an alternative.
- Powdered Sugar – Sweetens the filling perfectly; granulated sugar may be substituted, though it may affect texture slightly.
- Vanilla Extract – Enhances the flavors; try almond extract for a different flavor profile.
- Semi-Sweet/Dark Chocolate – Provides a rich chocolate flavor; choose high-quality chocolate for best results.
- Heavy Whipping Cream – Adds an airy lightness to the filling; coconut cream can be a dairy-free alternative.
For the Ganache
- Chopped Chocolate – Creates a glossy finish atop the cheesecake; use high-quality chocolate for optimum flavor.
- Heavy Cream – Ensures a smooth and luscious ganache; full-fat coconut milk can be used for a dairy-free option.
Feel the excitement build as you prepare your very own rich & creamy chocolate cheesecake that promises to impress!
Step‑by‑Step Instructions for Rich & Creamy Chocolate Cheesecake
Step 1: Prepare the Crust
Start by crushing Oreo cookies into fine crumbs using a food processor or a ziplock bag and rolling pin. Mix the crumbs with melted butter in a bowl until the mixture resembles wet sand. Firmly press this mixture into the bottom of a springform pan, ensuring it’s evenly distributed. Chill the crust in the refrigerator for about 30 minutes while you prepare the filling, allowing it to set nicely.
Step 2: Make the Filling
Melt semi-sweet or dark chocolate in a heatproof bowl, either in the microwave in 30-second bursts or over a double boiler until smooth. Let the chocolate cool slightly after melting. In a separate mixing bowl, beat room temperature cream cheese, powdered sugar, and vanilla extract with an electric mixer until creamy and well combined. Fold the cooled chocolate into the cream cheese mixture gently, mixing until smooth and evenly combined.
Step 3: Incorporate Whipped Cream
Take heavy cream and whip it in a chilled bowl with an electric mixer until stiff peaks form, which should take about 2-3 minutes. Gently fold the whipped cream into the chocolate mixture in batches, preserving its airy texture. This step will ensure your rich & creamy chocolate cheesecake is light and fluffy, avoiding overmixing, which can deflate the whipped cream.
Step 4: Assemble and Chill
Carefully spread the chocolate filling evenly over the chilled Oreo crust in the springform pan, using a spatula to smooth the top. Cover the pan tightly with plastic wrap and place it in the refrigerator. Let the cheesecake set for another 6 hours, or overnight if possible, to achieve the perfect creamy consistency and enhance the flavors.
Step 5: Prepare Ganache
In a small saucepan, heat heavy cream until it begins to steam but not boil, approximately 2-3 minutes over medium heat. Pour the hot cream over chopped chocolate in a mixing bowl and let it sit for 5 minutes. Stir the mixture gently until smooth and glossy. Allow it to cool slightly before drizzling it over the set cheesecake for a luscious finish.
Step 6: Final Chill
Once the ganache is poured over the cheesecake, return it to the refrigerator for an additional 30-60 minutes to set the ganache. This final chilling ensures that the ganache firms up nicely. When ready to serve, carefully release the cheesecake from the springform pan, slice it, and prepare for an indulgent treat that everyone will love!
What to Serve with Irresistible No-Bake Chocolate Cheesecake
Indulge your guests’ taste buds with delightful accompaniments that elevate your dessert experience, perfectly balancing the rich & creamy chocolate cheesecake.
- Fresh Berries: Juicy strawberries or raspberries add a vibrant, tart contrast to the rich sweetness, making each bite refreshing.
- Whipped Cream: Silky peaks of freshly whipped cream enhance the decadence while offering a light, airy finish alongside the cheesecake.
- Chocolate Shavings: Adding a sprinkle of chocolate shavings not only boosts the chocolate flavor but also provides an elegant touch to your presentation.
Pair the cheesecake with a refreshing Minty Iced Tea: The cool mint flavor pairs beautifully with chocolate, cleansing the palate and making each bite feel indulgently fresh.
- Coffee: A rich, bold cup of coffee balances the sweetness and complements the deep chocolate notes beautifully.
- Lemon Sorbet: For a zesty twist, serve a scoop of lemon sorbet; its citrus tang provides a delightful contrast to the creamy dessert.
Consider offering a Chocolate Stout Beer: This unique pairing brings out the chocolate flavor while adding depth and richness to the dessert’s overall experience.
- Gourmet Caramel Sauce: A drizzle of sweet caramel adds another layer of flavor, enhancing the dessert’s sweetness and creating an irresistible combination.
- Mini Fruit Tartlets: These little treats can contrast nicely with the cheesecake, providing crispy crusts and fresh fruit to complement your dessert spread.
Rich & Creamy Chocolate Cheesecake Variations
Feel free to explore these delightful twists and substitutions that will take your cheesecake experience to the next level!
-
Graham Cracker Crust: Swap the Oreo crust for a classic graham cracker crust to enjoy a different flavor dimension. Just crush the crackers and mix with butter for that quintessential taste.
-
Nut-Based Crust: For a gluten-free option, use ground almonds or walnuts mixed with melted butter as your crust. This adds a lovely nutty flavor and a bit of extra crunch!
-
Dairy-Free Cheesecake: Substitute cream cheese with silken tofu and coconut cream for a luscious, vegan-friendly version that still delivers on creaminess.
-
Peppermint Twist: Stir in a few drops of peppermint extract into the filling for a refreshing holiday-inspired flavor that will surprise your guests.
-
Coffee Kick: Add a couple of teaspoons of instant coffee or espresso powder to the chocolate mixture for a delightful mocha twist that enhances the rich flavor of chocolate.
-
Fruit Toppings: Elevate your cheesecake by adding a layer of fresh fruit on top, such as raspberries or strawberries. They add a burst of color and a sweet-tart contrast that perfectly complements the richness.
-
Chocolate Ganache Variations: Instead of using plain chocolate for the ganache, consider adding a splash of orange liqueur or rum for an adult twist that tantalizes the palate.
-
Mini Cheesecakes: For a fun party idea, make individual mini cheesecakes in muffin tins! Just scale down the crust and filling amounts for single servings that are perfect for sharing.
As you can see, there are countless ways to personalize your rich & creamy chocolate cheesecake! Whether it’s changing the crust, enhancing flavors, or experimenting with different toppings, the possibilities are endless. Don’t forget, you can also pair this indulgent treat with our Chocolate Chip Cheesecake or Dulce Leche Cheesecake for a decadent dessert spread everyone will love!
Make Ahead Options
These delightful No-Bake Chocolate Cheesecakes are a dream for any busy home cook looking to save time! You can prepare the crust** and filling up to 24 hours in advance. Simply follow the initial steps, press the crust into the pan, and then prepare the filling. Cover the cheesecake tightly with plastic wrap and place it in the refrigerator for a hassle-free treat ready when you are. To maintain quality, keep the ganache separate until just before serving; you can prepare it in advance and refrigerate it as well. When ready to indulge, simply drizzle the ganache over the cheesecake, let it chill for an additional 30-60 minutes, and enjoy your impressive dessert with minimal effort!
Expert Tips for Rich & Creamy Chocolate Cheesecake
- Room Temperature Cream Cheese: Make sure to let cream cheese sit at room temperature for 30 minutes before mixing; this ensures a smooth, creamy texture for your cheesecake.
- Proper Chilling Time: Don’t rush the chilling process—allow at least 6 hours for the cheesecake to set properly. This is key to achieving that indulgent texture!
- Fold Gently: When combining the whipped cream with the chocolate mixture, be gentle to maintain airiness. Overmixing can result in a denser cheesecake than desired.
- Quality Ingredients: Use high-quality semi-sweet or dark chocolate for the filling; it significantly enhances the rich chocolate flavor in your cheesecake.
- Wrap Well for Freezing: If you plan to freeze your cheesecake, wrap it tightly without ganache to prevent freezer burn and maintain its delicious flavor.
Storage Tips for Rich & Creamy Chocolate Cheesecake
Refrigerate: Store leftover cheesecake in the fridge, covered with plastic wrap or in an airtight container, for up to 5 days to maintain its creamy texture.
Freezer: Freeze the cheesecake without ganache for up to 2 months. Wrap it tightly in plastic wrap and foil to prevent freezer burn.
Thawing: When ready to enjoy your rich & creamy chocolate cheesecake, thaw it overnight in the fridge before serving for the best texture.
Serving Freshness: Always add fresh ganache after thawing for that glossy, indulgent finish everyone loves!
Rich & Creamy Chocolate Cheesecake Recipe FAQs
How do I pick the best ingredients for this cheesecake?
Absolutely! When selecting your cream cheese, go for full-fat varieties for a rich and creamy texture. It’s also essential to allow it to reach room temperature before mixing—about 30 minutes out of the fridge will do the trick. For the chocolate, aim for high-quality semi-sweet or dark chocolate; the taste difference is noticeable. If you’re going for the Oreo crust, look for fresh cookies without dark spots, which could indicate staleness.
How should I store my leftover chocolate cheesecake?
Very important! Store the cheesecake in the refrigerator by covering it tightly with plastic wrap or placing it in an airtight container. It will maintain its delicious flavor and creamy texture for up to 5 days. For extended storage, consider freezing it without the ganache.
Can I freeze the chocolate cheesecake, and if so, how?
Absolutely! To freeze your cheesecake, make sure to leave off the ganache. Wrap it tightly in plastic wrap, then in foil to protect it from freezer burn. You can freeze it for up to 2 months. When you’re ready to enjoy it, just transfer the cheesecake to the refrigerator to thaw overnight. This will help preserve that smooth and rich texture you love.
What should I do if my cheesecake seems too soft?
If your cheesecake isn’t setting up properly, it might not have chilled long enough. Make sure to allow it to chill for at least 6 hours—overnight is even better! For a firmer cheesecake, ensure you whip the heavy cream to stiff peaks before folding it into the filling. Additionally, if possible, increase the amount of cream cheese slightly for more structure.
Can pets enjoy any part of this cheesecake?
Definitely not! This rich & creamy chocolate cheesecake contains ingredients like chocolate and cream cheese, which are unsafe for pets. Always check ingredient suitability if you’re looking to share any treats with your four-legged friends. Stick to dog-friendly or cat-friendly snacks when treating them!
What should I do if I don’t have a springform pan?
No worries at all! If you don’t have a springform pan, you can use a regular pie dish or any similar shallow dish. Just make sure to line the bottom with parchment paper to help with removal later. If the dessert is too difficult to remove, you can always serve it directly from the dish—everyone will still love that rich & creamy chocolate cheesecake!
Decadent Rich & Creamy Chocolate Cheesecake You'll Love
Ingredients
Equipment
Method
- Start by crushing Oreo cookies into fine crumbs using a food processor or a ziplock bag and rolling pin. Mix the crumbs with melted butter in a bowl until the mixture resembles wet sand. Firmly press this mixture into the bottom of a springform pan, ensuring it’s evenly distributed. Chill the crust in the refrigerator for about 30 minutes while you prepare the filling, allowing it to set nicely.
- Melt semi-sweet or dark chocolate in a heatproof bowl, either in the microwave in 30-second bursts or over a double boiler until smooth. Let the chocolate cool slightly after melting. In a separate mixing bowl, beat room temperature cream cheese, powdered sugar, and vanilla extract with an electric mixer until creamy and well combined. Fold the cooled chocolate into the cream cheese mixture gently, mixing until smooth and evenly combined.
- Take heavy cream and whip it in a chilled bowl with an electric mixer until stiff peaks form, which should take about 2-3 minutes. Gently fold the whipped cream into the chocolate mixture in batches, preserving its airy texture.
- Carefully spread the chocolate filling evenly over the chilled Oreo crust in the springform pan, using a spatula to smooth the top. Cover the pan tightly with plastic wrap and place it in the refrigerator. Let the cheesecake set for another 6 hours, or overnight if possible.
- In a small saucepan, heat heavy cream until it begins to steam but not boil, approximately 2-3 minutes over medium heat. Pour the hot cream over chopped chocolate in a mixing bowl and let it sit for 5 minutes. Stir the mixture gently until smooth and glossy. Allow it to cool slightly before drizzling it over the set cheesecake.
- Once the ganache is poured over the cheesecake, return it to the refrigerator for an additional 30-60 minutes to set the ganache. When ready to serve, carefully release the cheesecake from the springform pan, slice it, and prepare for an indulgent treat that everyone will love!