Advertisement
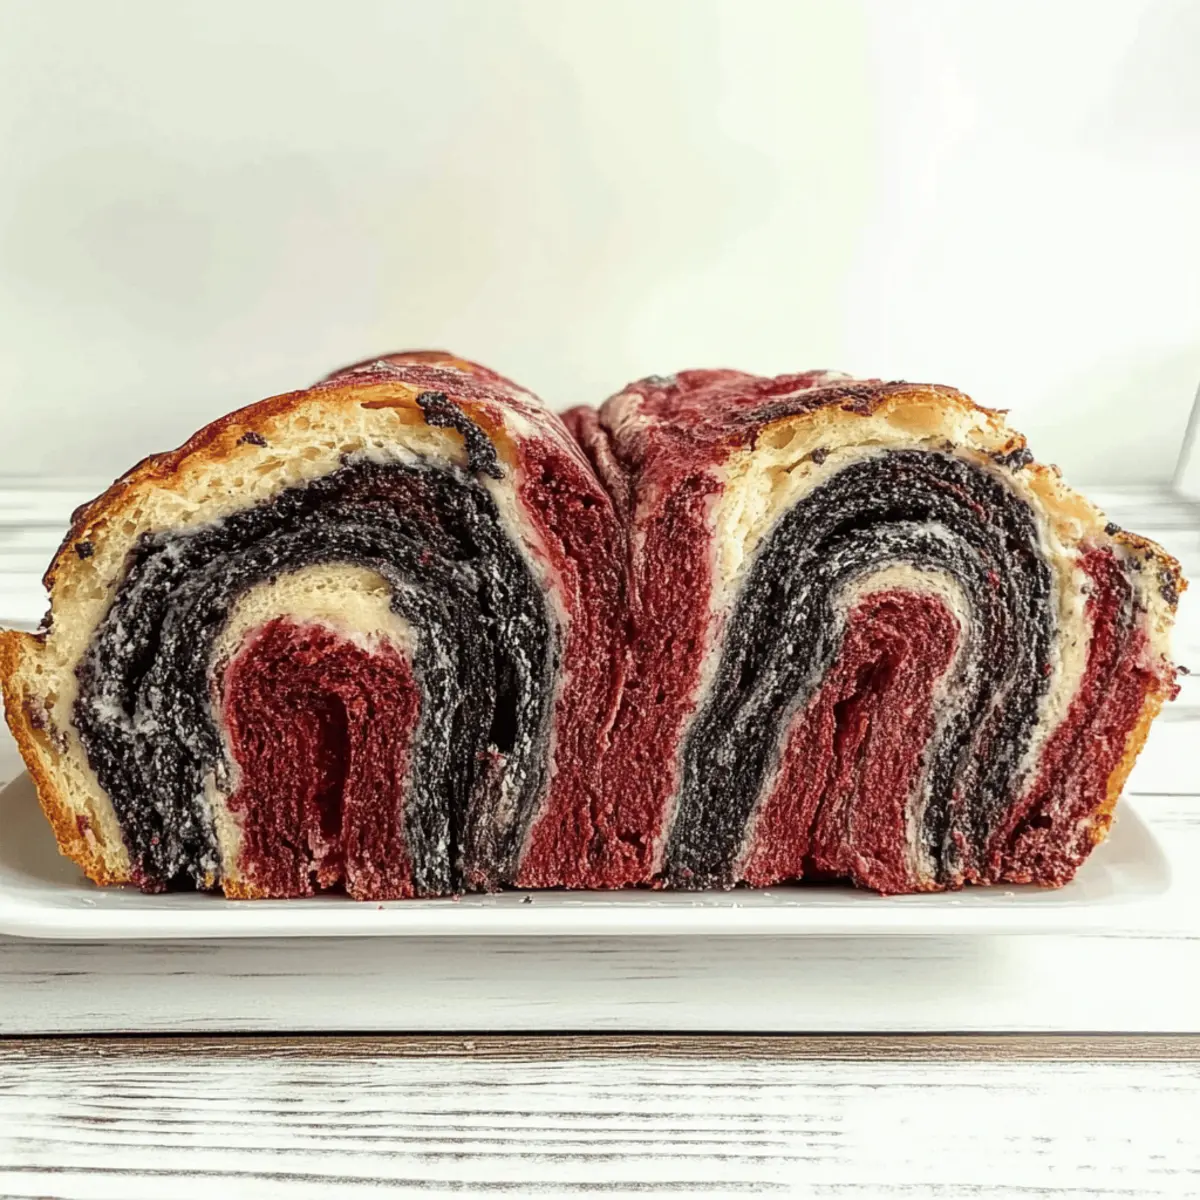
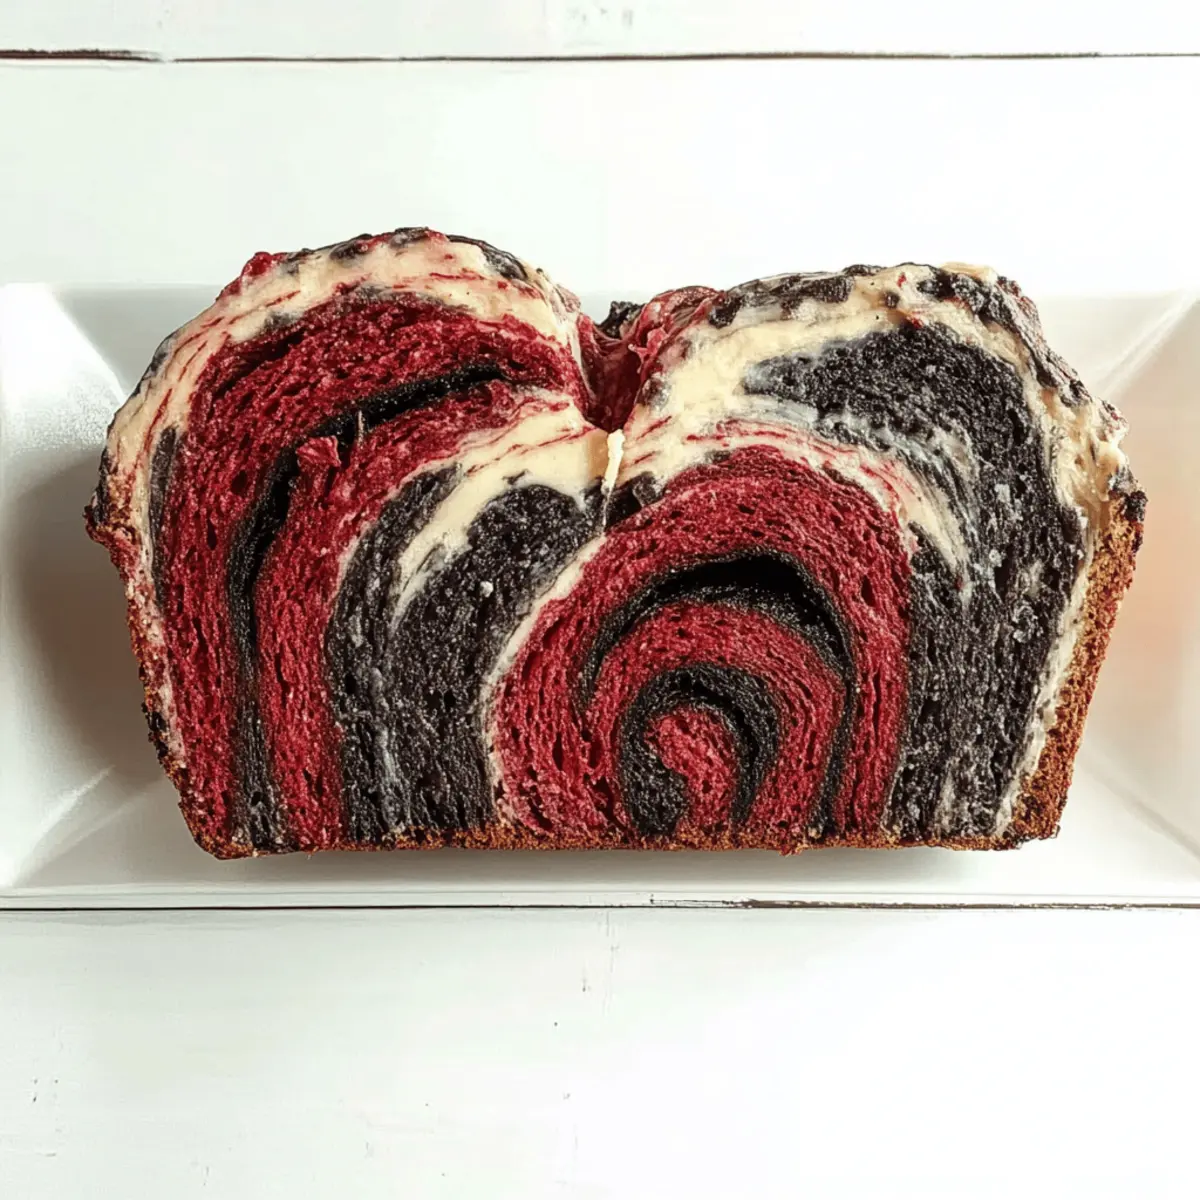
As the sun sets on a crisp autumn evening, the allure of the kitchen pulls me in, promising warmth and comfort. Today, I’m thrilled to share my colorful Vampire Bread, the perfect Halloween centerpiece that not only looks stunning with its vibrant red and black swirls but is also delightfully easy to make. This recipe offers two irresistible benefits: it’s low-fat and customizable to suit gluten-free or dairy-free diets, making it a guilt-free indulgence everyone can enjoy. The aroma of fresh-baked bread enveloping your home will have friends and family flocking to the table, ready to savor each slice. Are you curious about how to whip up this spooktacular treat and impress your guests? Let’s dive into the magic of baking together!
Why Is This Vampire Bread So Special?
Guilt-Free Goodness: This Vampire Bread is a low-fat indulgence that doesn’t skimp on flavor or fun.
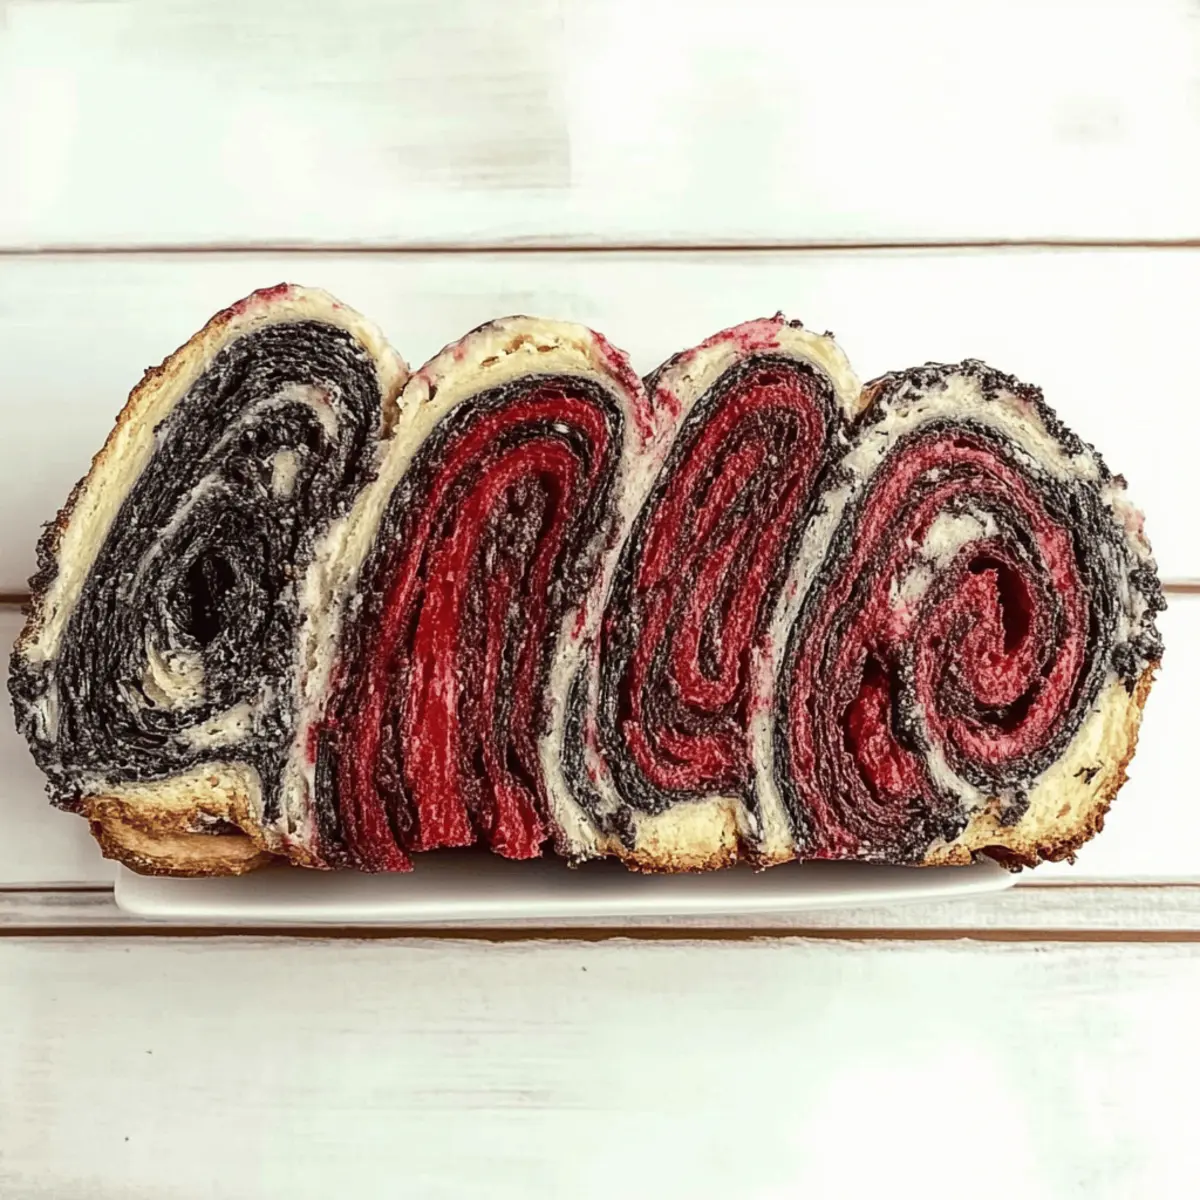
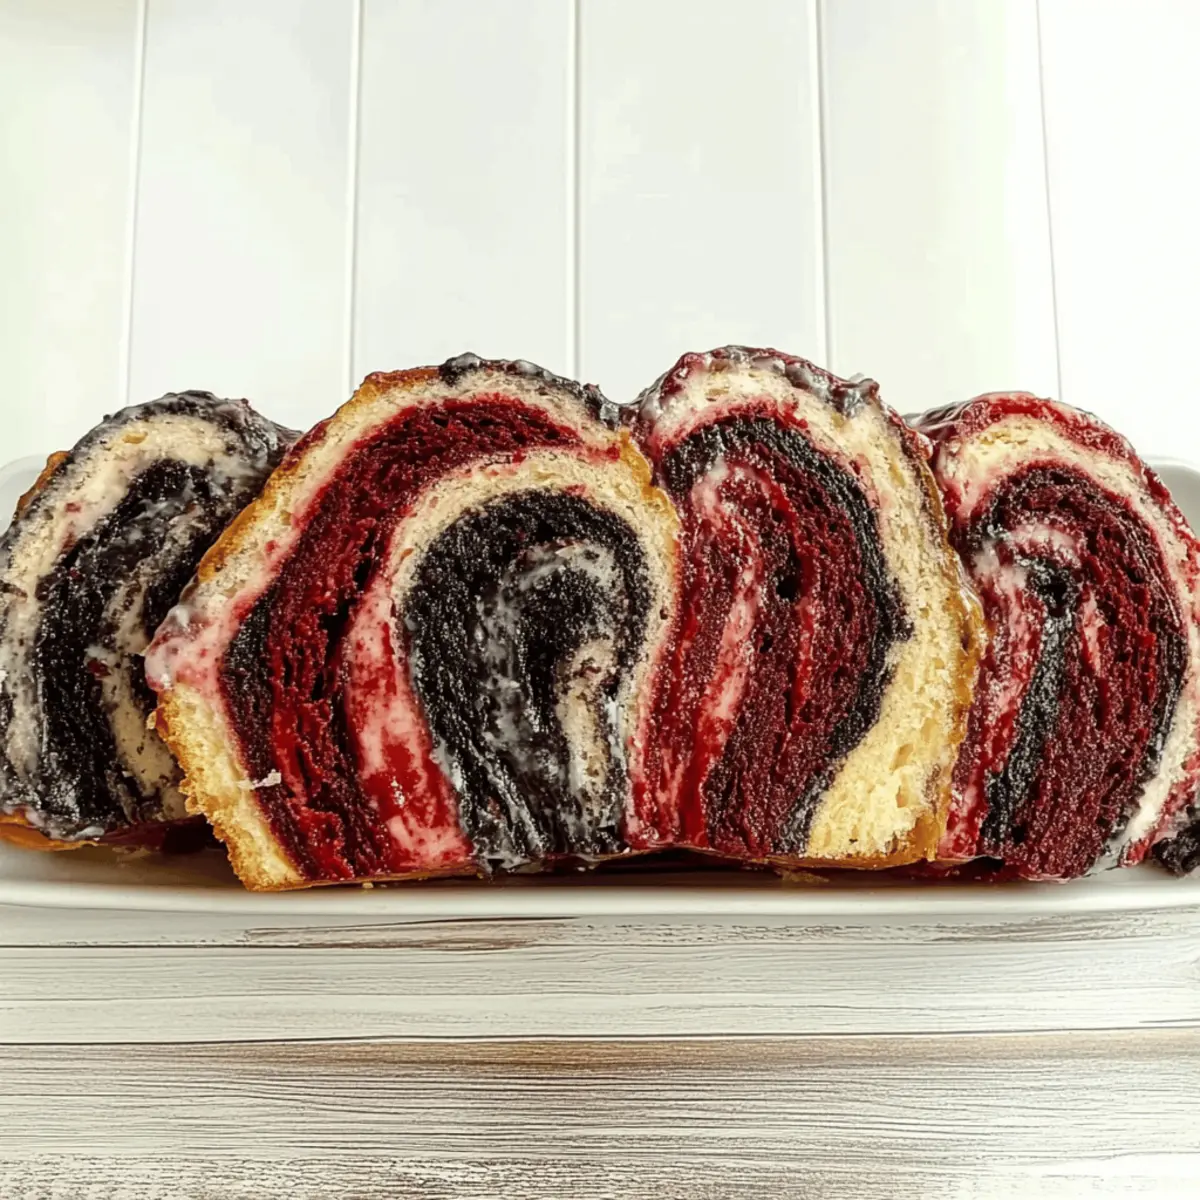
Visual Delight: With its striking red and black swirls, it’s bound to be the centerpiece of your Halloween feast.
Advertisement
Diet-Friendly Options: Easily adaptable for gluten-free and dairy-free diets, ensuring everyone can enjoy a slice.
Easy Preparation: The step-by-step instructions make this a perfect recipe for bakers of all levels.
Endless Customization: Want to add a savory twist? Consider infusing the bread with herbs or reducing sugar for a healthier take! For more delightful recipes, check out my Pistachio Shortbread Cookies that are equally charming.
Baking this enchanting bread is not just about the taste; it’s about bringing joy to your home with every bite!
Vampire Bread Ingredients
• Get ready to bake this eye-catching treat!
For the Dough
- All-purpose flour – Essential for structure; swap with gluten-free flour for a gluten-free option.
- Yeast – The magic leavening agent that gives your bread a light texture; both active dry and fresh yeast work well.
- Sugar – Sweetens the bread and helps achieve that golden crust; feel free to reduce it for less sweetness.
- Salt – Amplifies flavors and strengthens gluten; can be omitted for a low-sodium version.
- Water – Hydrates the dough; remember to use warm water to activate the yeast effectively.
- Butter (or oil) – Adds moisture and richness; opt for plant-based butter to keep it dairy-free.
For Color and Fun
- Food coloring (red and black) – Creates the festive swirls; consider natural dyes for a healthier alternative.
This Vampire Bread is a delightful and vibrant option for your Halloween celebrations, inviting everyone to savor each bite!
Step‑by‑Step Instructions for Vampire Bread
Step 1: Prepare the Dough
In a large mixing bowl, combine all-purpose flour, sugar, yeast, and salt. Gradually pour in about 1 cup of warm water (110°F/43°C) while mixing with a wooden spoon until a shaggy dough begins to form. Transfer the mixture onto a lightly floured surface and knead for 8-10 minutes until the dough is smooth and elastic. Place it in a greased bowl, cover it with a kitchen towel, and let it rise in a warm spot for 1-2 hours, or until doubled in size.
Step 2: Color the Dough
Once the dough has risen, punch it down gently to release the air. Divide the dough into two equal portions. Take one half and knead in the black food coloring until the color is dark and consistent. Repeat this process with the other half, using the red food coloring. Aim for deep, vibrant colors that will create stunning swirls in your Vampire Bread!
Step 3: Shape the Loaf
On a floured surface, roll out the black dough into a rectangle of about 1/2 inch thick. Repeat with the red dough, layering it directly on top of the black. Carefully twist the two layers together to form a loaf, being gentle to preserve the colors. Pinch the ends to seal and shape it into a smooth loaf. This step adds to the magical appearance of your Vampire Bread!
Step 4: Second Rise
Place your twisted loaf into a greased loaf pan, ensuring it fits snugly. Cover it with a towel and allow it to rise for another 30 minutes. This second rise helps the dough become even fluffier and enhances the swirl effect. Look for it to puff up slightly and appear airy before baking.
Step 5: Bake the Loaf
Preheat your oven to 350°F (175°C) while the loaf finishes rising. Once ready, place the loaf in the center of the oven and bake for approximately 30 minutes. Keep an eye on it; the bread should turn golden brown and sound hollow when tapped on the bottom. This final cooking step brings out the aromatic essence of the Vampire Bread.
Step 6: Cool Down
Once baked, carefully remove the loaf from the oven and out of the pan, placing it onto a wire rack. Allow it to cool for 10-15 minutes before slicing. This cooling period helps the bread set, ensuring you can achieve perfect, soft slices of your vibrant Vampire Bread without it crumbling.
Expert Tips for Perfect Vampire Bread
-
Fresh Yeast Matter: Use fresh yeast for optimal rise; if it doesn’t foam in warm water with sugar, it’s past its prime.
-
Chill the Color: Opt for gel food coloring, as it adds vibrancy without thinning the dough—keeping your Vampire Bread’s swirls intact.
-
Knead with Love: Aim for a smooth, elastic dough during kneading; under-kneading can result in a heavy loaf that doesn’t rise properly.
-
Cool Before Slicing: Allow the bread to cool completely before cutting, ensuring each slice maintains its delightful texture and appearance.
-
Storage Savvy: Keep Vampire Bread in an airtight container for up to 3 days at room temperature, ensuring it stays fresh and delicious.
Vampire Bread Variations & Substitutions
Feel free to explore your creativity in the kitchen, making this delightful Vampire Bread your own!
-
Gluten-Free: Use a gluten-free flour blend instead of all-purpose flour for a celiac-friendly treat. Just ensure the blend has xanthan gum for the best rise!
-
Dairy-Free: Substitute butter with plant-based butter or coconut oil for a rich, dairy-free version that everyone can enjoy.
-
Less Sugar: Reduce the sugar for a healthier option and consider adding a pinch of stevia to maintain sweetness without the calories.
-
Herb-Infused: For a savory surprise, mix in dried herbs such as rosemary or thyme. This twist transforms the bread into a wonderful complement to soups.
-
Natural Colors: Instead of food coloring, use beet juice for red and activated charcoal for black. It’s a colorful and natural approach to achieving those festive swirls.
-
Flavor Twists: Incorporate aromatic spices like cinnamon or nutmeg for a comforting flavor profile. You can also add almond extract for a hint of sweetness.
-
Nutty Crunch: Add toasted nuts like walnuts or hazelnuts in the dough for a delightful crunch and an added layer of flavor.
-
Sweet Treat: Drizzle with chocolate sauce or spread with a cream cheese frosting for an indulgent dessert rendition. You might even find a wonderful pairing with my Pistachio Shortbread Cookies for a festive celebration.
These variations make your Vampire Bread a canvas for endless creativity, inspiring fun and flavorful gatherings throughout the Halloween season!
What to Serve with Guilt-Free Colorful Vampire Bread
Warm, fresh-baked Vampire Bread pairs perfectly with delicious side dishes that enhance its festive charm and flavor.
- Garlic Butter: Spread this rich and aromatic concoction over warm slices for a mouthwatering experience that elevates its savory notes.
- Creamy Cheese Spreads: Opt for herbs or garlic-infused cream cheeses; they add a delightful contrast and creaminess that complements the bread’s texture beautifully.
- Pumpkin Soup: A bowl of hearty pumpkin soup alongside your Vampire Bread brings a cozy autumn vibe, making it an ideal Halloween meal.
- Herbed Olive Oil: Drizzling olive oil infused with fresh herbs offers a flavorful dip that plays well with the bread’s subtly sweet notes.
Imagine a cozy gathering where laughter fills the air, and your Vampire Bread serves as the delightful centerpiece. It’s not just about satisfying hunger; it’s about creating memorable moments!
- Spiced Hot Apple Cider: A warm cup of this sweet and spicy drink enhances the festive atmosphere, making every bite even more enjoyable.
- Chocolate Sauce Drizzle: For a touch of indulgence, drizzle warm chocolate sauce over a slice for a sweet dessert twist that tantalizes your taste buds.
- Fresh Salad: A light salad with mixed greens and a tangy vinaigrette adds refreshing crunch that balances the richness of the bread.
- Cranberry Compote: This tart and sweet addition cuts through the density of the bread, providing a lively burst of flavor with each bite.
How to Store and Freeze Vampire Bread
Room Temperature: Keep Vampire Bread in an airtight container for up to 3 days to maintain its freshness and prevent staleness.
Fridge: If you prefer to extend its life, you can store Vampire Bread in the refrigerator for up to 7 days, wrapped tightly to avoid drying out.
Freezer: Wrap Vampire Bread in plastic wrap and then in aluminum foil before placing it in the freezer. It will last up to 3 months, preserving its vibrant flavors and texture.
Reheating: Thaw the bread at room temperature, then reheat slices in a toaster or oven for a few minutes for that fresh-baked aroma and warmth!
Make Ahead Options
These irresistible Vampire Bread are perfect for meal prep enthusiasts! You can prepare the dough up to 24 hours in advance; simply mix and knead the dough as instructed, then cover and refrigerate it to slow the rising process. The colored dough can also be prepared ahead and stored separately in airtight containers to maintain their vibrant hues. When you’re ready to bake, let the dough sit at room temperature for about 30 minutes before shaping and allowing a final rise. Ensuring that the dough rises slowly in the fridge will help preserve its texture and flavor, resulting in deliciously fresh Vampire Bread that’s just as delightful!
Vampire Bread Recipe FAQs
What type of flour should I use?
You can use all-purpose flour for a classic texture, but if you’re looking for a gluten-free option, I recommend using a gluten-free flour blend specifically designed for baking to ensure similar results.
How do I store leftover Vampire Bread?
To keep your Vampire Bread fresh, store it in an airtight container at room temperature for up to 3 days. If you want to extend its life, refrigerate it wrapped tightly to prevent drying out, where it can last up to 7 days.
Can I freeze Vampire Bread?
Absolutely! To freeze, wrap the Vampire Bread tightly in plastic wrap, then in aluminum foil. This will keep it safe from freezer burn for up to 3 months. When you’re ready to enjoy, just thaw it at room temperature and reheat slices in a toaster or oven for that fresh-baked taste.
What should I do if my dough isn’t rising?
If your dough isn’t rising, check if your yeast is still active; it should foam when mixed with warm water and a pinch of sugar. If not, discard it and start fresh. Ensure your dough is in a warm environment and cover it properly to retain heat and moisture.
Is this recipe suitable for my dietary restrictions?
Yes! This Vampire Bread is easily adaptable. You can make it gluten-free by substituting the flour, and it’s simple to keep it dairy-free by using plant-based butter or oils instead of regular butter. For those reducing sugar intake, feel free to cut down the amount according to taste.
What can I serve with Vampire Bread?
This enchanting bread pairs wonderfully with rich garlic butter or creamy cheese spreads for savory options. For something sweet, try drizzling it with chocolate sauce or enjoy it alongside a warm bowl of pumpkin soup for a cozy meal.
Gorgeous Vampire Bread: A Spooky Treat for Halloween Mornings
Ingredients
Equipment
Method
- In a large mixing bowl, combine all-purpose flour, sugar, yeast, and salt. Gradually pour in about 1 cup of warm water while mixing until a shaggy dough forms. Knead for 8-10 minutes.
- Place the dough in a greased bowl, cover with a towel and let rise in a warm spot for 1-2 hours, or until doubled in size.
- After rising, punch down the dough, divide it in half, and knead in black food coloring to one half and red food coloring to the other until colors are vibrant.
- On a floured surface, roll out black dough into a rectangle, then layer the red dough on top. Twist together to form a loaf and pinch the ends.
- Place the twisted loaf into a greased loaf pan, cover with a towel and let rise for another 30 minutes.
- Preheat oven to 350°F (175°C). Bake for approximately 30 minutes until golden brown.
- Remove the loaf from the oven and place onto a wire rack. Allow to cool for 10-15 minutes before slicing.