
Advertisement
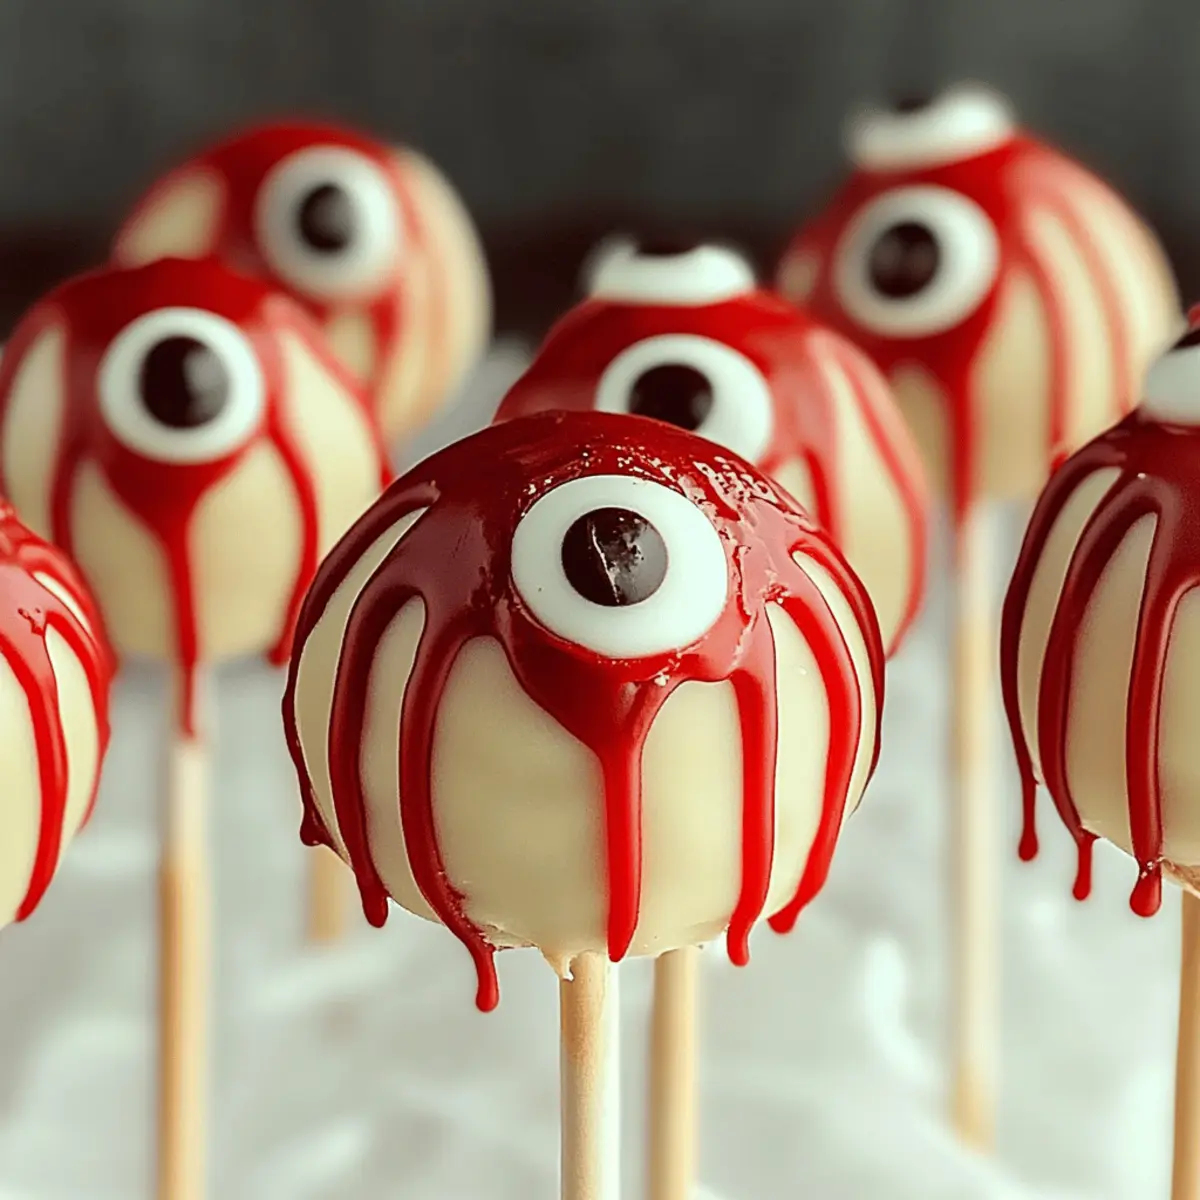
At a recent Halloween party, I overheard two kids gasp in delight as they spotted my spooky Eyeball Cake Pops. Their faces lit up, and immediately, I was transported back to those magical moments of childhood when everything enchanting and bizarre converged over sweet treats. This easy Halloween dessert transforms simple cake into whimsical eyeball delights that are not only visually captivating but also incredibly fun to make. Perfect for novice bakers and seasoned pros alike, this customizable recipe will have you experimenting with flavors like chocolate, vanilla, or even pumpkin spice. Plus, with gluten-free and dairy-free options, it’s a treat that everyone can enjoy. Are you ready to impress your little monsters and create unforgettable memories this Halloween? Let’s dive into the deliciously spooky world of cake pops!
Why Are Eyeball Cake Pops So Fun?
Whimsical Appeal: These cake pops bring a playful twist to any Halloween celebration, delighting both kids and adults alike.
Customizable Flavors: Choose from chocolate, vanilla, or even pumpkin spice for a seasonal treat—your options are endless!
Easy to Make: This simple recipe requires no advanced baking skills, perfect for anyone wanting to enjoy homemade treats.
Diet-Friendly Options: With gluten-free and dairy-free adaptations, these pops cater to various dietary needs without sacrificing fun.
Crowd-Pleasing Treat: Their eye-catching design makes them a hit at parties, turning any gathering into a memorable event.
For more festive ideas, don’t miss out on these Creamsicle Mini Cheesecakes that are sure to sweeten your Halloween!
Easy Halloween Cake Pops Ingredients
For the Cake Base
Advertisement
- Cake Mix – Use chocolate or vanilla for a classic flavor; try pumpkin spice for an autumn twist in your easy Halloween cake pops.
- Eggs – Provides structure to your cake; for best results, use 2-3 large eggs based on the mix requirements.
- Water or Milk – Adds moisture; opting for milk will enhance the richness of your pops.
For the Filling
- Frosting – Binds the cake crumbs together; chocolate or cream cheese frosting works wonderfully.
For Coating and Decoration
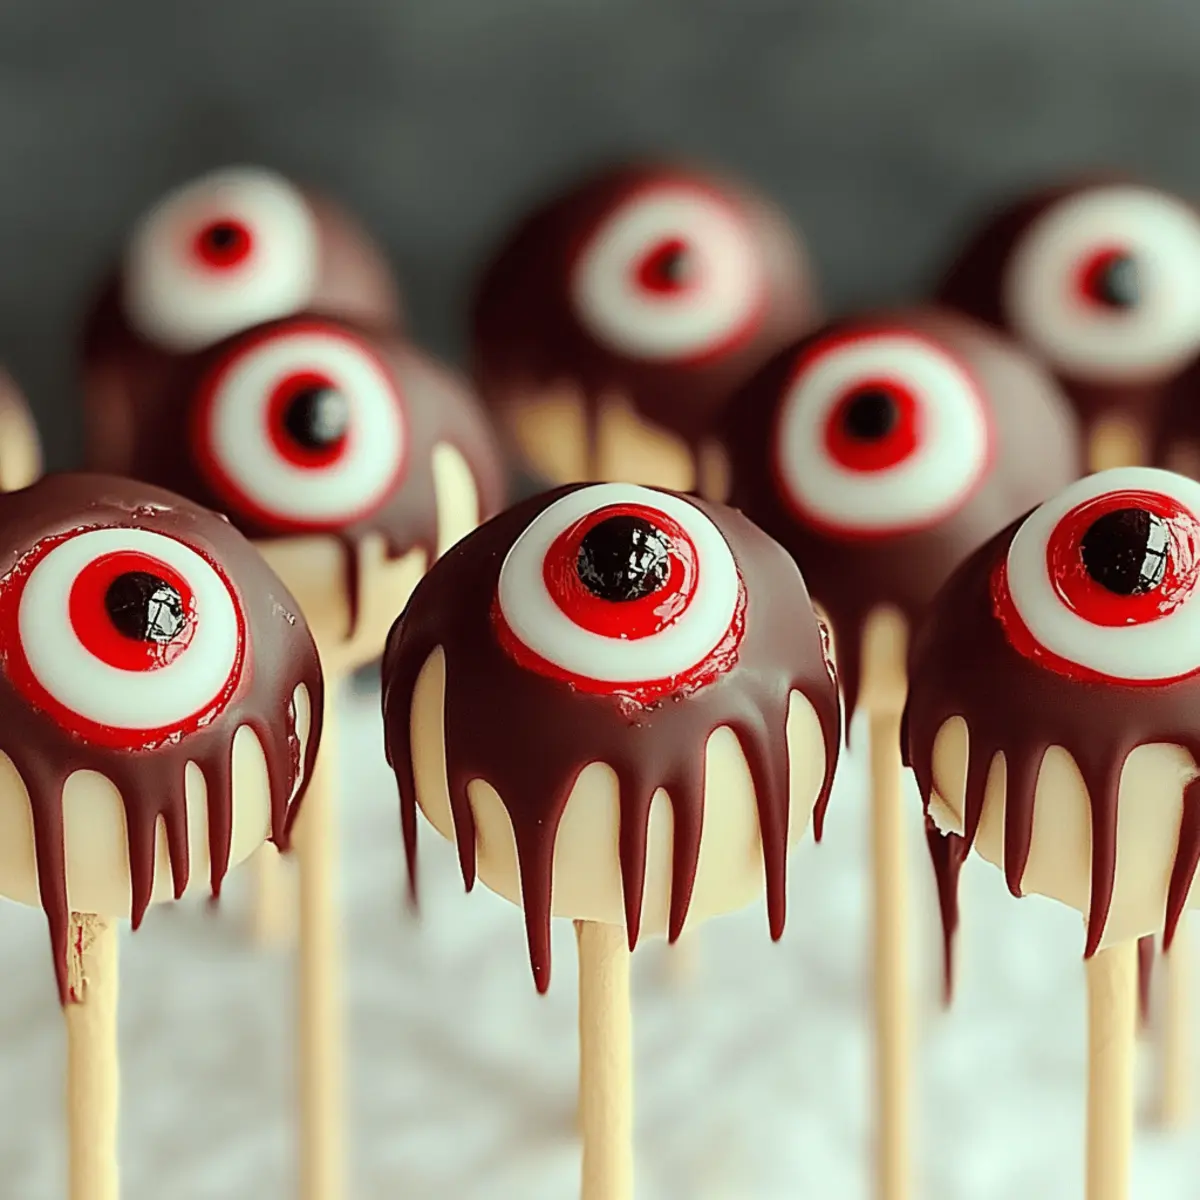
- Chocolate Melts – Essential for coating your cake pops; choose dark, milk, or white chocolate according to your preference.
- Candy Eyes – Create the whimsical “eyeball” effect; they come in various sizes to suit your design.
- Red Icing – Adds a frightfully fun bloodshot effect for decoration.
- Sprinkles or Edible Glitter – Optional embellishments to give your pops a festive flair.
Step‑by‑Step Instructions for Easy Halloween Cake Pops
Step 1: Bake the Cake
Preheat your oven to 350°F (175°C). Prepare the cake mix according to the package instructions, combining it with the necessary eggs and milk for added richness. Pour the batter into a greased baking pan and bake for 25–30 minutes until a toothpick inserted in the center comes out clean. Once baked, allow the cake to cool completely on a wire rack.
Step 2: Crumble the Cake
Once cooled, crumble the cake into a large mixing bowl. Use your hands to break it into fine crumbs, ensuring there are no large chunks. After achieving a uniform texture, add your chosen frosting, mixing it in until the mixture resembles a moist dough that holds together well. This step is crucial for creating your spooky Eyeball Cake Pops.
Step 3: Shape Pops
With the cake mixture ready, scoop out portions and roll them into golf ball-sized balls. Place each ball on a lined baking sheet, ensuring they are spaced apart to prevent sticking. This process should yield about 20–24 cake pops, depending on your size. Take care to form smooth, even shapes for a neat final presentation.
Step 4: Chill
Refrigerate the cake pop formations for at least 30 minutes. Chilling them will help firm up the mixture, ensuring the pops maintain their shape during coating. This step is key to avoiding any mishaps when you dip them in chocolate, so be patient and allow them to chill thoroughly.
Step 5: Coat Pops
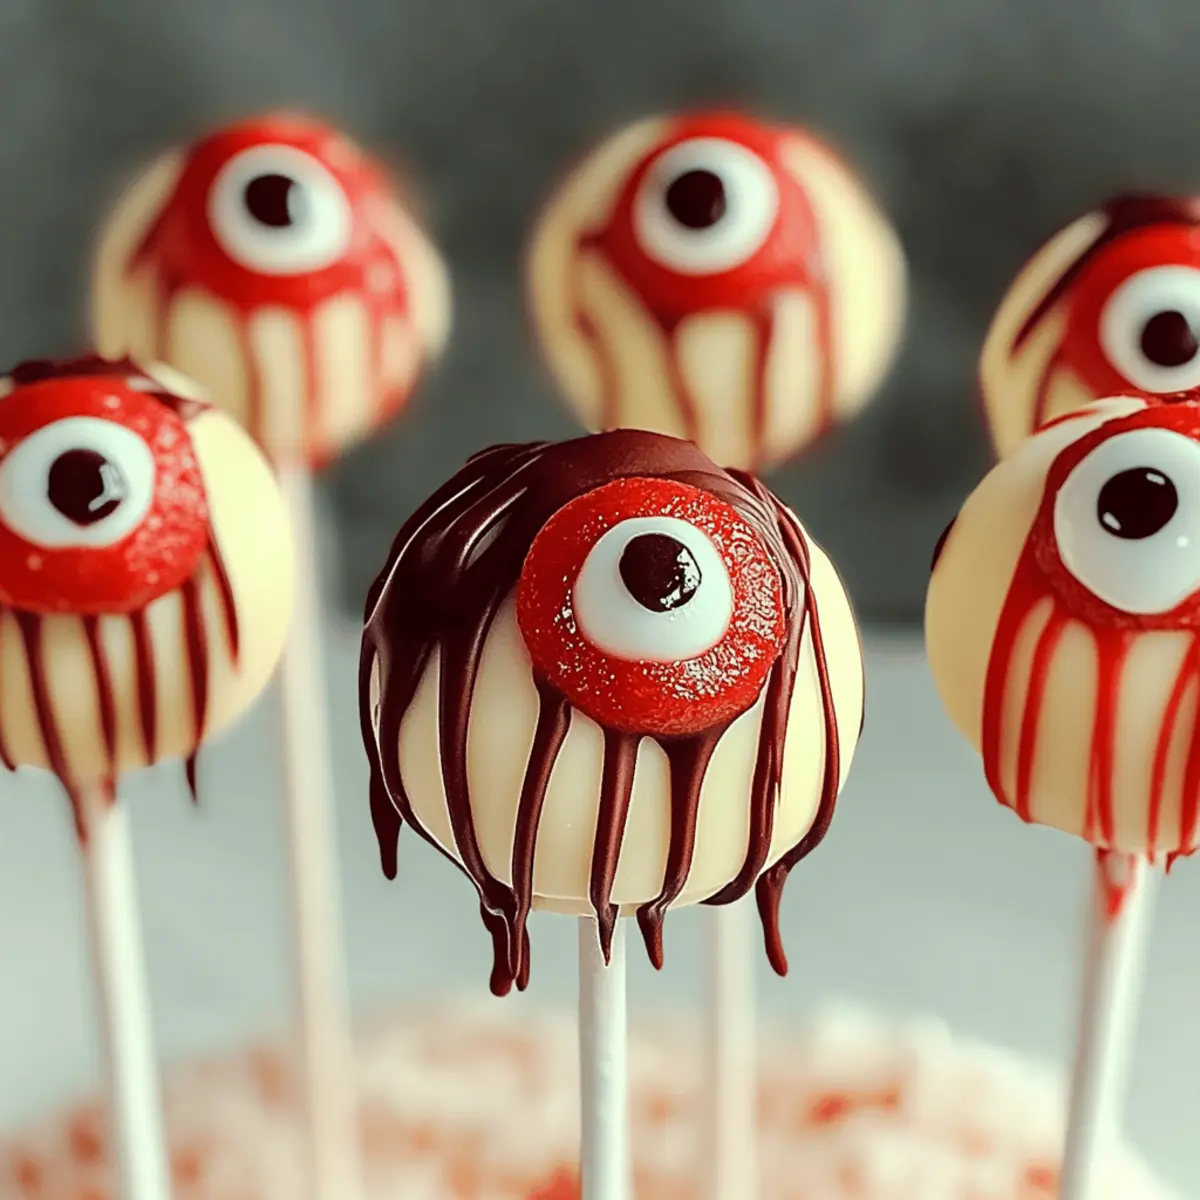
While the cake pops chill, melt the chocolate coating in a microwave-safe bowl, heating it in 30-second intervals until smooth. Once melted, remove the pops from the fridge and dip each one into the chocolate, ensuring they are fully covered. Gently tap the stick against the bowl to remove any excess chocolate, maintaining a clean finish.
Step 6: Decorate
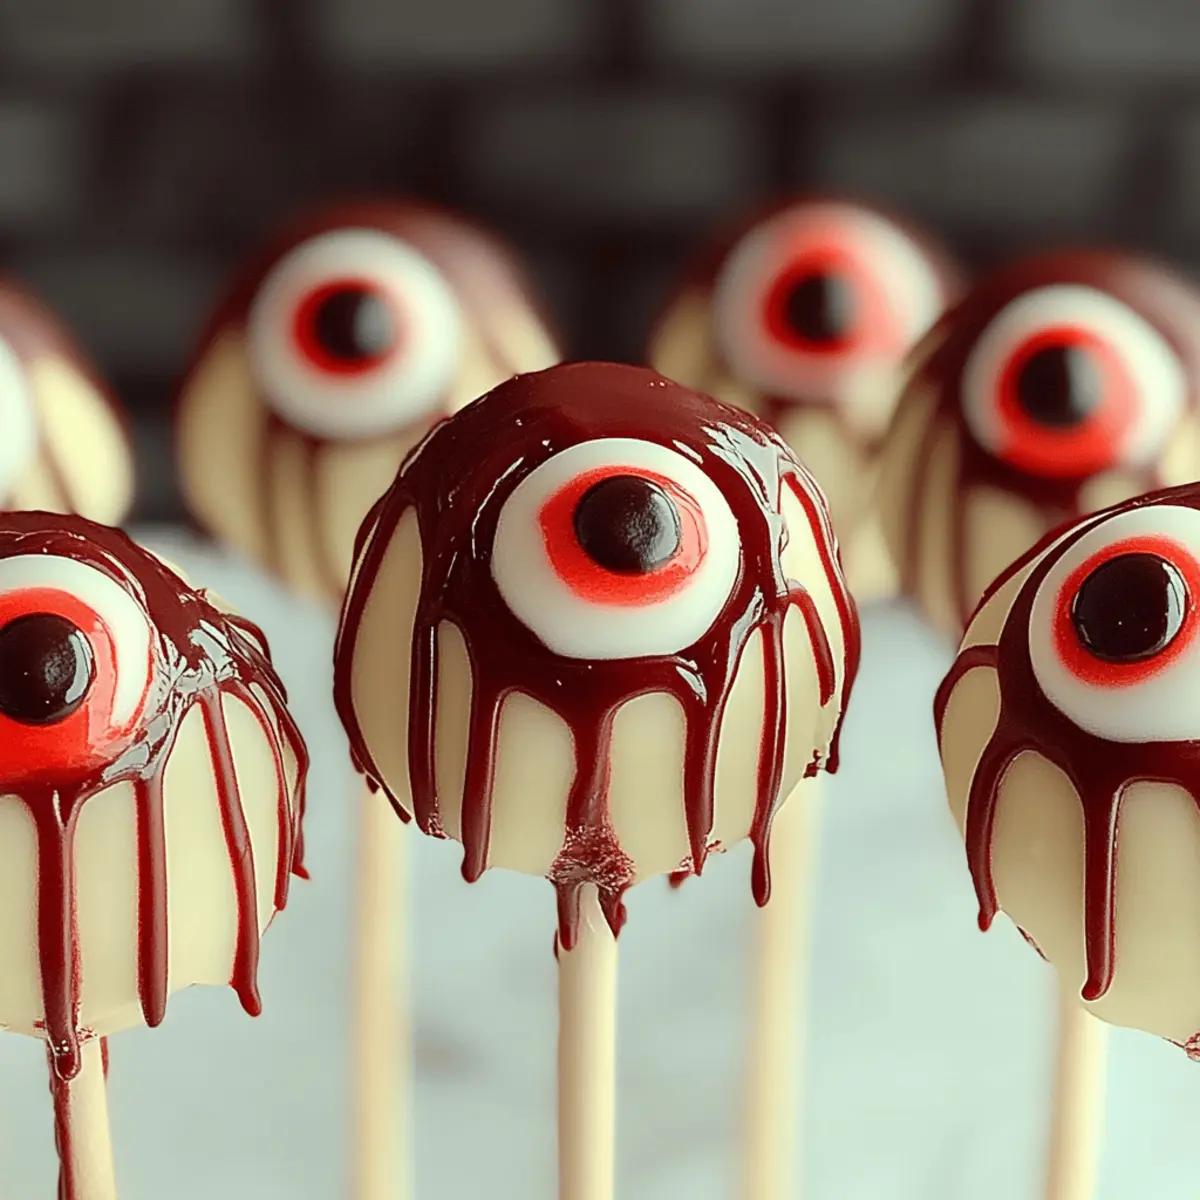
While the chocolate coating is still wet, apply the candy eyes to each pop, pressing gently to ensure they adhere. Then, use red icing to create bloodshot effects, piping it around the candy eyes for an authentic look. This step adds character to your Easy Halloween Cake Pops, making them extra fun and spooky for your Halloween festivities.
Step 7: Set
To let the chocolate set, place the cake pops upright in a styrofoam block or a deep mug. Ensure they are secure and not touching one another. Allow the coating to harden completely, which typically takes about 30 minutes. Once set, your spooky Eyeball Cake Pops will be ready to impress guests at your Halloween gatherings!
Easy Halloween Cake Pops Variations
Feel free to unleash your creativity and personalize these delightful cake pops with tasty twists and substitutions!
-
Flavor Swaps: Experiment with pumpkin spice cake mix or colorful vanilla to suit festive themes and personal tastes. Each flavor offers a unique flair, perfect for showcasing seasonal spices or classic favorites.
-
Gluten-Free Option: Swap in a gluten-free cake mix to make these pops accessible for those with dietary sensitivities. It’s just as fun and delicious without compromising flavor!
-
Dairy-Free Treat: Replace regular chocolate and frosting with dairy-free alternatives to create a treat that ensures everyone can enjoy these spooky sweets. A little coconut cream in the frosting can work wonders!
-
Texture Add-Ins: Throw in crushed cookies or nuts to the cake mixture for delightful bursts of flavor and an intriguing crunch. Imagine the blend of moist cake with a delightful surprise!
-
Flavored Coatings: Swap out basic chocolate melts for exciting variations like mint or orange-flavored chocolate. This creates a delightful surprise that complements the enchanting eyeball design.
-
Whipped Topping: Consider using whipped meringue instead of chocolate for a lighter and fluffier decoration. It offers a delightful contrast to the cake base!
-
Colorful Sprinkles: Get festive with themed sprinkles—think orange and black for Halloween, or even edible glitter to make your pops shimmer like stars in the night sky. They instantly elevate your spooky treats!
-
Spicy Surprise: For the daring, add a hint of cayenne to your chocolate coating for a spicy kick. Balancing sweetness and heat can lead to an unforgettable flavor experience!
For even more Halloween inspiration, you can experiment with creating festive flavors in a Pumpkin Spice Cake or whip up some delicious Black Forest Cake for those holiday gatherings!
Make Ahead Options
These Easy Halloween Cake Pops are fantastic for meal prep, allowing you to dazzle your guests with minimal last-minute effort! You can prepare the cake base and crumble it up to 24 hours in advance; simply store the crumbs and frosting mixture in an airtight container in the refrigerator to maintain their moisture. When ready to shape and coat, follow the remaining steps—just remember to chill the formed pops for at least 30 minutes before dipping them in chocolate. This prepped method ensures your cake pops turn out just as delicious and whimsical, saving you precious time on the day of your festivities!
What to Serve with Eyeball Cake Pops
Imagine a spooky Halloween gathering where vibrant, festive accents grace your table, perfectly complementing the delightful Eyeball Cake Pops.
- Spooky Punch: Serve with a chillingly refreshing drink made from cranberry juice and lemon-lime soda. The tartness pairs beautifully with the sweetness of the cake pops.
- Mini Hot Dogs Wrapped in Pastry: These bite-sized treats are great finger foods that add a savory contrast to the sweetness of your dessert. Plus, they are fun and easy for guests to grab!
- Pumpkin Soup: A warm, creamy pumpkin soup not only matches your Halloween vibe but its rich flavors can balance out the sweetness of the cake pops.
- Crispy Witch’s Fingers: Serve up some savory appetizers like carrot sticks decorated as creepy fingers, offering crunch and freshness to your dessert spread.
- Candy Corn Snack Mix: A blend of nuts, pretzels, and candy corn creates a sweet and salty snack perfect for nibbling between cake pops. The bright colors will also enhance your Halloween display.
- Kid-Friendly Mocktails: Create a fun, layered drink using juice and soda for a fizzy treat that mimics potion drinks, delighting kids while matching the playful spirit of your cake pops.
- Chocolate-Dipped Pretzels: Salty and sweet, these add another texture and flavor element to your dessert table, perfectly contrasting the soft cake pops.
- Apple Slices with Caramel Dip: This classic combo offers a refreshing, crisp bite that complements the sweetness of cake pops, providing a nice tartness against the sugary treats.
- Spooky Themed Cupcakes: Enhance your dessert table with themed cupcakes, providing a variety of choices for your guests, while keeping the Halloween spirit alive.
- Hot Apple Cider: Wrap up your sweet treats with a warm drink that infuses your gathering with seasonal aromas and flavors, making everything feel cozy and festive.
How to Store and Freeze Easy Halloween Cake Pops
Airtight Container: Refrigerate your cake pops in an airtight container for up to one week. This helps maintain their moisture and ensures they remain fresh for your spooky gatherings.
Freezing: To freeze, arrange your cake pops in a single layer on a baking sheet until firm. Then transfer to an airtight container, where they can be stored for up to three months.
Thawing: When ready to enjoy, simply remove them from the freezer and let them thaw in the fridge for a few hours before serving.
Reheating Tips: Avoid reheating cake pops in the microwave, as it can affect their texture. Just allow them to come to room temperature naturally for the best experience.
Expert Tips for Easy Halloween Cake Pops
Chill Properly: A key step to success is chilling the cake balls for at least 30 minutes. This ensures they hold their shape while coating.
Use Quality Chocolate: Choose high-quality chocolate melts for a smooth, glossy finish. This will elevate the presentation and flavor of your easy Halloween cake pops.
Avoid Crumbling: Ensure the cake is completely cooled before crumbling; warm cake can melt the frosting, leading to a messy mixture.
Customize Flavors: Feel free to experiment with different cake flavors like pumpkin spice or even add-ins like crushed cookies for a fun twist in your cake pops.
Quick Coating: Dip the cake pops quickly once melted; this helps maintain a full coating without creating a messy excess.
Decorate Quickly: While the coating is still wet, add your candy eyes and other decorations to ensure they stick properly to your spooky cake pops.
Easy Halloween Cake Pops Recipe FAQs
How do I select the best cake mix for my pops?
Absolutely! When choosing a cake mix for your Easy Halloween Cake Pops, look for your favorite flavors—chocolate or vanilla work wonderfully. If you’re feeling festive, consider pumpkin spice cake mix for a seasonal twist. Be sure to check the expiration date for freshness, ensuring your treats have that delightful, moist texture.
How should I store my cake pops, and for how long?
Very important—store your cake pops in an airtight container in the refrigerator for up to one week. This helps keep them fresh and moist, making sure they’re ready for your Halloween festivities. If you plan to save them longer, I suggest freezing!
What’s the best way to freeze cake pops?
The more the merrier! After preparing your cake pops, arrange them in a single layer on a baking sheet and place them in the freezer until firm, which should take about 1-2 hours. Once set, transfer them to an airtight container, where they can be stored for up to three months. This method keeps their shape and texture intact.
What if my cake pops are falling apart during coating?
It happens to the best of us! If your cake pops are crumbling or falling apart when you coat them, ensure you’ve sufficiently chilled the pops before dipping—at least 30 minutes in the refrigerator. Also, make sure your frosting and cake mixture are well combined and moist enough to hold together. If you find them still having trouble, try adding a bit more frosting to the mix until you achieve the right consistency.
Can I modify this recipe for dietary restrictions?
Absolutely! To create gluten-free Easy Halloween Cake Pops, just substitute a gluten-free cake mix and frosting. For a dairy-free option, use dairy-free chocolate melts and frosting—many brands offer great alternatives that taste fantastic. This way, everyone in your family can indulge in your spooky treats!
What should I do if I run out of candy eyes?
No worries! If you find yourself short on candy eyes, you can easily get creative. Use mini marshmallows with chocolate chips pressed into them, or pipe little dots of icing to create your own eyeballs. The fun of making these pops is in the creativity, so don’t hesitate to improvise!
Easy Halloween Cake Pops for Spooky Sweet Fun
Ingredients
Equipment
Method
- Preheat your oven to 350°F (175°C). Prepare the cake mix according to the package instructions, combining it with the necessary eggs and milk for added richness. Pour the batter into a greased baking pan and bake for 25–30 minutes until a toothpick inserted in the center comes out clean. Once baked, allow the cake to cool completely on a wire rack.
- Once cooled, crumble the cake into a large mixing bowl. Use your hands to break it into fine crumbs, adding your chosen frosting until the mixture resembles a moist dough.
- Scoop out portions of the cake mixture and roll them into golf ball-sized balls. Place each ball on a lined baking sheet.
- Refrigerate the cake pop formations for at least 30 minutes to maintain their shape.
- Melt the chocolate coating in a microwave-safe bowl until smooth. Dip each cake pop into the chocolate, ensuring they are fully covered.
- Apply candy eyes to each cake pop while the chocolate coating is still wet. Use red icing to create bloodshot effects around the candy eyes.
- Place the cake pops upright in a styrofoam block or deep mug to set for about 30 minutes.


