
Advertisement
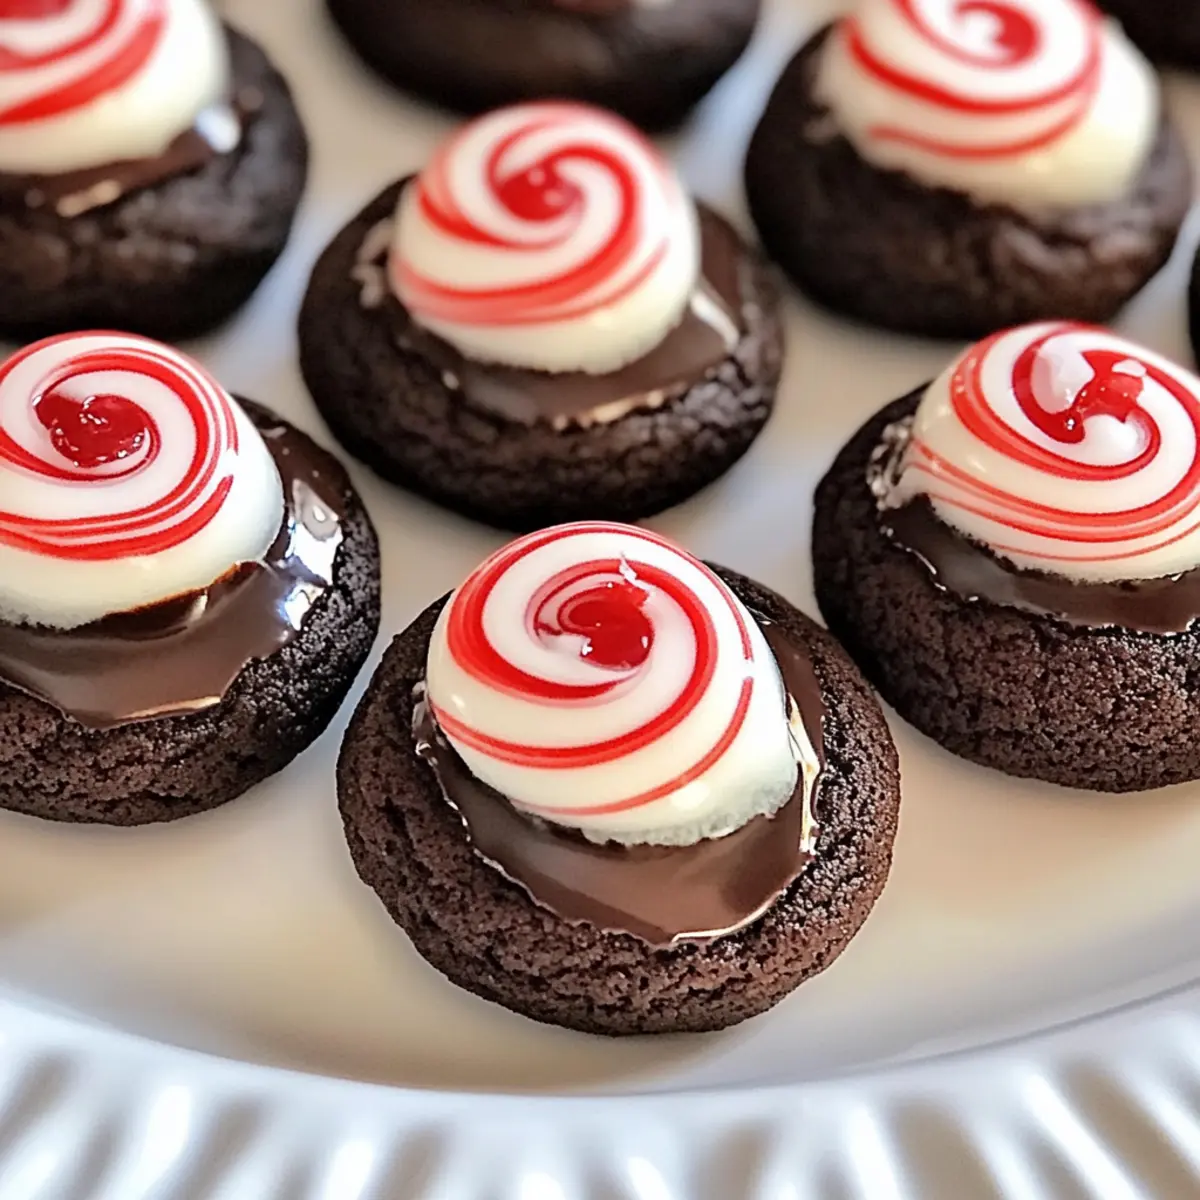
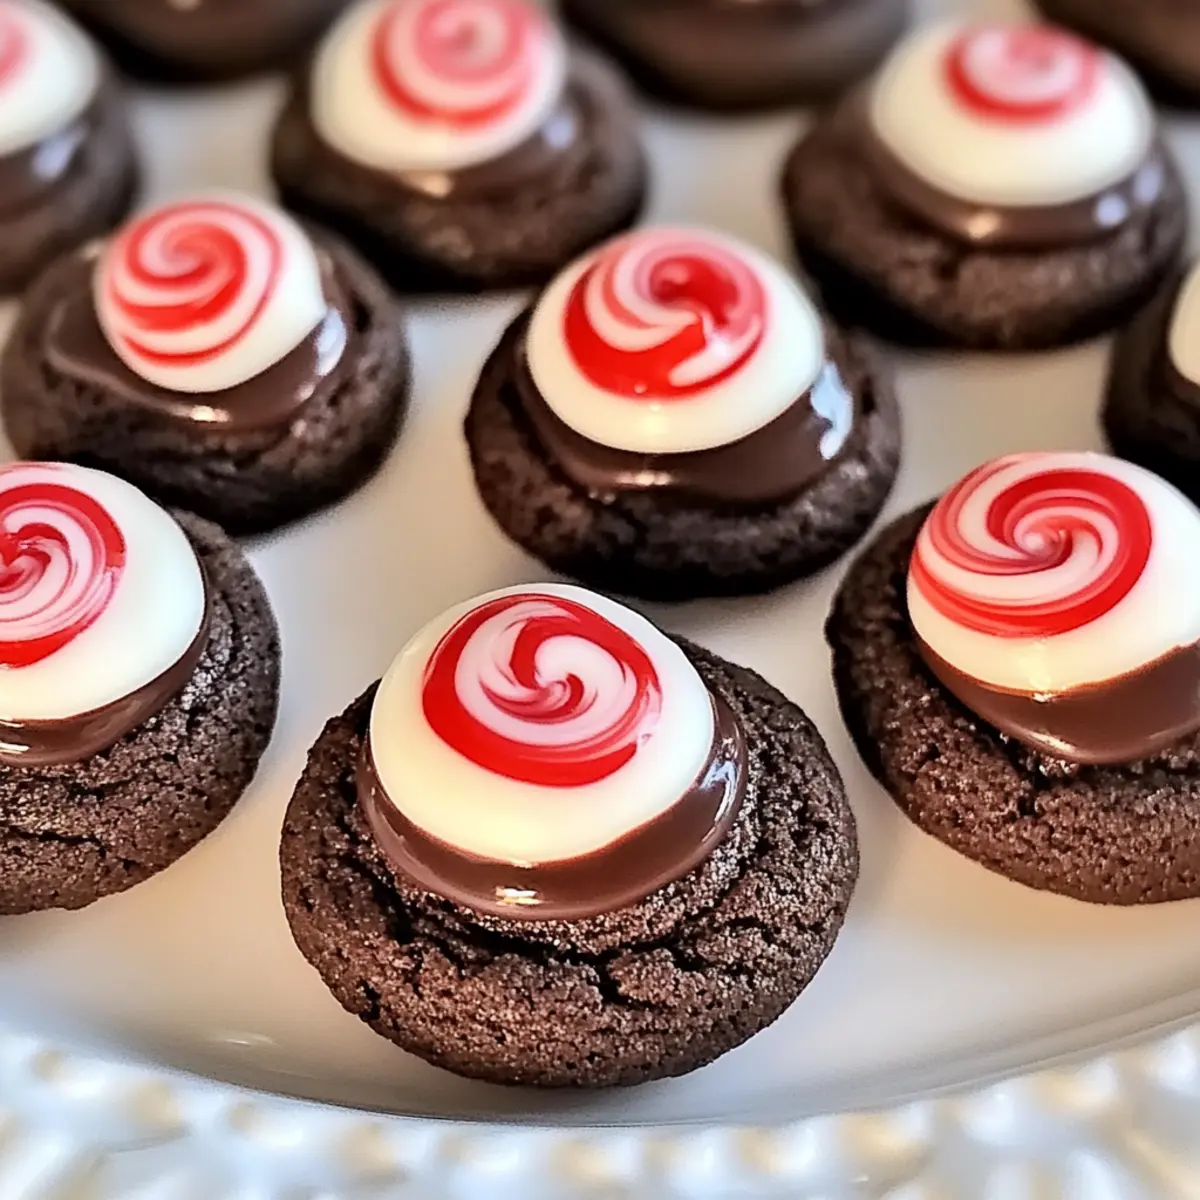
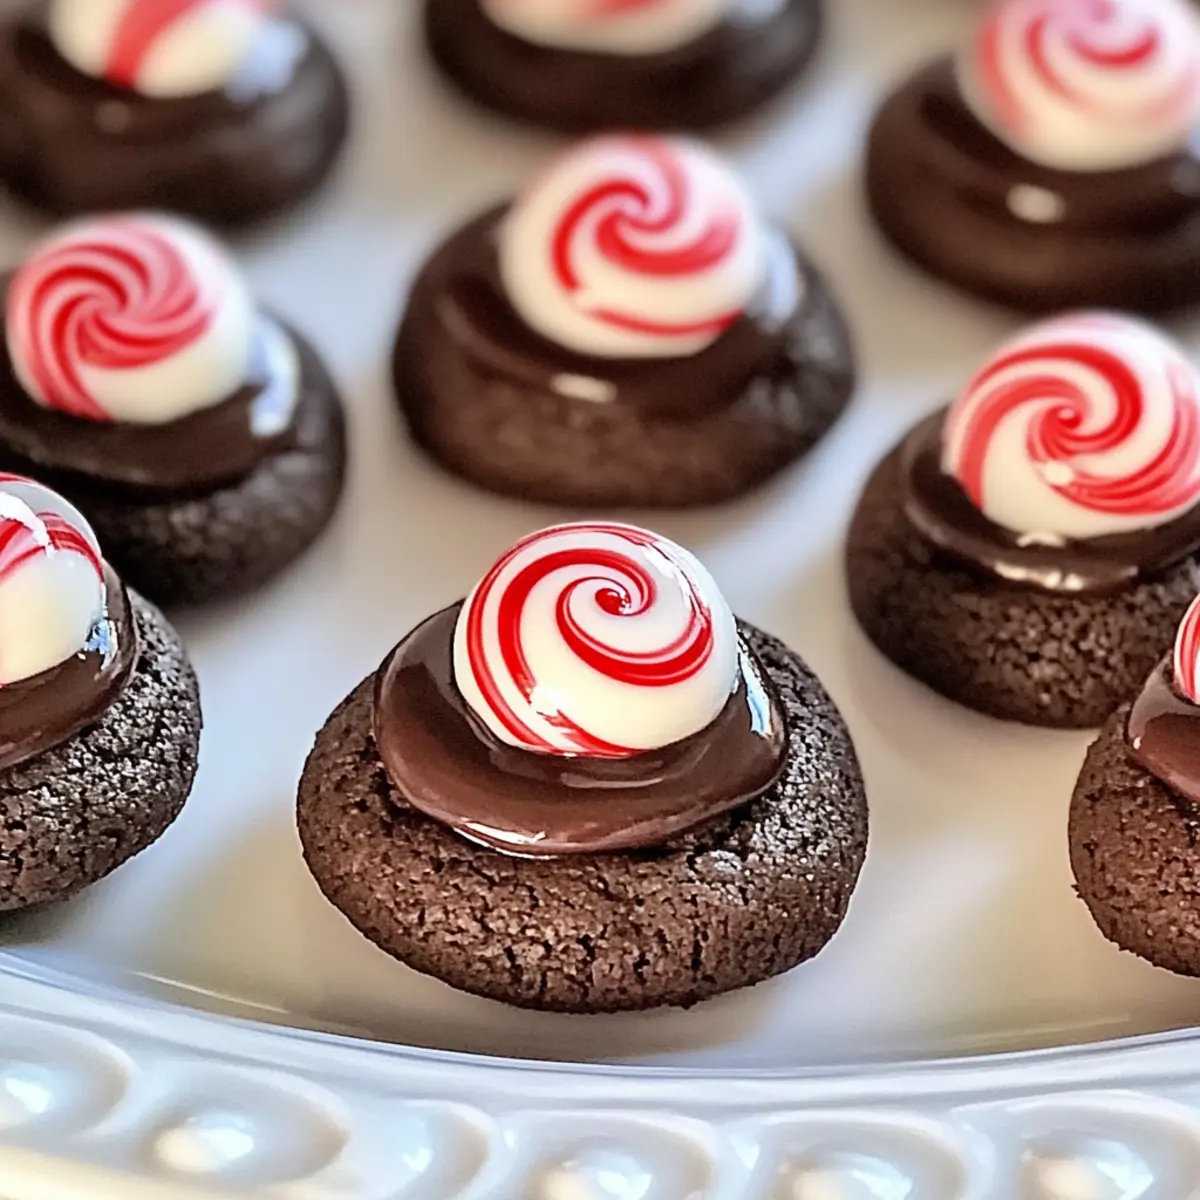
As I watched the snowflakes dance outside my kitchen window, the rich scent of melting chocolate started to fill the air. That’s when I knew it was time to whip up a batch of my beloved Peppermint Chocolate Thumbprint Cookies. These delightful cookies perfectly embody the spirit of the season, featuring a soft chocolate base and a sweet peppermint kiss on top. Not only are they incredibly easy to prepare, but they’re also freezer-friendly, making them the ultimate choice for holiday gatherings or last-minute gift giving. So, whether you’re looking to impress friends or simply indulge your own sweet tooth, these festive treats will surely be a hit. Are you ready to bake up some holiday magic?
Why Are These Cookies So Irresistible?
Festive Appeal: These Peppermint Chocolate Thumbprint Cookies capture the essence of the holiday season with their cheerful colors and delightful flavors.
Easy to Make: With simple ingredients and straightforward steps, even beginner bakers can create these treats without stress.
Advertisement
Freezer-Friendly: Prepare ahead of time and store them effortlessly in the freezer for spontaneous sweet cravings or unexpected guests.
Versatile Variations: Feel free to customize! From crushed candy canes to nutty additions, you can make these cookies uniquely yours.
Crowd-Pleasing Flavor: The rich chocolate pairs perfectly with the refreshing peppermint kiss, making them a guaranteed hit at any gathering!
So, why not make a batch today? Pair them with a cup of hot cocoa for the ultimate cozy experience, and don’t forget to check out Homemade Chocolate Chip for another delightful cookie recipe to add to your holiday lineup!
Peppermint Chocolate Thumbprint Cookies Ingredients
For the Cookie Base
- Unsalted Butter – Provides richness and moisture; substitute with coconut oil for a dairy-free version.
- Sugar – Adds sweetness and texture; coconut sugar can be used for a less refined option.
- Light Brown Sugar – Enhances moisture and contributes a caramel flavor profile to your cookies.
- Egg Yolks – Provide richness and help create a sturdy structure; ensure they’re at room temperature for better incorporation.
- Vanilla Extract – Adds depth and warmth; for an extra minty kick, try using peppermint extract instead.
For the Dry Ingredients
- All-Purpose Flour or Gluten-Free Flour – Forms the core of the cookie base; a gluten-free blend can work just as well for those avoiding gluten.
- Unsweetened Baking Cocoa – Delivers a deep chocolate flavor; choosing high-quality cocoa is key for an indulgent taste.
- Fine Sea Salt – Balances sweetness and enhances overall flavor, making each bite pop.
- Baking Powder and Baking Soda – Essential leavening agents to help your cookies rise; always use fresh for optimal results.
For the Signature Topping
- Frozen Peppermint Kisses – The delightful finishing touch that melts beautifully; ensure they’re well-frozen to maintain their shape during baking.
These Peppermint Chocolate Thumbprint Cookies ingredients invite you to create a festive masterpiece that overflows with warmth and joy. Happy baking!
Step‑by‑Step Instructions for Peppermint Chocolate Thumbprint Cookies
Step 1: Prepare Kisses
Start by freezing the peppermint kisses for at least 2 hours. This crucial step prevents them from melting completely during baking and ensures they hold their shape when pressed into the warm cookie centers. Use a baking sheet lined with parchment paper for easy transfer to the freezer.
Step 2: Mix Wet Ingredients
In a large mixing bowl, cream together 1 cup of unsalted butter, ½ cup of sugar, and ½ cup of light brown sugar using an electric mixer on medium speed until the mixture becomes light and fluffy, about 2-3 minutes. Then, add in 2 room temperature egg yolks and 1 teaspoon of vanilla extract, continuing to mix until smooth and well combined.
Step 3: Combine Dry Ingredients
In another bowl, whisk together 1 ½ cups of all-purpose flour, ½ cup of unsweetened baking cocoa, ¼ teaspoon of fine sea salt, ½ teaspoon of baking powder, and ½ teaspoon of baking soda until evenly blended. Gradually add this dry mixture to your wet ingredients, mixing on low speed until just combined to form a cohesive dough.
Step 4: Chill Dough
Cover the dough tightly with plastic wrap and refrigerate for at least 3 hours, or overnight for optimal flavor and texture. This chilling process is crucial and allows the flavors to meld while firming up the dough, making it easier to handle during the next steps.
Step 5: Form and Bake Cookies
Preheat your oven to 350°F (175°C) while the dough chills. Once ready, scoop the chilled dough and roll it into 1-inch balls using your hands. Place them on a parchment-lined baking sheet, spacing them about 2 inches apart. Bake in the preheated oven for 7-8 minutes, until the edges are set but the centers are still soft.
Step 6: Add Kisses
After removing the cookies from the oven, immediately press a frozen peppermint kiss into the center of each warm cookie. The heat will slightly melt the kiss, creating a delicious thumbprint appearance. Allow the cookies to sit on the baking sheet for about 5 minutes before transferring them to a wire rack.
Step 7: Cool Completely
Transfer the cookies to wire racks to cool completely. This not only allows the cookies to firm up but also lets the peppermint kisses soften slightly to create that irresistible chocolate-peppermint blend. Enjoy the delightful aroma as they cool, filling your kitchen with warm holiday cheer!
What to Serve with Peppermint Chocolate Thumbprint Cookies
These cookies are perfect for transforming any ordinary gathering into a festive celebration loaded with warmth and cheer.
-
Hot Cocoa: The luxurious chocolatey warmth of hot cocoa beautifully complements the rich chocolate base of the cookies, creating a cozy treat for winter evenings.
-
Peppermint Tea: A soothing cup of peppermint tea enhances the cookies’ minty notes, providing a refreshing balance while being wonderfully aromatic.
-
Vanilla Ice Cream: Serve a scoop of creamy vanilla ice cream alongside the cookies for a delightful contrast to their soft, chewy texture. The melting ice cream and warm cookies create a heavenly combination.
-
Chocolate Milkshake: Indulge your sweet tooth with a rich chocolate milkshake. The thick, creamy texture pairs brilliantly with the cookies’ soft center, making each bite a treat.
-
Fruit Salad: Brighten up your dessert table with a fresh fruit salad. The natural sweetness and acidity of the fruit help cut through the richness of the cookies, adding a delightful freshness.
-
Spiced Eggnog: Nothing says festive like a glass of spiced eggnog! This creamy, spiced beverage adds a holiday spirit that perfectly matches the flavors of the cookies.
-
Holiday Cheeseboard: Pair your cookies with various cheeses, nuts, and dried fruits on a festive cheeseboard. The savory elements counterbalance the sweetness, creating an exciting variety of flavors.
-
Gingerbread Latte: This seasonal beverage accents the holiday theme with warm spices, making it an ideal companion for your sweet peppermint treats, enhancing the festive experience.
How to Store and Freeze Peppermint Chocolate Thumbprint Cookies
Room Temperature: Store cookies in an airtight container at room temperature for up to 3 days to keep them soft and fresh.
Fridge: For extended freshness, place cookies in the refrigerator for up to 1 week. Just be sure to seal them well to prevent drying out.
Freezer: Freeze Peppermint Chocolate Thumbprint Cookies in an airtight container or freezer bag for long-term storage, lasting up to 6 weeks.
Reheating: When ready to enjoy, thaw cookies at room temperature, or gently warm them in the oven for a few minutes to regain that fresh-baked taste.
Peppermint Chocolate Thumbprint Cookies Variations
Feel free to let your creativity shine as you whip up these delightful cookies, adding a personal touch to every batch!
-
Candy Cane Crunch: Add ¼ cup of crushed candy canes to the dough for extra festive crunch and a visually appealing topping. Imagine the delightful crunch and bright peppermint flavor bursting in every bite!
-
Dark Chocolate Delight: Swap the peppermint kisses for dark chocolate kisses to create a richer, more decadent cookie. Dark chocolate pairs beautifully with peppermint, adding a luxurious twist to your holiday favorites.
-
Frosted Fun: Top each cookie with a swirl of peppermint frosting after baking. This additional layer will enhance both the sweetness and festive appeal, making your cookies look as good as they taste.
-
Nutty Addition: Stir in ½ cup of chopped nuts, such as pecans or walnuts, for extra texture. This twist gives your cookies a satisfying crunch, elevating your peppermint-themed treats to new heights.
-
Spicy Twist: Incorporate a pinch of cayenne pepper into the dough for an unexpected kick. The mild heat will complement the sweetness and richness, creating a unique rendition of the classic cookie.
-
Gluten-Free Option: Substitute all-purpose flour with a gluten-free flour blend for those avoiding gluten, ensuring everyone can indulge in these delightful treats. These cookies can be enjoyed by all, without sacrificing flavor or texture.
-
Minty Enhancements: Replace vanilla extract with peppermint extract to amplify that refreshing mint flavor. Just remember, a little goes a long way!
-
Chewy Version: For a chewier cookie, add an extra egg yolk for additional moisture and richness. You’ll delight in a soft, chewy center that perfectly contrasts the peppermint kiss on top.
These variations not only add a dash of creativity to your baking but also make these cookies a versatile treat for various palates. Enjoy experimenting, and if you love chocolate, don’t forget to check out Chocolate Cosmic Brownie and Chocolate Marshmallow Swirl for more delicious ideas!
Make Ahead Options
These Peppermint Chocolate Thumbprint Cookies are perfect for meal prep, saving you time during the bustling holiday season! You can prepare the cookie dough up to 24 hours in advance and refrigerate it until you’re ready to bake. Simply mix the dough, cover it tightly with plastic wrap, and chill. The frozen peppermint kisses can also be prepped ahead; just make sure they’re frozen for at least 2 hours before baking. When you’re ready to enjoy these festive treats, preheat the oven, roll out the chilled dough into balls, bake, and finish by adding the kisses to create that delightful thumbprint. This way, you’ll serve delicious cookies with minimal effort!
Tips for the Best Peppermint Chocolate Thumbprint Cookies
- Chill is Essential: Always chill your dough to ensure the cookies maintain their shape and texture during baking. This step cannot be skipped!
- High-Quality Cocoa: Invest in good cocoa powder; it makes a remarkable difference in flavor, enriching the chocolate taste in your Peppermint Chocolate Thumbprint Cookies.
- Frozen Kisses: Make sure the peppermint kisses are fully frozen before baking, preventing them from melting completely. A gentle press creates the perfect thumbprint!
- Oven Calibration: Every oven bakes differently, so consider testing a small batch to perfect the baking time for your specific setup.
- Room Temperature Eggs: Using room temperature egg yolks helps them mix more seamlessly into the batter, contributing to a better cookie structure.
Peppermint Chocolate Thumbprint Cookies Recipe FAQs
How do I choose the right peppermint kisses for my cookies?
Absolutely! When selecting peppermint kisses, look for high-quality brands that specify flavor and freshness on the packaging. They should be well-packaged and not past their expiry date to ensure they melt perfectly in the oven. Keep an eye out for any visible damage or melting.
What’s the best way to store leftover cookies?
Very! Store your Peppermint Chocolate Thumbprint Cookies in an airtight container at room temperature for up to 3 days and keep them in the fridge for up to 1 week for optimum freshness. I always recommend separating layers with parchment paper to prevent sticking.
Can I freeze these cookies?
Of course! To freeze your Peppermint Chocolate Thumbprint Cookies, place them in a single layer in an airtight container or freezer bag, separating layers with parchment paper if stacking. They can be frozen for up to 6 weeks. When you’re ready to indulge, let them thaw at room temperature or warm in the oven for that fresh-baked experience!
What should I do if my cookies spread too much during baking?
Fret not! If your cookies spread too much, it could be due to warm dough. Make sure to chill your dough for at least 3 hours; this gives the butter time to firm up and helps the cookies hold their shape. Also, ensure your baking soda and baking powder are fresh; old leavening agents can lead to overly flat cookies.
Are there any dietary considerations to keep in mind?
Definitely! For those with gluten sensitivities, simply use a certified gluten-free flour blend. Additionally, if you’re worried about allergies, check for potential allergens in peppermint kisses and your other ingredients. Always feel free to experiment with substitutes that cater to dietary restrictions; for example, coconut oil can replace butter for a dairy-free option.

Peppermint Chocolate Thumbprint Cookies That Wow Every Time
Ingredients
Equipment
Method
- Start by freezing the peppermint kisses for at least 2 hours.
- In a large mixing bowl, cream together the butter, sugar, and light brown sugar until light and fluffy.
- Add the egg yolks and vanilla extract, mixing until smooth and well combined.
- In another bowl, whisk together the flour, cocoa, salt, baking powder, and baking soda.
- Gradually add the dry mixture to your wet ingredients until just combined to form a cohesive dough.
- Cover the dough tightly with plastic wrap and refrigerate for at least 3 hours.
- Preheat your oven to 350°F (175°C). Once ready, scoop the dough and roll it into 1-inch balls.
- Place them on a parchment-lined baking sheet, spacing them about 2 inches apart, and bake for 7-8 minutes.
- Immediately press a frozen peppermint kiss into the center of each warm cookie.
- Allow the cookies to sit for about 5 minutes before transferring them to a wire rack.
- Transfer to wire racks to cool completely.


