
Advertisement
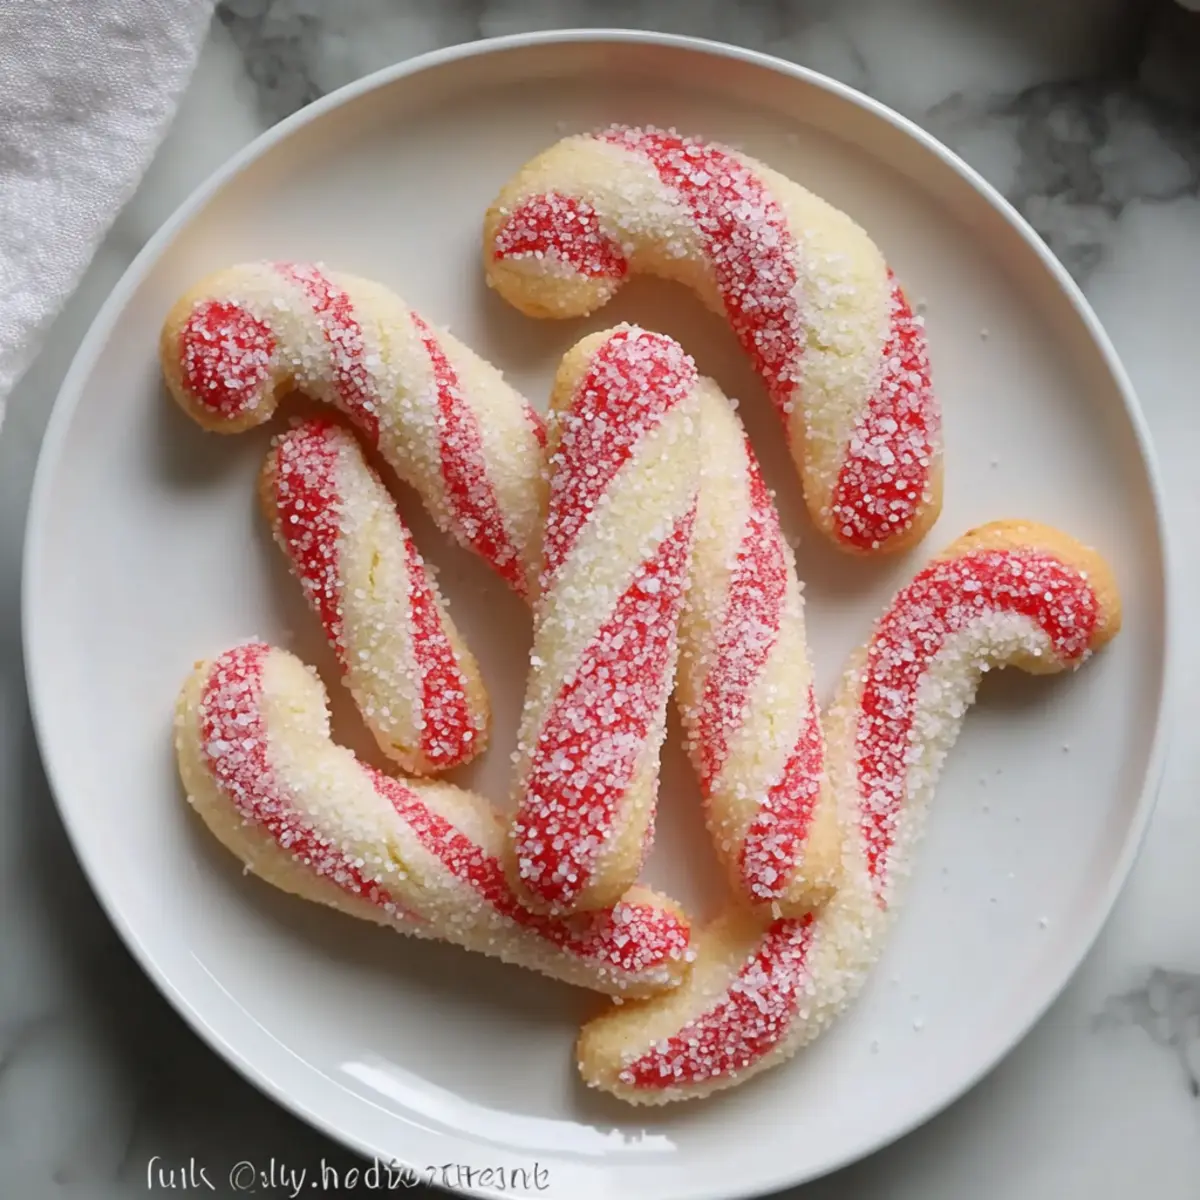
The aroma of freshly baked cookies is a memory that takes me back to my childhood, where the anticipation of sharing sweet treats filled the air. Today, I’m thrilled to share my recipe for Classic Candy Cane Cookies, a festive delight perfect for your holiday gatherings. Not only are these buttery cookies incredibly simple to make, but their charming red-and-white stripes add a whimsical touch to any dessert table. Plus, they’re a fantastic project to tackle with your kids, turning baking into cherished moments together. Get ready to embrace the cozy vibes of Christmas music and hot cocoa as we dive into making these delightful peppermint-infused treats. Curious about the easy variations you can try? Let’s unwrap the joy together!

Why are Candy Cane Cookies a Must-Make?
Festive Fun: These Classic Candy Cane Cookies bring holiday cheer with their vibrant colors and delightful flavors, making them a centerpiece for any celebration.
Simple Process: With just a few ingredients and straightforward steps, you’ll have your kitchen filled with the sweet aroma of freshly baked cookies in no time!
Kid-Friendly Activity: Invite your little ones to join in the fun as they twist and shape the dough, creating wonderful memories along the way.
Versatile Variations: From chocolate twists to gluten-free options, this recipe caters to everyone’s preferences, so you never run out of ideas!
Gifting Delight: Perfect for gifting, these cookies look beautiful on a platter or in a festive cookie box, making them a thoughtful gesture for friends and family.
Party Hit: With their charming design and delectable taste, these cookies are sure to be a hit at any holiday gathering, alongside other treats like Pistachio Shortbread Cookies and Marshmallow Swirl Cookies.
Classic Candy Cane Cookie Ingredients
For the Dough
• All-Purpose Flour – Structure and bulk; substitute with a 1:1 gluten-free flour blend for gluten-free cookies.
• Baking Powder – Provides lift for a soft texture.
• Salt – Enhances overall flavor.
• Unsalted Butter – Ensures a rich, buttery taste with softness; no substitutions recommended.
• Granulated Sugar – Adds sweetness and helps achieve a light texture.
• Large Egg – Binds the ingredients together and adds moisture.
• Vanilla Extract – Adds aromatic sweetness.
• Peppermint Extract – Provides the signature minty flavor; can swap with vanilla or almond extract for variation.
• Red Gel Food Coloring – Gives the dough its festive red color; avoid liquid coloring to maintain dough consistency.
Advertisement
For Garnishing
• Crushed Candy Canes or Sugar (optional) – Adds a festive touch and delightful crunch to the cookies.
Embrace the festive spirit with these Classic Candy Cane Cookies that fill the air with sweet, nostalgic memories!
Step‑by‑Step Instructions for Classic Candy Cane Cookies
Step 1: Prepare the Dough
In a large mixing bowl, whisk together 2 cups of all-purpose flour, 1 teaspoon of baking powder, and a pinch of salt. In a separate bowl, cream 1 cup of softened unsalted butter with 1 cup of granulated sugar until light and fluffy, about 3-4 minutes. Mix in 1 large egg, 1 teaspoon of vanilla extract, and 1 teaspoon of peppermint extract until fully incorporated. Gradually blend in the dry mixture and stir until combined. Divide the dough into two portions, tinting one with red gel food coloring for a festive touch.
Step 2: Shape Cookies
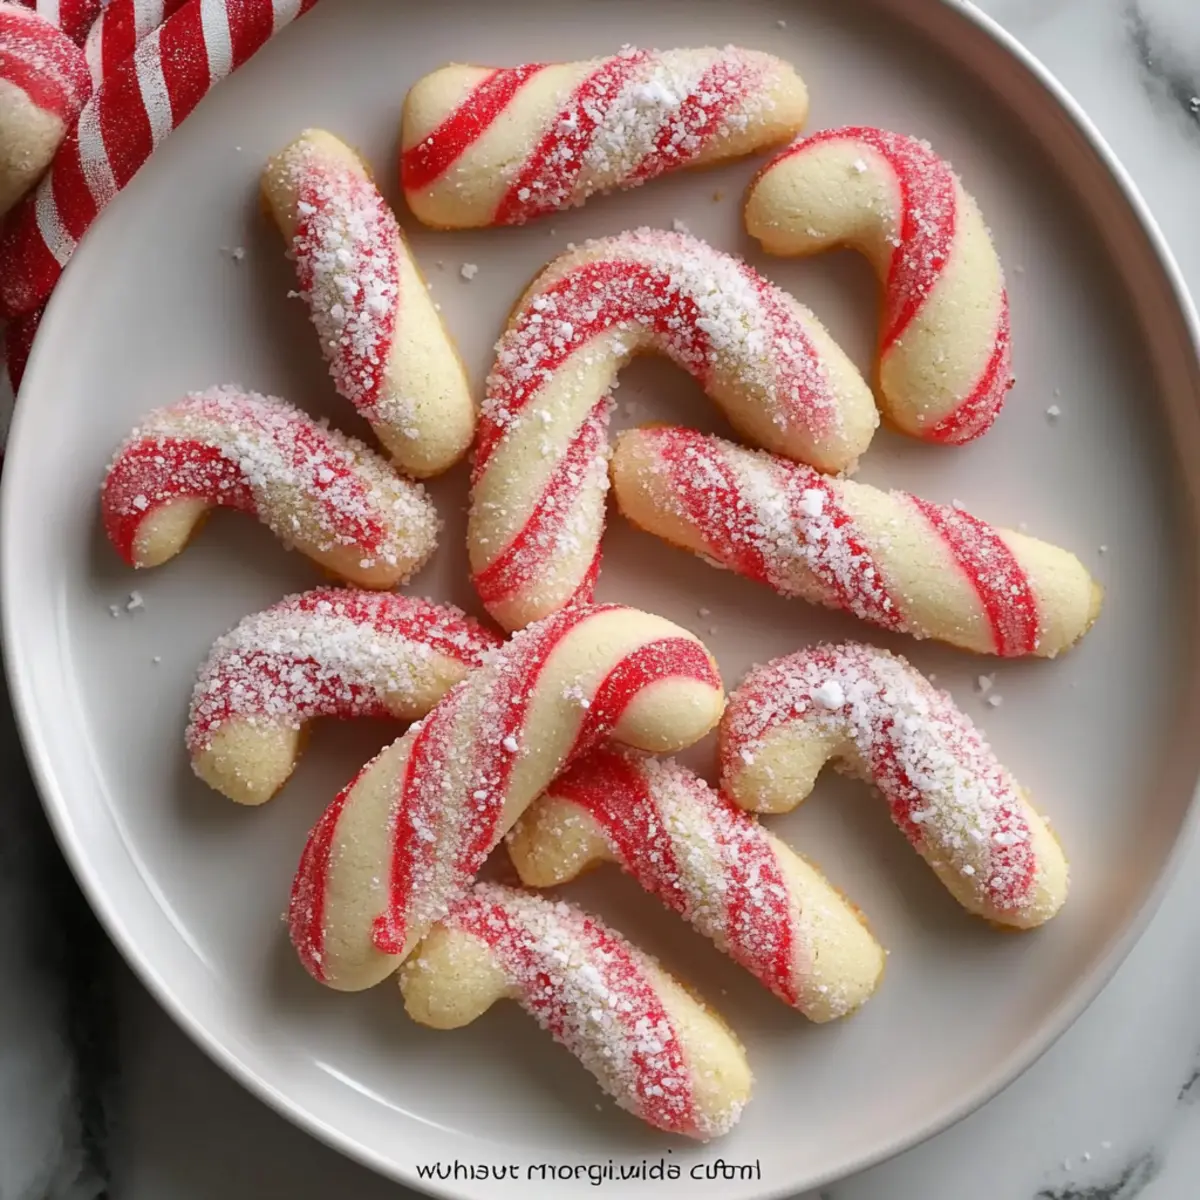
Take small pieces of each colored dough and roll them into ropes, about 6 inches long. Gently twist one red and one white rope together to form the iconic candy cane shape. Place each shaped cookie on a baking sheet lined with parchment paper, ensuring they are spaced apart to allow for spreading. Chill the cookies in the refrigerator for at least 30 minutes to firm up the dough, helping them hold their shape while baking.
Step 3: Bake
Preheat your oven to 375°F (190°C). Once the dough is chilled, bake the cookies on the prepared baking sheet for 8-10 minutes, or until the edges begin to turn lightly golden. Keep an eye on them as you want a soft, chewy center. The delightful aroma of the Classic Candy Cane Cookies will fill your kitchen while they bake, adding to the holiday spirit.
Step 4: Cool and Garnish
Once baked, remove the cookies from the oven and let them cool on the baking sheet for 3-5 minutes. Then, transfer them to wire racks to cool completely. If desired, sprinkle crushed candy canes or sugar on top while they are still warm for an extra festive crunch. These charming Classic Candy Cane Cookies are now ready to be enjoyed or beautifully gifted during the holiday season!
Storage Tips for Classic Candy Cane Cookies
Room Temperature: Store your Classic Candy Cane Cookies in an airtight container at room temperature for up to 5 days to keep them soft and fresh.
Freezer: For longer storage, freeze the cookies in a sealed bag with layers separated by parchment paper for up to 2 months. This prevents freezer burn and maintains their delightful flavor.
Reheating: To enjoy them warm, reheat the cookies in a 275°F (135°C) oven for 4-5 minutes or microwave them for about 10 seconds for a quick treat.
Gifting Tip: If gifting, allow the cookies to cool completely before packaging them in decorative boxes or tins to preserve their festive charm!
Expert Tips for Classic Candy Cane Cookies
-
Chill the Dough: Ensure the dough is properly chilled for at least 30 minutes. This helps prevent spreading and keeps the cookies’ shapes intact while baking.
-
Use Gel Coloring: Opt for red gel food coloring instead of liquid to achieve vibrant hues without altering the cookie’s consistency.
-
Shape Evenly: Roll the dough into uniform ropes to maintain consistent sizes. Uneven shapes can lead to uneven baking and a less polished look.
-
Watch the Bake Time: Keep an eye on your cookies; baking them just until the edges are lightly golden ensures a soft, chewy center in your Classic Candy Cane Cookies.
-
Experiment with Flavors: Don’t hesitate to swap out peppermint extract for vanilla or almond for fun variations. These can lead to delightful flavor twists!
Make Ahead Options
These Classic Candy Cane Cookies are perfect for meal prep enthusiasts aiming to save time during the busy holiday season! You can prepare the cookie dough and refrigerate it for up to 24 hours before baking. Simply mix the dough as instructed, shape it into ropes, and chill it in an airtight container to maintain freshness. For even longer storage, you can freeze the shaped cookies for up to 3 months; just roll each cookie in plastic wrap and store in a freezer-safe bag. When ready to enjoy, bake them directly from the refrigerator or freezer, adding an extra minute or two to the baking time. This way, you’ll have warm, delicious Classic Candy Cane Cookies ready to share with loved ones, creating sweet memories with minimal effort!
Classic Candy Cane Cookies Variations & Substitutions
Feel free to get creative with these Classic Candy Cane Cookies by exploring delightful variations that can bring a personal touch to your festive baking!
- Chocolate Twist: Incorporate 2 tablespoons of cocoa powder into half the dough for a delicious chocolate flavor that pairs beautifully with peppermint.
- Vanilla Almond: Substitute peppermint extract with almond extract for a fragrant and milder taste that still feels festive.
The almond-infused cookies offer a warm, cozy aroma, making them a perfect addition to your holiday treat lineup.
- Peppermint Swirls: Instead of shaping into canes, roll the two colors together to create stunning swirled cookies that are just as tasty and visually appealing.
- Stuffed Surprise: Place a piece of white chocolate or a peppermint candy inside the dough before shaping to create a delightful hidden treat.
Imagine biting into a cookie only to discover a gooey, sweet surprise inside – a fun twist that keeps everyone guessing!
- Mini Bites: Shape the dough into shorter, bite-sized twists for quicker baking. Perfect for those who want a smaller treat or for little hands to manage.
- Gluten-Free Delight: Use a 1:1 gluten-free flour blend instead of all-purpose flour, ensuring that everyone can enjoy these festive cookies no matter their dietary needs.
These adaptations make it easy to share your love of baking while catering to various preferences. Enjoy these delightful creations alongside other festive treats like Sweet Candy Cookies or Filled Snowball Cookies.
What to Serve with Classic Candy Cane Cookies?
Nothing pairs better with the sweet joy of freshly baked cookies than warm comfort food and festive drinks!
-
Rich Hot Chocolate: Enhances the peppermint flavor while providing a warm, creamy contrast to the cookies’ texture. It’s perfect for cozy evenings.
-
Peppermint Tea: A calming herbal tea that complements the cookie’s minty essence, creating an inviting atmosphere for your holiday gathering.
-
Vanilla Ice Cream: Consider serving these cookies with a scoop of vanilla ice cream. The cold, creamy treat balances the sugar and adds an elegant touch to your dessert table.
-
Nutty Biscotti: Crunchy, almond-flavored biscotti can be a delightful contrast, offering an extra texture while balancing the sweetness of the candy cane cookies.
-
Fruit Platter: A selection of tart berries or refreshing citrus adds a pop of color and acidity, perfectly balancing the sweetness of the cookies.
-
Sparkling Apple Cider: This festive drink provides a bubbly, fruity contrast to the cookies, making it a fun and delicious beverage option for holiday celebrations.
Each pairing not only complements these Classic Candy Cane Cookies but also elevates your holiday experience to new levels of enjoyment.

Classic Candy Cane Cookies Recipe FAQs
What type of flour should I use for Classic Candy Cane Cookies?
I recommend using all-purpose flour for the best structure and texture. If you’re looking for a gluten-free option, you can substitute it with a 1:1 gluten-free flour blend, which works just as well and keeps the cookies soft and delicious.
How should I store Classic Candy Cane Cookies?
Store your Classic Candy Cane Cookies in an airtight container at room temperature for up to 5 days. They should remain soft and delightful! If you want to keep them longer, you can freeze them in a sealed bag with layers separated by parchment paper for up to 2 months.
Can I freeze Classic Candy Cane Cookies?
Absolutely! To freeze your cookies, first let them cool completely. Then, layer them between sheets of parchment paper in an airtight container or freezer bag. Make sure to seal it well to prevent freezer burn. When you’re ready to enjoy them, simply thaw at room temperature or reheat in a warm oven for a few minutes.
What do I do if my dough is too sticky?
If you find your dough is too sticky to handle, it’s often helpful to chill it in the refrigerator for an additional 10-15 minutes. This will firm it up and make it easier to roll into ropes. If it’s still sticky after chilling, dust your hands and work surface with a little flour as you shape the dough.
Can I make these cookies dairy-free?
Yes! To make dairy-free Classic Candy Cane Cookies, substitute the unsalted butter with a plant-based butter alternative. This keeps the texture and flavor rich while accommodating dietary preferences. Most dairy-free butters can easily be swapped in a 1:1 ratio.
What’s the best way to ensure my cookies hold their shape while baking?
Chilling the dough for at least 30 minutes before shaping is crucial. This step helps the cookies retain their form as they bake. Additionally, keeping the shaped cookies on the baking sheet in the fridge for another 10 minutes before popping them in the oven can also enhance their shape retention.
Deliciously Festive Classic Candy Cane Cookies for Cheerful Holidays
Ingredients
Equipment
Method
- In a large mixing bowl, whisk together flour, baking powder, and salt. In a separate bowl, cream butter with sugar until light and fluffy. Mix in egg, vanilla extract, and peppermint extract. Gradually blend in the dry mixture and stir until combined. Divide the dough and tint one half with red gel food coloring.
- Take small pieces of each colored dough and roll into ropes, about 6 inches long. Twist one red and one white rope together to form candy cane shapes. Place on a baking sheet lined with parchment paper.
- Chill the shaped cookies in the refrigerator for at least 30 minutes. Preheat your oven to 375°F (190°C). Bake cookies for 8-10 minutes or until edges begin to turn lightly golden.
- Let the cookies cool on the baking sheet for 3-5 minutes, then transfer to wire racks. Sprinkle with crushed candy canes or sugar while warm, if desired.


