
Advertisement
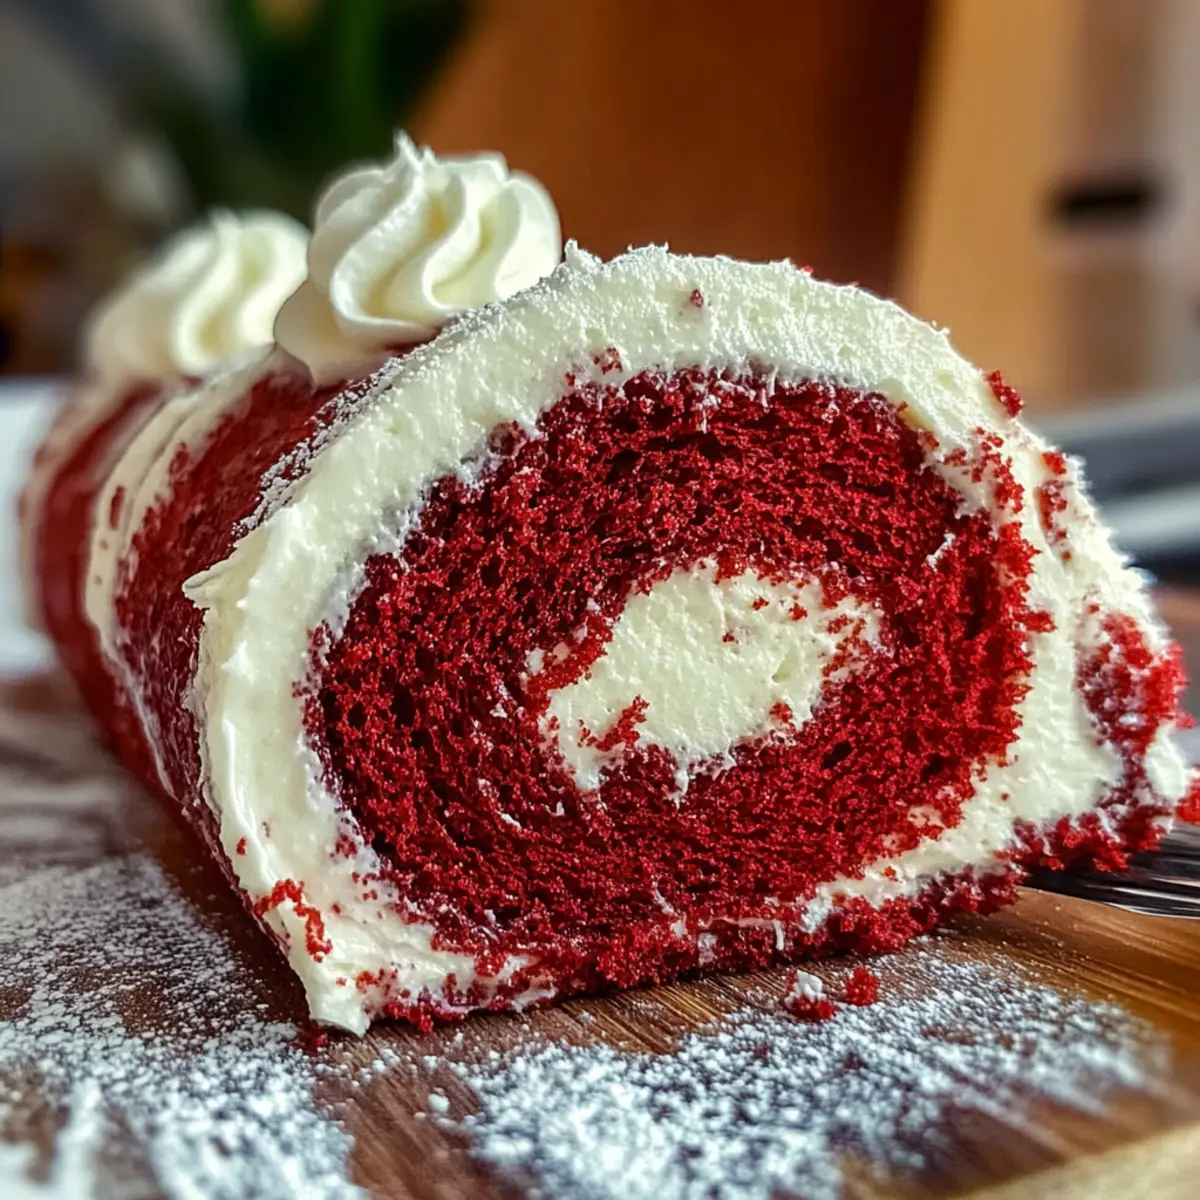
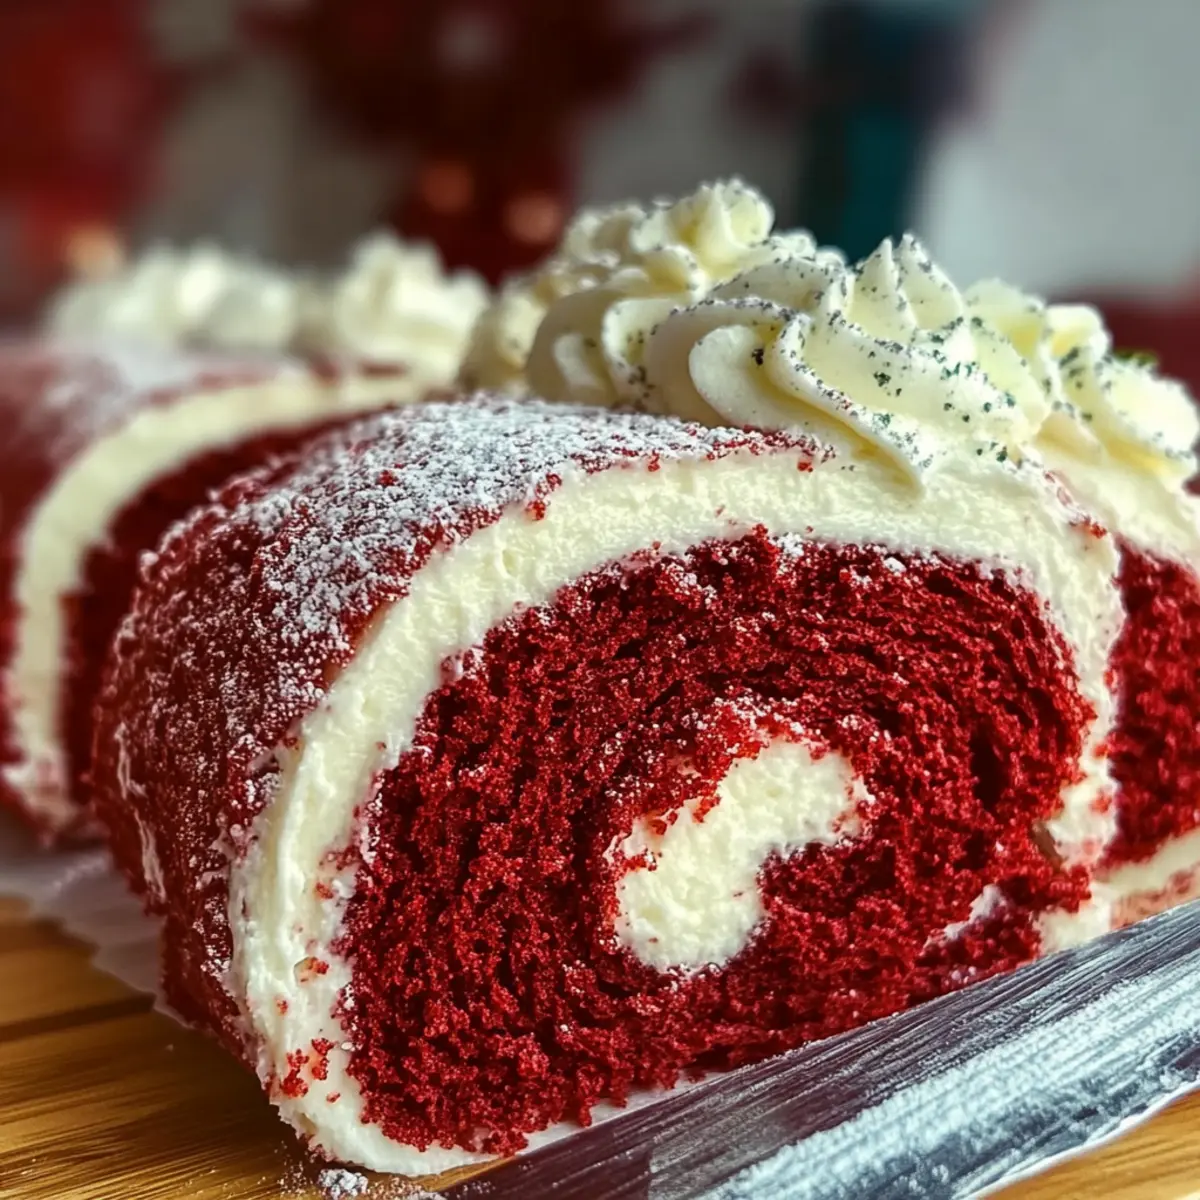
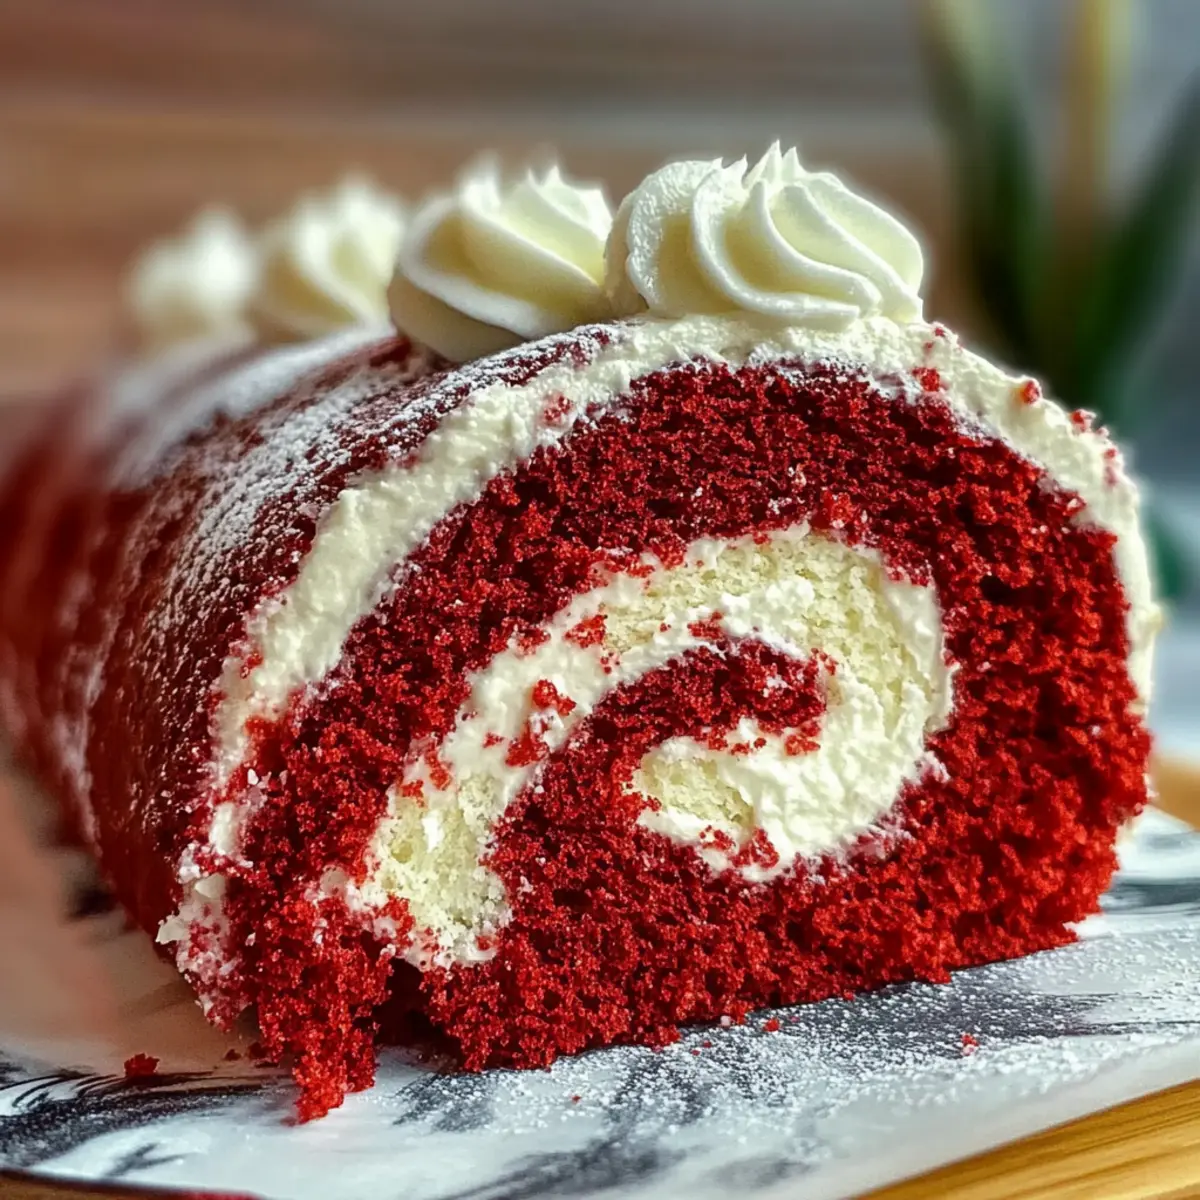
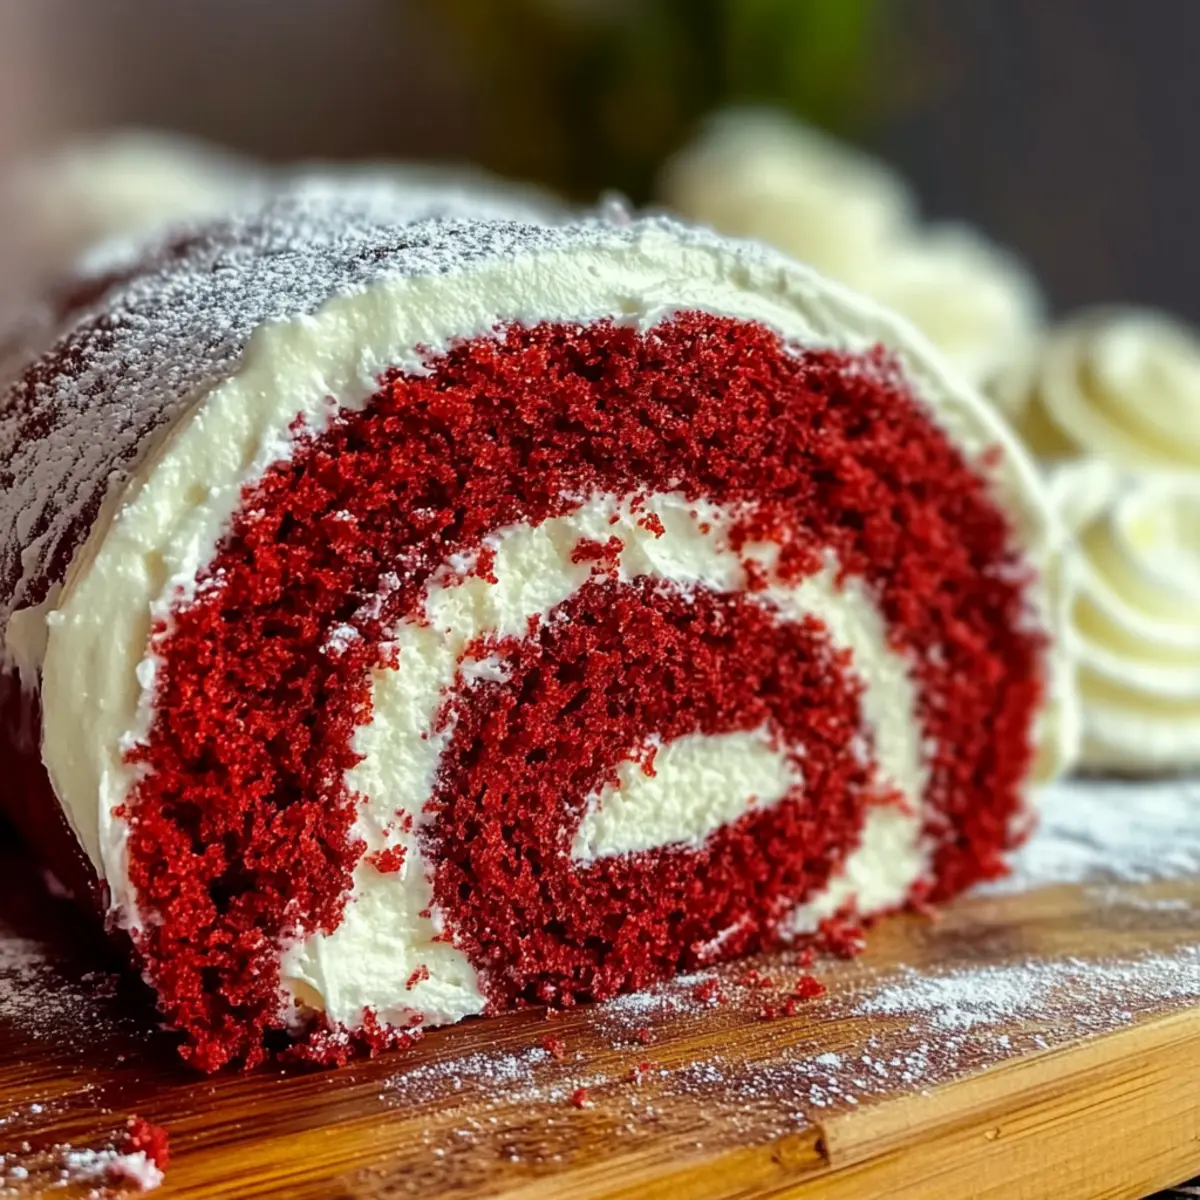
The scent of warm cocoa and vanilla wafting from the kitchen can transport you to childhood memories of baking with joy. Today, I’m excited to share my delightful Red Velvet Cake Roll recipe—an elegant dessert that dazzles with its stunning visuals and rich flavor. This cake roll brings a fun twist to the classic red velvet, proving you can make something beautiful without a ton of fuss. Not only is it easy to prepare, but it also slices beautifully, making it perfect for gatherings or celebrations where you want to impress. You’ll love how simple ingredients come together to form a deliciously light and satisfying treat. Ready to roll up your sleeves and create something memorable? Let’s dive into the magic of this festive dessert!
Why Is This Red Velvet Cake Roll Special?
Visual Delight: Each slice reveals a stunning spiraled design, making this cake roll a showstopper at any gathering.
Easy to Make: With just a few simple steps, you’ll have a gorgeous dessert that impresses without the extra effort.
Rich Flavor: The combination of sweet chocolate notes and creamy filling creates a flavor explosion that’s irresistibly delicious.
Versatile Options: Personalize your cake roll by experimenting with fillings or using natural coloring methods like beet juice.
Perfect for Any Occasion: Whether it’s a birthday, holiday, or casual get-together, this cake roll fits right in. Pair it with a scoop of vanilla ice cream or serve alongside a slice of delicious Pumpkin Spice Cake with Irresistible Caramel Frosting for a complete dessert experience!
Red Velvet Cake Roll Ingredients
For the Cake
Advertisement
- Large Eggs – These add vital moisture and structure; whip them until foamy to achieve the best texture.
- Granulated Sugar – Enhances sweetness while helping create that fluffy cake consistency.
- Vegetable Oil – Keeps the cake moist and tender; feel free to swap with melted butter for extra flavor.
- Baking Powder – Essential for leavening, ensuring your cake rises beautifully.
- Salt – Elevates the overall flavors, making each bite delightful.
- Vanilla Extract – Infuses a deeper and warmer flavor in your cake.
- Cocoa Powder – Offers a subtle chocolate undertone; use unsweetened for the best results.
- All-Purpose Flour – Forms the cake’s main structure; be cautious not to overmix to maintain a light texture.
For the Cream Cheese Filling
- Cream Cheese – Provides a rich, creamy filling; you can substitute with mascarpone for a slightly different taste.
- Butter – Adds an additional layer of richness to the filling.
- Powdered Sugar – Sweetens the filling perfectly and is also used for dusting; ensuring a lovely presentation.
For Assembly
- Powdered Sugar – A final touch to dust over the cake roll, enhancing its visual appeal.
Indulge your loved ones with this scrumptious Red Velvet Cake Roll that’s perfect for any celebration!
Step‑by‑Step Instructions for Red Velvet Cake Roll
Step 1: Preheat and Prepare the Pan
Preheat your oven to 350°F (175°C) and grab a 10×15-inch cake pan. Line the bottom with foil and lightly spray it with nonstick cooking spray to ensure easy removal later. This step is essential for achieving a flawless roll with your gorgeous Red Velvet Cake Roll.
Step 2: Beat the Eggs
In a large mixing bowl, beat the large eggs for about 3-5 minutes until they become foamy and pale in color. This aeration is vital for the cake’s structure. Once foamy, gradually add the granulated sugar and continue mixing for another 2 minutes until the mixture thickens slightly and is well combined, creating a sweet foundation for your cake.
Step 3: Mix the Wet Ingredients
Now, blend in the vegetable oil, baking powder, salt, vanilla extract, and cocoa powder into the egg mixture. Stir until everything is evenly combined, and the mixture is smooth and luscious. This ensures each bite of your Red Velvet Cake Roll will have a rich, delectable flavor.
Step 4: Incorporate the Flour
Next, gradually add the all-purpose flour into the wet ingredients, mixing gently until just combined. Be cautious not to overmix, as we want the cake to remain light and airy! The batter should be smooth and velvety, ready to transform into a stunning cake.
Step 5: Bake the Cake
Pour the batter into the prepared cake pan, spreading it evenly with a spatula. Bake in your preheated oven for 10-15 minutes, or until the cake is lightly browned and springs back when touched. Keep an eye on it, as overbaking can lead to dryness, which will affect the rolling process.
Step 6: Prepare the Towel
While your cake is baking, prepare a clean kitchen towel by dusting it generously with powdered sugar. This step is crucial to prevent the cake from sticking when you roll it up. The powdered sugar adds a touch of sweetness and visual appeal to your upcoming masterpiece.
Step 7: Roll the Cake
Once baked, remove the cake from the oven and immediately flip it onto the prepared towel. Carefully peel off the foil while the cake is still warm, and roll it up from the short end, using the towel to help guide the rolling process. Set it aside to cool completely in this rolled position, which helps it maintain its shape.
Step 8: Prepare the Filling
While the cake cools, let’s make that creamy filling. In a mixing bowl, beat together the cream cheese and butter until smooth. Gradually add the powdered sugar and vanilla extract, mixing until fluffy and evenly combined. This creamy filling will provide a delicious contrast to your Red Velvet Cake Roll.
Step 9: Unroll and Fill the Cake
Once the cake is completely cooled, gently unroll it from the towel. Carefully spread the cream cheese filling evenly over the surface of the cake, making sure to cover it generously for a delightful taste. Then, roll it back up tightly without the towel, ensuring a beautiful spiral for your cake roll.
Step 10: Chill and Serve
Wrap your Red Velvet Cake Roll in plastic wrap and place it in the refrigerator to chill for at least one hour. This chilling time helps the flavors meld beautifully. Just before serving, dust the top with additional powdered sugar for that perfect finishing touch that makes this dessert irresistible!
How to Store and Freeze Red Velvet Cake Roll
Fridge: Wrap any leftover Red Velvet Cake Roll tightly in plastic wrap and store in the refrigerator for up to 3 days. This keeps it fresh and moist for your sweet cravings!
Freezer: You can freeze the cake roll for up to 2 months. Tightly wrap it in plastic wrap and aluminum foil. Thaw overnight in the fridge when you’re ready to enjoy it again.
Reheating: If you prefer a warm treat, slice and microwave individual pieces for about 10-15 seconds. This brings back the delightful softness without drying it out.
Serving Tips: Always dust with powdered sugar before serving, as this enhances both the visual appeal and the flavor of your Red Velvet Cake Roll!
Red Velvet Cake Roll Variations
Feel free to play with this recipe and transform it into your own unique creation that excites your taste buds!
- Cream Cheese Twist: Swap cream cheese for mascarpone for a lighter, creamier filling that keeps things interesting.
- Natural Color: Use beet juice instead of red food coloring for a beautiful and natural hue, enhancing the cake’s health factor.
- Crunchy Add-in: Toss in chopped nuts or chocolate chips into the filling for a delightful crunch and added texture that complements the fluffiness of the cake.
- Berry Delight: Add fresh raspberries or strawberries into the filling for a fruity twist that balances the rich flavors and adds a pop of color.
- Spicy Kick: Incorporate a dash of cinnamon or nutmeg into the batter for a warm spice note that elevates the traditional red velvet flavor profile.
- Vegan Swap: Replace eggs with flaxseed meal and use non-dairy cream cheese to craft a delicious vegan version of this cake roll.
- Chocolate Layer: Drizzle melted chocolate on top of the cake roll for a decadent finish that makes this dessert even more indulgent. Pair it with a slice of classic Black Velvet Cake for a truly memorable dessert table!
- Coffee Infusion: Mix instant coffee into the batter for a mocha twist that beautifully complements the chocolate notes, creating a sophisticated flavor experience.
These exciting variations not only keep the original charm of the Red Velvet Cake Roll but also invite you to express your creativity in the kitchen!
What to Serve with Delightfully Rolled Red Velvet Cake Roll
Pair the stunning flavors of this cake roll with delightful sides to create an unforgettable dessert experience.
- Whipped Cream: A dollop of fresh whipped cream adds a lightness that enhances the cake’s richness beautifully.
- Vanilla Ice Cream: The creamy, cool sweetness of vanilla ice cream contrasts perfectly with the soft cake, making each bite even more indulgent.
- Fresh Berries: Strawberries or raspberries offer a burst of fresh tartness that complements the sweet, rich flavors of the cake roll. The vibrant colors also elevate the dish’s presentation.
- Chocolate Ganache: Drizzling warm chocolate ganache over the top adds an extra layer of decadence and beautifully contrasts with the red velvet.
- Zesty Citrus Salad: A light citrus salad with oranges and grapefruits brightens up the palate while balancing the sweetness of the cake. It’s a refreshing side that’s sure to impress.
- Coffee or Espresso: Pairing your dessert with a steaming cup of coffee or espresso enhances the cocoa notes in the cake, creating a comforting finish to your meal.
Expert Tips for Red Velvet Cake Roll
- Egg Whipping: Ensure the eggs are whipped until foamy; this brings air into the batter for a lighter texture, which is essential for the Red Velvet Cake Roll.
- Avoid Overmixing: When adding the flour, stir gently until just combined. Overmixing can lead to a dense cake that won’t roll properly.
- Bake Carefully: Keep an eye on the baking time; taking the cake out too early can result in a gooey center, while overbaking creates a dry roll.
- Cool Properly: Let the cake cool completely in its rolled position; this helps maintain its shape and prevents cracking when you unroll.
- Filling Variations: Consider swapping in flavors like lemon zest or almond extract for a unique twist on the classic cream cheese filling.
Make Ahead Options
These Red Velvet Cake Rolls are perfect for busy home cooks looking to save time! You can prepare the cake up to 24 hours in advance; simply bake it, roll it up, and leave it wrapped in plastic wrap in the refrigerator to preserve moisture and flavor. The cream cheese filling can be made ahead of time as well—just keep it refrigerated until you’re ready to assemble. When you’re ready to serve, unroll the cake, spread the filling evenly, roll it back up, and chill for an hour. This way, you’ll have a delightful dessert ready with minimal effort, ensuring it’s just as delicious and visually stunning!
Red Velvet Cake Roll Recipe FAQs
What kind of cocoa powder should I use for the Red Velvet Cake Roll?
Absolutely! For the best results, use unsweetened cocoa powder. This will give your cake the subtle chocolate flavor without adding extra sugar. Always sift the cocoa powder before incorporating it into the batter to avoid lumps and ensure a smooth and velvety cake.
How do I know when the cake is done baking?
The cake will be ready when it turns lightly browned and springs back when touched gently in the center. This usually takes about 10-15 minutes in a preheated oven at 350°F (175°C). A toothpick inserted into the center should come out clean, indicating the soft yet firm texture you desire!
How should I store the Red Velvet Cake Roll, and how long will it last?
To keep your Red Velvet Cake Roll fresh, wrap it tightly in plastic wrap or aluminum foil and store it in the refrigerator for up to 3 days. This method preserves its moisture and flavor beautifully. If you need to store it longer, you can freeze it for up to 2 months. Just remember to thaw it overnight in the fridge before serving!
What if my cake cracks while rolling it?
Very! If your cake happens to crack when rolling, don’t panic. You can simply cover the cracks with additional frosting or cream cheese filling once it’s unrolled. Alternatively, you can roll it up gently and that way, the cracks will be less noticeable when serving.
Can I make the Red Velvet Cake Roll dairy-free or vegan?
Absolutely! To make a dairy-free version, substitute the cream cheese with a dairy-free cream cheese substitute or whipped coconut cream for the filling. For a vegan option, you can replace the eggs with flaxseed meal (1 tablespoon flaxseed meal mixed with 2.5 tablespoons of water equals one egg) and use non-dairy milk and yogurt instead. Just keep in mind that texture and flavor may vary slightly!
Is the Red Velvet Cake Roll safe for pets?
It’s important to note that while the cake is delicious for human consumption, it contains ingredients like chocolate and sugar, which can be harmful to pets, especially dogs. Always keep human treats—like this delightful Red Velvet Cake Roll—away from your furry friends to ensure their safety!
Irresistible Red Velvet Cake Roll for Your Sweet Celebrations
Ingredients
Equipment
Method
- Preheat your oven to 350°F (175°C) and grab a 10x15-inch cake pan. Line the bottom with foil and lightly spray it with nonstick cooking spray.
- In a large mixing bowl, beat the large eggs for about 3-5 minutes until they become foamy and pale in color. Gradually add the granulated sugar and continue mixing for another 2 minutes.
- Blend in the vegetable oil, baking powder, salt, vanilla extract, and cocoa powder into the egg mixture. Stir until everything is evenly combined.
- Gradually add the all-purpose flour into the wet ingredients, mixing gently until just combined.
- Pour the batter into the prepared cake pan, spreading it evenly with a spatula. Bake for 10-15 minutes, or until the cake springs back when touched.
- Prepare a clean kitchen towel by dusting it generously with powdered sugar.
- Once baked, remove the cake from the oven and immediately flip it onto the prepared towel. Roll it up from the short end and set aside to cool completely.
- In a mixing bowl, beat together the cream cheese and butter until smooth, then gradually add the powdered sugar and vanilla extract.
- Once the cake is completely cooled, unroll it and spread the cream cheese filling evenly over the surface.
- Roll it back up tightly without the towel and wrap in plastic wrap, then refrigerate for at least one hour.
- Dust the top with additional powdered sugar before serving.


