
Advertisement
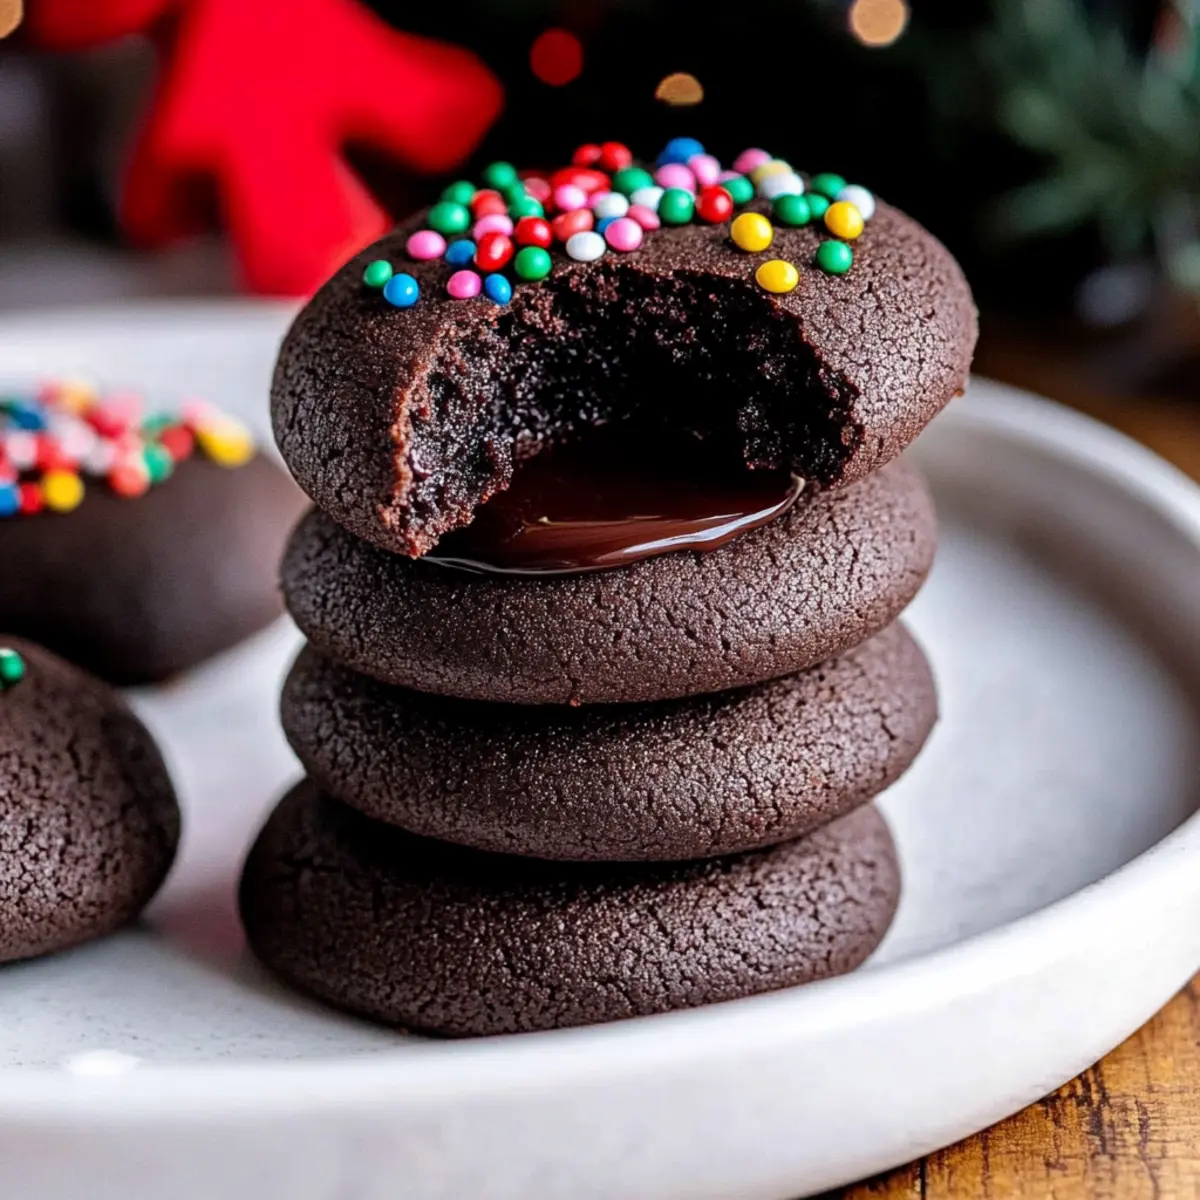
The aroma of warm cookies wafting through the kitchen can instantly transport me back to my childhood—where every holiday was marked by the joy of baking. Today, I’m excited to share my go-to recipe for Rich Chocolate Thumbprint Cookies with Velvety Ganache. These delights are not just delicious; their rich and chewy texture makes them a show-stopping dessert for gatherings or cozy nights in. With a handful of simple ingredients, you can whip up a batch that’s perfect for the Christmas season or any chocolate craving. These cookies offer two major perks: they’re quick to prepare and are sure to please everyone, from kids to adults. Curious how these little bites of goodness come together? Let’s dive into the delicious details!
Why Are These Cookies a Must-Try?
Irresistible Flavor: The rich chocolate meets a silky ganache, creating an indulgent experience that’s hard to resist.
Simple Yet Elegant: With just a handful of ingredients, you can impress your guests without a fuss.
Advertisement
Perfect for Any Occasion: Whether it’s a cozy night at home or a festive holiday gathering, these cookies fit right in.
Chewy and Rich Texture: The delightful combination of chewy cookies with a soft ganache center is reminiscent of a mini brownie, making each bite a treat.
Crowd Pleaser: Perfect for sharing, they guarantee smiles from family and friends alike. Consider pairing them with a hot mug of cocoa or alongside your favorite dessert bars like Peanut Butter Chocolate for the ultimate holiday dessert table!
Chocolate Thumbprint Cookies Ingredients
• Here’s everything you need to create these irresistible treats!
For the Cookies
- All-Purpose Flour – Provides structure and stability. Spoon and level to avoid excess flour.
- Dutch Process Cocoa Powder – Adds deep chocolate flavor and richness. Can be substituted with unsweetened cocoa powder, but flavor and texture may vary.
- Salt – Enhances flavor. Essential for balancing sweetness.
- Baking Powder – Helps cookies rise for a light texture. Do not substitute with baking soda.
- Unsalted Butter – Adds richness and moisture. Softened at room temperature for easy mixing.
- Light Brown Sugar – Adds moisture and a hint of caramel flavor. Can substitute with dark brown sugar for a deeper flavor.
- Granulated White Sugar – Contributes sweetness and texture. Use in combination with brown sugar for balance.
- Egg Yolks – Provides moisture and richness. Room temperature for better emulsification.
- Vanilla Bean Paste or Extract – Adds aromatic flavor. Extract can be substituted but will not have the same aesthetic.
For the Ganache
- Semi-Sweet Chocolate Chips – The main component of the ganache. Can be swapped for milk chocolate for a sweeter filling.
- Heavy Whipping Cream – Provides creaminess to the ganache. Do not substitute with low-fat alternatives for best results.
For Topping (Optional)
- Nonpareils – Decorative topping for visual appeal. Can be replaced with crushed peppermint or other sprinkles.
With these carefully chosen ingredients, your Chocolate Thumbprint Cookies will be the star of any holiday table or cozy gathering. Let’s get to baking!
Step‑by‑Step Instructions for Chocolate Thumbprint Cookies
Step 1: Prep the Baking Sheets
Begin by lining two baking sheets with parchment paper. This will prevent the cookies from sticking and ensure even baking. Make sure your oven is off for now as we’ll preheat it later. Having these prepared allows for a smooth baking process when your chocolate thumbprint cookies are ready to be placed in the oven.
Step 2: Mix Dry Ingredients
In a medium-sized bowl, whisk together 1 cup of all-purpose flour, 1/3 cup of Dutch process cocoa powder, 1/4 teaspoon salt, and 1/2 teaspoon baking powder until fully combined. The dry ingredients help create the structure and rich flavor of the chocolate thumbprint cookies. This step only takes about 1-2 minutes, ensuring you’re ready to mix in the wet ingredients next.
Step 3: Cream the Butter and Sugars
In a separate large bowl, cream together 1/2 cup of softened unsalted butter, 1/2 cup of light brown sugar, and 1/4 cup of granulated sugar until the mixture is fluffy and pale, about 2 minutes. You can use a hand mixer or stand mixer for this step. The fluffy texture is crucial as it gives your dough the right airy body for the cookies.
Step 4: Incorporate Wet Ingredients
Add 2 egg yolks and 1 teaspoon of vanilla bean paste to the creamed mixture. Mix until well-blended and fluffy, about another minute. The egg yolks contribute richness, while the vanilla bean paste provides a lovely aromatic flavor, making these chocolate thumbprint cookies truly special.
Step 5: Combine Mixtures
Gradually add the dry ingredients to the wet ingredients, mixing on low speed or by hand until just combined. Be careful not to overmix, as this can lead to tough cookies. You’ll know it’s ready when no flour streaks remain, and everything looks beautifully blended together, creating a soft chocolatey dough.
Step 6: Form Dough
Using a cookie scoop or spoon, scoop the dough into 34 small portions, rolling each into a ball. Place them on the prepared baking sheets, allowing space between each for spreading. Make an indentation in the center of each ball using a 1/4 teaspoon measuring spoon. This will hold the luscious ganache filling later, so ensure the indent is deep enough.
Step 7: Chill
Cover the baking sheets with plastic wrap and refrigerate the indented dough balls for at least 1 hour. Chilling helps the chocolate thumbprint cookies maintain their shape during baking and enhances their chewy texture. You can use this time to clean up or prep for the ganache!
Step 8: Preheat and Bake
Once chilled, preheat your oven to 350°F (175°C). After preheating, bake the cookies for 9-11 minutes, checking for slight puffing and a set edge. These cookies should not spread too much; they’ll look slightly soft in the center but will firm up as they cool.
Step 9: Re-indent if Necessary
Immediately after removing the cookies from the oven, check the indentations. If needed, gently press the centers again with a 1/4 teaspoon to ensure they’re suitable for filling with ganache once cool. Allow the cookies to sit for about 5 minutes on the baking sheet before transferring them to a cooling rack.
Step 10: Cool Cookies
Transfer the baked chocolate thumbprint cookies to a wire rack to cool completely. This usually takes about 10-15 minutes. Proper cooling is crucial as it helps the cookies achieve their perfect chewy texture and allows for the ganache to set properly once added.
Step 11: Prepare Ganache
In a small saucepan, heat 1/2 cup of heavy whipping cream over medium heat until it just begins to boil. Pour the hot cream over 1 cup of semi-sweet chocolate chips in a bowl. Let it sit for a minute before stirring gently until the mixture is smooth and glossy—a beautiful ganache ready for filling!
Step 12: Fill Cookies
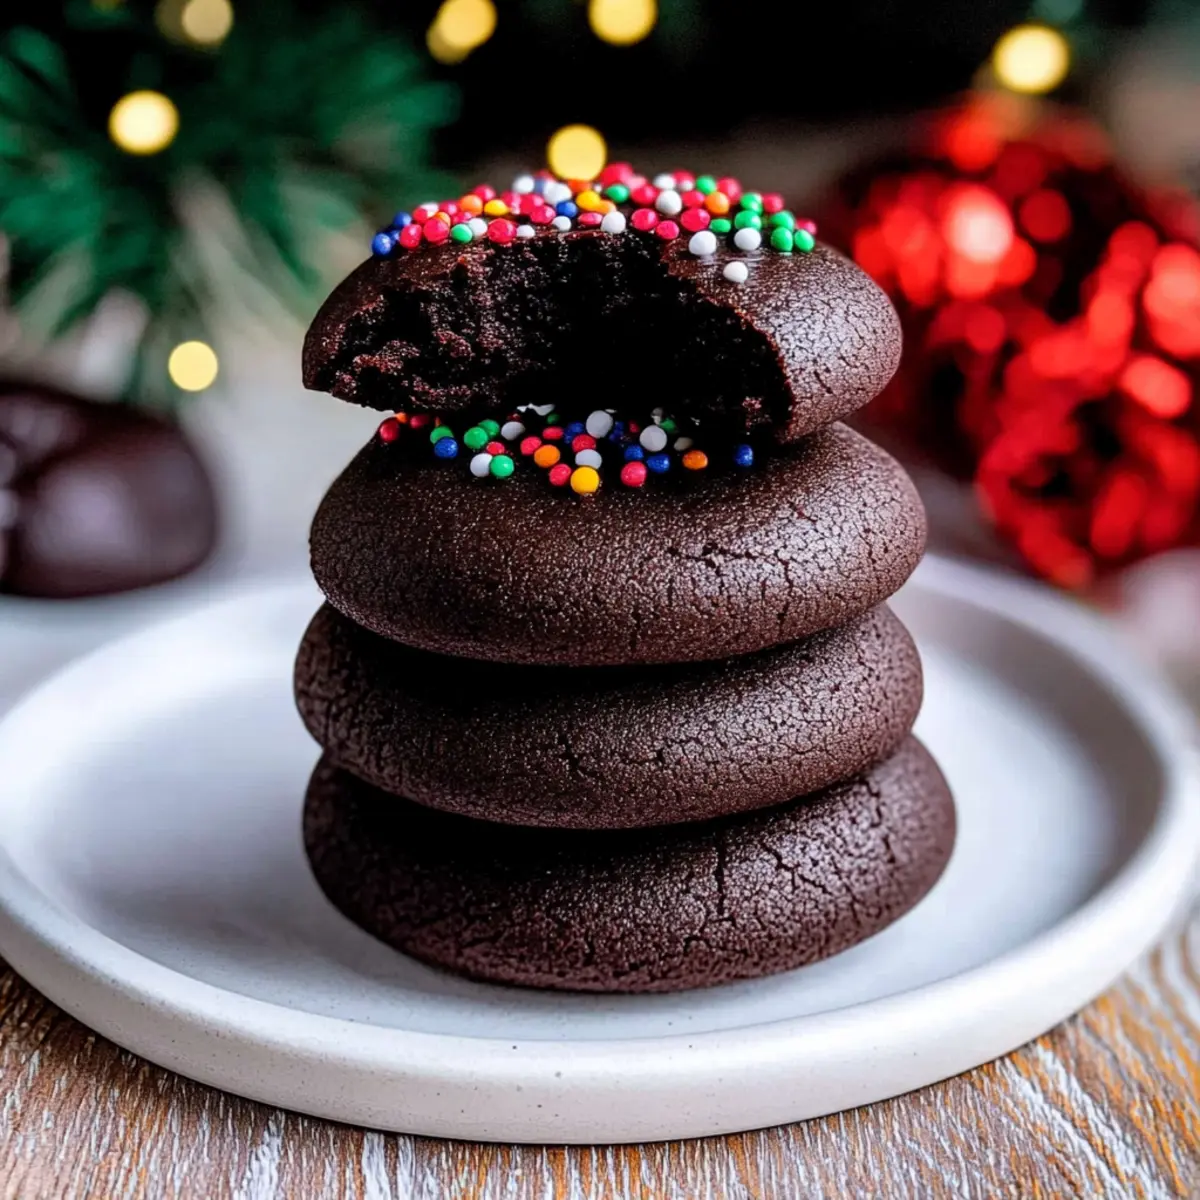
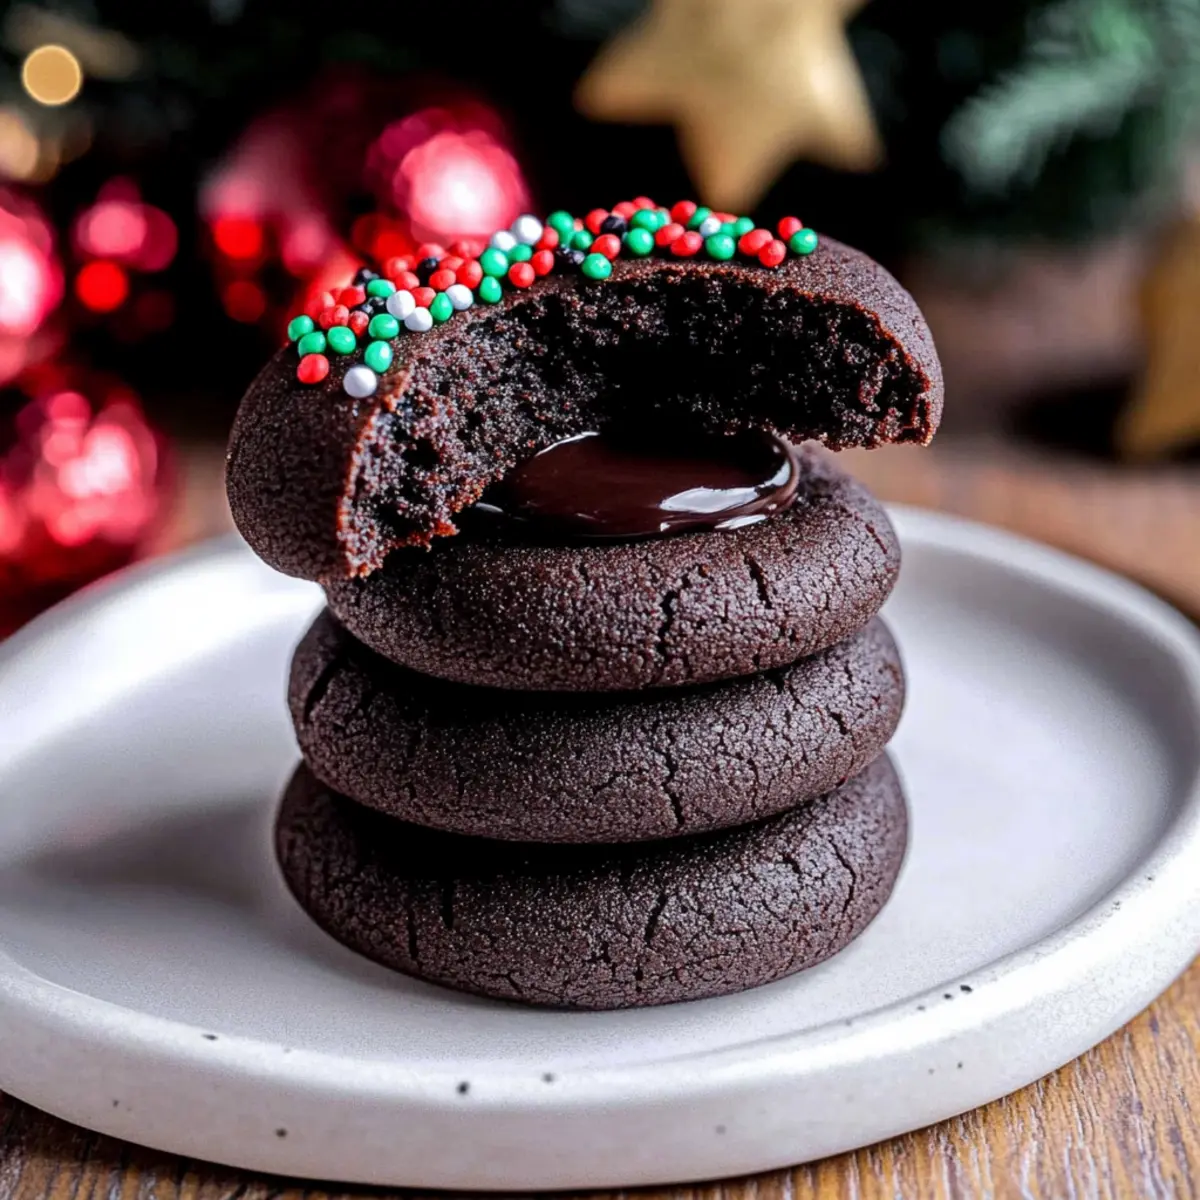
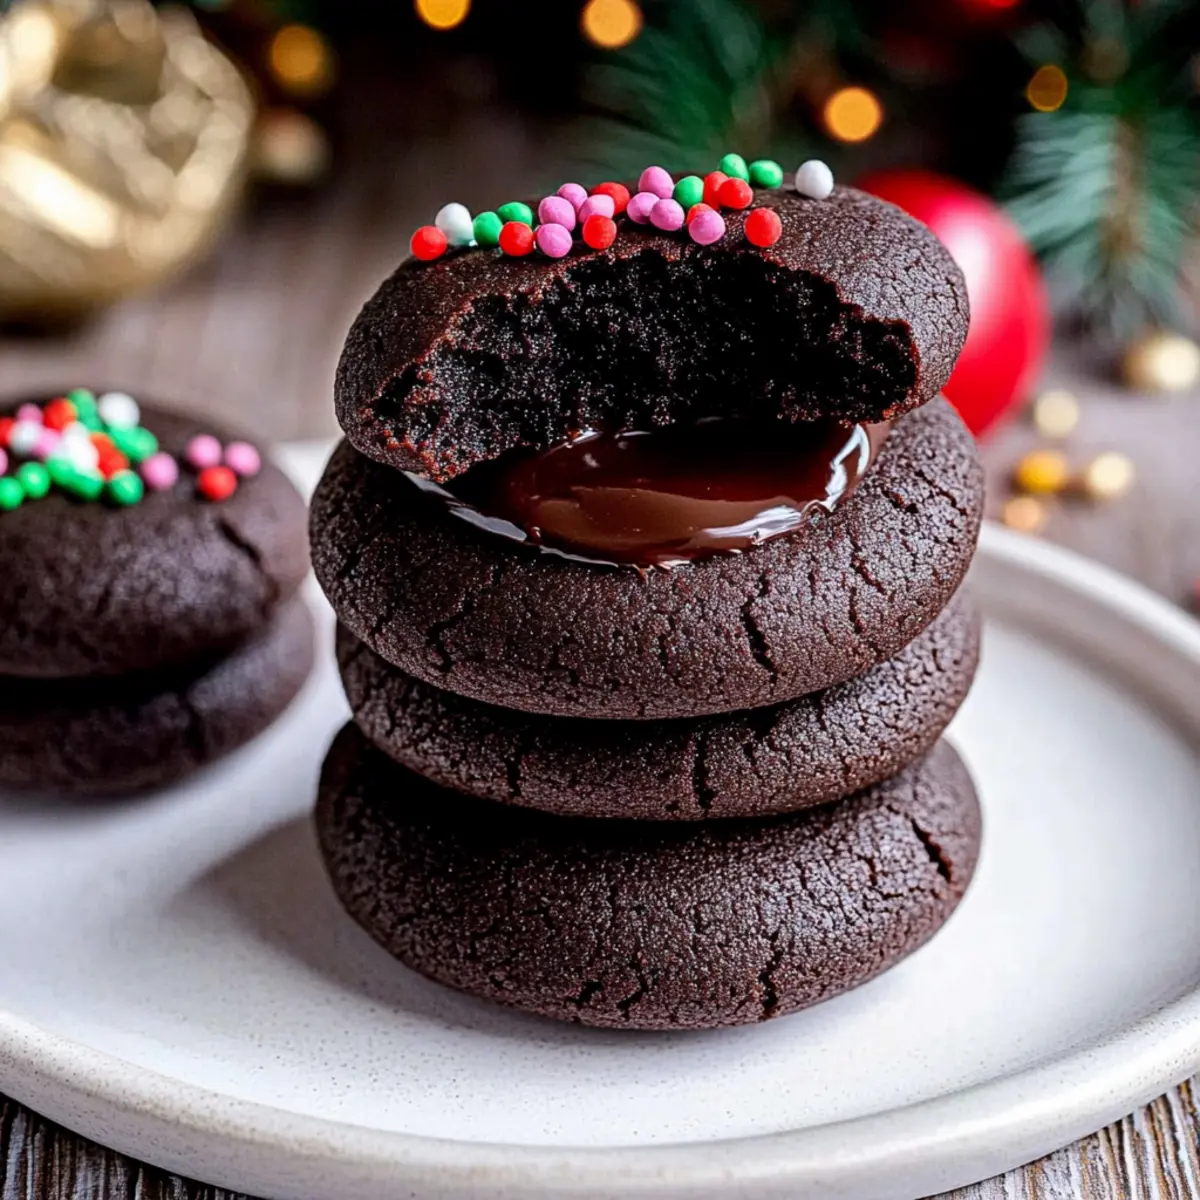
Using a teaspoon, fill each indentation of the cooled chocolate thumbprint cookies with about 1 teaspoon of the ganache. If desired, sprinkle some nonpareils on top to add a festive touch. This step transforms your cookies into a decadent chocolate treat that everyone will adore.
Step 13: Set Ganache
Finally, place the filled cookies in the refrigerator for 10-15 minutes, allowing the ganache to set and firm up slightly. This setting time ensures that the ganache holds its shape beautifully when serving, making your chocolate thumbprint cookies an irresistible delight!
Make Ahead Options
These Rich Chocolate Thumbprint Cookies are perfect for busy home cooks looking to save time without sacrificing quality! You can prepare the cookie dough up to 24 hours in advance by following the first six steps, then cover the indented dough balls and refrigerate them until you’re ready to bake. For an even longer option, the baked cookies can be stored in an airtight container for up to 3 days, maintaining their chewy texture. When you’re ready to fill them, simply whip up the ganache and fill the centers as instructed. Trust me, these cookies will taste just as delicious, making your holiday preparations a breeze!
Expert Tips for Chocolate Thumbprint Cookies
-
Proper Measuring: Always spoon and level flour for accuracy; improper measurements can lead to dry cookies instead of the rich, chewy texture you desire.
-
Chill Time: Don’t skip the chilling step; refrigerating the dough helps maintain shape and achieve the perfect chewy consistency in your Chocolate Thumbprint Cookies.
-
Indent Deeply: Make sure to create a deep enough indentation before chilling to accommodate the ganache—this will prevent overflow and give you that luscious filling.
-
Baking Watch: Keep an eye on the baking time; each oven varies. If cookies spread too much, double-check that your butter isn’t too warm before starting.
-
Ganache Perfection: Allow the ganache to cool slightly before filling—this helps it hold its shape in the cookies, ensuring a delightful chocolate experience with every bite!
Chocolate Thumbprint Cookies Variations
Feel free to get creative with these delicious Chocolate Thumbprint Cookies and make them your own!
-
Fruit Preserves: Swap the chocolate ganache for your favorite fruit preserves for a delightful twist. Raspberry or apricot would add a fruity burst of flavor.
-
Nut Butters: Replace ganache with creamy peanut or almond butter for a nutty and satisfying filling. This change creates a rich and nourishing treat, perfect for nut lovers!
-
Minty Freshness: Add a drop of peppermint extract to the dough or ganache for a refreshing mint chocolate experience. This invigorating twist is perfect for the holiday season!
-
Dairy-Free Option: Use coconut cream and dairy-free chocolate chips to create a luscious ganache that’s friendly for lactose-intolerant friends. These cookies can be enjoyed by everyone!
-
Extra Crunch: Stir in chopped nuts like walnuts or hazelnuts into the dough for a delightful textural contrast. The crunch complements the rich cookies wonderfully!
-
Spiced Flavor: Incorporate a sprinkle of cinnamon or a dash of chili powder in the dough for an unexpected kick. This adds warmth and intrigue to the cookies.
-
Swap Sugars: Experiment with dark brown sugar instead of light for a deeper, more caramelized flavor profile. The variation leads to a more complex taste, enhancing the overall experience.
-
Sweet Topping: Instead of nonpareils, try crushed peppermint or holiday-themed sprinkles for a festive touch. They not only make the cookies festive but also add a delightful crunch!
Each variation provides a unique twist to your Chocolate Thumbprint Cookies, making them even more exciting. For more delightful recipes, check out these Homemade Chocolate Chip cookies or indulge in some Chocolate Cosmic Brownie cookies for another treat!
How to Store and Freeze Chocolate Thumbprint Cookies
Room Temperature: Keep cookies in an airtight container at room temperature for up to 3 days to maintain their chewy texture and rich flavor.
Fridge: You can refrigerate for a longer lasting treat; store in an airtight container for up to a week, but the ganache may harden.
Freezer: Freeze chocolate thumbprint cookies for up to 2 weeks. Place them in a single layer on a baking sheet to freeze, then transfer to an airtight container.
Reheating: If desired, warm cookies in the microwave for a few seconds to enjoy their luscious ganache and chewy texture once more!
What to Serve with Rich Chocolate Thumbprint Cookies?
These delightful cookies are the perfect stars of your dessert table, inviting rich flavors and warmth to any occasion.
-
Fresh Berries: Serve with a side of raspberries or strawberries to add a refreshing contrast to the rich chocolate and enhance presentation. Their tartness cuts through the sweetness beautifully!
-
Vanilla Ice Cream: A scoop of creamy vanilla ice cream complements the deep chocolate flavor while providing a cool, smooth texture. Imagine the bliss of warm cookies with ice cream slowly melting over them!
-
Espresso or Coffee: Pair these cookies with a warm cup of espresso or your favorite coffee to accentuate their rich flavors. The bitterness from the coffee perfectly balances the sweetness of the cookies, creating a moment of indulgence.
-
Chocolate Fondue: For an extra chocolate fix, consider a chocolate fondue dip. Guests can enjoy dipping the cookies into molten chocolate, creating a rich experience that nobody can resist!
-
Caramel Sauce: A drizzle of homemade or store-bought caramel sauce adds a sweet touch that pairs beautifully with the dark chocolate, enhancing the overall dessert experience.
-
Nutty Complement: Toasted pecans or walnuts on the side can provide a delightful crunch and nuttiness, adding dimension to the rich, chewy cookie texture.
-
Spiced Holiday Mulled Wine: For a festive touch, serve these cookies alongside a glass of warm mulled wine. The spices in the wine will harmonize with the chocolate, creating a cozy atmosphere perfect for holiday gatherings.
Enjoy exploring these delightful pairings that transform your chocolate thumbprint cookies into a sophisticated dessert experience!
Chocolate Thumbprint Cookies Recipe FAQs
How do I choose ripe ingredients for my Chocolate Thumbprint Cookies?
When selecting ingredients, especially butter and eggs, it’s vital to have them at room temperature. This helps with proper mixing and emulsification, ensuring a smooth dough. For your butter, look for a soft texture that’s easy to cream, and make sure your egg yolks are fresh for the best flavor.
How should I store my cookies to keep them fresh?
For optimal freshness, store your Chocolate Thumbprint Cookies in an airtight container at room temperature for up to 3 days. If you want to extend their life, you can refrigerate them for up to a week, though the ganache might harden slightly. If freezing, place the cookies in a single layer on a baking sheet for about an hour before transferring them into an airtight container—this prevents them from sticking together.
Can I freeze Chocolate Thumbprint Cookies?
Absolutely! You can freeze these cookies for up to 2 weeks. To do this, let the cookies cool completely after baking. Then, place them in a single layer on a baking sheet to freeze for about an hour. Once frozen, transfer them to an airtight container or a freezer bag, separating layers with parchment paper. To enjoy later, simply let them thaw at room temperature or warm them in the microwave for a few seconds.
What should I do if my cookies spread too much during baking?
If your Chocolate Thumbprint Cookies spread excessively, it’s likely due to butter that was too warm when mixed. To troubleshoot, chill the dough again before baking or cover it and refrigerate for at least 30 minutes. Ensure you also create a deep enough indentation for the ganache, as this will help maintain the cookie’s form. Always keep an eye on your oven’s temperature, as baking times can vary.
Are these cookies safe for people with nut allergies?
Yes, this recipe is nut-free as written, making it suitable for those with nut allergies! However, be cautious if you’re serving them to guests; cross-contamination can happen. Always double-check ingredient labels for potential allergens, and consider using dedicated utensils and baking sheets to ensure safety.
Can I substitute any ingredients in the recipe?
You can make a few adjustments based on your preferences! For instance, if you want a lighter ganache, swap semi-sweet chocolate chips for milk chocolate for a sweeter filling. If you don’t have Dutch process cocoa powder, you can use regular unsweetened cocoa powder, although this may slightly alter the flavor and color. Just remember, each ingredient contributes to the overall texture and taste, so consider your substitutions wisely!
Irresistibly Rich Chocolate Thumbprint Cookies to Savor
Ingredients
Equipment
Method
- Prep the Baking Sheets: Line two baking sheets with parchment paper and set aside.
- Mix Dry Ingredients: Whisk together the flour, cocoa powder, salt, and baking powder until combined.
- Cream the Butter and Sugars: Cream together butter, light brown sugar, and granulated sugar until fluffy.
- Incorporate Wet Ingredients: Add egg yolks and vanilla to the creamed mixture and mix until fluffy.
- Combine Mixtures: Gradually add dry ingredients to wet ingredients and mix until just combined.
- Form Dough: Scoop dough into balls, place on baking sheets, and make an indentation in each.
- Chill: Cover with plastic wrap and refrigerate for at least 1 hour.
- Preheat and Bake: Preheat oven to 350°F (175°C) and bake for 9-11 minutes.
- Re-indent if Necessary: Press centers again if needed after baking; cool for 5 minutes.
- Cool Cookies: Transfer to a wire rack and allow to cool completely.
- Prepare Ganache: Heat cream, then pour over chocolate chips and stir until smooth.
- Fill Cookies: Fill indentations with ganache and top with nonpareils if desired.
- Set Ganache: Refrigerate filled cookies for 10-15 minutes to set the ganache.


