Advertisement
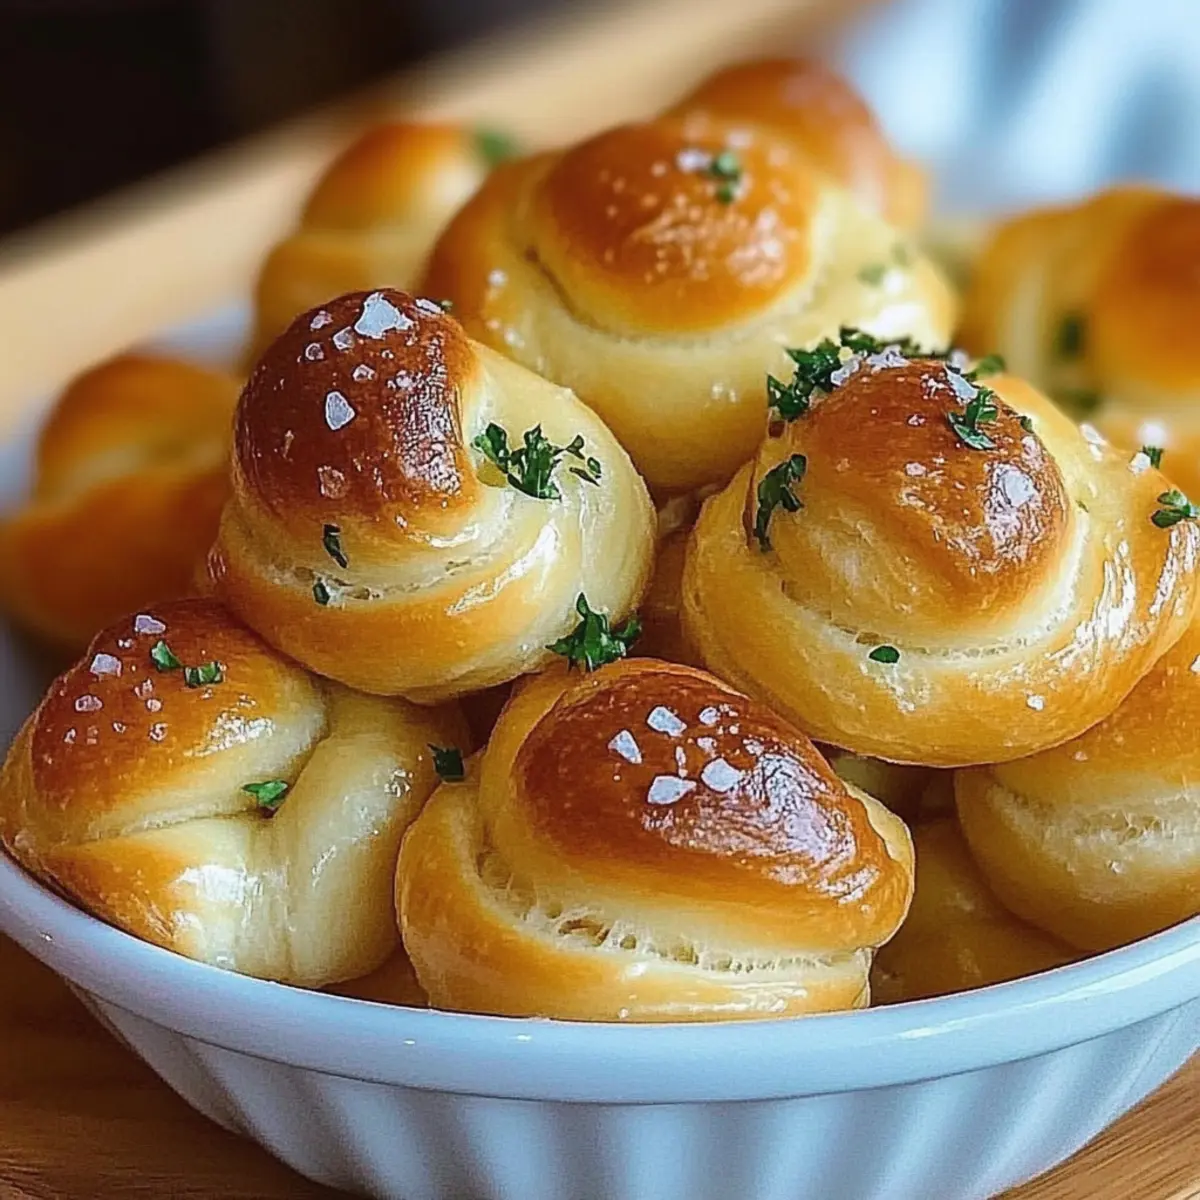
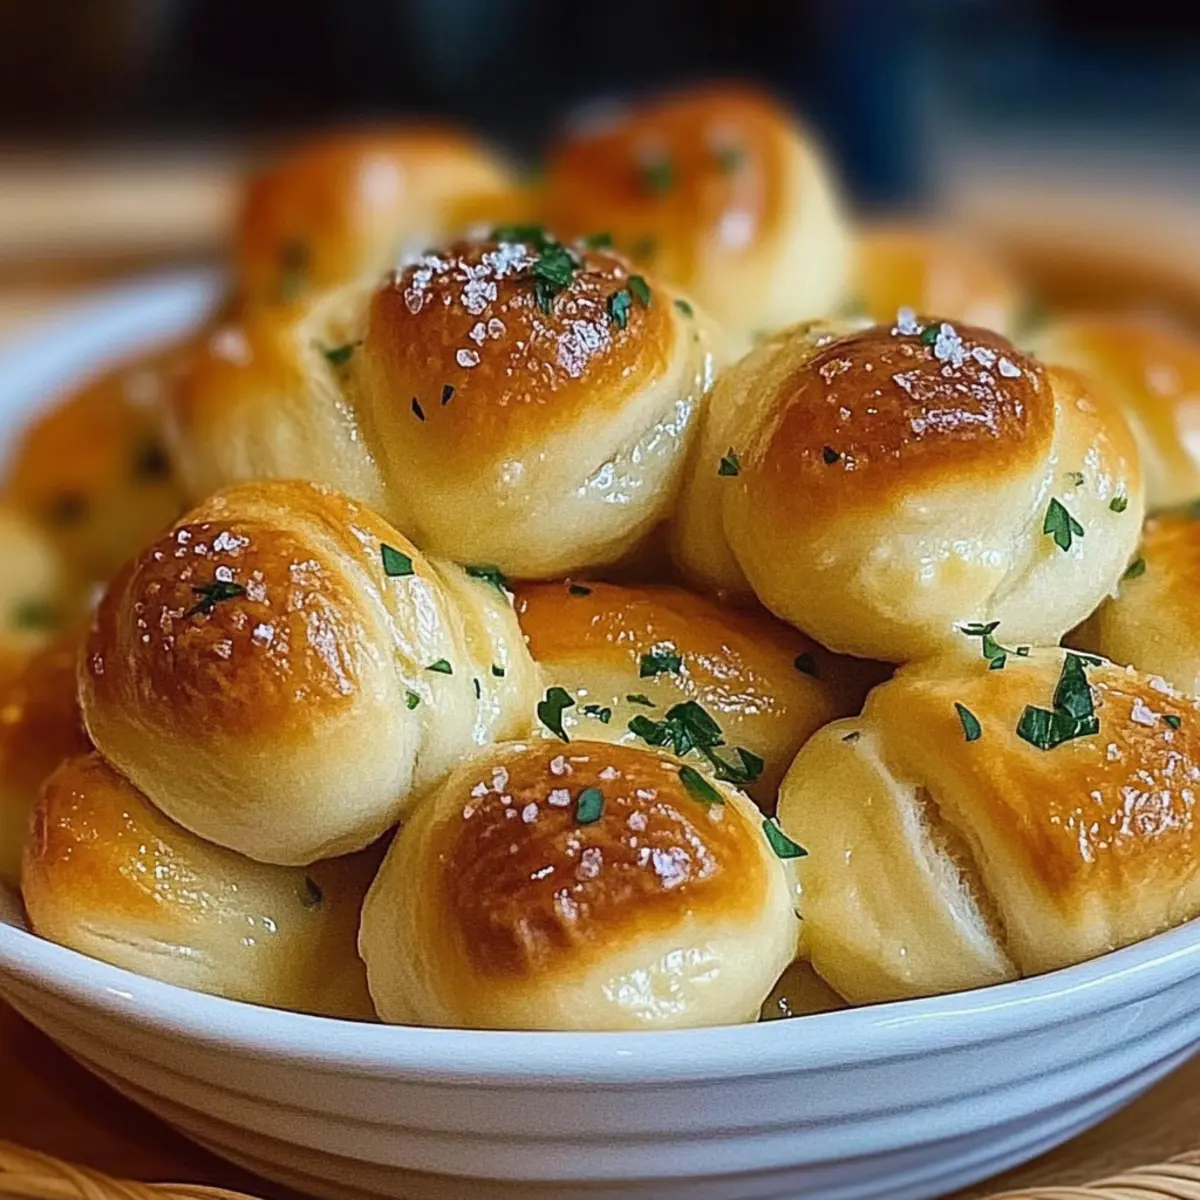
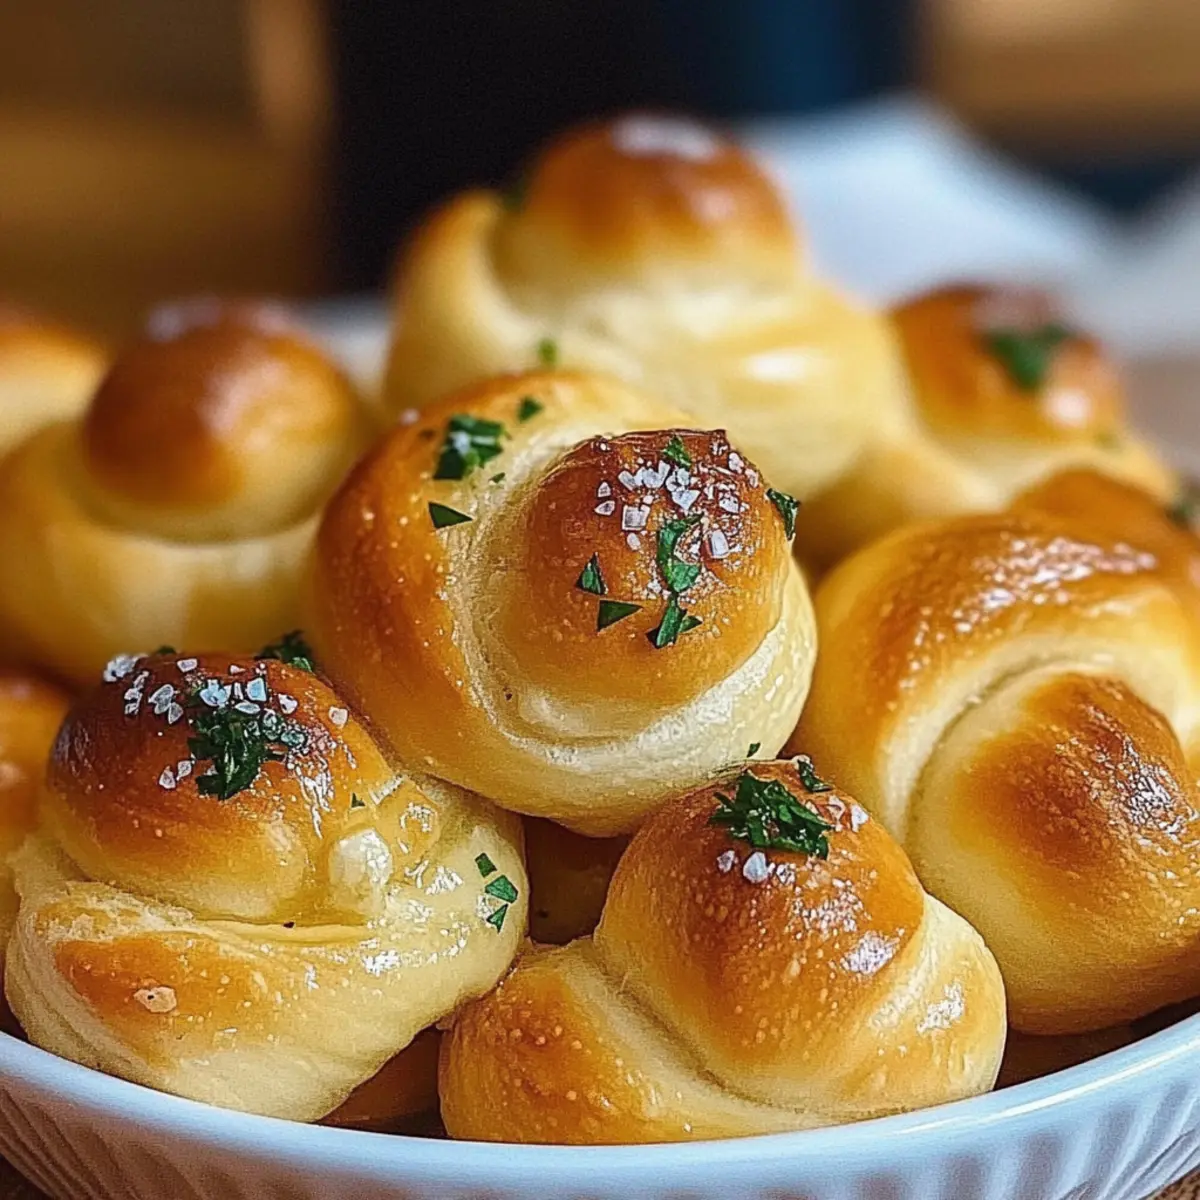
As I stepped into the kitchen, the delightful aroma of baking bread wrapped around me like a warm hug. Yes, today was all about creating these irresistible Gluten Free Garlic Knots. With their golden crust and fluffy interior, these little bites of joy are not just a gluten-free alternative; they’re a comforting addition to any meal. What makes this recipe truly special is how quickly they come together—perfect for those last-minute dinner plans or casual get-togethers with friends. Plus, they pair beautifully with marinara sauce for dipping, making them a guaranteed crowd-pleaser. Are you ready to experience the magic of homemade garlic knots in your own kitchen? Let’s dive in!
Why Are These Garlic Knots Irresistible?
Soft, Fluffy Texture: Each knot is a masterpiece of gluten-free baking, delivering a light and airy bite that rivals traditional recipes.
Buttery Goodness: A generous brushing of melted butter adds richness, elevating the flavor to new heights.
Advertisement
Quick Preparation: These knots come together in a breeze, perfect for when you’re in a pinch—ideal for unexpected guests or weeknight dinners.
Crowd Favorite: Serve them warm alongside marinara sauce, and watch as they disappear at parties or family gatherings. Those who love comforting foods will be begging for seconds!
For more delicious garlic-infused recipes, check out my Garlic Parmesan Cheeseburger for a fun twist, or enjoy these alongside our flavorful Skillet Garlic Parmesan chicken!
Gluten Free Garlic Knots Ingredients
For the Dough
• Gluten-Free All-Purpose Flour – Provides structure and mimics traditional flour; use a quality blend for the best results.
• Yeast – Active dry yeast is needed for rising; ensure it’s fresh for optimal puffiness.
• Warm Water – Activates yeast; the ideal temperature is around 110°F (43°C).
• Olive Oil – Adds moisture and richness; extra virgin is preferred for flavor.
• Garlic Powder – Infuses the dough with deep garlic flavor, making your gluten free garlic knots irresistible.
• Salt – Flaky sea salt enhances overall flavor.
For the Topping
• Butter – Melted butter brushed on top gives knots glossiness and a richer taste.
• Fresh Parsley – Adds color and a fresh taste contrast, elevating your garlic knots.
Step‑by‑Step Instructions for Gluten Free Garlic Knots
Step 1: Preheat the Oven
Preheat your oven to 400°F (200°C) to create the perfect environment for baking your gluten-free garlic knots. This temperature ensures that the knots will rise beautifully and develop a golden-brown crust. While the oven warms up, gather your ingredients and prepare your workspace for a smooth cooking experience.
Step 2: Activate the Yeast
In a mixing bowl, combine warm water (about 110°F or 43°C) with the active dry yeast. Allow this mixture to sit for about 5 minutes, until it becomes frothy on the surface. This step is crucial as it indicates that the yeast is alive and ready to help your gluten-free garlic knots rise.
Step 3: Combine Ingredients
Once the yeast is activated, add gluten-free all-purpose flour, olive oil, garlic powder, and salt to the yeast mixture. Stir with a wooden spoon or spatula until a sticky dough forms. The goal is to mix all ingredients thoroughly, giving you that delightful garlic flavor infused throughout your dough for the garlic knots.
Step 4: Knead the Dough
Transfer your sticky dough onto a floured surface and knead gently for about 2 minutes. This process helps develop the dough’s texture without overworking it, ensuring your gluten-free garlic knots stay soft and fluffy. Aim for a smooth consistency before moving on to the next step.
Step 5: Shape the Knots
Divide the kneaded dough into equal pieces, approximately 10 servings, then roll each piece into a 6-inch rope. With a gentle twist, tie each rope into a knot, tucking the ends underneath for a neat presentation. Place your formed knots on a greased baking sheet, ready for the next rise.
Step 6: Let Dough Rise
Cover the baking sheet with a kitchen towel and let the gluten-free garlic knots rise in a warm spot for 20 minutes. This resting time allows them to puff up and become airy, creating that lovely texture you expect in garlic knots. Keep an eye on them; they should noticeably expand in size.
Step 7: Brush with Butter
After the rising period, melt some butter and brush a generous amount over each knot. This step not only adds a rich flavor but also helps them achieve that glossy finish. Sprinkle fresh parsley and a touch of flaky salt on top for an extra burst of flavor and beautiful presentation.
Step 8: Bake to Perfection
Place the baking sheet in the preheated oven and bake your gluten-free garlic knots for around 15 minutes. Keep an eye on them; they should turn golden brown and develop a delightful aroma that fills your kitchen. Once they’re perfectly baked, remove them from the oven and let them cool slightly before serving.
What to Serve with Irresistible Gluten Free Garlic Knots
Add delightful side dishes to enhance your meal, creating unforgettable dining experiences.
-
Marinara Sauce: A classic pairing, the rich tomato sauce provides the perfect dip, enhancing the garlic flavor in each knot.
-
Creamy Tomato Basil Soup: This velvety soup’s comforting creaminess contrasts beautifully with the warm knots; a match made in culinary heaven.
-
Caesar Salad: Crunchy romaine, tangy dressing, and croutons add freshness, making a satisfying balance with the savory garlic knots.
-
Garlic Butter Shrimp: For a delightful seafood twist, succulent shrimp in garlic butter complements the knots’ flavors, making every bite a mouthwatering experience.
-
Roasted Veggies: A medley of seasonal veggies brings vibrant colors and textures; their earthy flavors beautifully offset the buttery knots.
-
Cheesy Scalloped Potatoes: Creamy and cheesy, these potatoes create a rich, indulgent side that pairs elegantly with the garlic notes in the bread.
-
Chardonnay: A glass of chilled Chardonnay enhances the meal’s flavors, marrying the richness of butter with the tangy notes of garlic.
-
Chocolate Mousse: To finish off the meal with a touch of sweetness, a light and airy chocolate mousse is the perfect dessert after enjoying savory knots.
Gluten Free Garlic Knots Variations
Feel free to get creative with these garlic knots, transforming them into something uniquely yours!
-
Fresh Garlic: Replace garlic powder with fresh minced garlic for an intense, aromatic kick. The freshness elevates the flavor to a whole new level, making each bite burst with garlicky goodness.
-
Cheese-Stuffed Knots: Add mozzarella or your favorite cheese inside each knot for a deliciously gooey surprise. Imagine pulling apart a warm, cheesy knot; it’s a true delight for cheese lovers!
-
Herb Infusion: Swap parsley for fresh herbs like rosemary or thyme for a fragrant twist. Each knot becomes a fragrant treat that’ll charm your dinner guests.
-
Spicy Kick: Add red chili flakes for a bit of heat. It’s a perfect way to take these knots from mild to wild without compromising their soft texture.
-
Sweet Twist: For a unique dessert version, brush the knots with melted butter mixed with cinnamon sugar before baking. These sweet knots will be an unexpected treat at any meal.
-
Garlic Parmesan: Toss in grated Parmesan cheese into your dough for an extra layer of flavor. It complements the garlic perfectly, creating a savory experience.
-
Glazed Finish: Brush the baked knots with a mixture of melted butter and honey after baking for a sweet and savory combination. It’s a delightful contrast to the garlic!
-
Herbed Oil Dip: Serve with a side of herbed olive oil for dipping instead of marinara. This twist will surprise your taste buds and create an inviting appetizer.
For more inspired garlic creations, check out my Skillet Garlic Parmesan chicken, or dive into the savory goodness of Garlic Parmesan Cheeseburger. The adventure doesn’t end here—they’ll pair just wonderfully with your homemade garlic knots!
How to Store and Freeze Gluten Free Garlic Knots
Room Temperature: Store leftover gluten free garlic knots in an airtight container at room temperature for up to 2 days. They’re best enjoyed fresh!
Fridge: If you need to keep them longer, place the knots in the fridge for up to 5 days. Simply heat them in the oven before serving to bring back their fluffy texture.
Freezer: For long-term storage, wrap gluten free garlic knots individually in plastic wrap, then place them in a freezer-safe bag for up to 3 months. Thaw in the fridge overnight before reheating.
Reheating: To restore the delightful texture, reheat frozen garlic knots in a preheated oven at 350°F (175°C) for about 10-15 minutes, or until warmed through.
Expert Tips for Gluten Free Garlic Knots
-
Quality Flour Matters: Use fresh, high-quality gluten-free all-purpose flour to ensure your knots have the best structure and taste.
-
Gentle Kneading: Avoid overworking the dough; gently knead for just 2 minutes to keep your gluten free garlic knots soft and fluffy.
-
Proper Rising: Make sure to let the knots rise adequately before baking. This allows them to puff up beautifully, achieving that signature airy texture.
-
Temperature Check: Ensure your warm water is at the right temperature (around 110°F or 43°C) to properly activate the yeast for a perfect rise.
-
Perfect Butter Brush: Don’t skip on brushing melted butter on top; it enhances flavor and gives a gorgeous, glossy finish to your garlic knots.
Make Ahead Options
These Gluten Free Garlic Knots are fantastic for meal prep, allowing you to enjoy homemade goodness on busy evenings! You can shape the knots up to 24 hours in advance, storing them in the refrigerator; simply cover them tightly with plastic wrap to keep them from drying out. Alternately, you can freeze the shaped knots for up to 3 months—just ensure they are well-wrapped to maintain their quality. When you’re ready to bake, allow them to come to room temperature and rise for about 20 minutes before brushing with melted butter and baking. This way, you’ll have warm, fluffy knots that are just as delicious as if you made them fresh that day!

Gluten Free Garlic Knots Recipe FAQs
What type of gluten-free flour should I use?
For the best results, I recommend using a high-quality gluten-free all-purpose flour blend that contains xanthan gum or other binders. This mimics traditional flour’s properties and helps achieve that perfect soft and fluffy texture in your garlic knots.
How long can I store leftover garlic knots?
Store your leftover gluten-free garlic knots in an airtight container at room temperature for up to 2 days. If you plan to keep them longer, they can be refrigerated for up to 5 days. Just remember to reheat them in the oven to regain their delicious fluffiness!
Can I freeze gluten-free garlic knots?
Absolutely! To freeze your garlic knots, wrap each one individually in plastic wrap and then place them in a freezer-safe bag. They will keep well for up to 3 months. When ready to enjoy, thaw them in the fridge overnight and reheat in a preheated oven at 350°F (175°C) for about 10-15 minutes.
What should I do if my dough isn’t rising?
If your dough isn’t rising, it may be due to inactive yeast. Ensure that your warm water is at the right temperature—around 110°F (43°C)—before adding the yeast. Also, check the expiration date of your yeast, as using fresh yeast is crucial for optimal puffiness in your garlic knots.
Are gluten-free garlic knots safe for those with allergies?
These gluten-free garlic knots can be suitable for individuals with gluten sensitivities. However, always ensure that you are using certified gluten-free ingredients, especially the flour. If anyone has other allergies, like dairy or garlic, feel free to adapt the recipe by substituting or omitting those ingredients as needed!
Melt-in-Your-Mouth Gluten Free Garlic Knots Recipe
Ingredients
Equipment
Method
- Preheat your oven to 400°F (200°C).
- Combine warm water with the active dry yeast and let it sit for 5 minutes until frothy.
- Add gluten-free flour, olive oil, garlic powder, and salt to the yeast mixture; stir until a sticky dough forms.
- Knead the dough gently on a floured surface for about 2 minutes.
- Divide dough into 10 pieces, roll each into a 6-inch rope, and knot them with the ends tucked underneath.
- Cover formed knots with a kitchen towel and let them rise for 20 minutes.
- Brush melted butter on each knot and sprinkle with parsley and salt.
- Bake for around 15 minutes until golden brown.