Advertisement
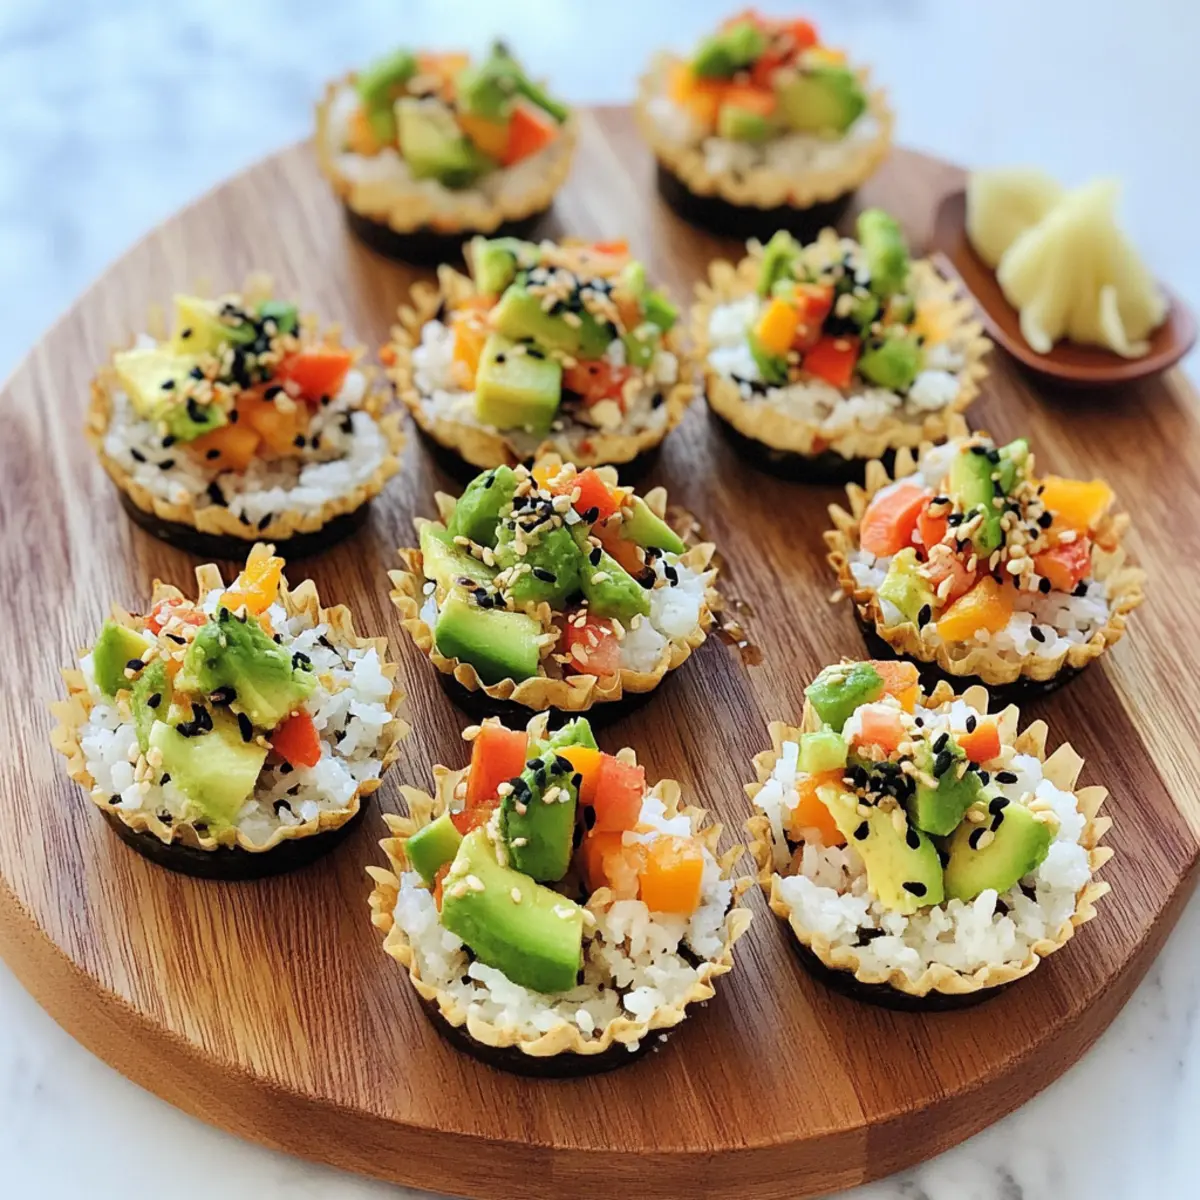
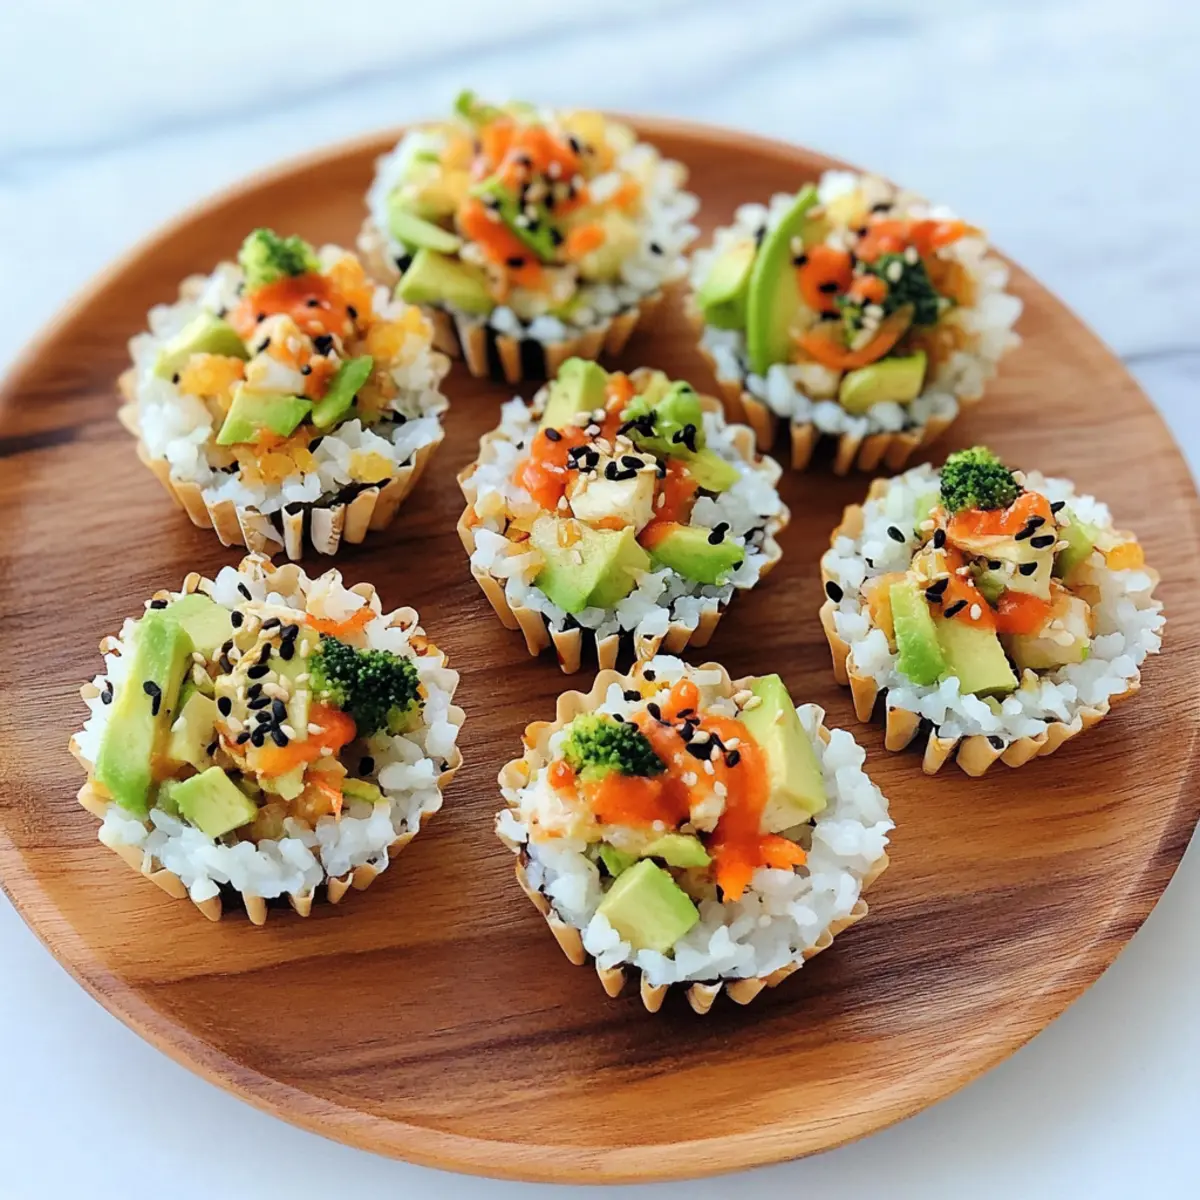
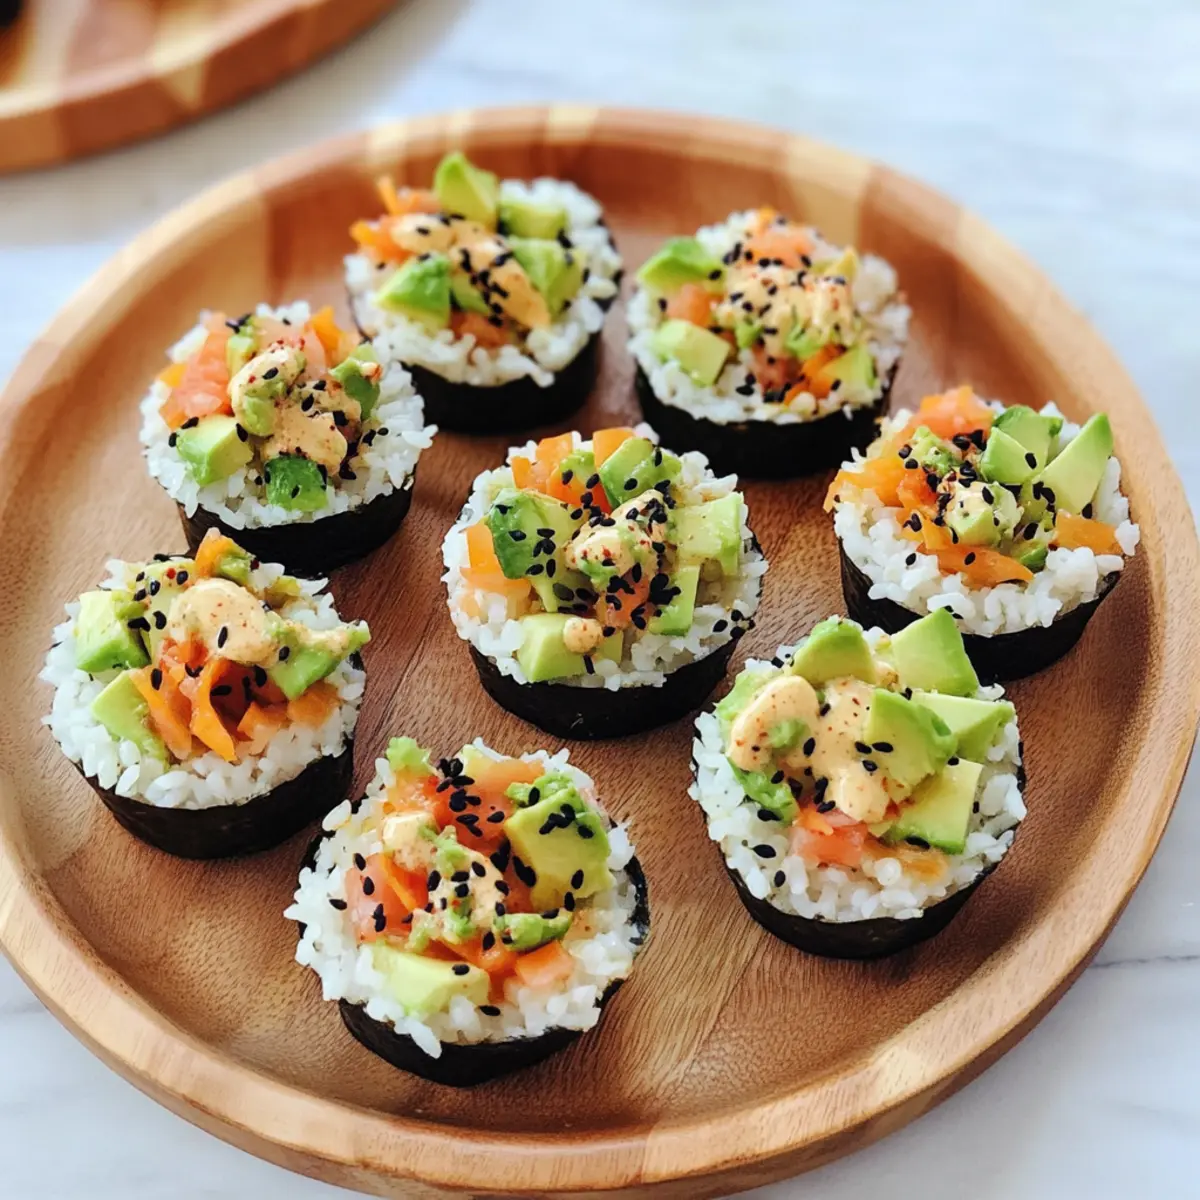
As I gazed upon the vibrant spread of colors on my kitchen counter, I felt the excitement of creativity bubbling within me. Today, I’m thrilled to share my recipe for Customizable No-Bake Sushi Cups! These delightful bites not only whisk you away to the sushi bars of Japan, but they also allow you to play chef with endless ingredient options, making each creation uniquely yours. With minimal prep time and no rolling required, you can whip them up as a quick appetizer or a satisfying snack that’s sure to impress. Imagine digging into a crunchy cup filled with fresh veggies and creamy avocado, all topped off with a drizzle of spicy mayo. Are you ready to dive into this sushi adventure? Let’s get started!
Why Are Sushi Cups a Must-Try?
Unique Experience: These no-bake sushi cups offer a delightful twist on traditional sushi, allowing for customization based on your taste preferences.
Quick and Easy: With no rolling required, you can whip these up in no time, making them perfect for busy weeknights or last-minute gatherings.
Advertisement
Fresh and Flavorful: The synergy of crunchy veggies and creamy avocado brings a burst of freshness in every bite, while the spicy mayo adds an irresistible kick.
Endless Variations: Whether you’re a vegetarian or looking to add protein, these sushi cups can be tailored with your choice of ingredients. Try different dipping sauces to elevate the flavor!
Crowd-Pleasing Snack: Serve them as bite-sized appetizers at parties, and watch your guests rave about these delectable little cups. You’ll never want to go back to takeout sushi again!
Sushi Cups Ingredients
For the Rice Base
- Sushi Rice – Provides the foundation for the cups; rinse well before cooking for optimal texture.
- Water – Hydrates the sushi rice; always use fresh, cold water when cooking.
For the Filling
- Finely Chopped Veggies (Carrots, Cucumber, Bell Peppers, Sprouts) – Adds crunch and freshness; feel free to use any raw veggies you enjoy.
- Steamed Mukimame (Shelled Edamame) – Contributes protein and a subtle nutty flavor; regular edamame pods can be used if mukimame is unavailable.
- Diced Avocado – Introduces creaminess and healthy fats; use approximately half a small avocado.
For the Sauce
- Sauce of Choice (Soy Sauce, Tamari, Coconut Aminos) – Enhances flavor; customize to fit your dietary preferences.
- Mayonnaise – Acts as the base for the spicy mayo; can substitute with vegan mayo for a plant-based option.
- Sriracha Sauce – Adds spiciness; adjust the quantity to your desired level of heat.
- Coconut Aminos or Soy Sauce – Adds umami flavor to the mayo; choose based on your dietary restrictions.
- Honey – Provides a hint of sweetness for balance; maple syrup or agave serve as great alternatives.
- Sesame Oil – Infuses a distinct flavor; omit if nut allergies are a concern.
For Garnishing
- Black Sesame Seeds – For garnish, adding visual appeal and slight nuttiness; regular sesame seeds can serve as a substitute.
Step‑by‑Step Instructions for Sushi Cups
Step 1: Cook the Rice
In a medium pot, combine 1 cup of rinsed sushi rice with 1 1/4 cups of cold water. Bring to a boil over medium heat, then reduce to low and cover the pot with a lid. Let it simmer for 20 minutes until the rice is tender and water has absorbed. Once done, remove from heat and let it cool slightly, allowing the rice to firm up for the sushi cups.
Step 2: Form Rice Cups
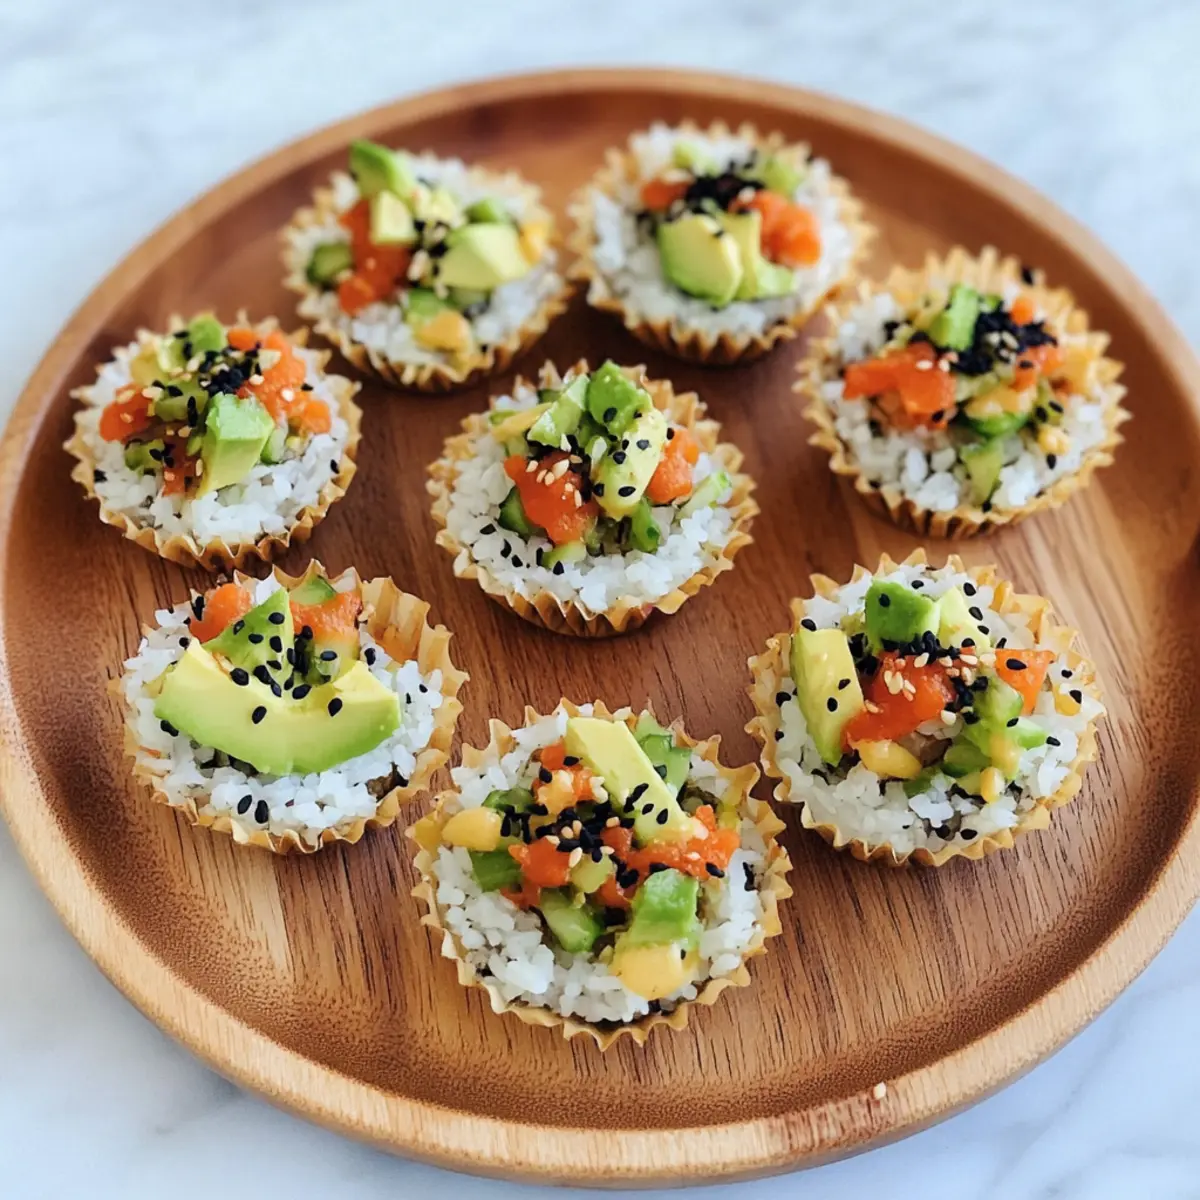
Using a silicone muffin tin, add about 2 heaping tablespoons of cooked sushi rice into each cup. Press down firmly but gently to form a solid base. This step ensures that the rice cups hold their shape. Chill the muffin tin in the refrigerator for 20 minutes, letting the rice set while you prepare the filling.
Step 3: Prepare Filling
In a mixing bowl, combine your finely chopped veggies such as carrots, cucumber, bell peppers, and sprouts with 1 cup of steamed mukimame and half a diced avocado. Drizzle with your choice of sauce, like soy sauce or tamari, and mix until everything is well coated and colorful. This fresh filling will bring crunch and flavor to your sushi cups.
Step 4: Make Spicy Mayo
In a separate bowl, whisk together 1/2 cup of mayonnaise, 1 tablespoon of Sriracha, and 1 teaspoon of coconut aminos. Add in 1 teaspoon of honey and 1 teaspoon of sesame oil for flavor. Adjust the Sriracha according to your spice preference. This spicy mayo will add a creamy and zesty element to your sushi cups.
Step 5: Assemble Sushi Cups
Remove the rice cups from the refrigerator and gently spoon the prepared veggie filling on top of each rice cup, creating a colorful and generous mound. Drizzle the spicy mayo over the veggie mixture, ensuring an even coating. Finally, sprinkle black sesame seeds on top for garnish, adding a beautiful touch to your customizable sushi cups.
Variations & Substitutions for Sushi Cups
Embrace your creativity and give these sushi cups your personal touch, transforming them into something uniquely delicious!
-
Protein Boost: Add imitation crab or cooked shrimp for a heartier option. This will elevate the dish with savory flavors and a satisfying texture.
-
Sweet and Savory: Swap the spicy mayo for a sweet soy sauce or a sesame dressing. This change offers a delightful contrast, making each bite a delightful surprise.
-
Quinoa Cups: Replace sushi rice with quinoa or cauliflower rice for a gluten-free option packed with fiber. You’ll enjoy a wonderful texture while keeping it healthy!
-
Veggie Swap: Explore different vegetables like radishes, avocados, or even pickled ginger. Each swap promises a new flavor profile to tantalize your taste buds.
-
Crispy Texture: Add toasted nori sheets or crunchy toppings like crispy onions for an unexpected crunch. These add depth and texture to your sushi cups.
-
Herbal Infusion: Incorporate fresh herbs like cilantro or mint for a burst of freshness. Herbs can elevate your sushi cups, giving them a fragrant twist.
-
Spice It Up: Experiment with a spicy chili sauce instead of Sriracha or add jalapeños to the filling. Adjust this element to meet your heat preference, ensuring a fiery enhancement.
-
Nut-Free Option: Omit sesame oil and garnish with sunflower seeds to cater to nut allergies. This assures everyone can enjoy your creation without worry.
For more inspiration, consider exploring a variety of dipping sauces that can complement your edible creations beautifully!
Tips for the Best Sushi Cups
-
Use Fresh Ingredients: Always opt for the freshest veggies and ripe avocados. This enhances flavor and texture in your sushi cups.
-
Don’t Rush the Rice: Let the sushi rice cool slightly after cooking. This prevents it from becoming sticky or mushy when forming the cups.
-
Chill for Stability: Allow the rice cups to chill in the fridge for at least 20 minutes after forming. This helps them hold their shape beautifully.
-
Customize Your Filling: Feel free to mix and match your favorite ingredients. Just ensure the components are chopped finely for even distribution in each sushi cup.
-
Adjust the Spice Level: When preparing the spicy mayo, start with less Sriracha if you’re sensitive to heat. You can always add more for an extra kick!
-
Avoid Overfilling: Keep an eye on portion sizes when adding the filling to your sushi cups. Overfilling can make them difficult to eat and enjoy.
How to Store and Freeze Sushi Cups
Fridge: Keep assembled sushi cups in an airtight container for up to 2 days to maintain freshness and flavor.
Freezer: While not ideal for freezing due to the rice texture, you can freeze plain rice cups in a freezer-safe container for up to 1 month.
Reheating: If refrigerated, enjoy sushi cups cold or at room temperature. Avoid reheating, as this can make the rice mushy and affect the overall texture.
Make Ahead Options
These Customizable No-Bake Sushi Cups are a fantastic solution for meal prep, saving you precious time during hectic weeknights! You can prepare the sushi rice and press it into muffin tins up to 24 hours in advance; refrigerate them to maintain their shape. Additionally, chop your veggies and mix the filling a day ahead, storing them in an airtight container to keep everything fresh. When you’re ready to serve, simply assemble the sushi cups by adding the prepared filling to the rice bases, drizzling with spicy mayo, and garnishing with sesame seeds. With these make-ahead steps, you’ll enjoy delightful sushi cups just as delicious as when freshly made!
What to Serve with Customizable No-Bake Sushi Cups
Elevate your meal with imaginative sides and pairings that harmonize beautifully with these sushi cups.
-
Crispy Seaweed Snacks: Perfectly complementing the sushi cups, these crunchy bites bring a gentle oceanic flavor to every mouthful.
-
Japanese Pickles: A tangy and sweet contrast, these fermented delights offer a delightful crunch that balances the flavors of sushi cups.
-
Fresh Edamame: Lightly salted, these tender pods add a nice protein boost, enhancing the healthful element of your meal.
-
Zesty Cucumber Salad: Refreshing and crisp, this salad with rice vinegar dressing provides a delightful tang that contrasts the creamy avocado.
-
Miso Soup: A warm bowl of miso soup serves as a soothing pairing, with umami flavors enhancing your sushi experience.
-
Sake or Green Tea: Elevate your dining experience with cold sake or hot green tea, both of which beautifully accent the freshness of sushi cups.
-
Fruit Sorbet: For dessert, a scoop of fruity sorbet offers a light and refreshing sweet finish, cleansing your palate after the sushi delights.
Customizable No-Bake Sushi Cups Recipe FAQs
What type of sushi rice should I use?
For making sushi cups, short-grain sushi rice is ideal because it becomes sticky when cooked, allowing the cups to hold their shape. Look for rice labeled specifically as “sushi rice” or “short-grain rice” at your grocery store.
How should I store leftover sushi cups?
Store assembled sushi cups in an airtight container in the refrigerator for up to 2 days. Be sure to separate layers with parchment paper to prevent them from sticking together. They are best enjoyed fresh, so try to consume them within this timeframe for optimal flavor and texture.
Can I freeze sushi cups?
While it’s not recommended to freeze the assembled sushi cups due to the texture of the rice, you can freeze the plain rice cups themselves. To do this, place the rice cups in a single layer on a baking sheet and freeze until firm. Then transfer them to a freezer-safe container for up to 1 month. When you’re ready to enjoy them, simply thaw in the fridge overnight and assemble your cups fresh.
How do I make the spicy mayo less spicy for kids?
Absolutely! To cater to younger palates, I suggest reducing the amount of Sriracha to a small squirt or even swapping it out for a mild sauce like sweet chili sauce. You can also add a touch more honey to balance the flavors—just mix it into your mayo until it’s nice and creamy.
Can I substitute ingredients for dietary restrictions?
Very! This recipe is wonderfully adaptable. For a vegan version, use plant-based mayo and avoid honey, opting for agave syrup instead. If anyone has nut allergies, you can simply omit sesame oil and choose alternative garnishes like sunflower seeds. Feel free to customize ingredients to fit your dietary needs!
What if my rice cups are falling apart?
If you find that your sushi cups are crumbling, it’s often due to undercooked or dry rice. To remedy this, make sure to rinse your sushi rice thoroughly before cooking to achieve that perfect sticky texture. After cooking, allow it to cool slightly before pressing it firmly into the muffin tin, ensuring it holds together. You can also chill them longer in the fridge to help them set better!
Delicious Sushi Cups: No-Bake, Customizable Flavor Bites
Ingredients
Equipment
Method
- In a medium pot, combine 1 cup of rinsed sushi rice with 1 1/4 cups of cold water. Bring to a boil over medium heat, then reduce to low and cover the pot with a lid. Let it simmer for 20 minutes until the rice is tender and water has absorbed. Remove from heat and let it cool slightly.
- Using a silicone muffin tin, add about 2 heaping tablespoons of cooked sushi rice into each cup. Press down firmly to form a solid base and chill in the refrigerator for 20 minutes.
- In a mixing bowl, combine your finely chopped veggies with 1 cup of steamed mukimame and half a diced avocado. Drizzle with your choice of sauce and mix until everything is well coated.
- In a separate bowl, whisk together 1/2 cup of mayonnaise, 1 tablespoon of Sriracha, and 1 teaspoon of coconut aminos. Add in 1 teaspoon of honey and 1 teaspoon of sesame oil for flavor.
- Remove the rice cups from the refrigerator and gently spoon the prepared veggie filling on top of each rice cup. Drizzle the spicy mayo over the veggie mixture and sprinkle with black sesame seeds.