Advertisement
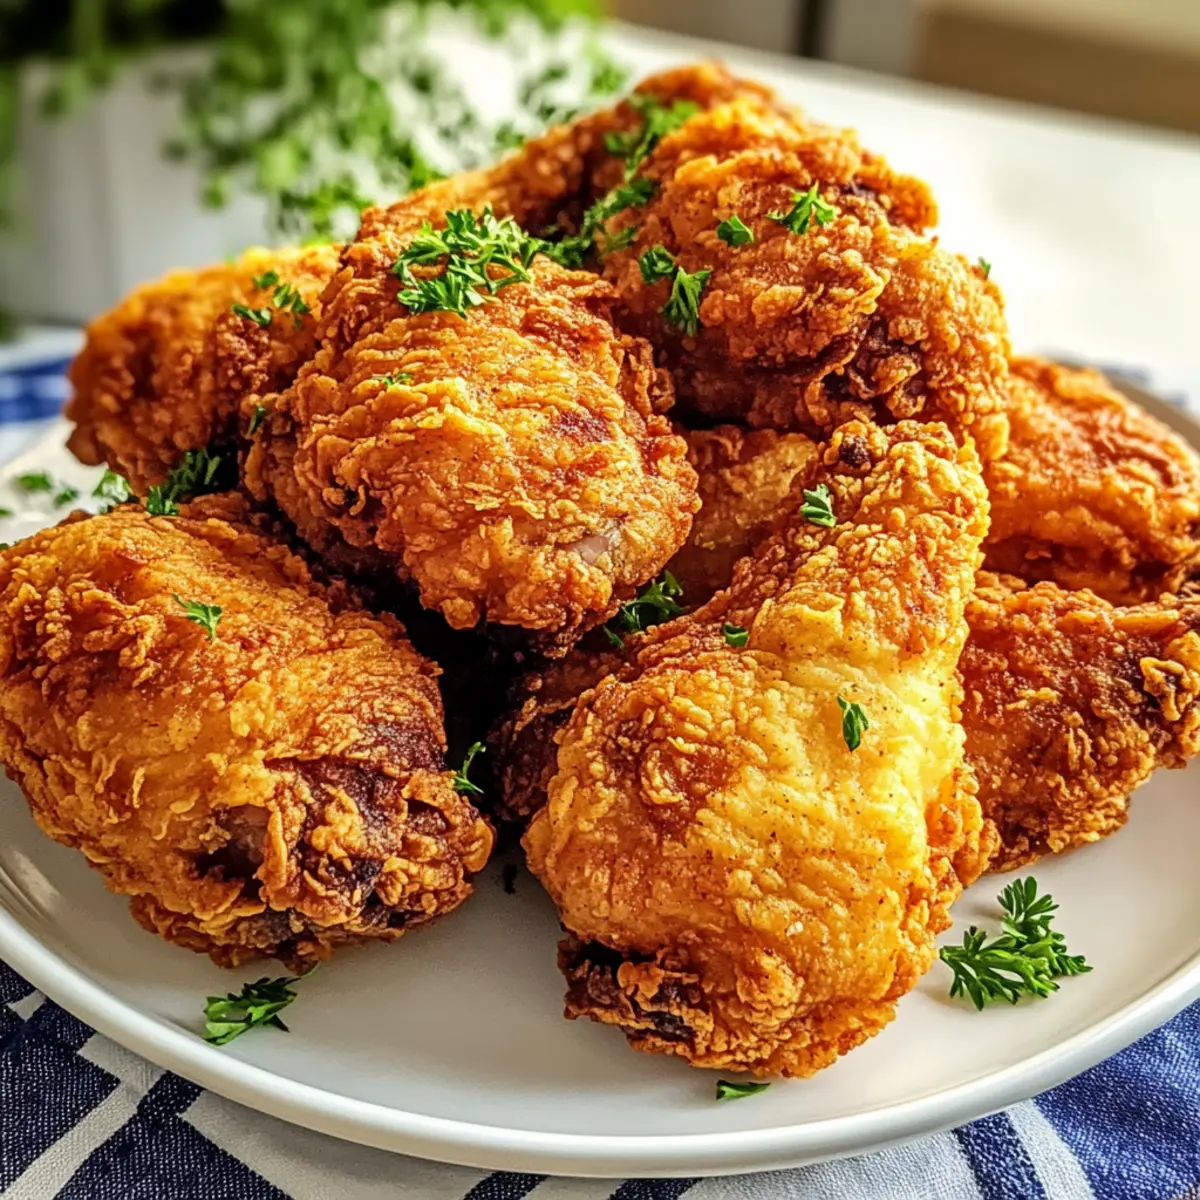
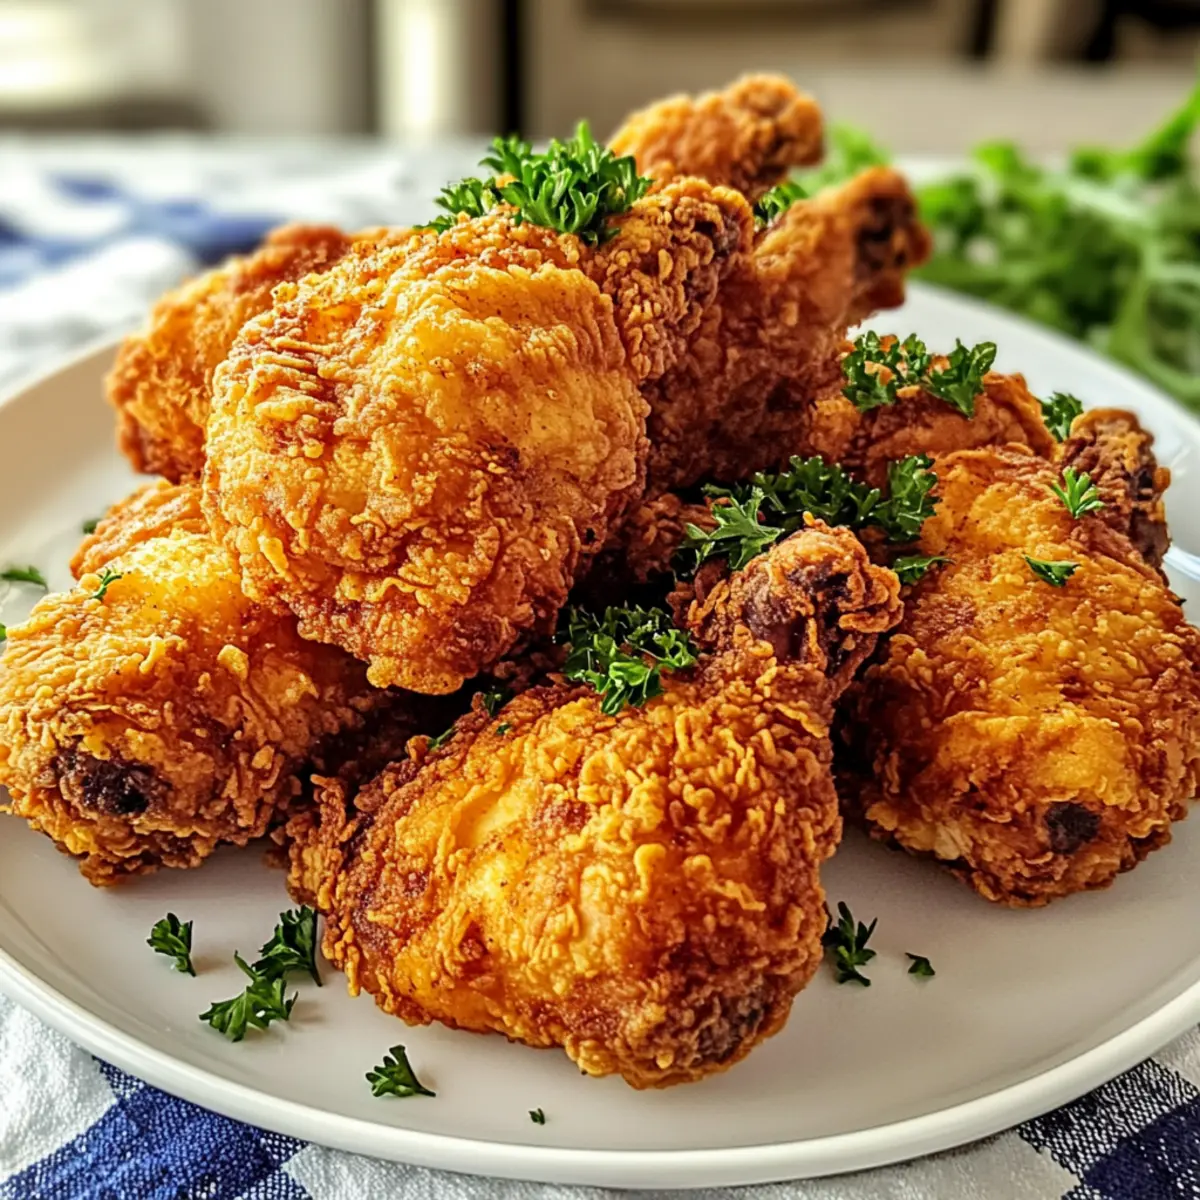
As the sizzle of frying chicken fills the kitchen, I’m transported to a sun-soaked Southern porch, where the laughter of family and friends echoes with the promise of comfort food. This Crispy Country Fried Chicken captures that feeling perfectly, boasting a crunchy, golden crust encasing tender, juicy meat. Not only is this recipe a true crowd-pleaser, but it’s also reassuringly simple—ideal for those of us who might be newer to frying. In just 30 minutes of prep and 15 minutes of cooking, you’ll create a delectable dish that transforms any meal into a celebration. Whether served alongside creamy mashed potatoes or nestled in a fluffy bun, this is one recipe you’ll want to keep close to heart. Ready to dive into the secrets of frying like a pro? Let’s get started!
Why Is This Country Fried Chicken Perfect?
Crispy Texture: The golden, crunchy coating provides the ultimate satisfaction in every bite, making it a true comfort food classic.
Flavor Explosion: With a blend of spices like garlic, paprika, and optional cayenne, each piece is packed with savory goodness that’s hard to resist.
Advertisement
Beginner-Friendly: This recipe is designed for new cooks, requiring just simple techniques and common ingredients.
Crowd-Pleasing: Whether for a casual dinner or a family feast, this dish is sure to impress. Pair it with creamy mashed potatoes or your favorite healthy coleslaw for the ultimate meal.
Quick and Easy: With minimal prep and cook time, you’ll be savoring this savory dish in no time! Don’t hesitate to store leftovers for a quick meal later, perfectly suited for any weeknight.
Country Fried Chicken Ingredients
• The essential components for frying up the best Country Fried Chicken at home.
For the Chicken
- Boneless, Skinless Chicken Breasts – Main protein; choose breasts for a lean meal option, or substitute with thighs for more flavor.
- Buttermilk – Tenderizes chicken and aids flour adherence; can be replaced with a mix of milk and vinegar or lemon juice.
- Large Eggs – Binding agent that helps the flour stick to the chicken.
For the Coating
- All-Purpose Flour – Coating base that provides crispiness; gluten-free flour can be used for a gluten-free option.
- Salt – Enhances flavor; always season to taste.
- Ground Black Pepper – Provides mild heat; swap for white pepper for a more subtle flavor.
- Garlic Powder – Adds savory depth; fresh minced garlic can be an alternative.
- Onion Powder – Complements the seasoning blend; can be omitted if not desired.
- Paprika – Contributes flavor and color; smoked paprika delivers a delightful smoky note.
- Cayenne Pepper (optional) – Adds heat; adjust based on personal preference for spice levels.
For Frying
- Vegetable Oil – Medium for frying; can be substituted with canola or peanut oil for different flavor profiles.
For Garnish
- Fresh Parsley – Adds a pop of color and freshness; omit if not available.
Step‑by‑Step Instructions for Country Fried Chicken
Step 1: Prepare the Chicken
Begin by flattening the boneless, skinless chicken breasts to an even thickness of about ½ inch. Place each breast between two sheets of plastic wrap and gently pound them with a meat mallet until uniform. This ensures that your Country Fried Chicken cooks evenly and achieves that perfect juicy texture.
Step 2: Mix the Dry Ingredients
In a shallow dish, combine all-purpose flour, salt, ground black pepper, garlic powder, onion powder, paprika, and cayenne pepper if using. Whisk together until well mixed to create a flavorful coating that will give your chicken its crunchy texture. This will be the first of two dipping stations for your chicken.
Step 3: Create the Wet Mixture
In a separate bowl, whisk together the buttermilk and large eggs until fully blended. This mixture not only helps to tenderize the chicken but also acts as a binding agent for the flour coating. Dip each piece of chicken into this wet mix, ensuring it’s completely covered for the best results.
Step 4: First Dredge in Flour
After coating the chicken in the wet mixture, dredge each piece in the flour mixture from Step 2. Make sure to shake off any excess flour, as a thick coating can lead to uneven frying. This first layer of flour creates a nice foundation for that crispy outside we crave in Country Fried Chicken.
Step 5: Second Coating for Extra Crispiness
Return the coated chicken to the buttermilk-egg mixture, ensuring it’s well covered once again. After that, place it back into the flour mixture for a second coat, pressing firmly so the flour adheres well. This double coating is key for an extra crunchy texture that will make your mouth water.
Step 6: Heat the Oil
In a large skillet, pour enough vegetable oil to cover the bottom by about ½ inch and heat over medium-high heat. Use a thermometer to check that the oil reaches around 350°F, or drop a small amount of batter into the oil—if it sizzles, you’re ready to fry! Perfect oil temperature is crucial for achieving that golden, crispy coating.
Step 7: Fry the Chicken
Carefully place the chicken pieces into the hot oil in batches, ensuring not to overcrowd the pan. Fry each piece for about 5-7 minutes per side, or until it’s a beautiful golden brown and reaches an internal temperature of 165°F. Keep an eye on the color and avoid burning; your kitchen will smell heavenly!
Step 8: Drain Excess Oil
Once the chicken is perfectly cooked, transfer it onto a plate lined with paper towels to absorb any excess oil. This ensures your Country Fried Chicken remains crunchy and not greasy. Allow the chicken to sit for a couple of minutes, letting the flavors settle and the steam escape.
Step 9: Rest and Serve
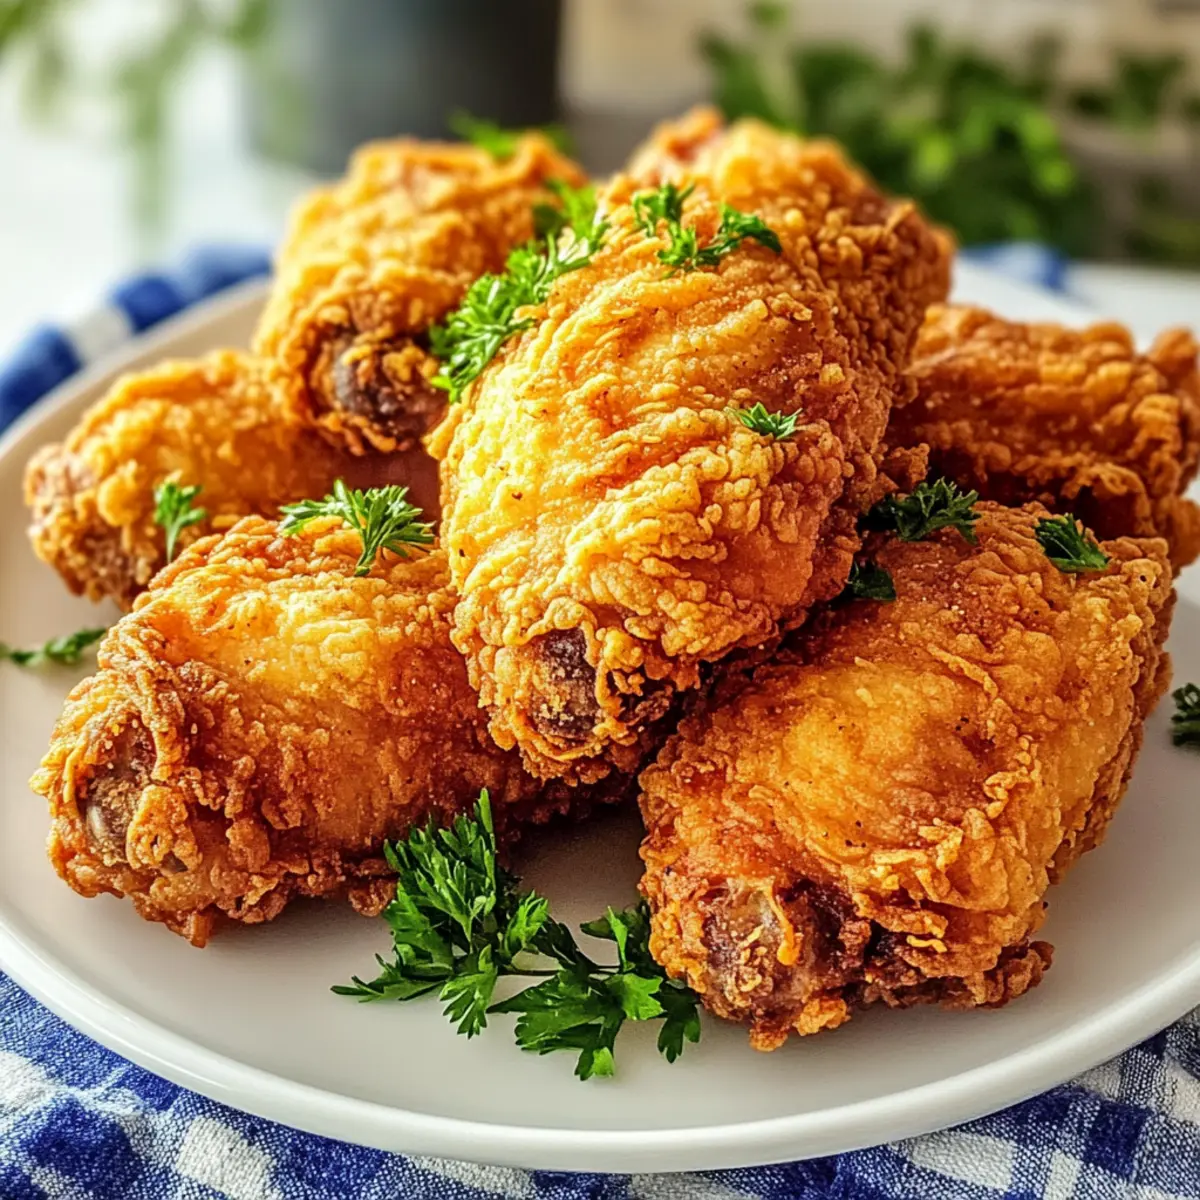
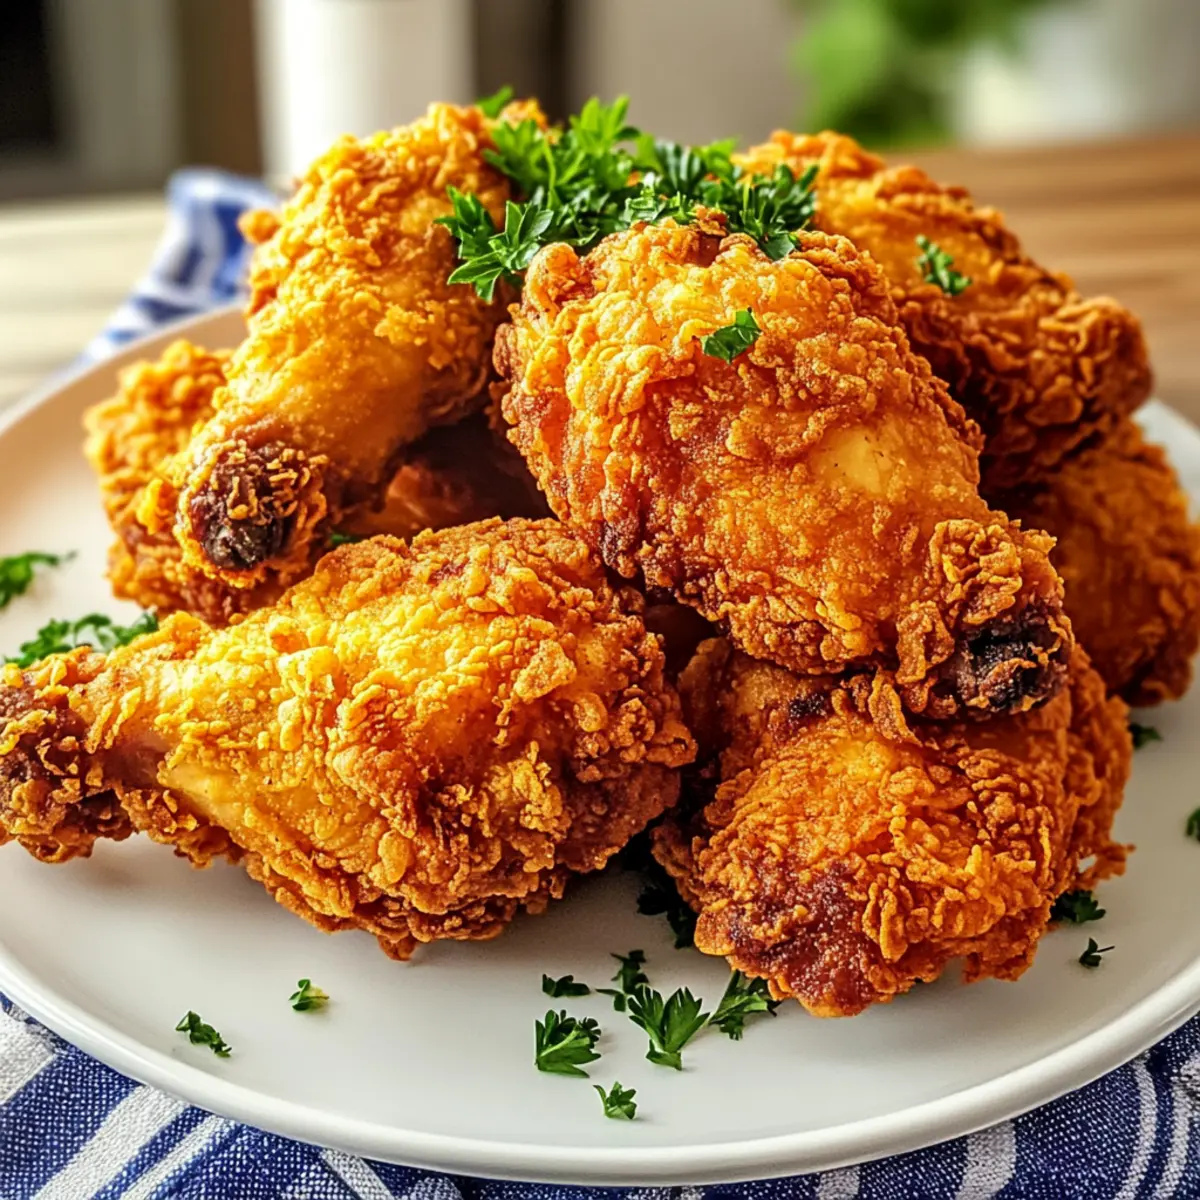
Let the fried chicken rest for a few minutes before serving. This final step allows the juices to redistribute throughout the meat, enhancing its tenderness. Optional: garnish with fresh parsley for a pop of color. Pair your Country Fried Chicken with sides like creamy mashed potatoes or coleslaw for a complete comfort meal that’s sure to impress!
How to Store and Freeze Country Fried Chicken
Fridge: Store cooked Country Fried Chicken in an airtight container for up to 3-4 days. Make sure it’s completely cooled before sealing to prevent moisture buildup.
Freezer: Wrap cooled chicken tightly in plastic wrap or foil, then place in a freezer-safe bag. It can be frozen for up to 2 months without losing flavor.
Reheating: For best results, reheat thawed chicken in the oven at 375°F for about 10-15 minutes, or until heated through. This restores its crispiness.
Avoiding Sogginess: If you’re reheating from frozen, consider using an air fryer to achieve that crunchy texture again; simply air fry until hot and crispy, about 15-20 minutes.
Country Fried Chicken Variations & Substitutions
Feel free to get creative with this Country Fried Chicken recipe, making it uniquely yours with these easy variations!
- Thighs for Flavor: Substitute chicken breasts with thighs for a juicier, more flavorful option. Thighs have a richer taste that enhances the overall dish.
- Gluten-Free: Use a gluten-free flour blend instead of all-purpose flour to cater to dietary needs. It’ll still provide that crunchy coating you crave!
- Buttermilk Substitute: If you don’t have buttermilk, mix regular milk with lemon juice or vinegar for a quick DIY alternative. This achieves a similar tenderizing effect.
- Herb Infusion: Add fresh herbs like thyme or rosemary to the flour mix for a delightful flavor twist. The aromatic notes will elevate your fried chicken experience!
- Spicy Kick: Increase the amount of cayenne pepper or include crushed red pepper flakes to amplify the heat level. It’s a great way to cater to spice lovers!
- Smoked Flavor: Switch regular paprika for smoked paprika to add a deep, smoky dimension to your fried chicken. This small change transforms the flavor profile beautifully.
- Air Fryer Option: For a healthier take, try cooking your coated chicken in an air fryer instead of frying. It still gets crispy, with significantly less oil!
- Crispy Coating Variations: For extra crunch, finely crush some cornflakes or panko breadcrumbs to mix in with the flour. Your chicken will thank you for that added texture!
Whichever variation you choose, every twist can lead to a delightful experience, just like pairing this dish with a side of creamy mashed potatoes or a zesty healthy coleslaw. Happy cooking!
Expert Tips for Country Fried Chicken
-
Even Thickness: Ensure chicken pieces are evenly flattened to about ½ inch for consistent cooking. This prevents some parts from overcooking while others remain undercooked.
-
Oil Temperature: Monitor the oil temperature closely; it should be around 350°F. Too cool oil will make for soggy chicken, while too hot will burn the coating before the chicken cooks through.
-
Batch Frying: Fry chicken in small batches to maintain oil temperature, allowing for an even, crispy coating. Overcrowding the pan can lead to greasy chicken.
-
Double Coating: Don’t skip the second coating in the flour mixture. This crucial step contributes significantly to that coveted crunch in your Country Fried Chicken.
-
Rest Before Serving: Allow the fried chicken to rest for a few minutes after frying. This helps the juices redistribute, resulting in tender meat that’s bursting with flavor.
-
Garnish Wisely: While fresh parsley adds a lovely touch, feel free to get creative with your garnishes. Lemon wedges or a drizzle of spicy honey can elevate the experience!
Make Ahead Options
Country Fried Chicken is a fantastic choice for meal prep! You can marinate the chicken in buttermilk for up to 24 hours in advance, ensuring it remains juicy and tender. Additionally, you can combine the dry ingredients and store them in an airtight container for up to 3 days to save time. When you’re ready to fry, simply dredge the marinated chicken in the pre-mixed flour, double-coat it as directed, and fry until golden brown. To maintain the crispy texture, avoid overcrowding the pan and drain on paper towels to remove excess oil. This way, you’ll enjoy that delightful, freshly-cooked taste even on your busiest weeknights!
What to Serve with Country Fried Chicken
There’s nothing quite like the delightful crunch of fried chicken paired with comforting sides that celebrate Southern hospitality.
-
Creamy Mashed Potatoes: The buttery richness of mashed potatoes acts as a perfect contrast to the crispy chicken, soaking up flavors beautifully. Add a generous drizzle of gravy to elevate this classic duo.
-
Classic Coleslaw: A refreshing coleslaw adds a crunchy, tangy counterpart that balances the richness of the fried chicken while providing a crisp texture that’s equally satisfying.
-
Cornbread Muffins: Soft and slightly sweet cornbread muffins bring a delightful warmth to the table. They’re perfect for mopping up any excess gravy or sauce.
-
Fried Green Tomatoes: Crispy fried green tomatoes introduce a delightful tartness, perfectly complementing the savory elements of the chicken while keeping the southern theme alive.
-
Pickle Chips: The tangy crunch of pickle chips serves as a bright contrast to the hearty flavors of the chicken, cutting through the richness for a balanced bite.
-
Southern-style Biscuits: Fluffy, buttery biscuits are a classic addition. They can be enjoyed alone or smothered with gravy, making every meal feel like a special occasion.
-
Sweet Tea: Complete your meal with a glass of sweet tea. Its refreshing sweetness and coolness contrast beautifully with the heat of any spices used in the frying.
-
Apple Pie: For dessert, a slice of warm apple pie topped with vanilla ice cream offers a sweet finish to a comforting Southern feast, perfectly rounding out your dining experience.
Country Fried Chicken Recipe FAQs
How do I select the best chicken for this recipe?
Absolutely! Look for boneless, skinless chicken breasts that feel firm and have a pink hue, avoiding any that are slimy or have dark spots. If you prefer more flavor, chicken thighs are an excellent substitute—just be mindful that they may take a bit longer to cook through.
What is the best way to store leftover Country Fried Chicken?
After enjoying your delicious Country Fried Chicken, store leftovers in an airtight container in the fridge. They can last for up to 3-4 days. Make sure the chicken is cooled completely before sealing it to prevent moisture buildup, which can lead to sogginess.
Can I freeze Country Fried Chicken?
Very much! To freeze, wrap the cooled chicken tightly in plastic wrap or foil, then place it inside a freezer-safe bag. Make sure to remove as much air as possible. Your fried chicken can stay deliciously fresh for up to 2 months. When ready to eat, thaw in the fridge overnight, then reheat in the oven or air fryer to restore that glorious crunch.
Why is my battered coating falling off while frying?
Oh no, the disappointment! If the coating is slipping off, it can be due to excess moisture on the chicken or insufficient flour adherence. When applying the flour, make sure to shake off any excess before dipping into the wet mixture, and ensure you give a second coating afterward. Patience in the dredging process is key for that crispy finish.
Can I make this recipe gluten-free?
Absolutely! You can substitute all-purpose flour with a gluten-free blend, such as almond flour or a dedicated gluten-free all-purpose flour. Just be sure to use certified gluten-free ingredients across the board, including the buttermilk (or its substitute), to avoid any cross-contamination.
Is this recipe suitable for pets?
While the Country Fried Chicken itself is okay for pets in moderation, it’s important to remove any seasoned coating. Ingredients like garlic and onion powder are harmful to dogs and cats. Plain, unseasoned chicken can be a tasty treat for your furry friends. Always check with your vet if you’re unsure!
Mouthwatering Country Fried Chicken You'll Crave Always
Ingredients
Equipment
Method
- Begin by flattening the boneless, skinless chicken breasts to an even thickness of about ½ inch.
- In a shallow dish, combine all-purpose flour, salt, ground black pepper, garlic powder, onion powder, paprika, and cayenne pepper if using. Whisk together until well mixed.
- In a separate bowl, whisk together the buttermilk and large eggs until fully blended.
- Dredge each piece of chicken in the flour mixture, shaking off excess flour.
- Return the chicken to the wet mixture, then back to the flour mixture for a second coat, pressing to adhere.
- Heat vegetable oil in a large skillet over medium-high heat to about 350°F.
- Carefully fry chicken pieces in batches for 5-7 minutes per side until golden brown and internal temperature reaches 165°F.
- Transfer cooked chicken to a plate lined with paper towels to absorb excess oil.
- Let chicken rest for a few minutes before serving. Garnish with fresh parsley if desired.