
Advertisement
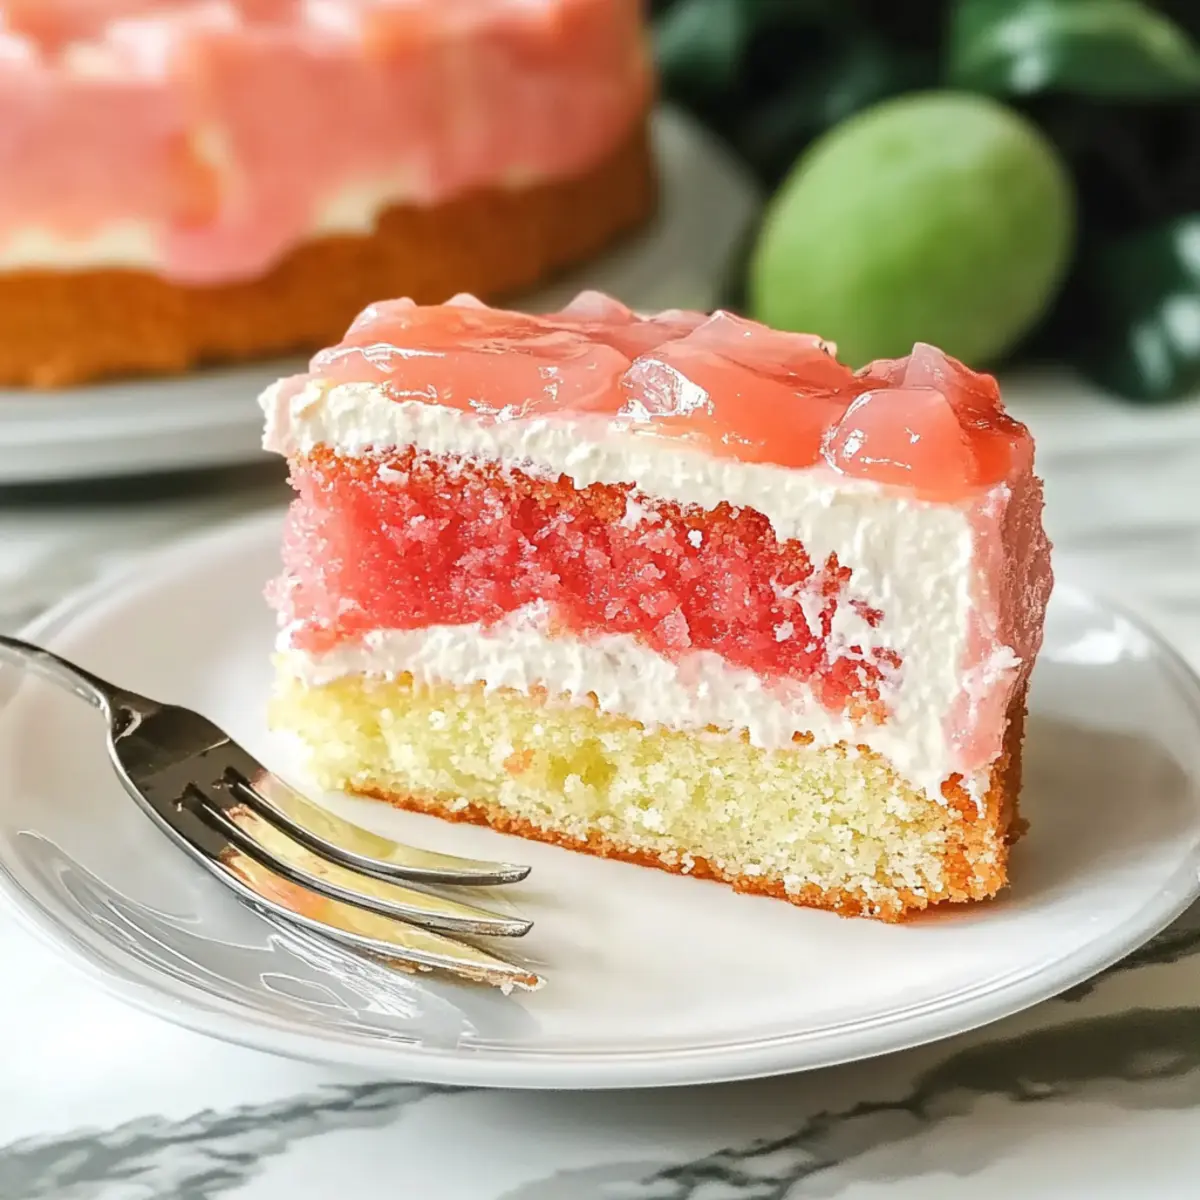
As I stepped into my kitchen today, the scent of tropical paradise enveloped me, transporting my mind to sun-kissed shores and swaying palms. I knew I had to share my latest creation: the delightful Hawaiian Guava Cake. This vibrant dessert serves as a celebration of luscious guava and hints of coconut, wrapped in a simple preparation that anyone can master. It’s a perfect addition to any table, whether you’re hosting a festive gathering or just indulging in a sweet treat after dinner. Beyond its stunning appearance, this cake offers a quick and easy way to bring a taste of the tropics to your home without the fuss. Ready to whip up something that will make taste buds dance and hearts flutter? Let’s dive into this recipe together!
Why is Hawaiian Guava Cake so special?
Tropical Escape: This cake captures the essence of paradise with each bite of juicy guava and creamy coconut.
Effortless Indulgence: Thanks to the use of cake mix, you’ll spend less time baking and more time enjoying!
Advertisement
Flavor Explosion: The delightful balance of sweetness and tanginess creates a memorable flavor profile that everyone will love.
Versatile Treat: Perfect for any occasion—whether it’s a summer barbecue, birthday bash, or weeknight dessert, it fits right in. Pair it with a refreshing fruit salad or a scoop of vanilla ice cream for an extra touch of tropical bliss.
Eye-Catching Presentation: This stunning cake not only tastes irresistible but will also wow your guests with its vibrant layers and glossy glaze.
Hawaiian Guava Cake Ingredients
• Get ready to create this tropical delight with simple ingredients that fuses flavor!
For the Cake
- Strawberry Cake Mix – Provides sweetness and structure; a gluten-free cake mix can be substituted for a gluten-free option.
- Guava Nectar/Juice – Adds that irresistible tropical flavor; make sure it’s 100% guava for authentic taste.
- Eggs – Binds the ingredients and adds moisture; for an egg-free version, unsweetened applesauce or a flax egg works well.
- Coconut Oil – Infuses richness and a hint of coconut flavor; vegetable oil can be a substitute if needed.
For the Cream Cheese Layer
- Cream Cheese – Delivers creaminess and a tangy touch; dairy-free cream cheese can be used for a vegan alternative.
- Granulated Sugar – Sweetens the cream cheese layer and glaze beautifully.
- Vanilla Extract – Enhances the overall flavor profile with warmth.
- Cool Whip – Provides an airy, fluffy texture; whipped coconut cream is a great dairy-free substitute.
For the Guava Gel
- Cornstarch – Essential for thickening the guava gel; if your guava gel is too runny, whisk in more cornstarch slurry while heating until thickened.
- Water – Helps create the cornstarch slurry for that perfect gel consistency.
For Garnishing
- Sweetened Coconut Flakes – An optional topping that adds both flavor and tropical flair to the cake.
Now, gather these ingredients and let’s bring the essence of Hawaii directly into your kitchen with this irresistible Hawaiian Guava Cake!
Step‑by‑Step Instructions for Hawaiian Guava Cake
Step 1: Preheat the Oven
Start by preheating your oven to 350°F (175°C). While the oven warms up, prepare a 13 x 9 baking dish by lightly greasing it with vegetable spray to prevent sticking. This crucial first step ensures your Hawaiian Guava Cake bakes evenly and comes out perfectly golden.
Step 2: Mix the Batter
In a mixing bowl, combine the strawberry cake mix, 100% guava juice, eggs, and melted coconut oil. Using a hand mixer or stand mixer, blend the ingredients on medium speed for about 2 minutes until the batter is smooth and well incorporated. The batter should look thick and glossy, capturing the tropical essence!
Step 3: Bake the Cake
Pour the batter into the prepared baking dish, using a spatula to spread it evenly. Place it in the preheated oven and bake for 24-26 minutes, checking for doneness by inserting a toothpick into the center. If it comes out clean, the Hawaiian Guava Cake is ready; if not, give it a few more minutes.
Step 4: Cool the Cake
Once baked, carefully remove the dish from the oven and place it on a wire rack. Let the cake cool in the pan for about 10 minutes, then gently transfer it to the rack to cool completely. Allowing the cake to cool is vital for setting its structure before adding layers.
Step 5: Prepare the Cream Cheese Layer
In a mixing bowl, beat 8 oz of cream cheese until light and fluffy, which should take about 2 minutes. Gradually mix in the granulated sugar and vanilla extract. Once combined, gently fold in the Cool Whip until the mixture is smooth and creamy, showcasing that delightful blend of flavors.
Step 6: Make Guava Gel
In a saucepan, combine guava juice and sugar, bringing it to a gentle boil over medium heat. In a small bowl, whisk together cornstarch and water to create a slurry. Slowly whisk this into the boiling juice mixture, keeping an eye on it as you stir until it thickens. This gel will be the delicious topping for your Hawaiian Guava Cake!
Step 7: Assemble the Cake
Once the cake has completely cooled, spread the cream cheese mixture evenly over the surface, creating a luscious layer. Afterward, pour the cooled guava gel over the cream cheese layer, allowing it to glide across the top, adding a vibrant finish. The assembly of these flavors is essential for a show-stopping Hawaiian Guava Cake.
Step 8: Chill Before Serving
Place the assembled Hawaiian Guava Cake in the refrigerator for at least 2 hours, allowing the layers to set properly. This chilling step enhances the cake’s flavor and texture, making each bite irresistible. If desired, sprinkle sweetened coconut flakes on top before serving for an extra tropical touch.
Variations for Hawaiian Guava Cake
Feel free to shake things up with these fun twists that will keep your Hawaiian Guava Cake exciting and delicious!
-
Gluten-Free: Use a gluten-free cake mix to ensure everyone can enjoy this delightful treat while maintaining its original flavor.
-
Fruit Additions: Add chopped fresh pineapple or ripe mango into the batter for an extra burst of tropical goodness. The added fruit will bring enhanced sweetness and texture.
-
Dairy-Free: Substitute cream cheese and Cool Whip with dairy-free versions to make this cake suitable for vegan friends and family.
-
Zesty Twist: Mix in some lemon zest into the cream cheese layer to add a bright and refreshing contrast to the sweetness of the guava. This perfect pairing will invigorate the palate.
-
Chocolate Drizzle: For chocolate lovers, a drizzle of melted dark chocolate over the guava gel can create a delightful combination of tropical and rich flavors.
These variations are a wonderful way to tailor the Hawaiian Guava Cake to suit your taste preferences or dietary needs. If you’re looking for more cake inspirations, don’t miss out on the moist and luscious Chocolate Cherry Cake or the delightful flavors of Black Velvet Cake that will surely impress your guests!
What to Serve with Hawaiian Guava Cake?
The perfect accompaniment can transform your Hawaiian Guava Cake from a delight into a feast, creating an unforgettable experience for everyone.
-
Tropical Fruit Salad: A mix of fresh mango, pineapple, and kiwi enhances the tropical theme and offers a refreshing contrast. The vibrant colors pair beautifully with the cake and add a burst of natural sweetness.
-
Coconut Vanilla Ice Cream: Creamy and cold, this ice cream complements the rich guava and coconut flavors, providing a nostalgic summer feeling. It’s a decadent way to cool down while savoring each bite of the cake.
-
Grilled Shrimp Skewers: These offer a savory balance to the dessert with a hint of smokiness and spice. The light, savory flavor of shrimp works wonderfully against the cake’s sweetness, elevating your meal with a delightful contrast.
-
Pineapple Mojito: This refreshing drink combines mint, lime, and pineapple juice, making it a perfect tropical beverage that mirrors the cake’s fruity notes. It’s an invigorating sip that pairs well with the cake’s rich and creamy textures.
-
Lemon Sorbet: The tangy sorbet provides a zesty balance that cuts through the richness of the cake. Serve it between bites to cleanse the palate and refresh your taste buds.
-
Macadamia Nut Cookies: These chewy delights add a nutty crunch while echoing the flavors of Hawaii. Their satisfying texture pairs well with the moist cake and creamy layers.
-
Sweetened Coconut Flakes: A simple sprinkle on top of the cake before serving adds an extra tropical flair and brightens the presentation. It can also be served alongside the cake for guests to sprinkle as desired.
-
Caribbean Fruit Punch: This vibrant drink, made with a blend of citrus juices and tropical fruits, captures the essence of an island getaway, perfectly matching the festive spirit of your Hawaiian Guava Cake.
-
Chocolate-Covered Pineapple: As a fun treat, chocolate-covered pineapple bites give a sweet and slightly tart flavor, adding a luxurious touch to your dessert table. The combination is a delightful way to indulge in two tropical favorites.
Each pairing enhances the Hawaiian Guava Cake experience, turning your table into a delightful tropical escape that everyone will cherish.
Expert Tips for Hawaiian Guava Cake
-
Room Temperature Ingredients: Ensure that eggs and cream cheese are at room temperature to achieve a smooth and well-mixed batter, elevating your Hawaiian Guava Cake’s texture.
-
Cooling is Key: Allow the baked cake to cool completely before applying the cream cheese layer. This will prevent melting and create a beautiful presentation.
-
Perfect Guava Gel: If your guava gel turns out too runny, don’t fret! Simply whisk in more cornstarch slurry while reheating until it thickens to the desired consistency.
-
Chill Time Matters: Don’t skip the chilling step! Refrigerate the assembled cake for at least 2 hours, as this allows the flavors to meld beautifully and enhances the overall taste experience.
-
Garnish Wisely: Consider adding sweetened coconut flakes on top just before serving to not only enhance flavor but also create a stunning tropical visual that will impress your guests.
Make Ahead Options
These delightful Hawaiian Guava Cake layers are perfect for making ahead, saving you time in the kitchen! You can prepare the cake itself up to 24 hours in advance; just allow it to cool completely, then wrap it tightly in plastic wrap to keep it fresh. The cream cheese layer can also be made ahead and stored in the refrigerator for up to 3 days—just mix it as directed and cover it well to prevent it from drying out. When you’re ready to serve, simply spread the cream cheese layer over the cooled cake and top it with the guava gel, which can be made right before serving (it will taste just as delicious!). This makes it ideal for busy days when you still want to impress your guests with a tropical treat!
How to Store and Freeze Hawaiian Guava Cake
Fridge: Store leftover Hawaiian Guava Cake in an airtight container for up to 3 days. This keeps the creamy layers fresh and delicious for later enjoyment.
Freezer: For longer storage, wrap the cake in plastic wrap and aluminum foil before freezing. It can be kept for up to 2 months. Thaw overnight in the refrigerator before serving.
Reheating: If you’d like to warm individual slices, pop them in the microwave for about 10-15 seconds. This helps restore the cake’s soft texture without compromising the layers.
Serving Tip: Always garnish with a sprinkle of sweetened coconut flakes before serving, as it adds a lovely tropical touch to the thawed Hawaiian Guava Cake.
Hawaiian Guava Cake Recipe FAQs
What is the best way to select ripe guava for the Hawaiian Guava Cake?
Absolutely! When selecting guava, look for fruit that gives slightly to pressure and has a fragrant aroma. It should have a smooth skin, free of dark spots and blemishes. Ripe guava will have a vibrant color, depending on the variety, which contributes to the cake’s stunning appearance!
How should I store leftover Hawaiian Guava Cake?
To keep your cake fresh, store any leftovers in an airtight container in the refrigerator for up to 3 days. Avoid leaving it out at room temperature to maintain the integrity of the cream cheese layer. If you plan to keep it longer, wrapping it tightly in plastic wrap and foil allows you to store it in the freezer for up to 2 months.
Can I freeze Hawaiian Guava Cake, and how do I do it properly?
Yes, you can! To freeze the Hawaiian Guava Cake, allow it to cool completely first. Then, wrap it tightly in plastic wrap and cover with aluminum foil to prevent freezer burn. Label it with the date, and it will stay fresh for up to 2 months. When you’re ready to enjoy it, thaw the cake overnight in the refrigerator before serving.
What should I do if my guava gel is too runny?
Very good question! If your guava gel turns out too runny, don’t worry. Simply whisk together an additional tablespoon of cornstarch with a tablespoon of water to create a slurry. Heat the guava mixture on the stove, slowly whisk in the cornstarch slurry, and cook until it thickens. This will bring your guava gel to the perfect consistency!
Are there any dietary considerations for Hawaiian Guava Cake?
Absolutely! This delightful cake can easily accommodate various dietary needs. For a gluten-free option, simply substitute the cake mix with a gluten-free version. If you’re vegan, use unsweetened applesauce or a flax egg in place of eggs, and swap the cream cheese and Cool Whip with respective dairy-free alternatives. Always double-check labels for allergens, especially for those who may have sensitivities.
How can I enhance the flavor of my Hawaiian Guava Cake?
The more the merrier when it comes to flavor! For an exciting twist, consider adding fresh diced pineapple or mango into the cake batter for an extra tropical punch. Incorporating some lemon zest into the cream cheese layer also adds a delightful zesty contrast! For a richer flavor, drizzle melted dark chocolate on top just before serving for a beautiful presentation.

Tropical Hawaiian Guava Cake: Easy and Irresistibly Delicious
Ingredients
Equipment
Method
- Preheat the oven to 350°F (175°C) and grease a 13 x 9 baking dish.
- In a mixing bowl, combine strawberry cake mix, guava juice, eggs, and melted coconut oil. Mix on medium speed for about 2 minutes until smooth.
- Pour the batter into the prepared baking dish and bake for 24-26 minutes, checking for doneness with a toothpick.
- Let the cake cool in the pan for 10 minutes, then transfer to a wire rack to cool completely.
- Beat cream cheese in a mixing bowl until fluffy, then mix in sugar and vanilla. Fold in Cool Whip until smooth.
- In a saucepan, combine guava juice and sugar, and bring to a boil. Whisk cornstarch and water into a slurry, then stir into the boiling mixture until it thickens.
- Spread the cream cheese mixture over the cooled cake, then pour the guava gel on top.
- Refrigerate the assembled cake for at least 2 hours before serving. Optionally, sprinkle with coconut flakes before serving.


