Advertisement
Chocolate pudding holds a special place in our hearts. Whether it’s a comforting treat on a cold day or the centerpiece of a family gathering, its velvety texture and rich flavor bring joy to every bite. But making homemade chocolate pudding? Now that’s where the magic truly begins. You might think it’s complicated, but with the right steps and ingredients, you can whip up a bowl of indulgence that rivals any store-bought variety.
Why Chocolate Pudding Deserves a Place in Your Kitchen
Imagine the warmth of silky, homemade chocolate pudding melting in your mouth. It’s not just about the taste; it’s the memories tied to it—family dinners, celebrations, or late-night cravings. Unlike processed alternatives, making chocolate pudding from scratch ensures you control the sweetness, richness, and quality.
Key Ingredients for the Perfect Chocolate Pudding
Here’s everything you’ll need for a creamy and decadent chocolate pudding:
| Ingredient | Quantity | Purpose |
|---|---|---|
| Brown sugar (packed) | 1 cup | Adds sweetness and depth of flavor |
| Cornstarch | 3 tablespoons | Thickens the pudding |
| Salt | ⅛ teaspoon | Balances the flavors |
| Cocoa powder | ⅔ cup | Provides the chocolatey richness |
| Whole milk (or 2%) | 4 cups | The base for creaminess |
| Unsalted butter | 3 tablespoons | Adds richness and a smooth texture |
| Vanilla extract | 1 teaspoon | Enhances the chocolate flavor |
Step-by-Step Instructions to Make Chocolate Pudding
1. Gather Your Ingredients
Before you start, ensure all ingredients are measured and ready. This simplifies the process and avoids last-minute scrambling.
Advertisement
2. Mix the Dry Ingredients
In a medium saucepan, sift together the brown sugar, cornstarch, salt, and cocoa powder. Sifting prevents lumps and ensures a smooth pudding.
3. Incorporate the Milk
Slowly whisk the milk into the dry mixture. The gradual addition ensures everything blends evenly, setting the foundation for a creamy texture.
4. Heat and Stir
Place the saucepan on medium to medium-low heat. Whisk continuously to prevent sticking or clumping. Bring the mixture to a full boil, then reduce it to a simmer.
5. Cook Until Thickened
Let the pudding cook for about 1½ to 2 minutes while whisking. You’ll notice the mixture thickening—this is when the magic happens!
6. Add Butter and Vanilla
Remove the saucepan from the heat. Stir in the butter and vanilla extract. These ingredients elevate the flavor and give the pudding its silky finish.
7. Prevent a Skin from Forming
Pour the pudding into a bowl and press plastic wrap directly onto the surface. This step prevents an unappetizing skin from forming.
8. Chill for Perfection
Refrigerate the pudding for several hours. The chilling time allows the flavors to meld and the texture to set.
9. Serve and Enjoy
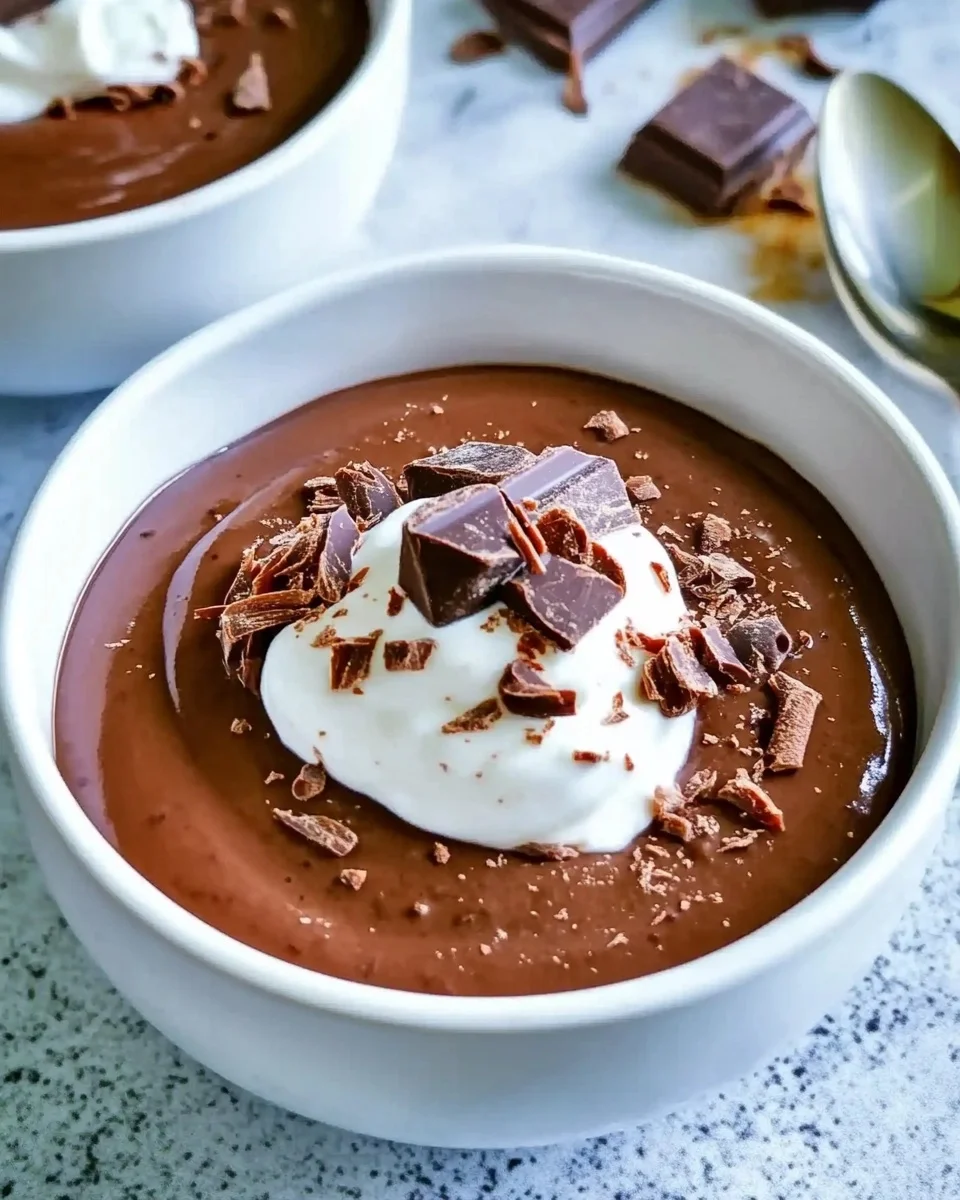
Scoop the pudding into bowls, garnish if desired, and enjoy the creamy delight!
Tips for the Perfect Chocolate Pudding
- Whisk Constantly: Avoid lumps by keeping the mixture moving during cooking.
- Don’t Rush the Cooking Process: Allow the pudding to thicken gradually on medium heat.
- Experiment with Flavors: Add a pinch of espresso powder or a dash of cinnamon for a unique twist.
- Storage: Keep leftovers in an airtight container in the fridge for up to three days.
Creative Serving Ideas
Chocolate pudding isn’t just a standalone dessert. Here are some creative ways to serve it:
- Layered Parfaits: Layer pudding with whipped cream and crushed cookies for a show-stopping dessert.
- Pie Filling: Use as a base for chocolate cream pie.
- Frozen Treats: Freeze pudding in molds for delicious popsicles.
- Toppings Galore: Garnish with fresh berries, shaved chocolate, or a dollop of whipped cream.
Nutritional Information
| Nutrient | Per Serving (1 Cup) |
|---|---|
| Calories | 230 |
| Total Fat | 8g |
| Saturated Fat | 5g |
| Cholesterol | 25mg |
| Sodium | 70mg |
| Total Carbohydrates | 35g |
| Sugars | 28g |
| Protein | 5g |
Common Mistakes to Avoid
- Skipping the Sifting: This can lead to lumps in your pudding.
- Overcooking: Cooking for too long can result in a grainy texture.
- Not Using Whole Milk: Lower fat milk affects the creaminess.
FAQs About Chocolate Pudding
1. Can I use a sugar substitute?
Yes, but it may alter the taste and texture. Opt for natural substitutes like coconut sugar for the best results.
2. What if my pudding is too runny?
You may not have cooked it long enough. Return it to the stove and cook until it thickens.
3. Can I make chocolate pudding dairy-free?
Absolutely! Use almond milk, coconut milk, or oat milk as substitutes. Ensure your butter replacement is also dairy-free.
4. Why does my pudding form a skin?
A skin forms when air dries the surface. Pressing plastic wrap directly on the pudding prevents this.
5. Can I double the recipe?
Yes, but ensure you use a larger saucepan and cook for slightly longer.
6. How do I make it richer?
Swap some milk for heavy cream or add an extra tablespoon of butter.
Conclusion: Your Chocolate Pudding Adventure Awaits
Making chocolate pudding from scratch is more than just a recipe—it’s a journey of flavors and textures. With this guide, you now have everything you need to create a dessert that’s rich, creamy, and utterly irresistible. So, grab your whisk, gather your ingredients, and treat yourself to a homemade delight.

Classic Homemade Chocolate Pudding
Ingredients
Method
- In a medium saucepan, sift together the brown sugar, cornstarch, salt, and cocoa powder.
- Gradually whisk in the milk until the mixture is smooth and lump-free.
- Place the saucepan over medium to medium-low heat. Whisk constantly to prevent sticking or clumping.
- Bring the mixture to a full boil, then reduce the heat to a simmer. Continue stirring and cooking for 1½ to 2 minutes, or until the pudding thickens.
- Remove the saucepan from the heat and stir in the butter and vanilla extract until fully incorporated.
- Pour the pudding into a bowl and press plastic wrap directly onto the surface to prevent a skin from forming.
- Chill in the refrigerator for several hours for the best results.
- Serve cold and enjoy!
Notes
- Milk Options: For a richer pudding, substitute half the milk with heavy cream.
- Storage: Store leftovers in an airtight container in the refrigerator for up to three days.
- Flavor Variations: Add a pinch of cinnamon or espresso powder to elevate the flavor.


