Advertisement
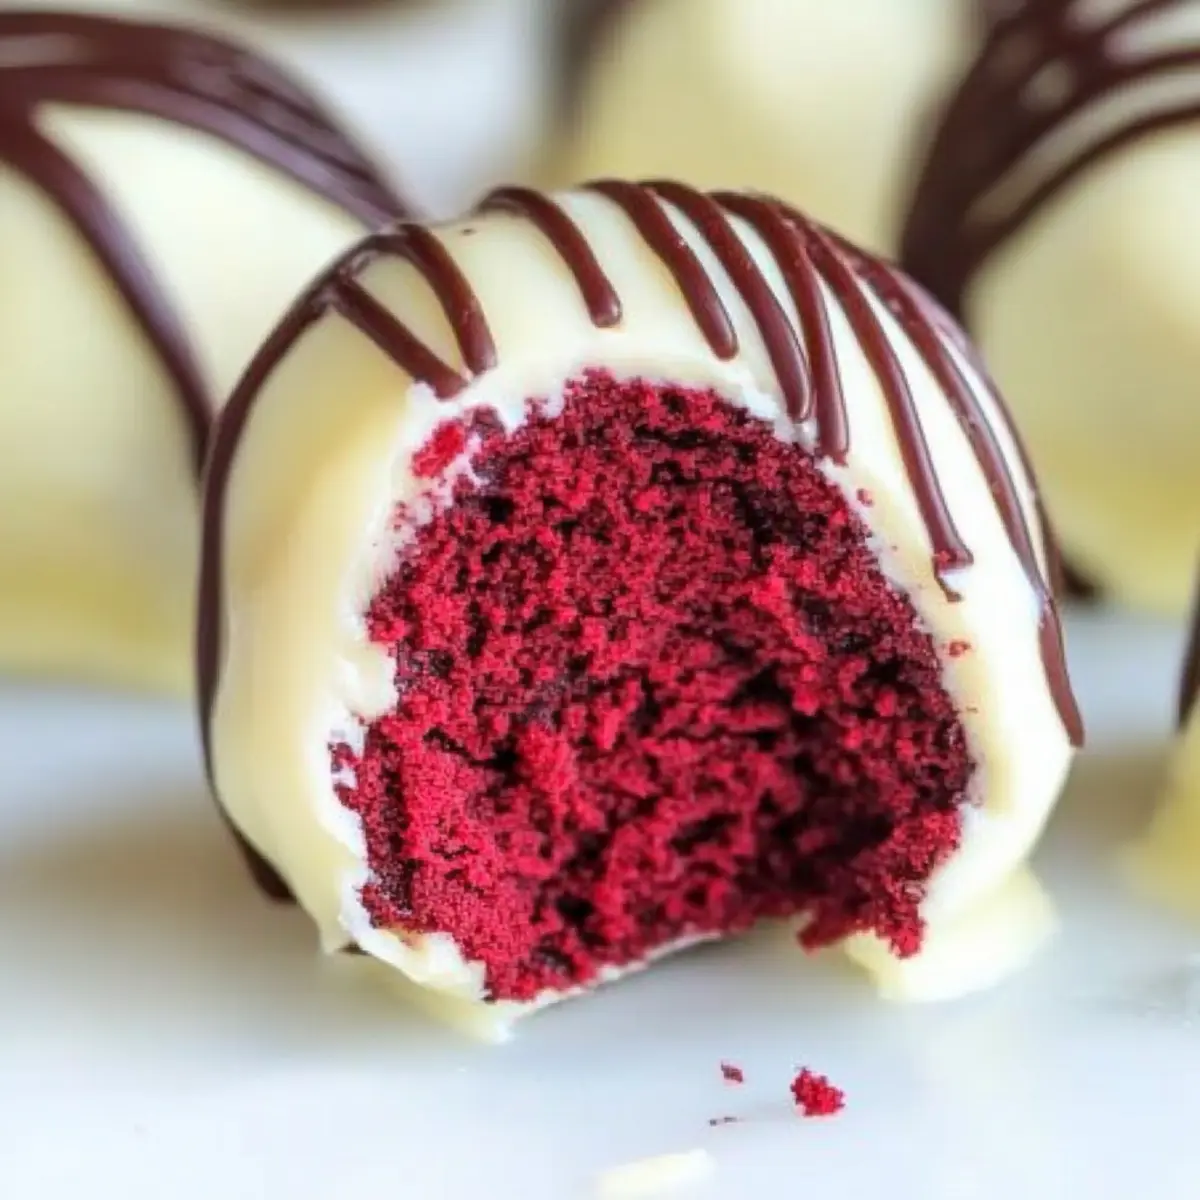
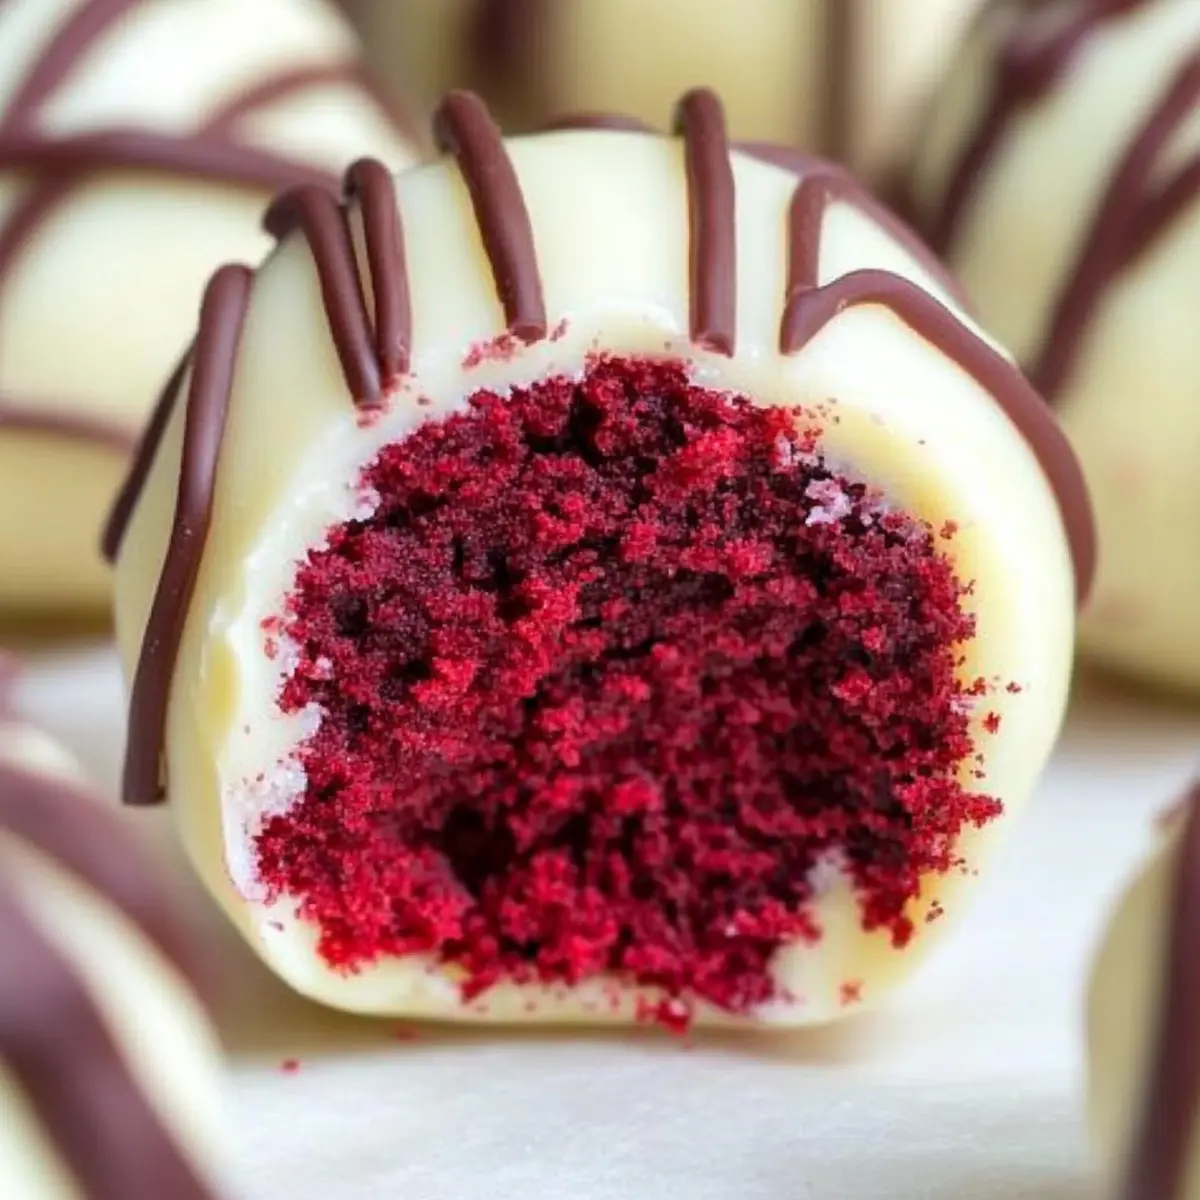
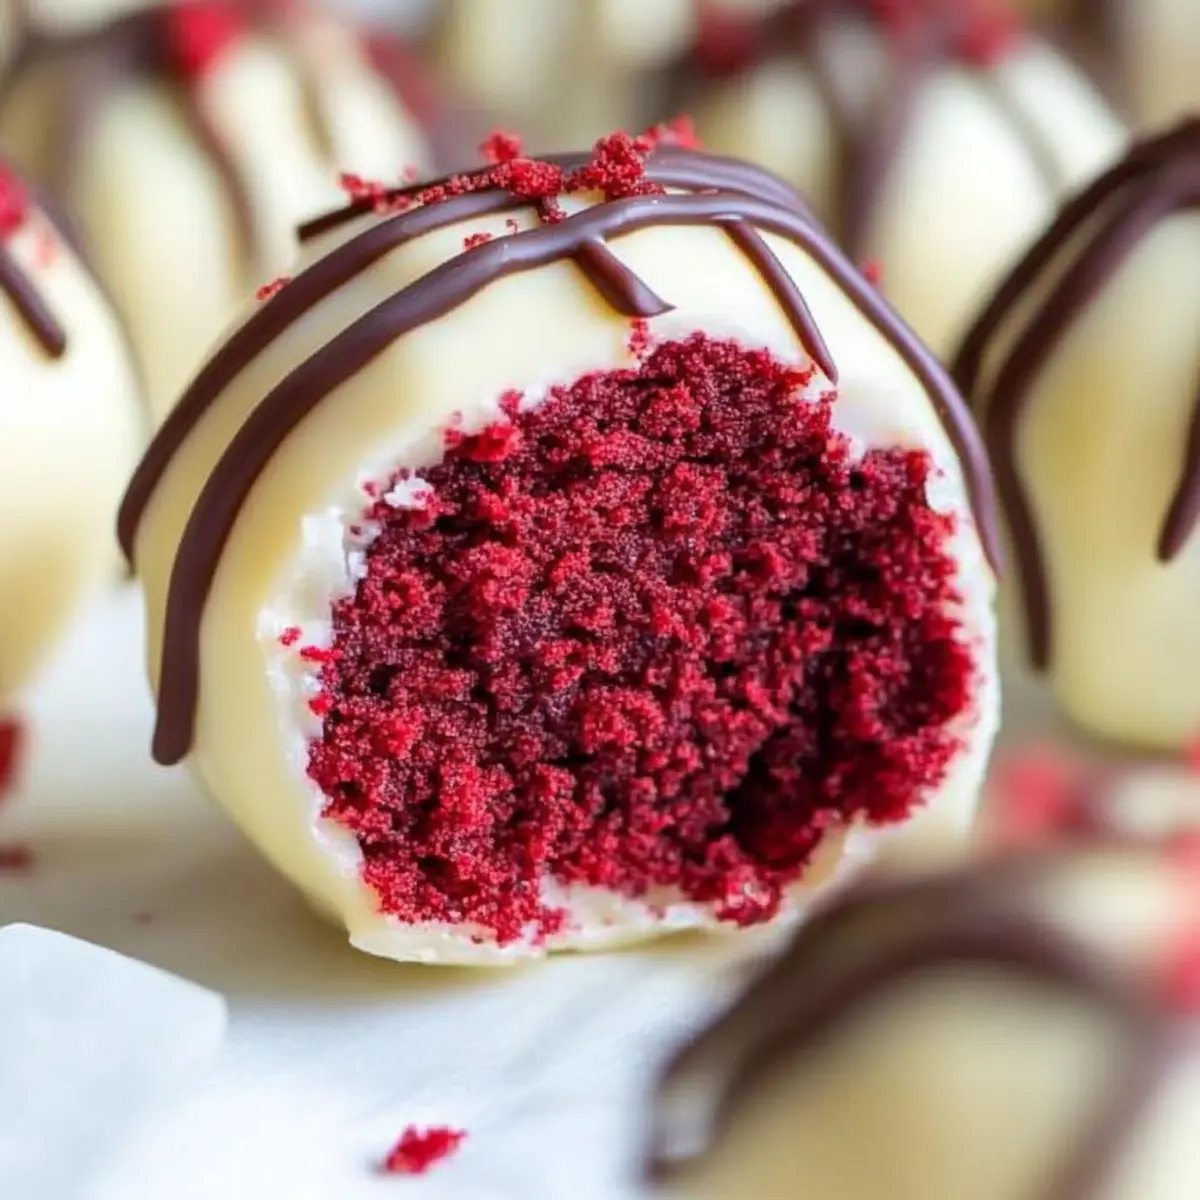
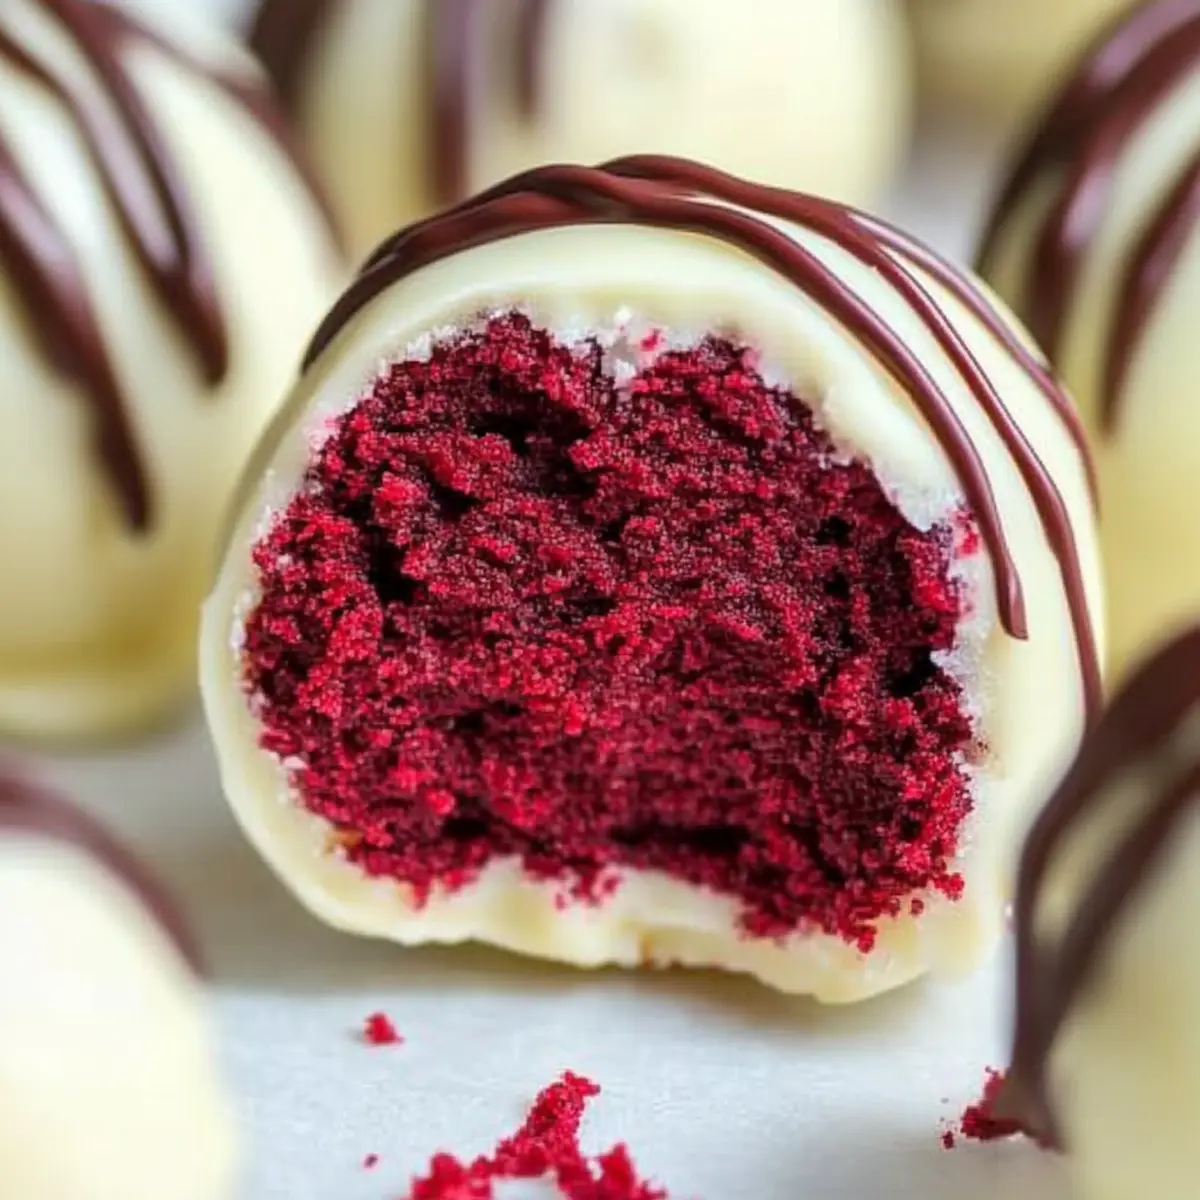
With the holiday season in full swing, it’s the perfect time to explore the delightful world of Red Velvet Truffles! These easy-to-make Christmas treats bring a touch of elegance to your festivities without the fuss of baking an entire cake. Imagine biting into a rich, creamy center nestled within a crisp white chocolate shell—pure bliss in every morsel. Not only are they a pretty addition to your dessert table, but these no-bake truffles can also be made ahead of time, making them a lifesaver during the busy holiday rush. And because I love giving options, I’ll show you how to personalize them with variations like cream cheese frosting or a festive peppermint twist. Are you ready to make your holidays even sweeter? Let’s dive into this scrumptious recipe!
Why Are Red Velvet Truffles a Must-Try?
Irresistible Flavor: The rich taste of red velvet combined with creamy cream cheese is a match made in dessert heaven.
No-Bake Simplicity: Perfect for busy bakers, these treats require minimal effort without sacrificing flavor or presentation.
Make Ahead: Whip up these truffles in advance; they store perfectly in the fridge, saving you time during holiday gatherings.
Endless Variations: Experiment with different coatings like dark chocolate, or add a festive kick with peppermint for a seasonal twist.
Crowd-Pleasing Appeal: Their stunning red color and elegant presentation will wow your guests, ensuring they’re the star of your dessert table! Don’t forget to check out my recipes for Peppermint Oreo Truffles and Raspberry Chocolate Truffles for more sweet inspirations.
Red Velvet Truffles Ingredients
For the Truffle Base
• Red Velvet Cake Mix – A boxed mix simplifies the process while providing that iconic flavor.
• Cream Cheese (8 oz) – Adds luscious creaminess; use cream cheese frosting for a quicker alternative if desired.
Advertisement
For the Coating
• White Chocolate (16 oz) – This beautiful shell offers sweetness and a smooth finish; be careful not to overheat it while melting.
• Semi-Sweet Chocolate (2 oz) – Optional drizzle for an elegant touch; dark chocolate can be used instead for a richer flavor.
Feel free to get creative with variations in your Red Velvet Truffles!
Step‑by‑Step Instructions for Red Velvet Truffles
Step 1: Bake the Cake
Begin by preheating your oven to 350°F (175°C). Prepare the red velvet cake mix according to the package instructions, pouring the batter into a greased cake pan. Bake for about 25-30 minutes, or until a toothpick inserted in the center comes out clean. Once baked, remove the pan from the oven and allow the cake to cool completely on a wire rack.
Step 2: Crumble the Cake
Once the red velvet cake is completely cool, transfer it to a large mixing bowl. Using your hands, crumble the cake into fine pieces, ensuring there are no large chunks left. Next, add 8 ounces of cream cheese to the crumbled cake. Mix both ingredients thoroughly until well combined and the mixture is smooth, resembling cookie dough.
Step 3: Form the Truffles
With the cake mixture ready, it’s time to form the truffles. Take small portions of the mixture and roll them into bite-sized balls, about 1 inch in diameter. Place the rolled truffles onto a parchment-lined baking sheet, ensuring they have space between them. Once done, refrigerate the truffles for at least 30 minutes to let them firm up, making them easier to coat.
Step 4: Melt the Chocolate
Prepare to coat your Red Velvet Truffles by melting the white chocolate. You can do this in a microwave-safe bowl, heating it in 30-second intervals at medium power, stirring in between until smooth. Alternatively, use a double boiler on low heat to melt the chocolate gently. Be cautious not to overheat; the chocolate should be silky and fluid, perfect for dipping.
Step 5: Coat the Truffles
Take the chilled truffles out of the refrigerator, ready for coating. Using a fork or dipping tool, dip each truffle into the melted white chocolate, ensuring it’s evenly coated. Gently shake off any excess chocolate and return the truffle to the parchment-lined sheet. Repeat until all truffles are coated, allowing the chocolate to set slightly.
Step 6: Add Finishing Touches
While the white chocolate coating is still soft, get creative with decor! Drizzle the tops with melted semi-sweet chocolate using a piping bag or a fork for an elegant touch. You can also sprinkle decorative items like crushed peppermint or colored sprinkles to enhance the festive look. Let the truffles sit until the chocolate coating has fully set.
Step 7: Serve and Store
Once the chocolate is completely hardened, your delightful Red Velvet Truffles are ready to serve. For the best flavor, keep them chilled in an airtight container in the refrigerator. Enjoy these festive treats within a week, or freeze them uncoated for longer storage. If frozen, allow them to thaw in the refrigerator before coating and decorating.
Storage Tips for Red Velvet Truffles
-
Fridge: Store your Red Velvet Truffles in an airtight container in the refrigerator for up to one week. This keeps them fresh and ensures they maintain their delightful creamy texture.
-
Freezer: For longer storage, freeze uncoated truffles by placing them in a single layer on a baking sheet. Once frozen, transfer them to an airtight container or freezer bag for up to 2-3 months.
-
Thawing: To enjoy frozen truffles, simply move them to the fridge for an overnight thaw before coating them with chocolate. This gentle approach helps preserve their delicious flavor and texture.
-
Reheating: If you’ve drizzled chocolate on the truffles, avoid reheating them. Instead, serve them chilled for the best experience, allowing their rich taste to shine through.
Red Velvet Truffles Variations & Substitutions
Feel free to get creative and make these delightful Red Velvet Truffles your own! The possibilities are endless, so let’s explore some fun twists.
-
Dairy-Free: Swap cream cheese with a dairy-free cream cheese alternative for a delicious lactose-free version. Enjoy that rich texture without the dairy!
-
Dark Chocolate: Use dark chocolate instead of white for a deeper flavor that balances the sweetness beautifully. The contrast is truly delightful and perfect for chocolate lovers!
-
Peppermint Twist: Add a splash of peppermint extract to the cream cheese mixture or sprinkle crushed peppermint candies on top. This festive flavor adds a holiday cheer that’s irresistible.
-
Flavored Cream Cheese: Replace regular cream cheese with flavored options, like lemon or strawberry, for a refreshing twist that brightens the classic taste. Each bite brings a delightful surprise!
-
Nutty Crunch: Mix in crushed nuts like pecans or walnuts into the truffle base for added texture and crunch. It’s a wonderful way to enhance both flavor and mouthfeel!
-
Fruity Surprise: Fold in a bit of raspberry or cherry puree into the truffle mix for a fruity explosion. This contrast of flavors elevates each truffle to a new level of delight!
-
Seasonal Spices: Add warming spices like cinnamon or nutmeg into the mix for a cozy flavor profile, perfect for winter festivities. Spice it up and bring comforting aromas to your kitchen!
-
Mini Truffles: Roll smaller bite-sized truffles for a fun, easy-to-eat treat that allows everyone to enjoy more without feeling too guilty. They’re crowd-pleasers and perfect for sharing!
Don’t forget to explore other sweet inspirations like my Raspberry Chocolate Truffles or my festive Peppermint Oreo Truffles!
What to Serve with Red Velvet Truffles?
Elevate your dessert experience with delightful accompaniments that perfectly balance the richness of these creamy indulgences.
-
Coffee or Espresso: The boldness of coffee enhances the truffles’ sweetness, offering a comforting after-dinner pairing that’s hard to resist. Imagine sipping your favorite brew as you savor each bite—pure bliss.
-
Chocolate Mint Cookies: A crisp cookie with sweet chocolate and a hint of refreshing mint complements the truffles beautifully, adding a delightful crunch to your dessert spread.
-
Vanilla Ice Cream: Serve these truffles alongside a scoop of creamy vanilla ice cream for a luxurious dessert duo that contrasts rich flavors with a refreshing coolness.
-
Fruit Salad: A vibrant mix of fresh berries and citrus brightens the plate, providing a fresh and tangy contrast that cuts through the truffles’ sweetness perfectly.
-
Sparkling Wine: The bubbly effervescence of sparkling wine brings a festive touch to your celebration, making each bite of the truffles even more special.
-
Hot Chocolate: A warm mug of rich hot chocolate creates a cozy pairing. Indulge in the warmth of both treats as you celebrate the holiday spirit.
-
Peppermint Bark: For a festive flourish, serve peppermint bark alongside the truffles. The minty crunch beautifully enhances the rich flavors of the red velvet, creating a joyful holiday experience.
-
Cheesecake Bites: Mini cheesecake bites add a different creamy texture and flavor that pairs wonderfully with the luscious truffles, ensuring your dessert table is irresistible.
Make Ahead Options
These Red Velvet Truffles are perfect for busy home cooks looking to save time during the holiday rush! You can prepare the truffle mixture up to 24 hours in advance by crumbling the cooled red velvet cake and mixing it with cream cheese, then rolling the mixture into balls. Simply refrigerate the formed truffles until you’re ready to coat them. Additionally, uncoated truffles can be frozen for up to 3 months. Just remember to thaw them overnight in the refrigerator before dipping them in melted chocolate. When you’re ready to serve, simply coat them in chocolate and let the coating set—your festive truffles will be just as delicious as when freshly made!
Expert Tips for Red Velvet Truffles
-
Cool Before Crumbling: Make sure the red velvet cake is completely cooled before crumbling; this prevents a soggy mixture and ensures perfect truffles.
-
Chill For Shape: Refrigerate the rolled truffles for at least 30 minutes before dipping. This step is crucial for maintaining their shape during the coating process.
-
Perfectly Melted Chocolate: Use low heat and monitor your chocolate constantly while melting. Overheating can cause the chocolate to seize, ruining your coating for the Red Velvet Truffles.
-
Adjust Cream Cheese: If using cream cheese frosting instead of plain cream cheese, start with less and gradually incorporate more to achieve the desired consistency without overwhelming the mixture.
-
Variations Galore: Feel free to switch up the chocolate coating! Dark chocolate offers a richer taste, while adding peppermint extract can give a festive, seasonal kick to your truffles.
Red Velvet Truffles Recipe FAQs
How do I select the best ingredients for Red Velvet Truffles?
Absolutely! When picking your red velvet cake mix, look for one with a rich color and a good flavor profile. For the cream cheese, high-quality, full-fat versions provide the most creaminess. If using frosting instead, ensure it matches the flavor of your cake mix for a cohesive taste experience.
How should I store my Red Velvet Truffles?
You can store your delightful truffles in an airtight container in the refrigerator for up to one week. This method keeps them fresh and maintains their delicious creamy center. Just be sure not to stack them too tightly; you don’t want any chocolate to stick together!
Can I freeze Red Velvet Truffles, and if so, how?
Certainly! To freeze uncoated truffles, arrange them in a single layer on a baking sheet first. Once frozen, transfer them into a freezer-safe container or a resealable bag. They can be stored for up to 2-3 months. When you’re ready to enjoy, just move them to the refrigerator to thaw overnight. This way, their creamy texture stays intact!
What kind of troubleshooting tips do you have for making Red Velvet Truffles?
If your mixture seems too crumbly after combining the cake and cream cheese, you can gently knead it with your hands to incorporate more moisture. Alternatively, you can add a little more cream cheese or even a splash of milk until it reaches the right consistency. Also, ensure your white chocolate is smooth but not overheated; a seized chocolate can ruin your coating! If that happens, try adding a teaspoon of vegetable oil to help smooth it out again.
Are there any dietary considerations for Red Velvet Truffles, especially regarding allergies?
For those with dairy allergies, you can substitute cream cheese with a dairy-free alternative, such as cashew cream, though it won’t have quite the same flavor. Additionally, if there are nut allergies, be sure to check the chocolate and other ingredients for any potential cross-contamination. It’s best to read labels to ensure your festive treats are safe for everyone to enjoy!
How do I get a nice coating on my Red Velvet Truffles?
To achieve a beautifully coated truffle, ensure that your chocolate is perfectly melted and smooth. Dip each truffle gently, letting excess chocolate drip off before returning it to the parchment paper. You can also add a drizzle of contrasting chocolate while the coating is still wet for a decorative finish. If you want an even coating, consider using dipping tools or forks to help guide your truffles into the chocolate bath!
Red Velvet Truffles: Festive No-Bake Delights to Savor
Ingredients
Equipment
Method
- Preheat your oven to 350°F (175°C). Prepare the red velvet cake mix according to the package instructions, pouring the batter into a greased cake pan. Bake for about 25-30 minutes, or until a toothpick inserted in the center comes out clean. Allow the cake to cool completely on a wire rack.
- Once the red velvet cake is completely cool, crumble it into a large mixing bowl. Add 8 ounces of cream cheese and mix until smooth, resembling cookie dough.
- Roll the mixture into bite-sized balls, about 1 inch in diameter, and place them on a parchment-lined baking sheet. Refrigerate for at least 30 minutes to firm up.
- Melt the white chocolate in a microwave-safe bowl in 30-second intervals, stirring in between, or use a double boiler. Ensure the chocolate is silky and fluid.
- Using a fork or dipping tool, dip each truffle into the melted white chocolate until evenly coated. Shake off excess chocolate and return them to the baking sheet.
- While the coating is still soft, drizzle melted semi-sweet chocolate over the tops and add decorative items like crushed peppermint or sprinkles. Let the truffles sit until the chocolate coating has fully set.
- Once hardened, store the truffles in an airtight container in the refrigerator. Enjoy within a week, or freeze uncoated truffles for longer storage.