Advertisement
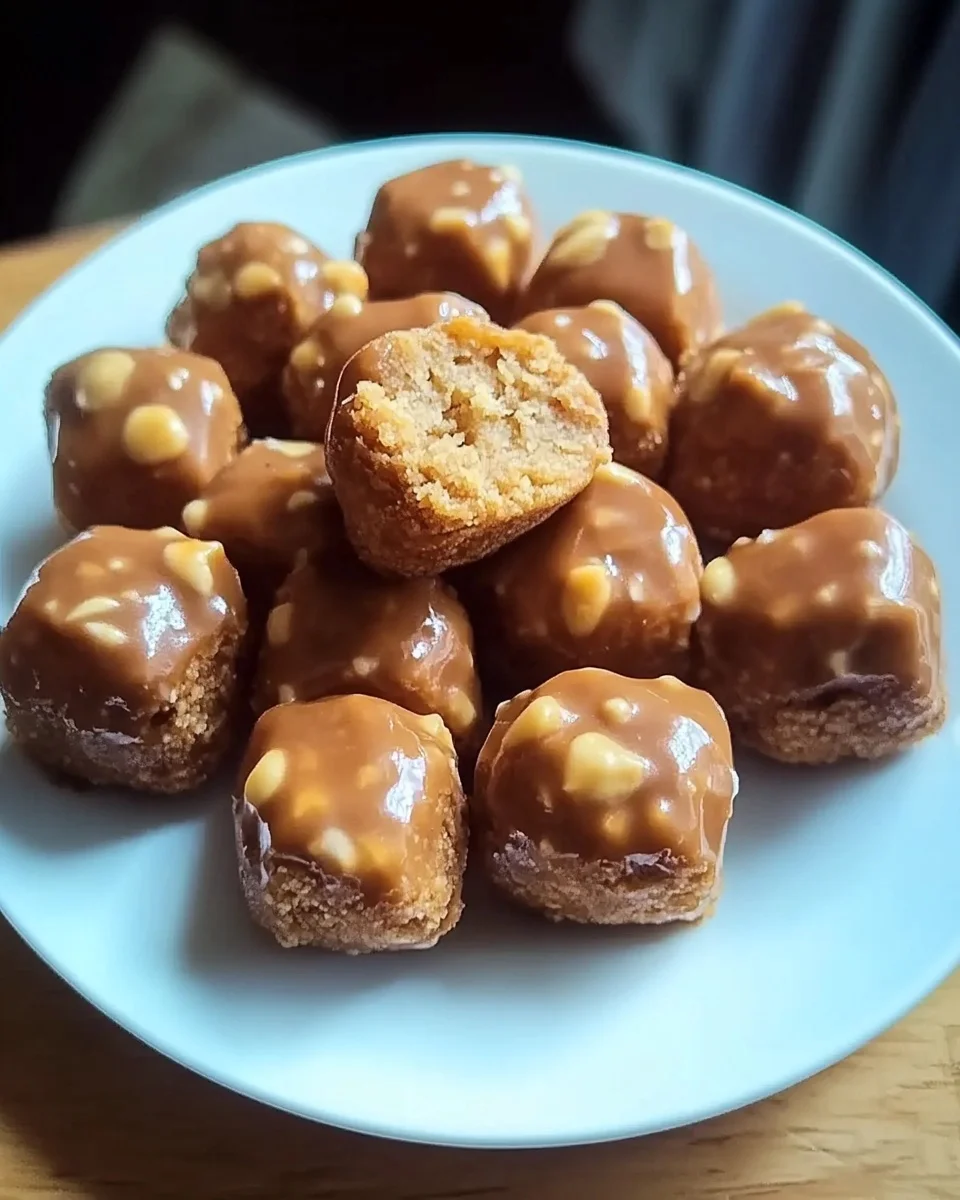
If you love the crunchy, peanut buttery goodness of Butterfinger candy bars and the indulgent richness of chocolate, then these Butterfinger Bliss Bites are a must-try. These bite-sized treats combine creamy peanut butter, crushed Butterfinger bars, graham crackers, and chocolate for the ultimate sweet and salty snack.
Unlike traditional desserts that require baking, these no-bake delights are quick, easy, and foolproof, making them perfect for holidays, parties, or everyday cravings. Whether you’re a seasoned baker or just starting out, these treats require minimal effort while delivering maximum flavor.
Why You’ll Love These Butterfinger Bliss Bites
1. No Oven Needed
There’s no need to turn on the oven, making these perfect for hot summer days or quick dessert fixes.
2. A Dreamy Combination of Textures
The crunch of Butterfinger pieces, the smoothness of peanut butter, and the velvety chocolate coating create an irresistible contrast.
Advertisement
3. Simple & Quick
With just a handful of ingredients and a few easy steps, these treats can be whipped up in under an hour—including chilling time!
4. Crowd-Pleasing & Portable
These bite-sized confections are great for parties, holidays, road trips, or packing in lunchboxes for a special treat.
5. Highly Customizable
You can mix up the flavors by using different nut butters, chocolate varieties, or add-ins like chopped nuts or pretzels.
Ingredients:
- Softened butter
- Vanilla extract
- Chocolate bark or chocolate chips
- Crushed Butterfinger candy bars
- Powdered sugar
- Peanut butter (avoid all-natural varieties)
- Graham cracker crumbs
- Optional garnishes: additional crushed Butterfinger bars, festive sprinkles, or coarse sea salt
Instructions:
- Prepare the Dough: In a mixing bowl, combine peanut butter and softened butter. Use an electric or stand mixer set to medium speed and blend until the mixture is creamy and uniform.
- Add Aromatic Notes: Incorporate vanilla extract and blend thoroughly.
- Sweeten the Deal: Gradually add powdered sugar in increments, blending at a low speed. Don’t forget to scrape down the sides of the bowl to ensure even mixing.
- Crunch Time: Gently fold in graham cracker crumbs and crushed Butterfinger bars.
- Shape ’em Up: Line a large cookie sheet with parchment paper. Scoop out approximately 1 to 1½ tablespoons of the dough, roll into neat balls, and place on the cookie sheet.
- Chilling Phase: Freeze the dough balls on the sheet for roughly 30 minutes until they are completely firm.
- Melting the Chocolate: Once the dough balls are chilled, proceed to melt the chocolate. Utilize a microwave-safe bowl and heat in 30-second spurts at 50% power, stirring in between each interval. Be cautious not to overheat; some lumps should remain and will melt as you stir.
- Coat and Decorate: Submerge each chilled ball into the melted chocolate. You can fully coat them or leave a bit of the peanut butter mixture exposed.
- Finishing Touches: Add a sprinkle of additional crushed Butterfinger bars, holiday-themed sprinkles, or a dash of flaky sea salt for that extra pop.
- The Grand Finale: Allow the chocolate to solidify completely before indulging in your Butterfinger Bliss Balls.
Notes:
- Store these delights in an airtight container and refrigerate for up to a week.
- Stick to conventional peanut butter brands like Jif or Skippy, as all-natural varieties can be too oily.
- For a smoother texture, chocolate bark is recommended. Alternatively, you can use a mix of chocolate bark and chocolate chips or opt for tempered chocolate chips.
- A double boiler can be used for melting chocolate at a low or medium-low heat setting if you prefer that method.
Secrets to Making the Perfect Butterfinger Bliss Bites
1. Choose the Right Peanut Butter
For the best consistency, use a regular creamy peanut butter like Jif or Skippy. Avoid natural peanut butter, as the oils can cause the mixture to be too runny.
2. Crush the Butterfingers Just Right
To achieve the perfect crunch, crush the Butterfinger bars into small bits rather than a fine powder. Too fine, and you lose the crunch—too chunky, and the balls won’t hold together well.
3. Don’t Skip the Chilling Step
Freezing the peanut butter mixture before dipping prevents the chocolate from melting the dough and helps the bites keep their shape.
4. Use High-Quality Chocolate
For a smoother coating, use chocolate bark, melting wafers, or tempered chocolate instead of regular chocolate chips, which can seize up when melted.
5. Add a Garnish for Extra Appeal
Before the chocolate sets, sprinkle the bites with extra crushed Butterfinger, flaky sea salt, or festive sprinkles for added texture and presentation.
Fun Variations to Try
1. White Chocolate Butterfinger Bites
Swap out the regular chocolate for white chocolate to create a lighter, creamier version of these treats.
2. Dark Chocolate Peanut Butter Bites
For a richer, slightly less sweet treat, coat the balls in dark chocolate instead of milk chocolate.
3. Nutty Butterfinger Bliss Bites
Add chopped almonds, pecans, or cashews into the mixture for extra crunch.
4. Pretzel Butterfinger Bites
Stir in crushed pretzels for a salty-sweet combination that enhances the Butterfinger flavor.
5. Coconut Butterfinger Balls
Roll the peanut butter mixture in toasted coconut flakes before dipping in chocolate for a tropical twist.
Best Ways to Serve Butterfinger Bliss Bites
1. As a Party Dessert
Arrange them on a decorative platter with a variety of bite-sized treats like truffles, cake pops, and chocolate-covered strawberries.
2. As a Gift
Place them in a decorative tin or gift box lined with parchment paper for a homemade edible gift.
3. With Ice Cream
Serve alongside a scoop of vanilla, chocolate, or peanut butter ice cream for a decadent dessert pairing.
4. On a Dessert Charcuterie Board
Pair them with cookies, chocolate bars, nuts, and fruit for a fun and indulgent dessert platter.
5. With Coffee or Hot Chocolate
Enjoy one with a hot cup of coffee, espresso, or hot chocolate for a cozy, sweet treat.
How to Store and Keep Fresh
Refrigeration:
- Store in an airtight container in the refrigerator for up to one week.
- Let them sit at room temperature for 5–10 minutes before eating for the best texture.
Freezing:
- Freeze in a single layer on a baking sheet before transferring to a freezer-safe bag or container.
- Store for up to three months.
- Thaw in the fridge or eat straight from the freezer for a firmer texture.
Frequently Asked Questions
1. Can I Use a Different Candy Bar Instead of Butterfingers?
Yes! Try using Snickers, Reese’s Cups, Heath Bars, or Kit-Kats for a different flavor twist.
2. Can I Make These Without Graham Cracker Crumbs?
Yes, but the graham crackers help bind the mixture. You can substitute with crushed vanilla wafers, crushed pretzels, or finely ground oats.
3. Why Did My Chocolate Seize Up While Melting?
Chocolate can seize up due to overheating or exposure to moisture. To avoid this:
- Melt chocolate slowly using a double boiler or microwave in short 30-second intervals at 50% power.
- Stir frequently and stop microwaving once the chocolate is mostly melted—residual heat will melt the rest.
4. Can I Make These in Advance?
Yes! These store well in the fridge or freezer, making them a great make-ahead treat for holidays and parties.
5. Can I Make These Vegan?
Yes! Use dairy-free chocolate, vegan graham crackers, and a peanut butter brand that doesn’t contain dairy.
6. How Do I Get a Smooth Chocolate Coating?
- Use melting chocolate or tempered chocolate for a glossy finish.
- Dip the balls using a fork or dipping tool, letting excess chocolate drip off before placing them on parchment paper.
Final Thoughts – A Bite-Sized Treat Worth Making
Butterfinger Bliss Bites are everything you could want in a dessert—sweet, salty, crunchy, and coated in rich chocolate. These no-bake treats are incredibly easy to make, store well, and can be customized in countless ways, making them a staple for parties, gifts, and quick indulgences.
Whether you enjoy them as a late-night snack, a party treat, or a gift for a fellow chocolate lover, these bites are guaranteed to satisfy. With just a few ingredients and minimal prep time, you’ll have a batch of irresistible Butterfinger treats that everyone will love.
So go ahead—whip up a batch today and indulge in these perfect little bites of heaven!
Chocolate-Dipped Butterfinger Balls
Ingredients
Method
- Prepare the Dough: In a mixing bowl, combine peanut butter and softened butter, mixing until smooth and creamy.
- Add Vanilla & Sugar: Stir in vanilla extract, then gradually mix in powdered sugar until fully incorporated.
- Fold in the Crunch: Add graham cracker crumbs and crushed Butterfinger bars, stirring until evenly combined.
- Shape the Bites: Roll the mixture into small balls (about 1–1.5 tablespoons each) and place them on a parchment-lined baking sheet.
- Chill the Dough Balls: Freeze for 30 minutes until firm.
- Melt the Chocolate: Microwave chocolate bark or chips in 30-second intervals, stirring in between, until smooth.
- Dip in Chocolate: Coat each chilled ball in melted chocolate, letting excess drip off.
- Garnish & Set: Place coated balls back on the baking sheet and sprinkle with crushed Butterfinger, sea salt, or sprinkles before the chocolate sets.
- Let Harden & Serve: Allow the chocolate to fully harden before serving. Enjoy!
Notes
- Store in an airtight container in the fridge for up to one week.
- Freeze for up to three months and enjoy straight from the freezer or thaw in the fridge.
- Use chocolate bark or melting wafers for a smooth coating instead of regular chocolate chips.
- Avoid natural peanut butter, as the oil separation may affect texture.
- For a lighter variation, swap milk chocolate for dark or white chocolate.