Advertisement
As the vibrant colors of the sunset danced across the horizon, I found myself dreaming of a dessert that captures that same magic. Enter my No-Bake Dragon Fruit Cheesecake! This delightful treat combines a smooth, creamy filling with a buttery graham cracker crust, taking your taste buds on a tropical adventure. It’s not just visually stunning; it’s also a breeze to prepare, making it the perfect dessert to share at gatherings or to enjoy on a quiet evening at home. Plus, it’s a fantastic way to impress guests while keeping things effortlessly delicious. Curious about how to create this enticing masterpiece? Let’s dive into the recipe and bring a slice of paradise to your table!
Why Choose Dragon Fruit Cheesecake?
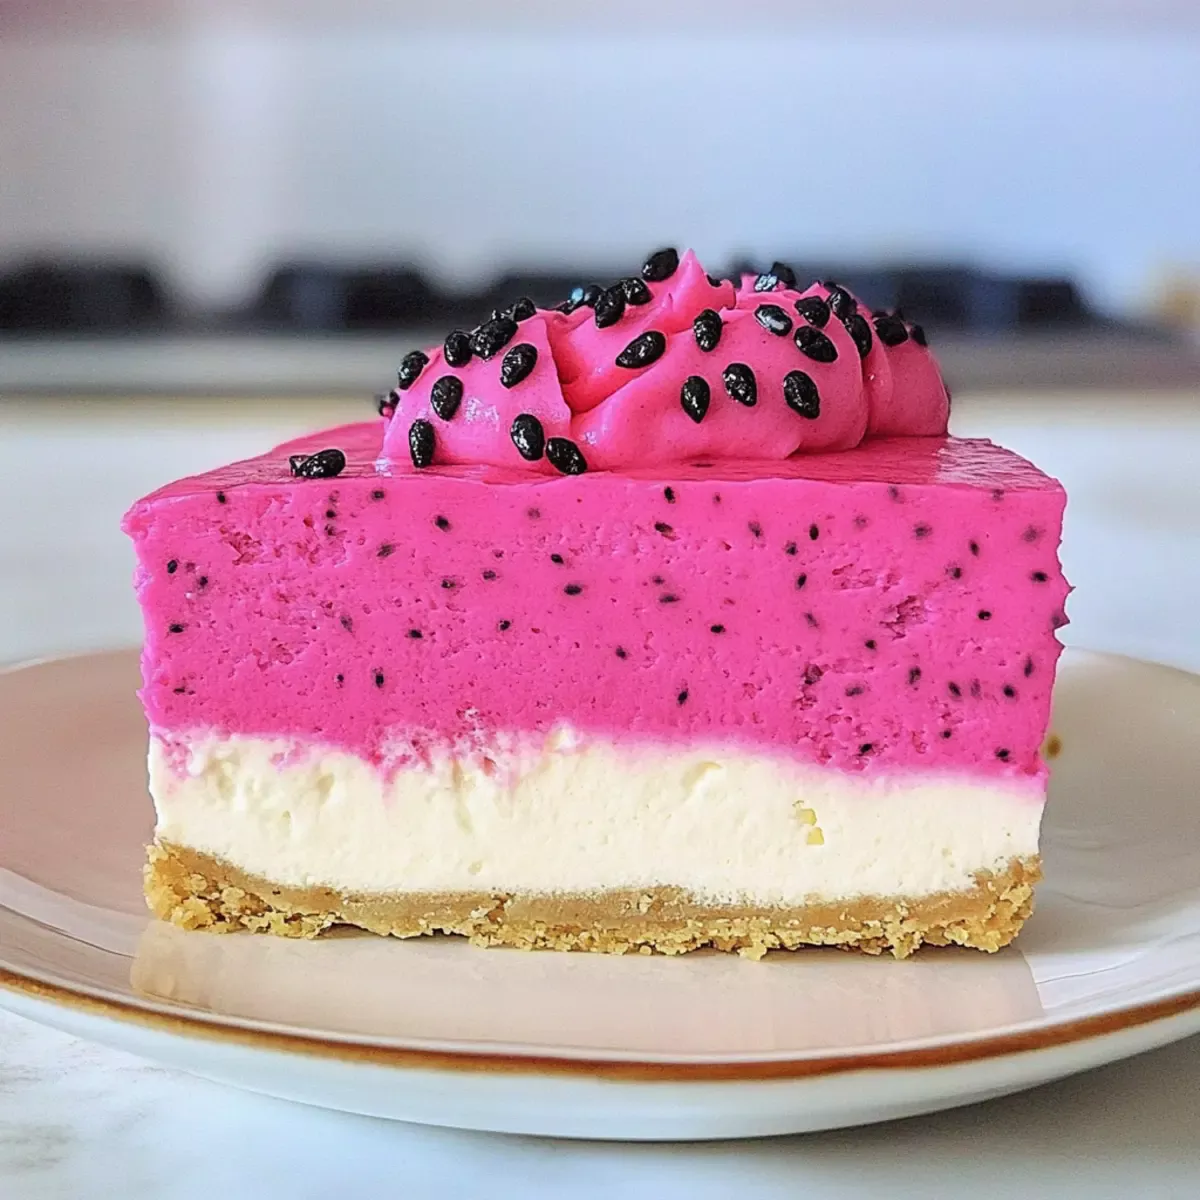
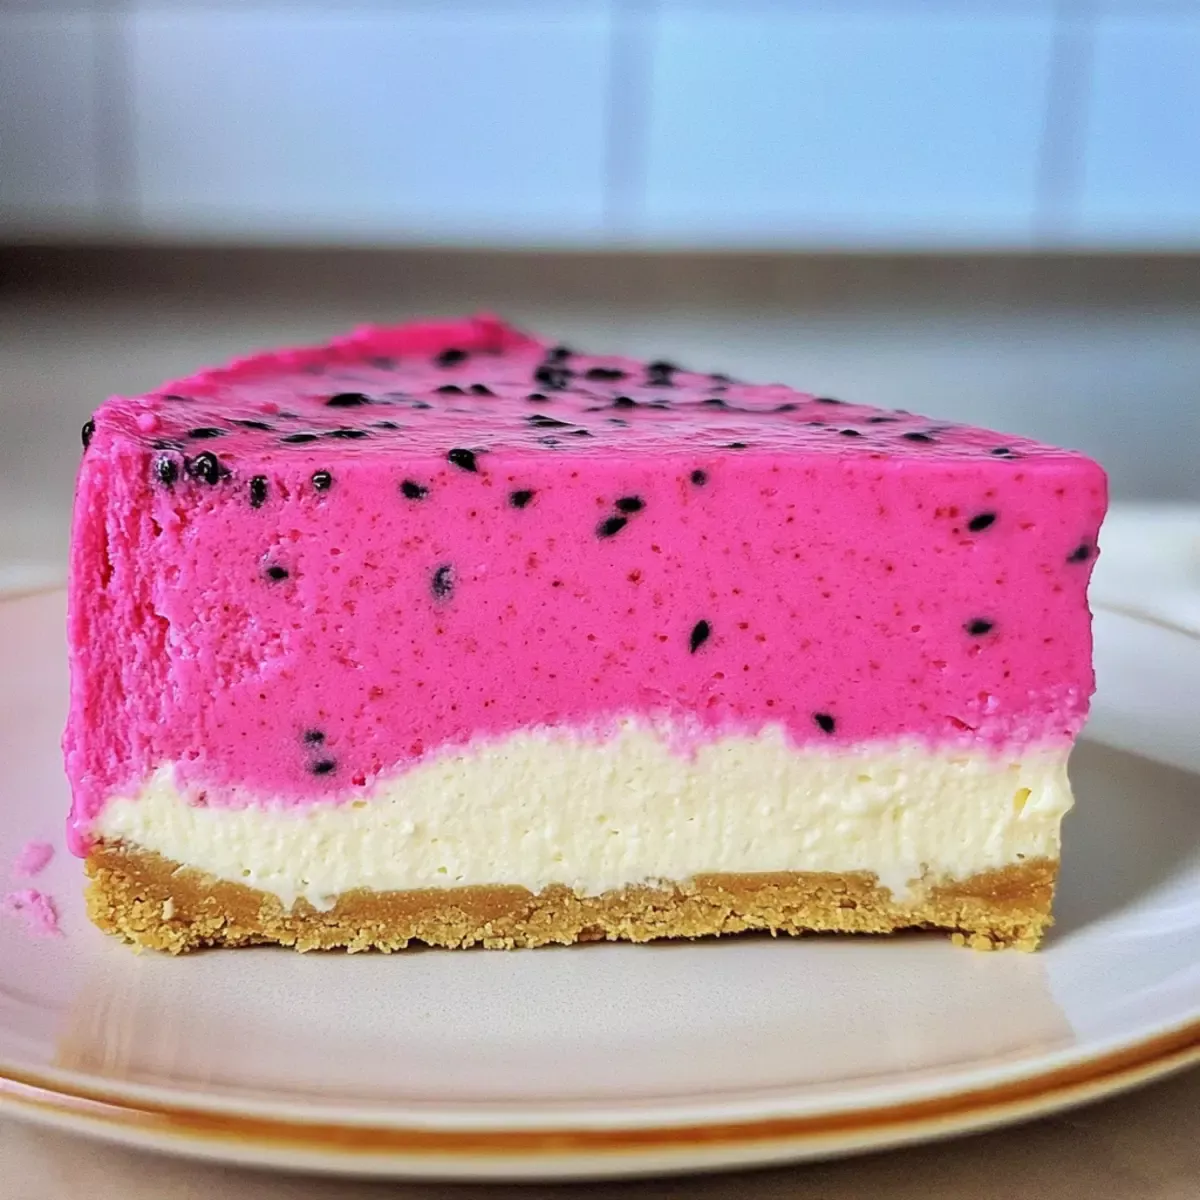
Vibrant Colors: This cheesecake is not just a dessert; it’s a masterpiece that brightens up any table with its stunning pink and white layers. Creamy Texture: The luscious filling made from whipped cream and cream cheese creates a melt-in-your-mouth experience that will leave everyone asking for seconds. No Bake Convenience: Skip the oven! This recipe is a breeze to whip up, perfect for busy chefs looking for an impressive yet easy dessert. Tropical Twist: With the unique flavor of dragon fruit, this cheesecake transports you to a tropical getaway, making it ideal for summer gatherings or festive occasions. You might also enjoy our Strawberry Cheesecake Crunch for another vibrant option. Crowd-Pleaser: Whether it’s a family gathering or a dinner party, this cheesecake is sure to impress both kids and adults alike!
Dragon Fruit Cheesecake Ingredients
Dive into the enchanting world of flavors with this vibrant dessert!
Advertisement
For the Crust
- Graham Crackers – Provides a sweet, buttery base; swap for gluten-free crackers to accommodate dietary needs.
- Sugar – Sweetens the crust and filling; feel free to adjust based on your sweetness preference.
- Butter – Binds the crust components together; coconut oil can be used for a dairy-free twist.
For the Filling
- Cream Cheese – Delivers a rich, creamy texture; opt for full-fat for the best results.
- Heavy Cream – Whipped to create an airy filling; substitute with coconut cream for a dairy-free alternative.
- Vanilla Extract – Enhances the overall flavor; avoid imitation for the best taste experience.
- Unflavored Gelatin – Helps stabilize the cheesecake; agar-agar can be utilized as a vegetarian substitute.
- Water – Used to dissolve the gelatin.
For Color & Flavor
- Neon Pink & Purple Gel Food Coloring – Adds eye-catching hues; explore natural colorants if you prefer a healthier option.
- Frozen Dragon Fruit – Infuses the cheesecake with tropical flavor and striking color; fresh dragon fruit works beautifully if available.
Now you have everything you need to create your stunning Dragon Fruit Cheesecake!
Step‑by‑Step Instructions for Dragon Fruit Cheesecake
Step 1: Prep Dragon Fruit
Begin by placing your frozen dragon fruit in a bowl to thaw for about 30 minutes at room temperature. You’ll know it’s ready when it becomes soft and easily mashable. If you’re using fresh dragon fruit, simply peel and chop it into small pieces. This will create a luscious, tropical flavor that’s essential for your Dragon Fruit Cheesecake.
Step 2: Make Crust
Crush the graham crackers into fine crumbs using a food processor, which should take about 1 minute. Transfer the crumbs into a bowl and mix in sugar and melted butter until well combined. Press this mixture firmly into the bottom of a spring-form pan to create an even layer. Chill the crust in the freezer for at least 15 minutes to help it set.
Step 3: Whip Cream
In a large mixing bowl, beat the heavy cream and sugar using an electric mixer on medium speed until stiff peaks form, approximately 3-4 minutes. You’ll want it to be thick yet fluffy, ideal for folding into your cheesecake filling. After whipping, set the bowl in the refrigerator to keep the cream cold while you prepare the cream cheese mixture.
Step 4: Mix Cream Cheese
Beat the softened cream cheese in a separate bowl until smooth and creamy, around 2-3 minutes at medium speed. Gradually add sugar and vanilla extract, mixing well until everything is fully incorporated. This creamy base will provide the lush texture for your Dragon Fruit Cheesecake, so ensure there are no lumps for a perfect finish.
Step 5: Combine
Gently fold the whipped cream into the cream cheese mixture with a spatula until blended and smooth, taking care not to deflate the whipped cream. The resulting filling should be light and airy, embodying the vibrant spirit of your dragon fruit. This mixture creates the heart of your cheesecake, so be thorough yet gentle during this step.
Step 6: Prepare Gelatin
In a small saucepan, dissolve unflavored gelatin in warm water according to package instructions, usually over low heat for 2-3 minutes. Allow it to cool slightly but not set, as you want it to blend smoothly into the cheesecake batter. This gelatin will ensure your Dragon Fruit Cheesecake holds its shape beautifully.
Step 7: Layer
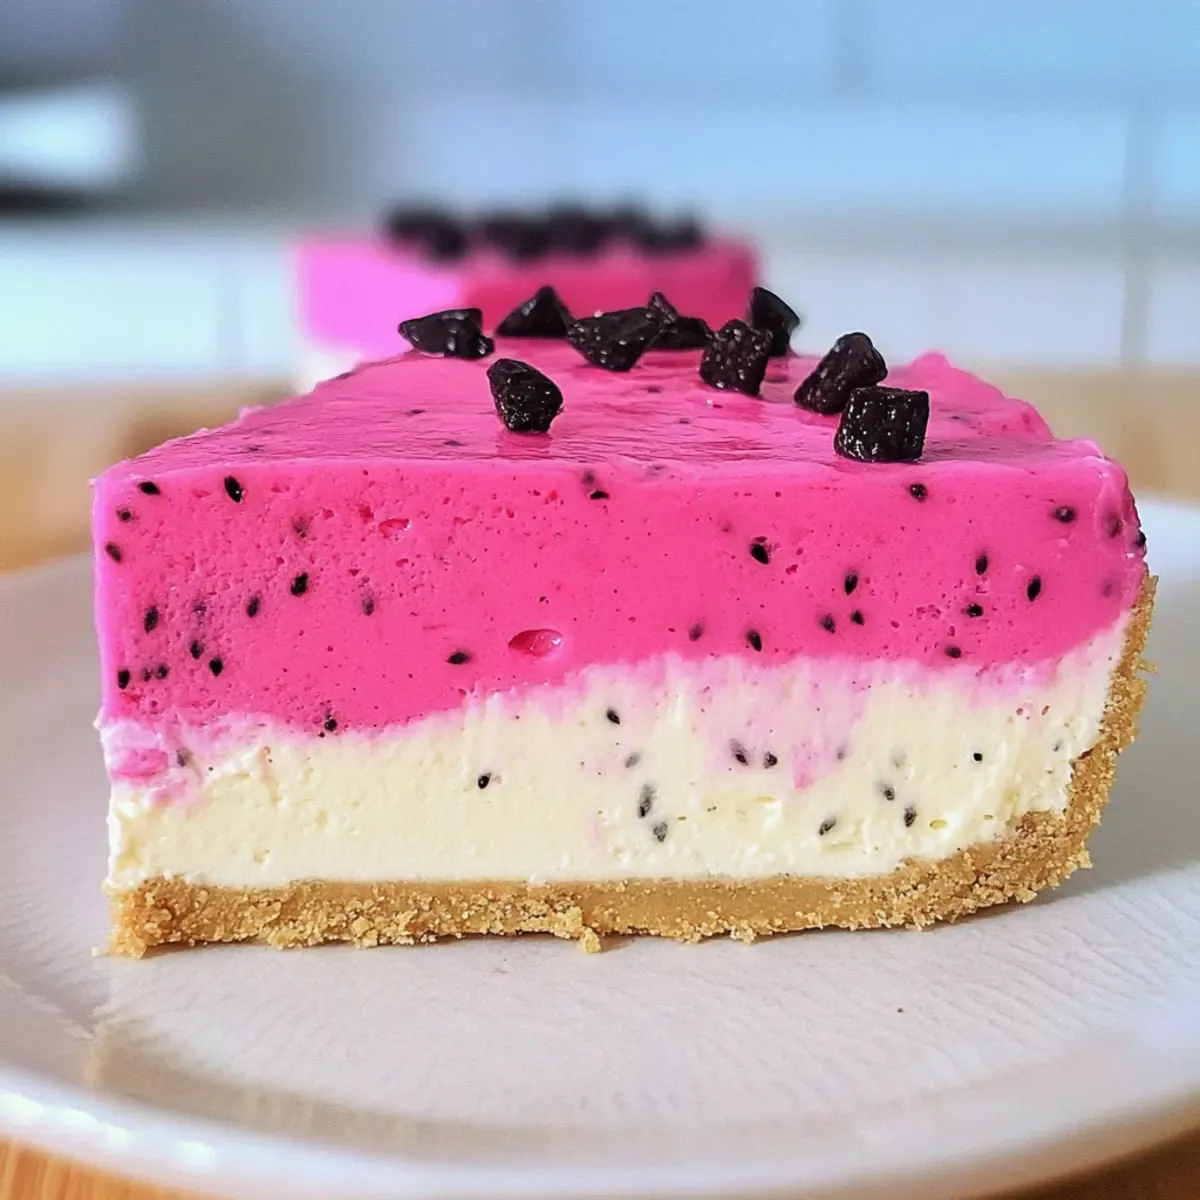
Pour half of the cheesecake mixture into the chilled crust, smoothing it out evenly with a spatula. Freeze this layer for approximately 1 hour or until firm to the touch. This base layer creates a stunning contrast to the vibrant upper layer, setting the stage for the tropical flavors to come.
Step 8: Add Dragon Fruit
In a bowl, mix the thawed dragon fruit with the remaining cheesecake batter until evenly combined. You’ll see the lovely colors while mixing! Carefully pour this dragon fruit-infused batter over the frozen white layer, smoothing it out gently. Return the cheesecake to the freezer for at least 4 hours, or ideally overnight, to fully firm up and meld the flavors.
Step 9: Serve
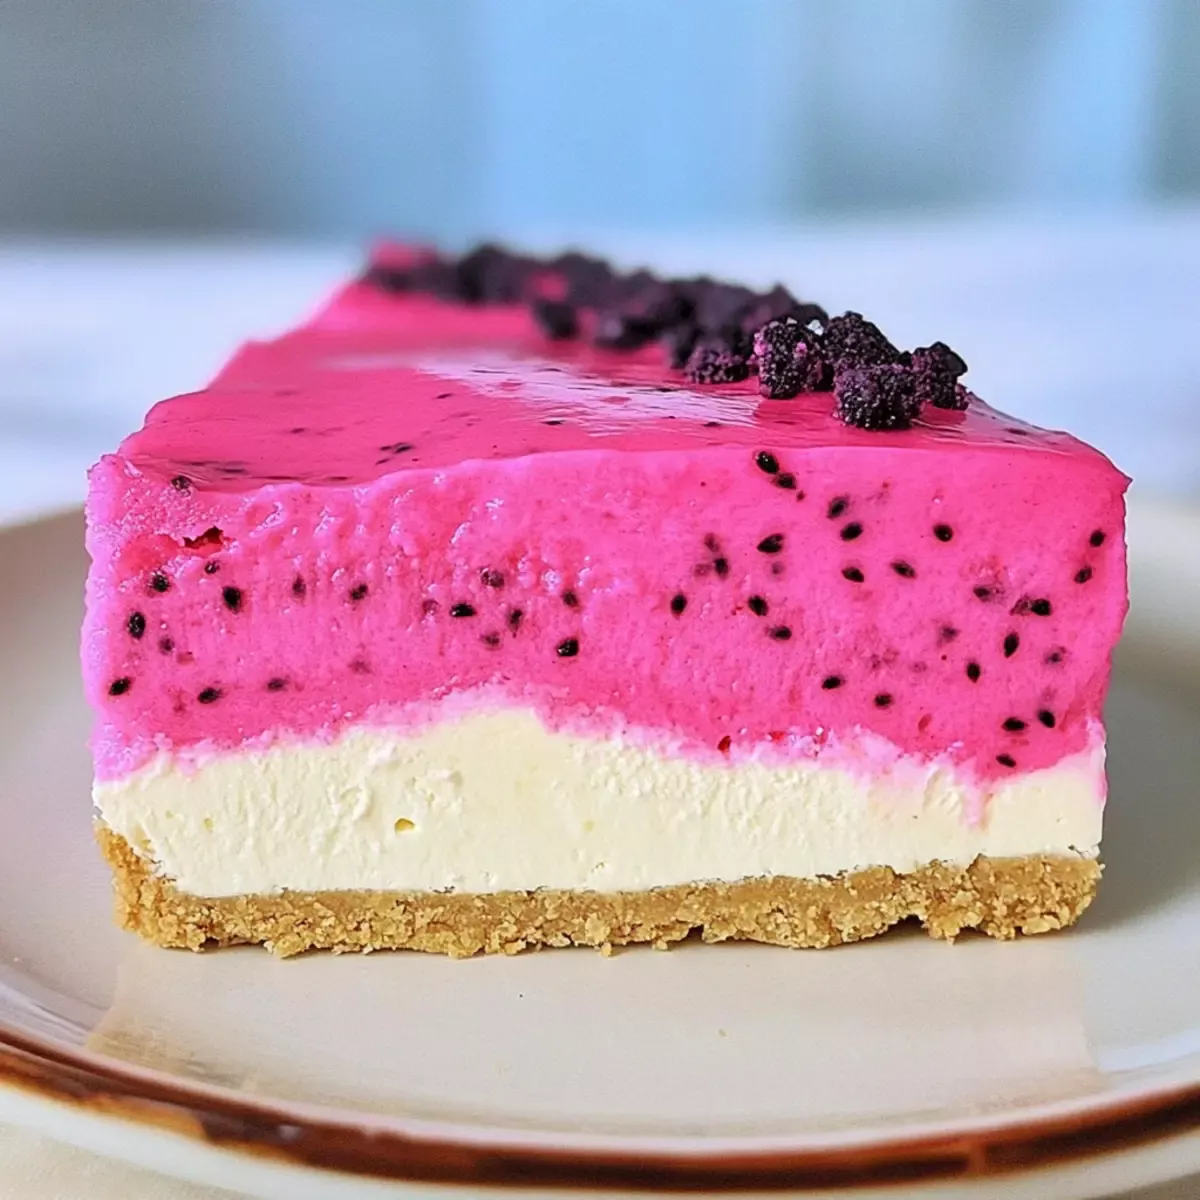
Once fully chilled, remove the cheesecake from the freezer and carefully release it from the spring-form pan. Use a sharp serrated knife, warming it in hot water if needed, to slice through the creamy layers. Your stunning Dragon Fruit Cheesecake is now ready to be served, showcasing its beautiful colors and creamy texture to delight your guests!
Dragon Fruit Cheesecake Variations
Feel free to explore these fun and flavorful twists on your Dragon Fruit Cheesecake!
-
Mango Madness: Substitute dragon fruit with ripe mango for a tropical twist. The sweet and juicy flavor pairs beautifully with the creamy filling.
-
Raspberry Ripple: Swirl in fresh or frozen raspberries to add a tart contrast. This variation brings a burst of color and flavor to each slice.
-
Nutty Crust: Use ground almonds or walnuts instead of graham crackers for a delightful crunch. It adds a rich, nutty flavor that complements the cheesecake beautifully.
-
Chocolate Delight: Incorporate cocoa powder into the cream cheese mixture for a chocolate dragon fruit cheesecake. This rich combination makes for an irresistible dessert.
-
Coconut Bliss: Add shredded coconut to the crust for an extra tropical vibe. This twist enhances the flavor without compromising the texture.
-
Berry Burst: Try mixing in blueberries or strawberries along with the dragon fruit for a colorful berry blend. It’s perfect for berry lovers and looks stunning!
-
Spicy Kick: Add a hint of chili powder or cayenne pepper to the filling for a surprising kick. This unique flavor profile excites the palate and feels like a warm summer breeze.
-
Creamy Alternatives: Swap cream cheese for mascarpone cheese for an even richer and creamier texture. This decadence makes each bite even more heavenly.
Don’t forget to explore other delightful recipes, such as Strawberry Cheesecake Crunch for yet another refreshing take on classic cheesecake desserts!
What to Serve with Dragon Fruit Cheesecake?
Elevate your dessert experience by pairing this vibrant delight with complementary flavors and textures that will tantalize your taste buds.
-
Fresh Berries: A medley of strawberries, blueberries, and raspberries adds a refreshing tartness that balances the sweet creaminess of the cheesecake.
-
Minty Fruit Salad: A vibrant mix of seasonal fruits with a hint of fresh mint brings a refreshing touch to each slice, enhancing the tropical essence.
-
Tropical Sorbet: Serve with a scoop of mango or coconut sorbet for an extra icy treat, echoing the cheesecake’s exotic flavors and providing a delightful contrast in temperature.
-
Whipped Coconut Cream: A dollop of this luscious topping complements the cheesecake’s richness while adding a dairy-free twist, making every bite even more indulgent.
-
Lemonade or Iced Tea: Pair with a glass of refreshing lemonade or iced tea to cleanse your palate and keep the tropical vibe flowing through your gathering.
-
Chocolate Drizzle: A light drizzle of dark or white chocolate sauce not only enhances the cheesecake’s visual appeal but also adds a rich sweetness that elevates each bite.
These delightful pairings are carefully curated to enhance the flavors of your Dragon Fruit Cheesecake, making every moment a celebration of taste!
Make Ahead Options
These delightful Dragon Fruit Cheesecakes are perfect for meal prep, making entertaining a breeze! You can prepare the crust and cheesecake filling up to 24 hours in advance. Simply make the crust and freeze it, then whip up the filling and keep it chilled in the refrigerator until ready to layer—this keeps all the flavors fresh. When you’re ready to serve, just complete the last steps of assembling and freezing the cheesecake overnight for the best texture. To maintain quality, ensure you cover it well with plastic wrap to prevent freezer burn. Just like that, you’ll have a stunning, tropical dessert at your fingertips, ready to impress with minimal effort!
Expert Tips for Dragon Fruit Cheesecake
-
Softened Cream Cheese: Ensure cream cheese is at room temperature for easier mixing and a smoother filling, avoiding lumps in your Dragon Fruit Cheesecake.
-
Whip Cream Right: Beat the heavy cream until stiff peaks form, as under-whipping leads to a flat filling that lacks the desired airy texture.
-
Dissolve Gelatin Properly: Allow the gelatin to cool slightly after dissolving in water to prevent it from curdling when added to the filling.
-
Use a Serrated Knife: For clean, even slices, use a serrated knife and warm it slightly in hot water before cutting through the cheesecake layers.
-
Layering Technique: Make sure to freeze each layer for the recommended time to achieve a striking contrast and ensure the layers hold up during slicing.
How to Store and Freeze Dragon Fruit Cheesecake
Fridge: Store the cheesecake covered in plastic wrap or in an airtight container for up to 3 days. This helps maintain its creamy texture and vibrant colors.
Freezer: To freeze, slice the cheesecake and wrap each piece in plastic wrap, then place in a freezer-safe container. It can be stored for up to 2 months.
Thawing: When ready to enjoy, remove from the freezer and thaw in the fridge for about 4-6 hours. This will allow the cheesecake to return to its delightful creamy consistency without losing flavor.
Reheating: There’s no need to reheat the cheesecake; simply slice and serve chilled, allowing the tropical flavors of the dragon fruit to shine.
Dragon Fruit Cheesecake Recipe FAQs
What type of dragon fruit should I use?
For the freshest flavor and best texture, I recommend using fresh dragon fruit if you can find it; however, frozen dragon fruit works beautifully as well. Just make sure it’s thawed and soft before adding it to the mixture—it should be easily mashable!
How long can I store the Dragon Fruit Cheesecake?
You can store the cheesecake in the refrigerator covered with plastic wrap or an airtight container for up to 3 days. If you need to keep it longer, consider freezing individual slices; they’ll last up to 2 months in the freezer. Just remember to wrap them tightly!
Can I freeze the Dragon Fruit Cheesecake?
Absolutely! To freeze, slice the cheesecake and individually wrap each piece in plastic wrap. Then, place them in a freezer-safe container. Thaw them in the refrigerator for about 4–6 hours before serving to retain their creamy texture.
How can I fix a runny filling?
If your filling turns out runny, it might be due to not enough gelatin or not allowing it to cool properly before mixing. Try adding a little more dissolved gelatin to the mixture next time! Make sure the gelatin cools slightly before combining it, ensuring it blends in seamlessly without curdling.
Is this recipe suitable for people with dietary restrictions?
Very! You can easily adapt this Dragon Fruit Cheesecake for various dietary needs. Use gluten-free graham crackers for a gluten-free option, and if you’re looking for a dairy-free version, substitute cream cheese and heavy cream with vegan alternatives like cashew cream and coconut cream.
What if I don’t have gelatine?
No problem! You can substitute unflavored gelatin with agar-agar, which is a plant-based thickening agent. To use agar-agar, dissolve it in boiling water following the package instructions. Just make sure to let it cool slightly before adding it to your cheesecake mixture!
Creamy Dragon Fruit Cheesecake That's a Tropical Delight
Ingredients
Equipment
Method
- Begin by placing your frozen dragon fruit in a bowl to thaw for about 30 minutes at room temperature.
- Crush the graham crackers into fine crumbs using a food processor for about 1 minute. Mix in sugar and melted butter, then press into the bottom of a spring-form pan.
- Beat the heavy cream and sugar with an electric mixer on medium speed until stiff peaks form, approximately 3-4 minutes. Set aside in the refrigerator.
- Beat the softened cream cheese in a separate bowl until smooth. Gradually add sugar and vanilla extract, mixing until fully incorporated.
- Gently fold the whipped cream into the cream cheese mixture until blended and smooth.
- Dissolve unflavored gelatin in warm water over low heat for 2-3 minutes and let it cool slightly.
- Pour half of the cheesecake mixture into the chilled crust. Freeze this layer for approximately 1 hour or until firm.
- Mix the thawed dragon fruit with the remaining cheesecake batter. Pour over the frozen white layer and return the cheesecake to the freezer for at least 4 hours.
- Once fully chilled, remove the cheesecake from the freezer, release from the spring-form pan, and slice carefully using a serrated knife.