Advertisement
Growing up, chocolate was always the answer—whether it was a celebration, a bad day, or just a craving for something sweet. My grandmother had a knack for making desserts that felt like pure comfort, and one of my favorites was her rich, fudgy brownies. But the real magic happened when she layered them with a light, velvety chocolate mousse. It was the perfect balance of deep cocoa flavor and airy sweetness, a dessert that felt like a warm hug and a luxurious treat all at once.
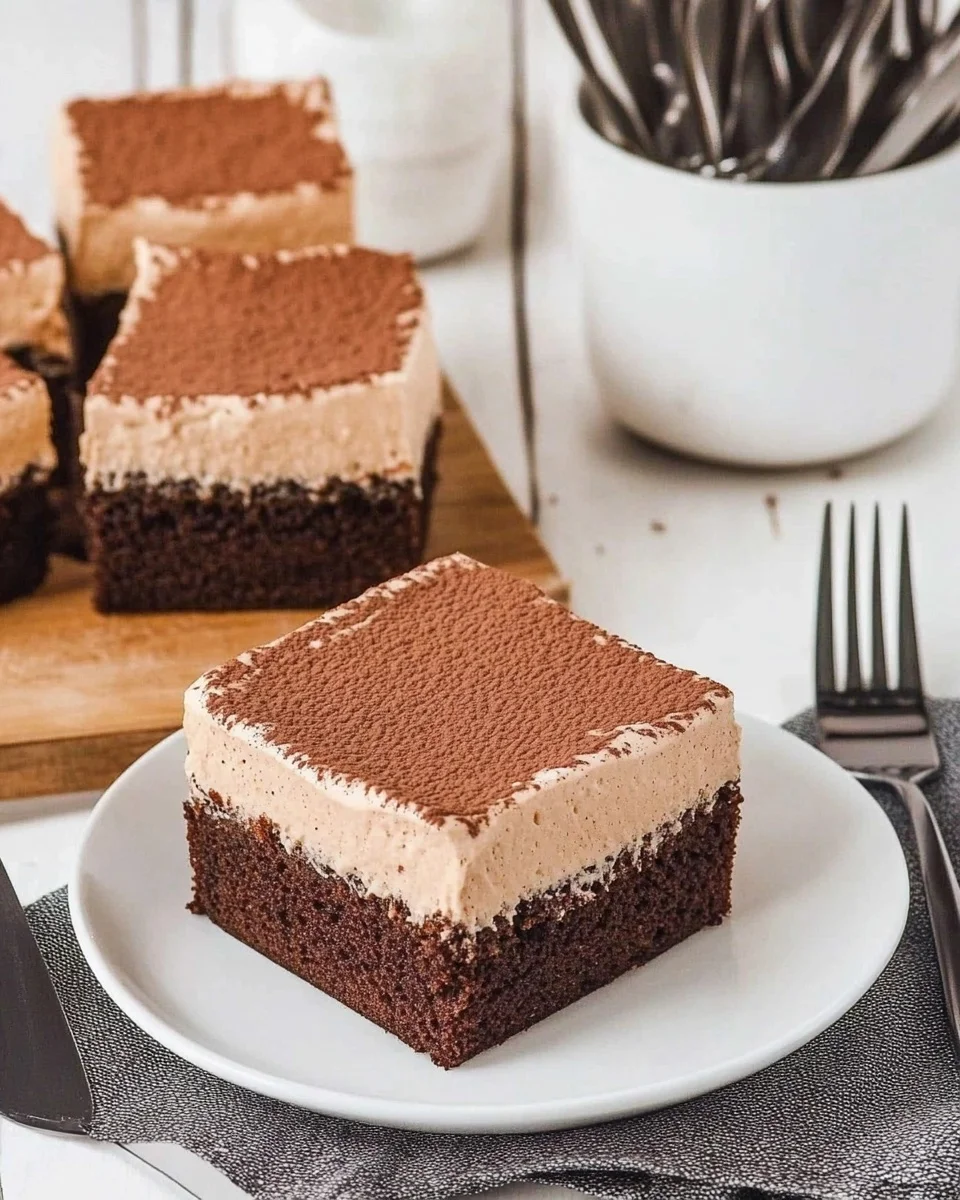
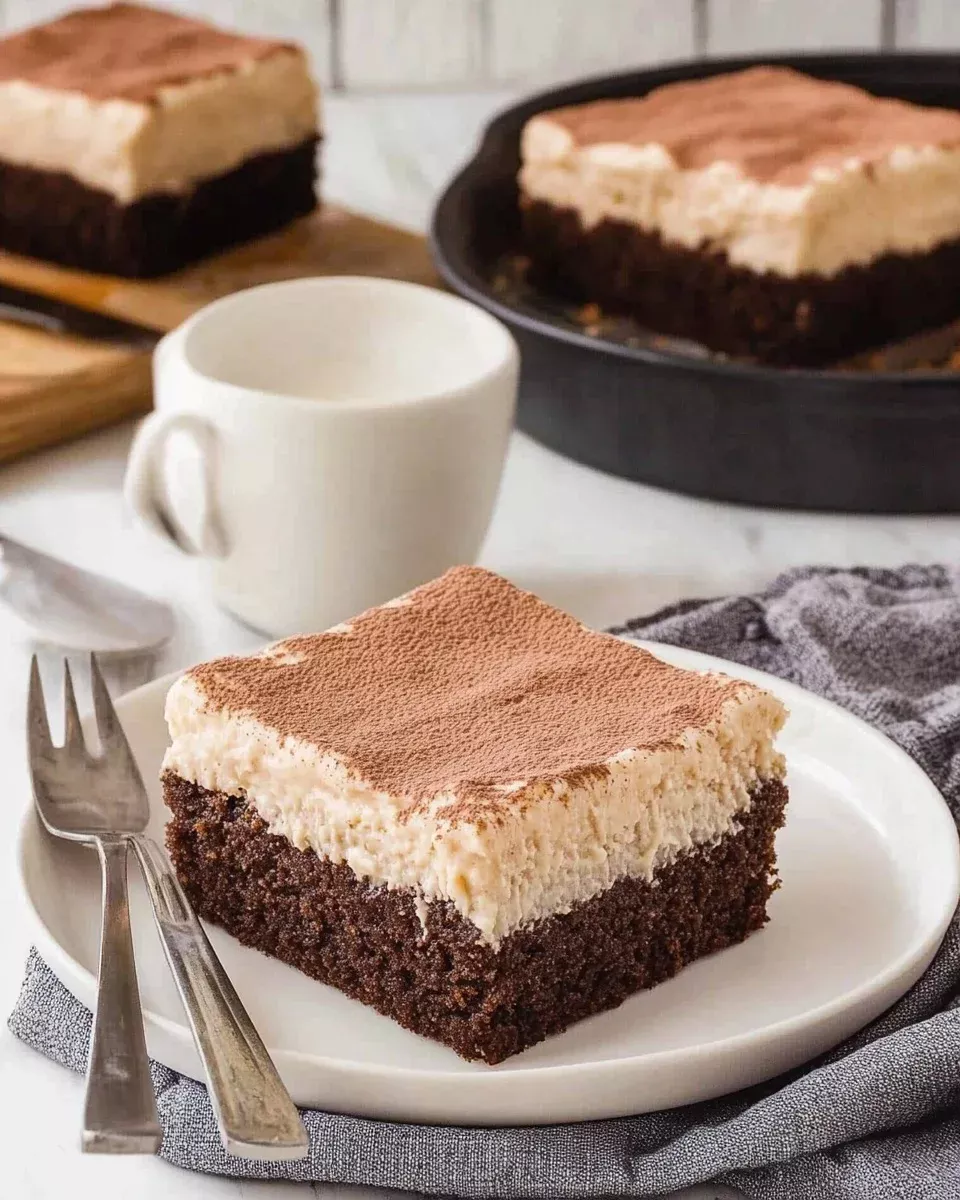
Fast forward to today, and that childhood memory inspired me to create these Chocolate Mousse Brownies—a dessert that’s indulgent, sophisticated, and impossible to resist. With a dense and fudgy brownie base topped with a silky chocolate mousse, every bite melts in your mouth. Whether you’re making these for a gathering, a romantic dinner, or simply to treat yourself after a long day, these brownies are guaranteed to bring joy with every forkful.
Why You’ll Love These Brownies
There are plenty of brownie recipes out there, but this one stands out because of its:
- Perfect Texture: The combination of a rich, fudgy brownie and light, airy chocolate mousse creates a melt-in-your-mouth experience.
- Deep Chocolate Flavor: Using high-quality cocoa powder and real melted chocolate ensures an intense and luxurious taste.
- Elegant Yet Simple: While this dessert looks like something from a bakery, it’s surprisingly easy to make at home.
- Make-Ahead Friendly: You can prepare these a day in advance, making them perfect for special occasions.
Ingredients for Chocolate Bliss
Brownie Layer:
- 1 cup unsalted butter, melted
- 2¼ cups granulated sugar
- 1 tablespoon vanilla extract
- 4 large eggs, room temperature
- 1¼ cups all-purpose flour
- 1 cup Dutch-processed unsweetened cocoa powder
- ¾ teaspoon salt
Chocolate Mousse Layer:
- 2 tablespoons cold water
- 2 teaspoons unflavored gelatin
- 2½ cups heavy cream, very cold (½ cup for melting chocolate, 2 cups for whipped cream)
- 4 ounces semi-sweet baking bar, finely chopped
- ¼ cup powdered sugar
- ½ teaspoon vanilla extract
Garnish:
- 1 tablespoon Dutch-processed unsweetened cocoa powder (for dusting)
Directions to Indulgence
Step 1: Bake the Perfect Brownie Base
- Preheat the oven to 350°F (175°C) and line a 9×13-inch baking pan with parchment paper.
- In a large bowl, whisk together melted butter, granulated sugar, and vanilla extract.
- Add eggs one at a time, whisking well after each addition.
- Sift in the all-purpose flour, cocoa powder, and salt. Gently fold until combined.
- Pour the batter into the prepared pan and spread evenly.
- Bake for 30-35 minutes or until a toothpick inserted in the center comes out with a few moist crumbs.
- Let the brownies cool completely before adding the mousse layer.
Step 2: Create the Chocolate Mousse Magic
- In a small bowl, mix cold water with unflavored gelatin and let it sit for 5 minutes to bloom.
- Heat ½ cup of heavy cream in a saucepan over low heat. Add the chopped semi-sweet chocolate and stir until fully melted and smooth. Remove from heat.
- Microwave the gelatin mixture for 5-10 seconds until liquefied, then stir it into the melted chocolate mixture. Let cool slightly.
- In a large bowl, beat the remaining 2 cups of heavy cream with powdered sugar and vanilla extract until soft peaks form.
- Gently fold the whipped cream into the chocolate mixture until smooth and airy.
Step 3: Assemble and Set
- Spread the chocolate mousse evenly over the cooled brownie layer.
- Refrigerate for at least 4 hours or until the mousse is fully set.
Step 4: The Finishing Touch
- Lightly dust the top with Dutch-processed cocoa powder before slicing and serving.
Nutritional Breakdown (Per Serving)
- Calories: ~450 kcal
- Carbohydrates: ~50g
- Protein: ~6g
- Fat: ~28g
- Saturated Fat: ~17g
- Sugar: ~38g
- Fiber: ~3g
- Sodium: ~120mg
These rich, fudgy brownies topped with a smooth and airy chocolate mousse are a chocolate lover’s dream! Whether for a special occasion or a sweet craving, this dessert never fails to impress.
Advertisement

The Secret Behind a Perfect Brownie-Mousse Combination
The Brownie Base: Fudgy, Not Cakey
The base of this dessert is a brownie that leans on the fudgy side rather than cakey. The secret to achieving this? A higher fat-to-flour ratio and a longer baking time at a moderate temperature. The result is a rich, dense texture that perfectly contrasts with the light mousse layer on top.
The Chocolate Mousse: Light Yet Flavorful
The mousse topping isn’t just whipped cream mixed with chocolate—it’s a delicate balance of textures and flavors. The gelatin provides structure without making it too firm, and the combination of melted chocolate and whipped cream gives it that luscious, melt-in-your-mouth consistency. The key is to whip the cream just enough to form soft peaks, ensuring the mousse stays light and airy.
How to Elevate This Recipe Even More
1. Use the Best Chocolate
For the deepest chocolate flavor, opt for high-quality cocoa powder and real baking chocolate. Dutch-processed cocoa gives the brownies a rich, almost espresso-like depth, while a semi-sweet chocolate bar in the mousse ensures smoothness and just the right amount of sweetness.
2. Infuse Extra Flavors
While classic chocolate mousse brownies are divine, adding a hint of flavor can elevate them even more. Try:
- A teaspoon of espresso powder in the brownie batter to enhance the chocolate taste.
- A splash of liqueur (like Baileys or Grand Marnier) in the mousse for a sophisticated twist.
- A pinch of sea salt on top to bring out the depth of flavors.
3. Play With Toppings
Dusting cocoa powder over the top is a classic finishing touch, but you can also try:
- Chocolate shavings or curls for an elegant look.
- A drizzle of dark chocolate ganache for extra indulgence.
- Fresh raspberries or strawberries for a fruity contrast.
Serving Suggestions: Making It Even More Special
These brownies are perfect on their own, but if you want to turn them into a show-stopping dessert, try pairing them with:
- Whipped Cream: A dollop of lightly sweetened whipped cream makes every bite even more luxurious.
- Vanilla Ice Cream: The contrast between the cold ice cream and the rich brownie-mousse combo is irresistible.
- Espresso or Coffee: The bitterness of coffee perfectly balances the sweetness of the chocolate.
How to Store and Make Ahead
One of the best things about this dessert is that it’s make-ahead friendly. Here’s how to store it:
- Refrigeration: Store in an airtight container in the fridge for up to 4 days. The mousse stays firm, and the flavors develop even more.
- Freezing: You can freeze these brownies for up to 2 months. Wrap them tightly in plastic wrap and store them in an airtight container. Let them thaw in the fridge before serving.
Frequently Asked Questions (FAQs)
1. Can I make these without gelatin?
Yes! If you prefer a gelatin-free version, you can stabilize the whipped cream with a bit of cornstarch or use a mousse recipe that relies on egg yolks and melted chocolate for structure.
2. How do I know when the brownies are done baking?
The best way to check is to insert a toothpick into the center. It should come out with a few moist crumbs, but not wet batter. Overbaking will make them dry, so keep an eye on them!
3. Can I use milk chocolate instead of semi-sweet for the mousse?
You can, but keep in mind that milk chocolate is sweeter and less intense than semi-sweet chocolate. If using milk chocolate, reduce the powdered sugar slightly to balance the sweetness.
4. Can I make these brownies gluten-free?
Absolutely! Swap out the all-purpose flour for a 1:1 gluten-free flour blend. The texture may be slightly different, but they’ll still be delicious.
5. Can I use regular cocoa powder instead of Dutch-processed?
Yes, but Dutch-processed cocoa gives a smoother, less acidic chocolate flavor. If using natural cocoa powder, you might notice a slightly more intense and tangy taste.
6. How can I make these brownies even more decadent?
For the ultimate chocolate lover’s dessert, try adding a layer of chocolate ganache between the brownie and mousse. Simply heat heavy cream, pour it over chopped chocolate, and spread it over the brownies before adding the mousse.
Conclusion: The Dessert That Feels Like a Hug
These Chocolate Mousse Brownies are more than just a dessert; they’re an experience. The rich, fudgy brownie layer combined with the light and silky mousse creates a perfect contrast that feels indulgent yet balanced. Whether you’re making them for a special occasion, a dinner party, or simply to satisfy your chocolate cravings, they’re guaranteed to impress.
Every bite brings a moment of pure bliss—a reminder that sometimes, the best things in life are the simplest. A little chocolate, a little patience, and a whole lot of love go into these brownies, making them a dessert that will stay in your memory long after the last bite.
So, go ahead—treat yourself, share them with loved ones, and create your own sweet memories. Because some desserts aren’t just meant to be eaten; they’re meant to be cherished.
Fudgy Brownies with Chocolate Mousse
Ingredients
Method
- Preheat and Prepare: Preheat the oven to 350°F (175°C). Line a 9×13-inch baking pan with parchment paper.
- Make the Brownie Batter: In a large bowl, whisk together melted butter, granulated sugar, and vanilla extract. Add eggs one at a time, whisking well after each addition.
- Incorporate Dry Ingredients: Sift in all-purpose flour, cocoa powder, and salt. Gently fold the mixture until fully combined.
- Bake the Brownie Layer: Pour the batter into the prepared baking pan and spread evenly. Bake for 30-35 minutes or until a toothpick inserted in the center comes out with a few moist crumbs. Let the brownies cool completely before adding the mousse layer.
- Prepare the Gelatin: In a small bowl, mix cold water with unflavored gelatin and let it sit for 5 minutes to bloom.
- Melt the Chocolate: In a saucepan, heat ½ cup of heavy cream over low heat. Add the chopped semi-sweet chocolate and stir until fully melted and smooth. Remove from heat.
- Incorporate the Gelatin: Microwave the bloomed gelatin for 5-10 seconds until liquefied, then stir it into the melted chocolate mixture. Let cool slightly.
- Whip the Cream: In a large bowl, beat the remaining 2 cups of heavy cream with powdered sugar and vanilla extract until soft peaks form.
- Combine and Layer: Gently fold the whipped cream into the melted chocolate mixture until smooth. Spread the chocolate mousse evenly over the cooled brownie layer.
- Chill and Set: Refrigerate for at least 4 hours or until the mousse is fully set.
- Garnish and Serve: Lightly dust the top with cocoa powder before slicing and serving.
Notes
-
- For best results, use high-quality Dutch-processed cocoa and real chocolate for a richer flavor.
- The mousse should be gently folded, not overmixed, to maintain its airy texture.
- Let the brownies set in the fridge for at least 4 hours to ensure a firm mousse layer.
- Store leftovers in an airtight container in the fridge for up to 4 days.