Advertisement
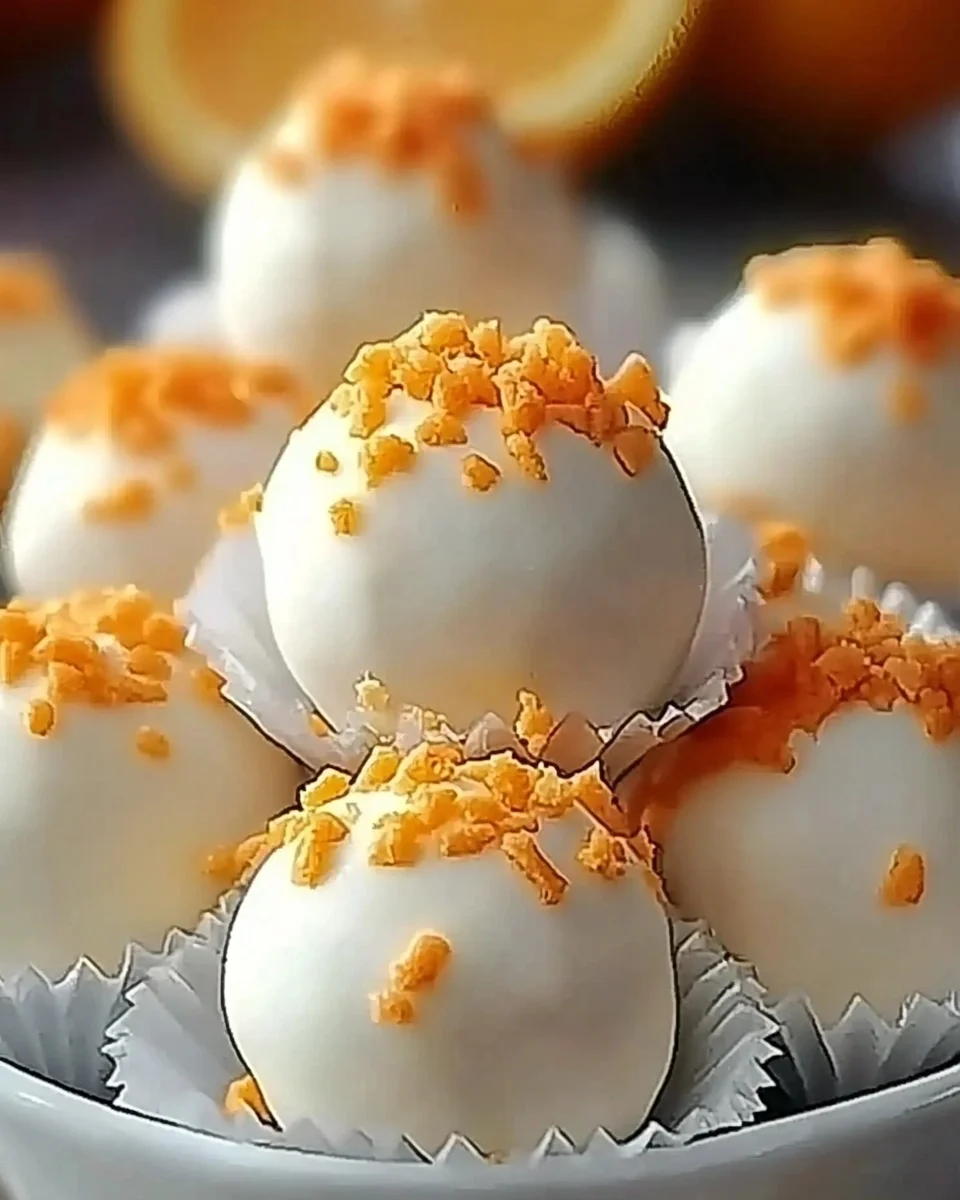
There’s something irresistible about the flavor of orange creamsicle. It’s nostalgic, refreshing, and packed with the perfect balance of tangy and sweet. Now imagine capturing that flavor in a rich, creamy truffle that requires no baking at all. No-Bake Orange Creamsicle Truffles bring together the classic creamsicle taste with a touch of elegance, making them ideal for parties, gifts, or a special treat just for you.
Whether you’re an experienced home chef or a beginner in the kitchen, this recipe is simple, quick, and foolproof. Let’s explore the ingredients, step-by-step instructions, and tips to create these dreamy truffles.
Why You’ll Love No-Bake Orange Creamsicle Truffles
- Quick and Easy: No need to turn on the oven, making this recipe perfect for warm days or last-minute desserts.
- Bursting with Flavor: Fresh orange zest and juice create a vibrant citrus flavor.
- Customizable: Adjust the sweetness or garnish to suit your preferences.
- Perfect for Sharing: These truffles are bite-sized, portable, and always a hit at gatherings.
Ingredients for No-Bake Orange Creamsicle Truffles
Main Ingredients:
- Cream cheese: 1 package (8 ounces), softened
- Powdered sugar: 1 cup
- Vanilla extract: 1 teaspoon
- Orange zest: 1 tablespoon
- Fresh orange juice: 1/4 cup
- White chocolate chips: 2 cups
- Orange sprinkles or additional zest for garnish
Optional Substitutions:
- For a dairy-free version, use a plant-based cream cheese alternative.
- Reduce the powdered sugar by 1/4 cup for a less sweet version.
- Substitute orange sprinkles with grated white chocolate or crushed candied orange peel for a unique garnish.
Step-by-Step Instructions for No-Bake Orange Creamsicle Truffles
Step 1: Prepare the Base
- In a large mixing bowl, beat the softened cream cheese until it’s smooth and creamy.
- Gradually add the powdered sugar, beating until fully incorporated.
Step 2: Add Creamsicle Flavor
- Mix in the vanilla extract, orange zest, and fresh orange juice.
- Beat the mixture until well combined and fragrant.
Step 3: Chill the Mixture
- Cover the bowl and refrigerate the mixture for about 1 hour, or until firm enough to handle.
Step 4: Shape the Truffles
- Using a small cookie scoop or spoon, portion the mixture into 1-inch balls.
- Roll the portions into smooth balls and place them on a baking sheet lined with parchment paper.
- Freeze the truffles for at least 30 minutes to help them hold their shape during dipping.
Step 5: Melt the White Chocolate
- Place the white chocolate chips in a microwave-safe bowl.
- Microwave in 30-second intervals, stirring between each, until the chocolate is melted and smooth.
Step 6: Coat the Truffles
- Using a fork or dipping tool, dip each frozen truffle into the melted white chocolate.
- Allow any excess chocolate to drip off before placing the truffle back on the parchment paper.
Step 7: Add Garnish
- While the chocolate coating is still wet, sprinkle the truffles with orange sprinkles or additional orange zest.
Step 8: Set and Serve
- Refrigerate the truffles for about 10 minutes, or until the chocolate coating is firm.
- Serve chilled and enjoy these delightful orange creamsicle bites!
Pro Tips for Perfect Orange Creamsicle Truffles
- Use Fresh Ingredients: Freshly squeezed orange juice and zest provide the best flavor.
- Don’t Overheat the Chocolate: Melt the white chocolate slowly to prevent it from seizing.
- Consistent Sizing: Use a cookie scoop for evenly sized truffles, ensuring they look uniform.
- Work Quickly: Dip the truffles while they’re still frozen to avoid softening during the coating process.
Nutritional Information (Per Truffle)
| Nutrient | Amount |
|---|---|
| Calories | 120 |
| Protein | 1g |
| Fat | 8g |
| Carbohydrates | 12g |
| Sugar | 10g |
Values may vary based on ingredient brands and serving sizes.
Why These Truffles Are a Must-Try Dessert
- No Oven Needed: Perfect for summer or quick dessert prep.
- Eye-Catching Presentation: The vibrant orange garnish makes them as pretty as they are tasty.
- Great for Gifting: Package these truffles in decorative boxes for a thoughtful homemade gift.
FAQ: No-Bake Orange Creamsicle Truffles
1. Can I make these truffles ahead of time?
Yes, these truffles can be made up to 3 days in advance. Store them in an airtight container in the refrigerator until ready to serve.
Advertisement
2. Can I freeze these truffles?
Absolutely! Store them in a freezer-safe container for up to 2 months. Thaw in the refrigerator before serving.
3. What can I use instead of white chocolate?
You can use milk chocolate or dark chocolate for a different flavor profile, but the classic creamsicle taste works best with white chocolate.
4. Can I use bottled orange juice?
Fresh orange juice is recommended for the best flavor, but bottled juice can be used in a pinch.
5. How do I fix seized chocolate?
If your chocolate seizes, try adding a teaspoon of vegetable oil or shortening and stirring until smooth.
6. What if my mixture is too soft to roll?
Refrigerate the mixture for an additional 30 minutes or add a bit more powdered sugar to firm it up.
Make Your Own Orange Creamsicle Truffles Today!
Now that you know how easy and delicious these No-Bake Orange Creamsicle Truffles are to make, it’s time to gather your ingredients and give them a try. Whether you’re treating yourself or sharing with friends, these truffles are sure to brighten your day with their vibrant flavor and creamy texture.
Orange Creamsicle Truffles
Ingredients
Method
- In a large mixing bowl, beat the softened cream cheese until smooth and creamy. This creates the base for your truffles.
- Gradually add the powdered sugar, beating until fully incorporated. Mix in the vanilla extract, orange zest, and fresh orange juice, ensuring everything is evenly combined.
- Cover the bowl and refrigerate the mixture for about 1 hour, or until firm enough to shape into balls.
- Use a small cookie scoop or spoon to form the mixture into 1-inch balls. Roll each portion into a smooth ball and place them on a baking sheet lined with parchment paper.
- Freeze the shaped truffles for at least 30 minutes. This helps them hold their shape during coating.
- In a microwave-safe bowl, melt the white chocolate chips in 30-second intervals, stirring after each interval, until smooth.
- Dip each frozen truffle into the melted white chocolate, ensuring it’s fully coated. Let any excess chocolate drip off before placing the truffle back on the parchment paper.
- While the chocolate coating is still wet, sprinkle the truffles with orange sprinkles or additional orange zest for a decorative finish.
- Refrigerate the coated truffles for about 10 minutes, or until the chocolate is firm.
- Once set, serve the truffles chilled and enjoy their bright, citrusy flavor!
Notes
- For a dairy-free version, substitute the cream cheese with a plant-based alternative.
- If your mixture feels too soft to roll, refrigerate it for an additional 30 minutes or mix in more powdered sugar.
- Avoid overheating the white chocolate during melting; stir frequently to prevent it from seizing.
- Store truffles in an airtight container in the refrigerator for up to 5 days or freeze for up to 2 months.