Advertisement
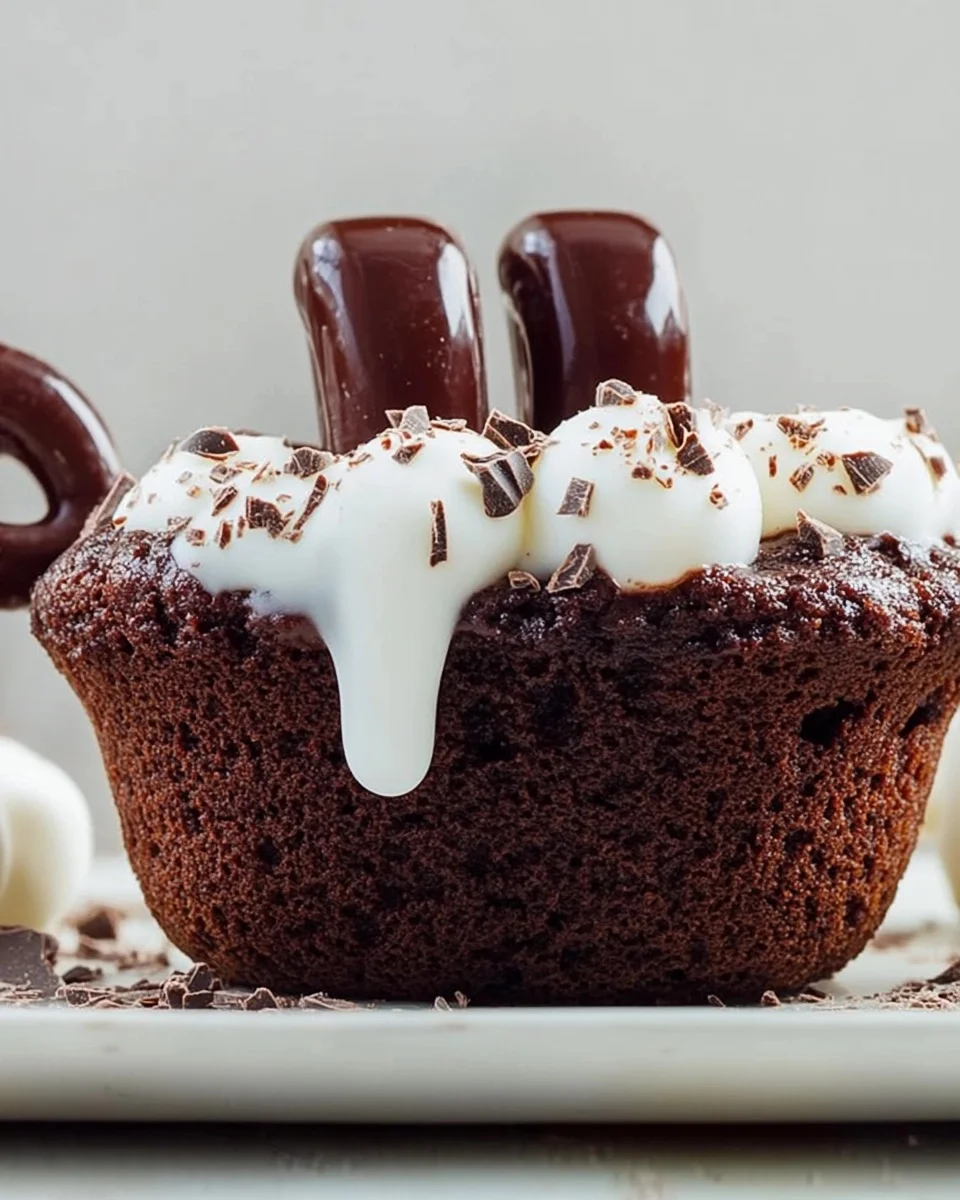
There’s something magical about hot chocolate during the holidays, and when you combine it with brownies, you get a dessert that’s simply irresistible. Mini Hot Chocolate Brownie Cups are the perfect winter treat—adorable, bite-sized desserts that look like tiny mugs of hot cocoa, complete with marshmallows and candy decorations. These are as fun to make as they are to eat, making them ideal for holiday parties, family baking days, or gifting to friends.
In this article, you’ll learn how to create these festive brownie cups step by step, along with tips, tricks, and answers to your burning questions. Whether you’re an experienced baker or new to the kitchen, this recipe will delight everyone who tries it. Let’s dive in and create some holiday magic!
Why You’ll Love Mini Hot Chocolate Brownie Cups
Before we jump into the recipe, let’s talk about why these brownie cups are a must-try:
- Adorable Presentation: They look like mini mugs of hot cocoa, complete with tiny handles and marshmallows!
- Rich and Decadent: The brownie base is fudgy, the ganache is silky, and the marshmallow topping adds the perfect gooey texture.
- Customizable: Add crushed peppermint, colorful sprinkles, or candy for your own unique twist.
- Perfect for Gatherings: These bite-sized treats are easy to share and make a statement on any dessert table.
Ingredients for Mini Hot Chocolate Brownie Cups
Here’s what you’ll need to make these festive treats:
Advertisement
- Cooking spray
- 1 (18.3-oz.) box brownie mix (plus ingredients called for on the box, such as eggs, oil, and water)
- 3 tablespoons heavy cream
- 4 oz. semisweet chocolate, chopped (divided)
- 1 cup mini marshmallows
- 2 tablespoons nonpareils
- 1/4 cup crushed peppermint candies (optional)
- 15 chocolate-covered mini pretzels (broken into half circles for the “handle”)
Step-by-Step Directions for Mini Hot Chocolate Brownie Cups
Follow these simple steps to make your own batch of Mini Hot Chocolate Brownie Cups:
Step 1: Prepare Your Pans
- Preheat your oven to 350°F if you’re using silicone or nonstick pans, or 325°F for metal pans.
- Coat two 24-cup mini muffin pans with cooking spray to ensure the brownies pop out easily.
Step 2: Mix the Brownie Batter
- In a large mixing bowl, prepare the brownie mix according to the package directions.
- Scoop the batter into the prepared muffin cups, filling each about three-quarters full. You should get around 28-30 mini brownies.
Step 3: Bake the Brownies
- Bake in the preheated oven for 15 to 18 minutes, or until the edges are set but the centers remain fudgy.
- Let the brownies cool for about 5 minutes in the pan.
Step 4: Create the Indentations
- While the brownies are still warm, use the back of a small melon baller or a rounded 1/4-teaspoon measuring spoon to press a small indentation into the top of each brownie.
- Let the brownies cool in the pan until they’re cool enough to handle (about 15 to 20 minutes), then transfer them to a wire rack to cool completely.
Step 5: Make the Ganache
- In a small, microwave-safe bowl, combine the heavy cream and 2 oz. of chopped semisweet chocolate.
- Microwave in 30-second intervals, stirring after each, until the mixture is melted and smooth (about 2 minutes total).
- Transfer the ganache to a small zip-top bag and snip off a corner to make a piping bag.
Step 6: Fill the Brownies with Ganache
- Pipe the ganache into the indentations on each brownie.
- Top each brownie with 3 to 4 mini marshmallows.
- Refrigerate the brownies for about 30 minutes to allow the ganache to set.
Step 7: Add the Chocolate Drizzle
- In another microwave-safe bowl, melt the remaining 2 oz. of chocolate in 30-second intervals, stirring until smooth (about 3 minutes total).
- Transfer the melted chocolate to another zip-top bag and snip off a small corner.
- Drizzle the chocolate over the tops of the brownies.
Step 8: Add Decorations
- Sprinkle the brownies with nonpareils and crushed peppermint candies (if using) for a festive touch.
- Use the remaining melted chocolate as “glue” to attach the broken mini pretzel halves to the sides of the brownies, forming the “handles” of the mini hot chocolate mugs.
Step 9: Final Chill and Serve
- Refrigerate the brownies for 5 to 10 minutes to ensure the decorations are secure.
- Serve and enjoy your adorable, delicious Mini Hot Chocolate Brownie Cups!
Tips for Perfect Mini Hot Chocolate Brownie Cups
- Prevent Sticking: Use silicone pans or generously grease metal pans with cooking spray to prevent the brownies from sticking.
- Work Quickly with Chocolate: Melted chocolate can harden fast, so be prepared to work quickly when attaching decorations.
- Custom Decorations: Add holiday-themed sprinkles, edible glitter, or even a dollop of whipped cream to make your brownie cups unique.
- Storage: Store the brownie cups in an airtight container in the refrigerator for up to one week.
Nutritional Information (Per Brownie Cup)
| Nutrient | Amount |
|---|---|
| Calories | 120 kcal |
| Total Fat | 5 g |
| Saturated Fat | 2 g |
| Carbohydrates | 17 g |
| Sugars | 12 g |
| Protein | 1 g |
FAQs About Mini Hot Chocolate Brownie Cups
1. Can I use homemade brownie batter instead of a boxed mix?
Yes, you can absolutely use homemade brownie batter! Just ensure the batter has a thick consistency so it holds up well in the mini muffin pans.
2. What can I use if I don’t have mini pretzels for the handles?
If you can’t find chocolate-covered mini pretzels, you can use small candy canes or even shape melted chocolate into handles.
3. Can I make these brownie cups ahead of time?
Yes! These can be made 1 to 2 days in advance and stored in an airtight container in the refrigerator. Add the pretzel handles closer to serving time for the best results.
4. Can I freeze these brownie cups?
While you can freeze the brownie base, avoid adding the decorations until after thawing. Marshmallows and pretzels don’t freeze well.
5. How can I make this recipe dairy-free?
Use dairy-free chocolate, coconut cream instead of heavy cream, and ensure your brownie mix and other ingredients are dairy-free.
6. What’s the best way to transport these brownie cups?
Place the brownie cups in a sturdy container with compartments to keep them from tipping over during transport.
Conclusion: Let’s Bake Some Mini Hot Chocolate Brownie Cups!
Now that you know how to make these festive and delicious treats, it’s time to gather your ingredients and start baking! Mini Hot Chocolate Brownie Cups are the perfect way to add a touch of sweetness to your holiday season. Whether you’re sharing them at a party, making them with your kids, or enjoying them yourself, these brownie cups are guaranteed to spread joy.
Hot Chocolate Brownie Cups: Simple Winter Dessert Everyone Loves
Ingredients
Method
- Preheat the Oven
- Preheat your oven to 350°F for silicone or nonstick pans, or 325°F if using metal pans.
- Coat two 24-cup mini muffin pans with cooking spray to prevent sticking.
- Prepare the Brownie Batter
- In a large mixing bowl, prepare the brownie batter according to the package directions.
- Scoop the batter into the prepared muffin cups, filling each about three-quarters full. You should get 28-30 mini brownies.
- Bake the Brownies
- Bake the brownies for 15 to 18 minutes, or until the edges are set but the centers remain soft and fudgy.
- Remove from the oven and let them cool for 5 minutes in the pans.
- Create Indentations
- While the brownies are still warm, use the back of a small melon baller or a rounded 1/4-teaspoon measuring spoon to press a small indentation into the top of each brownie.
- Let the brownies cool in the pans until they’re safe to handle (about 15 to 20 minutes), then transfer them to a wire rack to cool completely.
- Make the Ganache Filling
- In a small, microwave-safe bowl, combine the heavy cream and 2 oz. of chopped semisweet chocolate.
- Microwave in 30-second increments, stirring after each, until the mixture is smooth and fully melted (about 2 minutes total).
- Transfer the ganache to a small zip-top bag and snip off a small corner to create a piping bag.
- Fill the Brownies
- Pipe the ganache into the indentations on the brownie tops, filling each indentation generously.
- Top each brownie with 3 to 4 mini marshmallows.
- Refrigerate the brownies for 30 minutes to allow the ganache to set.
- Add the Chocolate Drizzle
- In another microwave-safe bowl, melt the remaining 2 oz. of chopped semisweet chocolate in 30-second increments, stirring after each, until smooth (about 3 minutes total).
- Transfer the melted chocolate to a second zip-top bag and snip off a corner to create another piping bag.
- Drizzle the melted chocolate over the tops of the brownie cups.
- Decorate the Brownie Cups
- Sprinkle the tops of the brownies with nonpareils and crushed peppermint candies (if using) for a festive touch.
- Use the remaining melted chocolate as “glue” to attach the broken mini pretzel halves to the sides of the brownie cups, forming the handles.
- Chill and Serve
- Place the brownie cups in the refrigerator for 5 to 10 minutes to ensure the decorations and pretzel handles are secure.
- Serve and enjoy your festive Mini Hot Chocolate Brownie Cups!
Notes
- Use Silicone Pans for Easy Removal: Silicone pans make it much easier to remove the brownie cups without breaking them.
- Work Quickly with Chocolate: Melted chocolate can set quickly, so have all your decorations ready before you start piping.
- Storage: Store the brownie cups in an airtight container in the refrigerator for up to one week.
- Make Ahead: You can make the brownie base a day in advance. Add the decorations just before serving for the freshest presentation.
- Customize Your Toppings: Feel free to experiment with other toppings like mini chocolate chips, caramel drizzle, or edible glitter to make your brownie cups unique.


