Advertisement
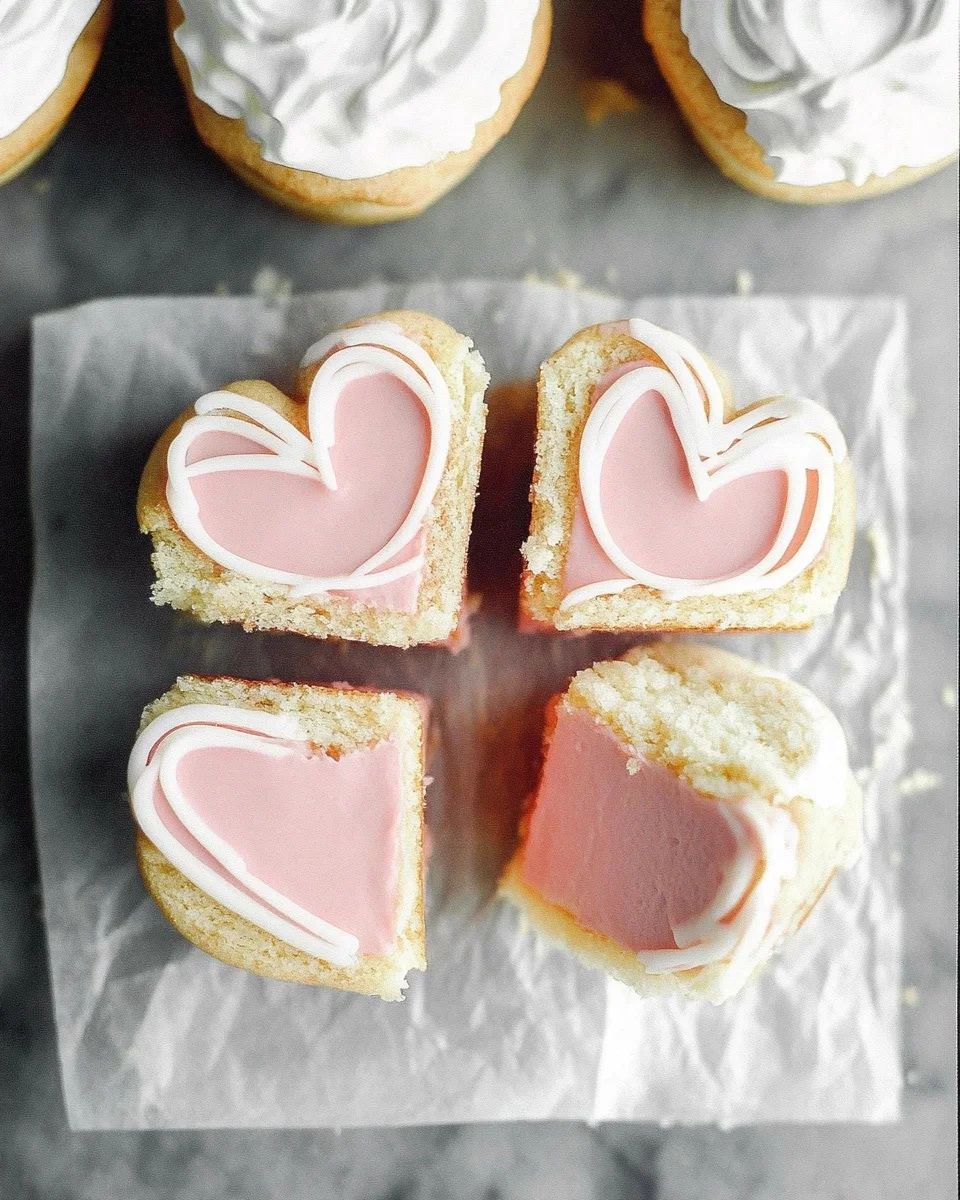
Little Debbie Valentine Cakes are a cherished treat, bringing back memories of childhood lunchboxes, sweet holiday surprises, and delightful indulgences. Their soft, fluffy cake layers, smooth marshmallow filling, and perfectly coated outer shell make them a seasonal favorite. But why wait for Valentine’s Day to enjoy them when you can recreate them at home?
Homemade Little Debbie Valentine Cakes are even better than store-bought versions because they allow you to control the ingredients, customize the flavors, and ensure a fresh, melt-in-your-mouth experience. Whether you’re making them for a romantic occasion, a special family treat, or simply to satisfy your sweet tooth, these heart-shaped confections will bring joy to any dessert table.
This guide dives deep into what makes these cakes special, the best tips for achieving bakery-level results, and how you can customize them for different occasions. We’ll also answer some frequently asked questions to help you master this recipe.
Why These Homemade Valentine Cakes Are a Must-Try
1. Fresh, Flavorful, and Made with Love
Unlike their store-bought counterparts, homemade Little Debbie Valentine Cakes are made with fresh, real ingredients—no preservatives, artificial flavors, or stabilizers. The difference in taste and texture is noticeable from the first bite, giving you a moist, flavorful cake and a rich, velvety filling.
Advertisement
2. Fun and Easy to Make
Though these cakes look impressive, they are surprisingly simple to prepare. Whether you’re an experienced baker or a beginner, you can achieve stunning results with a little patience and the right techniques. Plus, cutting out heart shapes, dipping cakes in melted coating, and decorating with sprinkles is a fun activity for the whole family.
3. Customizable for Any Occasion
While they are perfect for Valentine’s Day, these cakes can be adapted for other celebrations:
- Baby Showers: Use pastel-colored coatings for a baby-themed dessert.
- Birthdays: Decorate with colorful sprinkles and festive toppings.
- Holiday Parties: Change the coating color to match the season (e.g., green and red for Christmas, orange for Halloween).
- Anniversaries: Add a drizzle of chocolate or edible gold dust for an elegant touch.
4. A Nostalgic, Homemade Upgrade
Many of us grew up enjoying Little Debbie snacks, but making them from scratch brings an added layer of nostalgia and satisfaction. You get the same childhood favorite, only better—fluffier cake, creamier filling, and a rich, smooth coating that melts in your mouth.
Ingredients:
For the Cake:
- 1 box white cake mix
- 1 cup granulated sugar
- 1⅓ cups water
- 3 large eggs, at room temperature
- 1 tablespoon vanilla extract
- 2 tablespoons vegetable oil
- 1 cup all-purpose flour
- 1 cup sour cream
For the Filling:
- 7 ounces marshmallow creme (or marshmallow fluff)
- ¾ cup salted butter, at room temperature
- 2 cups powdered sugar
- 1½ teaspoons vanilla extract
For the Coating:
- 16 ounces white almond bark
- Pink or red food coloring
- Sprinkles, for decoration
Directions: Creating Your Heartfelt Confections
1. Prepare the Cake Batter
- Preheat your oven to 350°F (175°C). Line a 9×13-inch baking pan with parchment paper and lightly grease it to ensure easy removal.
- In a large mixing bowl, combine the white cake mix, granulated sugar, water, eggs, vanilla extract, vegetable oil, all-purpose flour, and sour cream. Mix until the batter is smooth and well combined.
2. Bake the Cake
- Pour the batter into the prepared baking pan, spreading it evenly.
- Bake in the preheated oven for 25-30 minutes, or until a toothpick inserted into the center comes out clean.
- Once baked, remove the cake from the oven and allow it to cool completely in the pan.
3. Prepare the Filling
- In a medium bowl, beat the room temperature salted butter until creamy.
- Add the marshmallow creme and vanilla extract, mixing until well combined.
- Gradually add the powdered sugar, continuing to beat until the filling is smooth and fluffy.
4. Assemble the Cakes
- Once the cake has cooled, use a heart-shaped cookie cutter to cut out heart-shaped pieces.
- Pair the heart-shaped pieces to create sandwich layers.
- Spread a generous amount of the marshmallow filling on one heart-shaped piece and top with its pair to form a sandwich.
5. Coat the Cakes
- Melt the white almond bark according to the package instructions.
- Add pink or red food coloring to achieve your desired shade.
- Dip each heart-shaped cake sandwich into the melted almond bark, ensuring it is fully coated.
- Place the coated cakes on a wire rack or parchment paper.
- While the coating is still wet, decorate with sprinkles as desired.
- Allow the coating to set completely before serving.
Nutritional Information: Indulge Mindfully
| Nutrient | Amount per Serving (1 Cake) |
|---|---|
| Calories | ~450 kcal |
| Carbohydrates | 60g |
| Protein | 4g |
| Fat | 22g |
| Saturated Fat | 12g |
| Sugar | 45g |
| Fiber | 1g |
| Sodium | 350mg |
Please note that these values are approximate and can vary based on specific ingredients used.
Enjoy these delightful homemade treats that capture the essence of the classic Little Debbie Valentine Cakes, perfect for sharing with loved ones or indulging in a sweet moment yourself.
Pro Tips for Achieving Perfect Little Debbie Valentine Cakes
1. Use Room Temperature Ingredients
For a smooth batter and creamy filling, always use room temperature eggs, butter, and sour cream. This ensures that the ingredients blend seamlessly, creating a uniform texture in both the cake and frosting.
2. Don’t Overmix the Batter
Overmixing can cause the cake to become dense and tough. Mix just until the ingredients are incorporated to maintain a light, fluffy texture.
3. Let the Cake Cool Completely Before Assembling
Cutting warm cake can cause it to crumble, making it harder to create clean, even heart shapes. Allow the cake to cool completely before using a cookie cutter to ensure precise, uniform hearts.
4. Use a Double Coating for the Perfect Shell
For a thick, even coating, dip the cakes twice in the melted almond bark. The first layer seals in the moisture, while the second gives them a smooth, glossy finish.
5. Chill Before Serving
Refrigerating the cakes for at least 30 minutes before serving helps the coating set and enhances the flavors. This also makes them easier to handle without smudging the coating.
Creative Variations to Try
1. Chocolate Lover’s Dream
If you prefer chocolate over vanilla, try making these cakes with a chocolate cake base and dark chocolate coating instead of the traditional white almond bark.
2. Strawberry Shortcake Version
For a fruity twist, add strawberry jam to the filling or mix freeze-dried strawberry powder into the marshmallow creme for a naturally flavored filling.
3. Gluten-Free & Dairy-Free Option
Substitute gluten-free all-purpose flour for regular flour and use dairy-free butter to make a version that’s suitable for gluten-sensitive and lactose-intolerant individuals.
4. Red Velvet Edition
Want to make these even more festive? Use red velvet cake as the base and cream cheese marshmallow filling for a rich, tangy flavor contrast.
FAQs About Homemade Little Debbie Valentine Cakes
1. Can I Make These Cakes Ahead of Time?
Yes! These cakes store well, making them a great make-ahead treat. You can prepare them 1-2 days in advance and store them in an airtight container in the refrigerator.
2. How Do I Get a Smooth Coating on My Cakes?
For a professional-looking coating:
- Make sure the almond bark is fully melted and smooth before dipping.
- Use a fork or dipping tool to lower each cake into the coating, allowing excess to drip off before placing it on parchment paper.
- If the coating starts to harden while dipping, reheat it in short bursts in the microwave or over a double boiler.
3. Can I Freeze These Cakes?
Absolutely! To freeze, wrap each cake individually in plastic wrap and place them in an airtight container. They can be stored for up to 2 months. Thaw in the refrigerator before serving.
4. What Can I Use Instead of Almond Bark?
If you don’t have almond bark, you can use:
- White chocolate chips (melted with a little coconut oil for smoothness).
- Candy melts in any color of your choice.
5. Can I Make These Without a Heart-Shaped Cutter?
Yes! If you don’t have a heart-shaped cutter, you can:
- Use a round cutter to make classic circular sandwich cakes.
- Cut the cake into small squares for bite-sized treats.
- Hand-cut heart shapes using a sharp knife and a heart-shaped template.
6. How Do I Prevent the Cakes from Becoming Soggy?
To prevent sogginess:
- Let the cake cool completely before cutting and assembling.
- Avoid overfilling with marshmallow creme, as too much moisture can seep into the cake.
- Ensure the coating fully seals the cakes to keep the moisture inside.
Conclusion: A Homemade Treat Worth the Effort
Homemade Little Debbie Valentine Cakes bring a nostalgic favorite into your kitchen, allowing you to enjoy a fresh, flavorful, and personalized version of the store-bought classic. With their light, fluffy cake layers, sweet marshmallow filling, and beautifully smooth coating, these cakes are the perfect way to celebrate love—whether it’s Valentine’s Day, an anniversary, or simply a cozy night in.
Not only do they taste better than the original, but they also give you endless opportunities for creativity. From red velvet to gluten-free adaptations, the possibilities are endless. Plus, making them at home adds an extra touch of love that no store-bought treat can replicate.
So why wait for Valentine’s Day? Get your ingredients, grab your heart-shaped cutter, and start baking these adorable, delicious, and utterly irresistible homemade Little Debbie Valentine Cakes today.
Easy Valentine’s Treat – DIY Little Debbie-Style Cakes from Scratch!
Ingredients
Method
- Prepare the Cake Batter
- Preheat your oven to 350°F (175°C). Line a 9×13-inch baking pan with parchment paper and lightly grease it to ensure easy removal.
- In a large mixing bowl, combine the white cake mix, granulated sugar, water, eggs, vanilla extract, vegetable oil, all-purpose flour, and sour cream. Mix until the batter is smooth and well combined.
- Pour the batter into the prepared baking pan, spreading it evenly.
- Bake in the preheated oven for 25-30 minutes, or until a toothpick inserted into the center comes out clean.
- Once baked, remove the cake from the oven and allow it to cool completely in the pan.
- In a medium bowl, beat the room temperature salted butter until creamy.
- Add the marshmallow creme and vanilla extract, mixing until well combined.
- Gradually add the powdered sugar, continuing to beat until the filling is smooth and fluffy.
- Once the cake has cooled, use a heart-shaped cookie cutter to cut out heart-shaped pieces.
- Pair the heart-shaped pieces to create sandwich layers.
- Spread a generous amount of the marshmallow filling on one heart-shaped piece and top with its pair to form a sandwich.
- Melt the white almond bark according to the package instructions.
- Add pink or red food coloring to achieve your desired shade.
- Dip each heart-shaped cake sandwich into the melted almond bark, ensuring it is fully coated.
- Place the coated cakes on a wire rack or parchment paper.
- While the coating is still wet, decorate with sprinkles as desired.
- Allow the coating to set completely before serving.
Notes
- For extra smooth coating, dip the cakes twice for a bakery-quality finish.
- Store the cakes in an airtight container in the refrigerator for up to 5 days.
- Freeze for up to 2 months and thaw in the refrigerator before serving.
- Swap white almond bark for milk or dark chocolate for a different flavor profile.
- If the almond bark hardens while dipping, reheat in short intervals to keep it smooth.