Advertisement
Classic Banana Pudding Recipe
The History of Banana Pudding
Banana pudding has a rich history that dates back to the 19th century. It is believed to have originated in the Southern United States, where it quickly became a beloved dessert. The combination of creamy pudding, sweet bananas, and crunchy cookies created a delightful treat that families enjoyed for generations. Over the years, banana pudding has evolved, but its classic version remains a staple at gatherings and celebrations. This dessert is not just a dish; it’s a nostalgic reminder of home-cooked meals and family traditions.
Why You Should Try This Classic Banana Pudding Recipe
If you’re looking for a dessert that’s both comforting and delicious, this classic banana pudding recipe is a must-try. It’s simple to make and requires only a few ingredients. The creamy texture of the pudding pairs perfectly with the sweetness of ripe bananas and the crunch of Nilla Wafers. Plus, it’s a crowd-pleaser! Whether you’re hosting a party or just want to treat your family, this dessert will surely impress. Not to mention, it’s a great way to use up those overripe bananas sitting on your counter. So, roll up your sleeves and get ready to create a dessert that will bring smiles to everyone’s faces!
Ingredients for Classic Banana Pudding Recipe
To create the perfect classic banana pudding, you’ll need a handful of simple ingredients. Each one plays a vital role in achieving that creamy, dreamy texture and delightful flavor. Here’s what you’ll need:
- 2 cups whole milk: This is the base of your pudding, providing creaminess and richness.
- 1 cup heavy cream: Adding heavy cream enhances the pudding’s texture, making it extra smooth.
- 3/4 cup granulated sugar: This sweetens the pudding, balancing the flavors beautifully.
- 1/3 cup cornstarch: This thickening agent helps the pudding set perfectly.
- 1/4 teaspoon salt: A pinch of salt enhances the sweetness and overall flavor.
- 1 teaspoon vanilla extract: This adds a lovely aroma and depth of flavor.
- 4 large egg yolks: They contribute to the richness and creaminess of the pudding.
- 1 box (11 ounces) Nilla Wafers: These cookies provide a delightful crunch and classic taste.
- 4 ripe bananas, sliced: Fresh bananas add natural sweetness and a fruity flavor.
- Whipped cream for topping: This adds a light, fluffy finish to your dessert.
With these ingredients on hand, you’re well on your way to making a delicious classic banana pudding. Each component works together to create a dessert that’s not only tasty but also comforting. So gather your ingredients and get ready to whip up this delightful treat!
Advertisement
Step-by-Step Preparation of Classic Banana Pudding Recipe
Step 1: Preparing the Pudding Base
To start, you’ll want to prepare the pudding base. First, grab a medium saucepan and whisk together the whole milk, heavy cream, granulated sugar, cornstarch, and salt. Place the saucepan over medium heat. As you cook, stir the mixture constantly. This is important to prevent any lumps from forming. After about 5 to 7 minutes, you’ll notice the mixture thickening and bubbling. Once it reaches this stage, it’s time to move on to the next step.
In a separate bowl, whisk the egg yolks until they are smooth. Now, here’s a crucial part: slowly pour about 1 cup of the hot milk mixture into the egg yolks while whisking continuously. This process is called tempering, and it helps to prevent the eggs from scrambling. After mixing well, pour the egg mixture back into the saucepan with the remaining milk mixture. Continue to cook for another 2 to 3 minutes, stirring constantly until the pudding thickens further. Finally, remove the saucepan from the heat and stir in the vanilla extract. Your pudding base is now ready!
Step 2: Layering the Ingredients
Now that your pudding base is prepared, it’s time to layer the ingredients. Grab a 9×13 inch dish for this step. Start by placing half of the Nilla Wafers at the bottom of the dish. These cookies will provide a delightful crunch. Next, add half of the sliced bananas on top of the wafers. The bananas will add a sweet, fruity flavor that complements the pudding perfectly.
Once you’ve added the bananas, pour half of the pudding mixture over the top. Make sure to spread it evenly so every bite is delicious. Repeat this process with the remaining Nilla Wafers, bananas, and pudding. This layering creates a beautiful dessert that looks as good as it tastes. After you’ve completed the layers, cover the dish with plastic wrap to keep everything fresh.
Step 3: Chilling the Banana Pudding
The final step in preparing your classic banana pudding is chilling it. Place the covered dish in the refrigerator for at least 4 hours, or even better, overnight. This chilling time allows the flavors to meld together and the pudding to set properly. When you’re ready to serve, remove the dish from the fridge. Top it with whipped cream and additional banana slices if you like. Your classic banana pudding is now ready to be enjoyed!
Variation of Classic Banana Pudding Recipe
Alternative Ingredients for a Unique Twist
If you’re feeling adventurous, there are many ways to put a unique spin on the classic banana pudding recipe. Here are some alternative ingredients you can try:
- Chocolate Pudding: For a rich chocolate flavor, substitute half of the vanilla pudding with chocolate pudding. This creates a delightful chocolate-banana combination that’s sure to please chocolate lovers.
- Peanut Butter: Mix in a few tablespoons of creamy peanut butter into the pudding base. This adds a nutty flavor that pairs wonderfully with bananas.
- Caramel Sauce: Drizzle caramel sauce between the layers for a sweet, gooey surprise. It adds a lovely depth of flavor and makes the dessert even more indulgent.
- Fresh Berries: Layer in some fresh strawberries or blueberries along with the bananas. The tartness of the berries balances the sweetness of the pudding beautifully.
These variations can elevate your classic banana pudding to new heights. Feel free to mix and match these ingredients to create a dessert that suits your taste buds!
Gluten-Free and Dairy-Free Options
For those with dietary restrictions, you can still enjoy a delicious banana pudding. Here are some tips to make gluten-free and dairy-free versions:
- Gluten-Free: Use gluten-free cookies instead of Nilla Wafers. There are many brands available that offer tasty alternatives. Just make sure to check the label for gluten-free certification.
- Dairy-Free: Substitute whole milk and heavy cream with almond milk or coconut milk. You can also use dairy-free whipped cream for topping. Look for brands that offer a rich and creamy texture.
By making these simple swaps, you can create a banana pudding that everyone can enjoy, regardless of dietary needs. It’s all about being creative and finding the right ingredients that work for you!
Cooking Note for Classic Banana Pudding Recipe
When making your classic banana pudding, there are a few important cooking notes to keep in mind. These tips will help ensure that your pudding turns out perfectly every time.
First, be patient while cooking the pudding base. It’s essential to stir constantly over medium heat. This prevents the mixture from sticking to the bottom of the pan and forming lumps. If you notice any lumps forming, don’t worry! You can use a whisk to break them up as you continue to stir.
Next, when tempering the egg yolks, remember to pour the hot milk mixture slowly. This gradual process helps to warm the eggs without cooking them too quickly. If you pour too fast, you risk scrambling the eggs, which can ruin the smooth texture of your pudding.
Also, keep in mind that the pudding will thicken more as it cools. So, don’t be alarmed if it seems a bit runny when you first remove it from the heat. Once it chills in the refrigerator, it will set to the perfect consistency.
Lastly, for the best flavor, use ripe bananas. They should be yellow with a few brown spots. These bananas are sweeter and will enhance the overall taste of your pudding. Avoid using overly ripe bananas, as they can become mushy and affect the texture of your dessert.
By following these cooking notes, you’ll be well on your way to creating a delicious classic banana pudding that everyone will love. Happy cooking!
Serving Suggestions for Classic Banana Pudding Recipe
Ideal Pairings and Presentation Tips
When it comes to serving your classic banana pudding, presentation and pairings can elevate the experience. Here are some delightful suggestions to make your dessert shine:
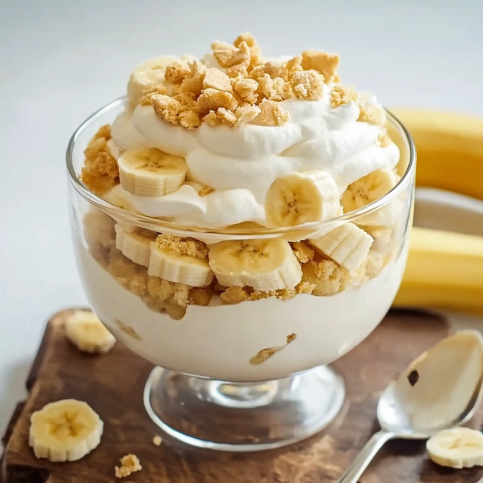
- Garnish with Fresh Bananas: Before serving, add a few extra slices of ripe bananas on top of the whipped cream. This not only enhances the visual appeal but also adds a fresh burst of flavor.
- Chocolate Shavings: For a touch of elegance, sprinkle some chocolate shavings over the whipped cream. This adds a rich flavor and makes the dessert look fancy.
- Mint Leaves: A sprig of fresh mint can brighten up the dish. It adds a pop of color and a refreshing taste that complements the sweetness of the pudding.
- Serve in Individual Cups: For a fun twist, consider serving the banana pudding in individual cups or jars. This makes it easy for guests to enjoy and adds a personal touch.
- Pair with Coffee or Tea: Banana pudding pairs wonderfully with a warm cup of coffee or tea. The rich flavors of the pudding balance nicely with the warmth of your favorite beverage.
These serving suggestions will not only enhance the taste but also make your classic banana pudding a showstopper at any gathering. Remember, the way you present your dessert can make it even more enjoyable for your guests. So, get creative and have fun with it!
Tips for Perfecting Your Classic Banana Pudding Recipe
Common Mistakes to Avoid
Making classic banana pudding can be a delightful experience, but there are a few common mistakes to watch out for. First, avoid using unripe bananas. They should be perfectly ripe, with a few brown spots. Unripe bananas can be too firm and lack the sweetness needed for the pudding.
Another mistake is rushing the cooking process. It’s crucial to stir the pudding base constantly over medium heat. If you cook it too quickly, you risk burning the mixture or creating lumps. Take your time to ensure a smooth, creamy texture.
Also, be careful when layering the ingredients. If you don’t let the pudding cool slightly before layering, it can cause the Nilla Wafers to become too soggy. Allow the pudding to cool for a few minutes before assembling your dessert.
Lastly, don’t skip the chilling step! Refrigerating the pudding for at least 4 hours is essential for the flavors to meld and the pudding to set properly. Skipping this step can lead to a runny dessert that doesn’t hold its shape.
Storage Tips for Leftovers
If you have any leftover classic banana pudding, proper storage is key to keeping it fresh. First, cover the dish tightly with plastic wrap or aluminum foil. This prevents the pudding from absorbing any odors from the fridge and keeps it moist.
Store the banana pudding in the refrigerator for up to 3 days. However, keep in mind that the bananas may brown over time. To minimize this, you can add a little lemon juice to the banana slices before layering them. This helps to slow down the browning process.
When you’re ready to enjoy your leftovers, you can refresh the pudding by adding a dollop of whipped cream on top. This will give it a fresh look and taste. If you find the pudding has thickened too much, you can stir in a splash of milk to loosen it up before serving.
By following these tips, you’ll ensure that your classic banana pudding remains delicious and enjoyable, even after the first serving. Happy indulging!
Breakdown of Time for Classic Banana Pudding Recipe
Prep Time
Preparing your classic banana pudding is a breeze! The prep time for this delightful dessert is approximately 20 minutes. During this time, you’ll gather all your ingredients, whisk together the pudding base, and layer the Nilla Wafers, bananas, and pudding. It’s a quick and enjoyable process that sets the stage for a delicious treat!
Cooking Time
The cooking time for the pudding base is about 10 minutes. This includes the time it takes to heat the milk mixture and thicken it to the perfect consistency. Remember to stir constantly to avoid lumps. After that, you’ll need an additional 2 to 3 minutes to incorporate the egg yolks and finish thickening the pudding. So, in total, you’re looking at around 10 to 13 minutes of cooking time.
Total Time
When you combine the prep and cooking times, the total time to make your classic banana pudding is roughly 30 to 35 minutes. However, don’t forget about the chilling time! You’ll need to refrigerate the pudding for at least 4 hours, or ideally overnight, to let the flavors meld and the pudding set properly. So, while the active time is short, plan ahead to enjoy this delicious dessert at its best!
Nutritional Information for Classic Banana Pudding Recipe
Calories and Macronutrients
Understanding the nutritional content of your classic banana pudding is essential, especially if you’re mindful of your diet. Each serving of this delightful dessert contains approximately 320 calories. Here’s a breakdown of the macronutrients:
- Net Carbs: 40g
- Protein: 4g
- Fat: 15g
These values can vary slightly based on the specific brands of ingredients you use. The combination of whole milk, heavy cream, and sugar contributes to the calorie count, while the bananas provide natural sweetness and essential nutrients. Enjoying this dessert in moderation can be a delightful treat without compromising your dietary goals.
Health Considerations
While classic banana pudding is a delicious indulgence, it’s important to consider its health aspects. The pudding contains whole milk and heavy cream, which are high in saturated fats. Consuming these in moderation is key, especially for those watching their cholesterol levels.
On the positive side, bananas are a great source of potassium, vitamin C, and dietary fiber. They can aid digestion and provide a quick energy boost. If you’re looking to make this dessert a bit healthier, consider these tips:
- Reduce Sugar: You can cut back on the granulated sugar or use a natural sweetener like honey or maple syrup.
- Use Low-Fat Dairy: Substitute whole milk and heavy cream with low-fat or non-dairy alternatives to lower the calorie count.
- Add Nuts: Incorporating nuts like walnuts or almonds can add healthy fats and protein, enhancing the nutritional profile.
By making these small adjustments, you can enjoy your classic banana pudding while keeping it a bit healthier. Remember, balance is key, and enjoying this dessert occasionally can be part of a well-rounded diet!
FAQs about Classic Banana Pudding Recipe
Can I use instant pudding for this recipe?
Yes, you can use instant pudding if you’re short on time! However, the texture and flavor will differ from the traditional method. Instant pudding is quick and easy, but it may not have the same creamy richness as the cooked version. If you choose this route, simply follow the package instructions and layer it with the bananas and Nilla Wafers as you would with the homemade pudding.
How long does banana pudding last in the fridge?
Banana pudding can last in the fridge for about 3 days. However, the bananas may start to brown and the texture can change over time. To keep it fresh, cover the dish tightly with plastic wrap or aluminum foil. If you want to extend its life, consider adding a little lemon juice to the banana slices before layering them. This helps slow down the browning process.
Can I make banana pudding ahead of time?
Absolutely! In fact, making banana pudding ahead of time is a great idea. It allows the flavors to meld together and the pudding to set properly. You can prepare it a day in advance and store it in the refrigerator. Just remember to add the whipped cream and any additional toppings right before serving to keep them fresh and fluffy.
What type of bananas are best for banana pudding?
The best bananas for banana pudding are ripe ones, which are yellow with a few brown spots. These bananas are sweeter and softer, making them perfect for layering in your dessert. Avoid using overly ripe bananas, as they can become mushy and affect the overall texture of your pudding. Aim for bananas that are just ripe enough to provide that delicious flavor without compromising the dish’s integrity.
Conclusion on Classic Banana Pudding Recipe
Final Thoughts and Encouragement to Try the Recipe
In conclusion, classic banana pudding is more than just a dessert; it’s a delightful experience that brings joy to any table. With its creamy texture, sweet bananas, and crunchy Nilla Wafers, this recipe is sure to become a favorite in your household. Whether you’re making it for a special occasion or just to enjoy on a cozy evening, the process is simple and rewarding.
We encourage you to gather your ingredients and give this classic banana pudding recipe a try. Remember, cooking is all about experimenting and having fun. Don’t hesitate to add your personal touch, whether it’s a twist of chocolate or a sprinkle of nuts. Each variation can create a new favorite version of this timeless treat.
As you prepare your banana pudding, think of the smiles it will bring to your family and friends. It’s a dessert that sparks nostalgia and creates lasting memories. So, roll up your sleeves, embrace the joy of cooking, and enjoy every delicious bite of your homemade classic banana pudding!
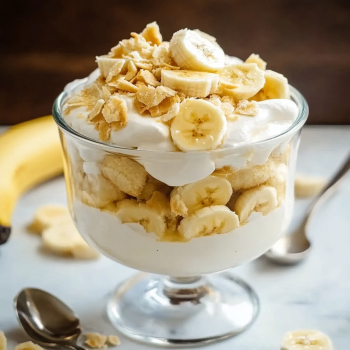
Classic Banana Pudding is a must-try dessert recipe!
Ingredients
Method
- In a large bowl, whisk together the sweetened condensed milk and ice-cold water until fully combined.
- Add the instant vanilla pudding mix and whisk for about 2 minutes until smooth.
- Cover and refrigerate for at least 4 hours (or overnight) until thickened.
- In a separate bowl, beat the heavy whipping cream, powdered sugar, and vanilla extract using an electric mixer on medium-high speed until stiff peaks form.
- Gently fold the whipped cream into the chilled vanilla pudding mixture until smooth and fluffy.
- In a large trifle dish or serving bowl, layer Nilla wafers, sliced bananas, and pudding mixture.
- Repeat layers until all ingredients are used, ending with a layer of pudding on top.
- Cover and refrigerate for at least 4 hours (or overnight) to allow flavors to meld.
- Before serving, garnish with crushed Nilla wafers and banana slices. Serve chilled and enjoy!
Notes
- Make-Ahead Tip: The pudding tastes even better the next day as the flavors meld.
- Banana Browning: Toss banana slices in a little lemon juice to prevent browning.
- Storage: Best eaten within 2 days, as the bananas will soften over time.
- Whipped Cream Alternative: You can use Cool Whip instead of homemade whipped cream for convenience.


