Advertisement
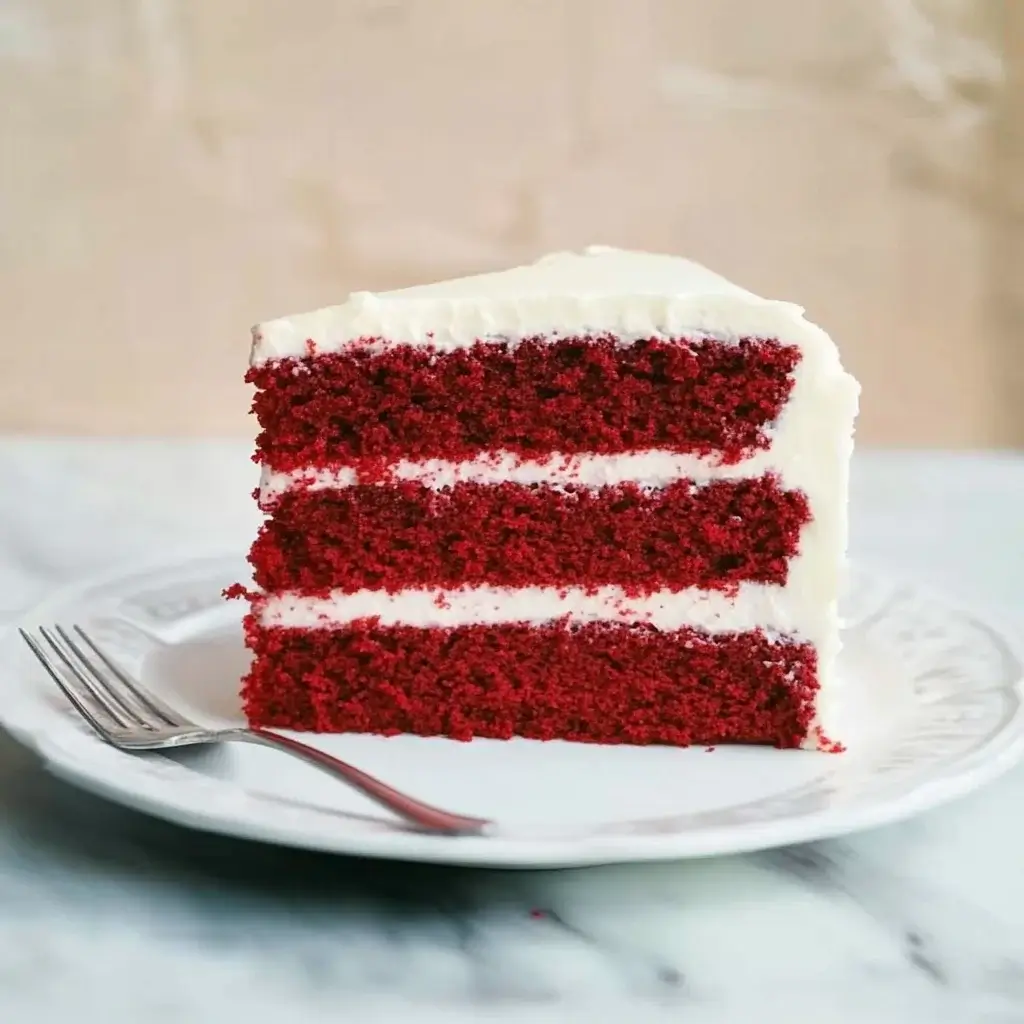
Classic Red Velvet Cake
There’s something truly special about Grandma’s Classic Red Velvet Cake. This delightful dessert is not just a treat; it’s a cherished memory for many. The rich, velvety texture and vibrant red color make it a showstopper at any gathering. But what makes this cake so beloved? Let’s dive into its history and discover why Grandma’s version stands out from the rest.
The History of Red Velvet Cake
Red velvet cake has a fascinating history that dates back to the 1800s. Originally, it was a simple chocolate cake with a hint of red hue, thanks to the reaction between cocoa powder and acidic ingredients like buttermilk and vinegar. Over time, the cake evolved, and the vibrant red color became more pronounced, especially with the introduction of food coloring in the 1920s.
During the Great Depression, red velvet cake gained popularity as a luxurious dessert. It was often served at special occasions, making it a symbol of celebration. Today, it remains a favorite for birthdays, weddings, and holidays. The cake’s unique flavor and stunning appearance continue to captivate dessert lovers everywhere.
Why Grandma’s Classic Red Velvet Cake Stands Out
What sets Grandma’s Classic Red Velvet Cake apart from others? It’s all about the love and care that goes into making it. Grandma’s recipe often includes secret ingredients and techniques passed down through generations. The use of high-quality ingredients, like fresh buttermilk and real butter, ensures a moist and flavorful cake.
Advertisement
Moreover, the cream cheese frosting adds a tangy sweetness that perfectly complements the cake’s rich flavor. Each bite is a delightful experience, evoking memories of family gatherings and celebrations. Grandma’s Classic Red Velvet Cake is not just a dessert; it’s a heartfelt tradition that brings people together.
So, whether you’re celebrating a special occasion or simply indulging in a sweet treat, Grandma’s Classic Red Velvet Cake is sure to bring joy to your table.
Ingredients for Grandma’s Classic Red Velvet Cake
To create Grandma’s Classic Red Velvet Cake, you’ll need a selection of simple yet essential ingredients. Each component plays a vital role in achieving that signature flavor and texture. Here’s what you’ll need:
- 2 ½ cups all-purpose flour: This forms the base of your cake, providing structure and stability.
- 1 ½ cups granulated sugar: Sugar adds sweetness and helps create a moist cake.
- 1 teaspoon baking soda: This leavening agent helps the cake rise, giving it a light texture.
- 1 teaspoon salt: A pinch of salt enhances the flavors and balances the sweetness.
- 1 teaspoon cocoa powder: Just a hint of cocoa adds depth to the flavor without overpowering the cake.
- 1 ½ cups vegetable oil: Oil keeps the cake moist and tender, making it rich and delicious.
- 1 cup buttermilk, room temperature: Buttermilk adds a tangy flavor and helps activate the baking soda.
- 2 large eggs, room temperature: Eggs provide structure and moisture, helping bind the ingredients together.
- 2 tablespoons red food coloring: This is what gives the cake its iconic red hue, making it visually stunning.
- 1 teaspoon vanilla extract: Vanilla adds a warm, sweet flavor that complements the cake beautifully.
- 1 teaspoon white vinegar: The vinegar reacts with the baking soda, contributing to the cake’s rise and tenderness.
For the cream cheese frosting, gather the following ingredients:
- 8 ounces cream cheese, softened: Cream cheese is the star of the frosting, providing a rich and creamy texture.
- ½ cup unsalted butter, softened: Butter adds richness and helps create a smooth frosting.
- 4 cups powdered sugar: This sweetens the frosting and gives it a fluffy consistency.
- 1 teaspoon vanilla extract: Just like in the cake, vanilla enhances the flavor of the frosting.
- 2 tablespoons milk (if needed for consistency): Milk can be added to adjust the frosting’s thickness to your liking.
With these ingredients on hand, you’re ready to embark on the delightful journey of baking Grandma’s Classic Red Velvet Cake. Each ingredient contributes to the cake’s unique flavor and texture, ensuring a delicious result that will impress everyone at your table.
Step-by-Step Preparation of Grandma’s Classic Red Velvet Cake
Now that you have all your ingredients ready, it’s time to dive into the fun part: baking! Follow these simple steps to create Grandma’s Classic Red Velvet Cake. Each step is designed to ensure your cake turns out perfectly delicious.
Step 1: Prepping Your Baking Tools
Before you start mixing, make sure you have everything you need. Gather your baking tools:
- Two 9-inch round cake pans
- Mixing bowls (one large and one medium)
- Whisk and spatula
- Measuring cups and spoons
- Cooling racks
- Oven mitts
Next, preheat your oven to 350°F (175°C). Grease and flour the cake pans to prevent sticking. This step is crucial for a smooth cake release!
Step 2: Mixing the Dry Ingredients
In a large mixing bowl, sift together the dry ingredients. Combine:
- 2 ½ cups all-purpose flour
- 1 ½ cups granulated sugar
- 1 teaspoon baking soda
- 1 teaspoon salt
- 1 teaspoon cocoa powder
Sifting helps to aerate the flour and mix the ingredients evenly. This ensures a light and fluffy cake!
Step 3: Combining the Wet Ingredients
In another bowl, whisk together the wet ingredients. Mix:
- 1 ½ cups vegetable oil
- 1 cup buttermilk (room temperature)
- 2 large eggs (room temperature)
- 2 tablespoons red food coloring
- 1 teaspoon vanilla extract
- 1 teaspoon white vinegar
Make sure everything is well combined. The vinegar and baking soda will react, creating bubbles that help the cake rise!
Step 4: Creating the Red Velvet Batter
Now, it’s time to combine the dry and wet ingredients. Gradually add the wet mixture to the dry ingredients. Use a spatula to gently fold them together. Be careful not to overmix; you want to keep the batter light and airy. Once combined, you’ll have a beautiful red velvet batter!
Step 5: Baking the Cake Layers
Divide the batter evenly between the prepared cake pans. Smooth the tops with a spatula for even baking. Place the pans in the preheated oven and bake for 25-30 minutes. To check for doneness, insert a toothpick into the center. If it comes out clean, your cakes are ready!
Step 6: Preparing the Cream Cheese Frosting
While the cakes are cooling, it’s time to whip up the cream cheese frosting. In a mixing bowl, beat together:
- 8 ounces softened cream cheese
- ½ cup softened unsalted butter
Mix until smooth and creamy. Gradually add:
- 4 cups powdered sugar
- 1 teaspoon vanilla extract
Continue mixing until well combined. If the frosting is too thick, add milk a tablespoon at a time until you reach your desired consistency.
Step 7: Assembling Grandma’s Classic Red Velvet Cake
Once the cakes are completely cooled, it’s time to assemble! Place one layer on a serving plate. Spread a generous amount of cream cheese frosting on top. Then, carefully place the second layer on top. Frost the top and sides of the cake with the remaining frosting. Make it as smooth or as textured as you like!
And there you have it! Grandma’s Classic Red Velvet Cake is ready to be enjoyed. Each slice is a piece of history, filled with love and deliciousness.
Variations of Grandma’s Classic Red Velvet Cake
While Grandma’s Classic Red Velvet Cake is a timeless recipe, there are many ways to adapt it to fit different dietary needs and preferences. Whether you’re looking for gluten-free options or vegan adaptations, you can still enjoy this delightful dessert. Let’s explore some variations that keep the spirit of Grandma’s cake alive!
Gluten-Free Options
If you or someone you know is gluten-sensitive, you can easily make a gluten-free version of Grandma’s Classic Red Velvet Cake. Here’s how:
- Use Gluten-Free Flour: Substitute the all-purpose flour with a gluten-free all-purpose flour blend. Make sure it contains xanthan gum, which helps mimic the texture of traditional flour.
- Check Other Ingredients: Ensure that your baking soda, cocoa powder, and food coloring are gluten-free. Most brands are, but it’s always good to double-check.
- Follow the Same Recipe: You can follow the original recipe as is, just swapping the flour. The taste and texture will still be delightful!
With these simple changes, you can enjoy a moist and flavorful gluten-free red velvet cake that everyone will love.
Vegan Adaptations
For those following a vegan lifestyle, Grandma’s Classic Red Velvet Cake can be made without any animal products. Here’s how to adapt the recipe:
- Replace Eggs: Use flaxseed meal or chia seeds as an egg substitute. Mix 1 tablespoon of flaxseed meal or chia seeds with 2.5 tablespoons of water. Let it sit for a few minutes until it thickens.
- Use Plant-Based Milk: Instead of buttermilk, use almond milk or soy milk. Add a teaspoon of vinegar to the milk to create a buttermilk effect.
- Choose Vegan Butter: For the cream cheese frosting, use vegan cream cheese and vegan butter. This will keep the frosting creamy and delicious.
By making these adjustments, you can create a vegan version of Grandma’s Classic Red Velvet Cake that is just as rich and satisfying. Everyone can enjoy a slice, regardless of their dietary choices!
Cooking Note for Grandma’s Classic Red Velvet Cake
Baking Grandma’s Classic Red Velvet Cake is a delightful experience, but there are a few important cooking notes to keep in mind. These tips will help ensure your cake turns out perfectly every time, making it a true showstopper at any gathering.
First, always use room temperature ingredients. This includes your eggs and buttermilk. Room temperature ingredients blend more easily, resulting in a smoother batter. It also helps the cake rise better, giving it that light and fluffy texture we all love.
Next, be mindful of your mixing technique. When combining the wet and dry ingredients, mix until just combined. Overmixing can lead to a dense cake, which is not what you want. A gentle hand will keep the batter airy and light.
Another key point is to check your oven temperature. Ovens can vary, so it’s a good idea to use an oven thermometer. This ensures that your cake bakes evenly and doesn’t end up overcooked or undercooked.
When it comes to cooling, patience is essential. Allow the cakes to cool in the pans for about 10 minutes before transferring them to wire racks. This helps prevent breakage and ensures a smooth release from the pans.
Lastly, don’t rush the frosting process. Make sure your cream cheese and butter are softened to room temperature. This will make it easier to achieve a creamy and smooth frosting. If your frosting is too thick, remember to add milk gradually until you reach the desired consistency.
By following these cooking notes, you’ll be well on your way to creating a stunning and delicious Grandma’s Classic Red Velvet Cake. Enjoy the process, and most importantly, have fun baking!
Serving Suggestions for Grandma’s Classic Red Velvet Cake
When it comes to serving Grandma’s Classic Red Velvet Cake, presentation and pairing can elevate the experience. Here are some delightful serving suggestions that will impress your guests and make every slice memorable.
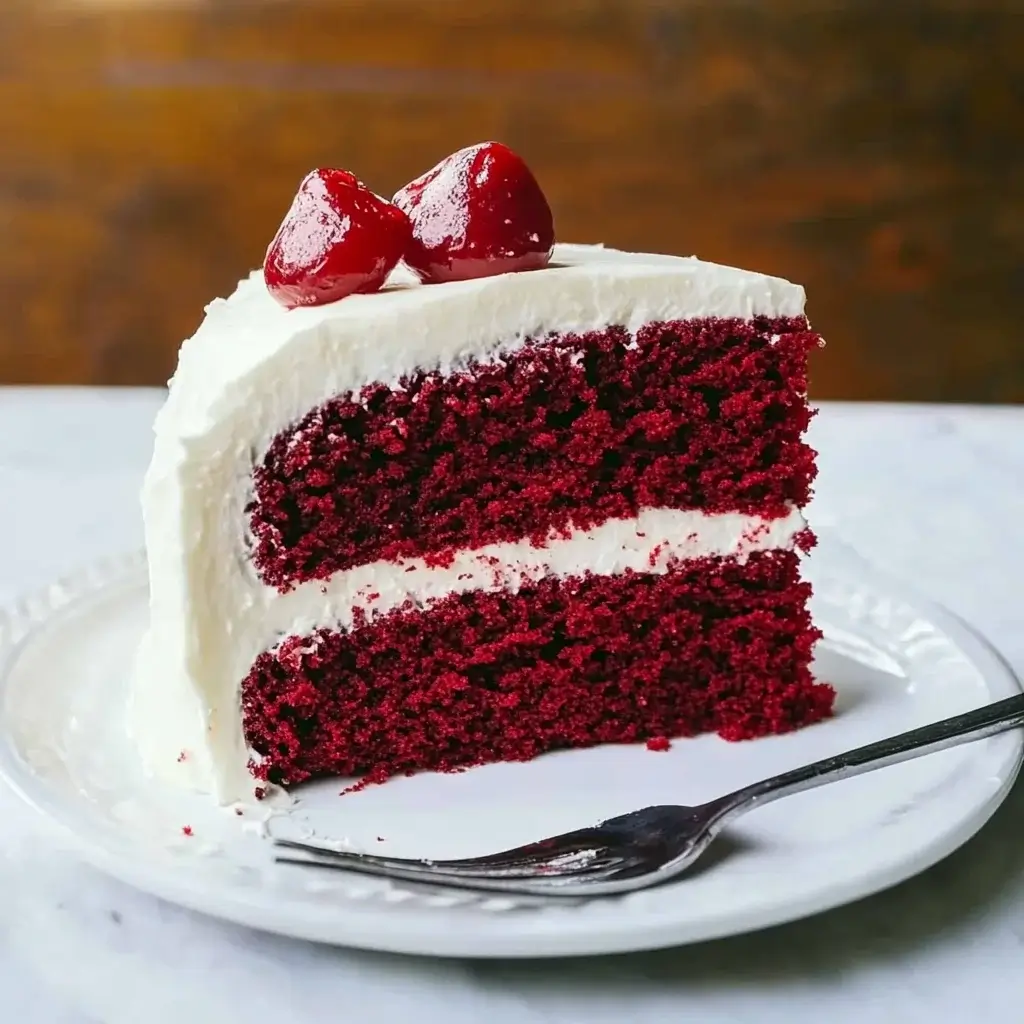
Classic Presentation
For a traditional look, serve the cake on a beautiful cake stand. This allows the vibrant red color and creamy frosting to shine. You can garnish the top with a sprinkle of cocoa powder or chocolate shavings for an elegant touch. Fresh berries, like raspberries or strawberries, can also add a pop of color and a hint of tartness that complements the sweetness of the cake.
Pairing with Beverages
Pairing drinks with your red velvet cake can enhance the flavors. Here are some great options:
- Coffee: A rich cup of coffee balances the sweetness of the cake. The bitterness of the coffee complements the creamy frosting beautifully.
- Tea: A warm cup of chai or Earl Grey tea can add a fragrant touch. The spices in chai, in particular, work well with the cake’s flavors.
- Milk: For a classic pairing, serve a glass of cold milk. It’s a nostalgic choice that brings out the cake’s richness.
Creative Serving Ideas
If you want to get a bit creative, consider these fun serving ideas:
- Red Velvet Cupcakes: Use the same batter to make cupcakes. Top them with cream cheese frosting for individual servings that are perfect for parties.
- Layered Dessert Cups: Crumble pieces of the cake into dessert cups, layer with frosting, and add fresh fruit. This creates a fun and interactive dessert.
- Ice Cream Sandwiches: Use slices of cake to create ice cream sandwiches. Add a scoop of vanilla or chocolate ice cream between two layers for a delightful treat.
With these serving suggestions, Grandma’s Classic Red Velvet Cake can be enjoyed in various ways. Whether you stick to the classic presentation or try something new, each slice is sure to bring joy and deliciousness to your table.
Tips for Perfecting Grandma’s Classic Red Velvet Cake
Creating the perfect Grandma’s Classic Red Velvet Cake is an art that combines technique, patience, and a little love. Here are some essential tips to help you achieve a cake that is not only visually stunning but also deliciously moist and flavorful.
Use Quality Ingredients
Start with high-quality ingredients. Fresh eggs, real buttermilk, and pure vanilla extract can make a significant difference in flavor. Opt for natural food coloring for a more vibrant hue without artificial additives.
Measure Accurately
Accurate measurements are crucial for baking success. Use a kitchen scale for precise flour measurements, or spoon and level the flour into your measuring cup. Avoid packing it down, as this can lead to a dense cake.
Room Temperature Ingredients
Ensure all your ingredients are at room temperature before mixing. This includes eggs, buttermilk, and butter. Room temperature ingredients blend more easily, resulting in a smoother batter and a lighter cake.
Don’t Overmix
When combining the wet and dry ingredients, mix until just combined. Overmixing can develop gluten, leading to a tough cake. A gentle hand will keep your batter airy and fluffy.
Check for Doneness
Ovens can vary in temperature, so always check for doneness a few minutes before the suggested baking time. Insert a toothpick into the center of the cake; if it comes out clean or with a few moist crumbs, your cake is ready.
Cool Properly
After baking, let the cakes cool in the pans for about 10 minutes. Then, transfer them to wire racks to cool completely. This prevents sogginess and helps maintain the cake’s structure.
Frosting Tips
For the cream cheese frosting, ensure your cream cheese and butter are softened to room temperature. This will help you achieve a smooth and creamy texture. If your frosting is too thick, add milk gradually until you reach the desired consistency.
Decorate with Care
When frosting the cake, start with a crumb coat. This is a thin layer of frosting that traps any crumbs. Chill the cake for about 30 minutes, then apply a thicker layer of frosting for a clean finish. You can also use a spatula or a cake scraper for a smooth look.
By following these tips, you’ll be well on your way to perfecting Grandma’s Classic Red Velvet Cake. Each step is an opportunity to create a dessert that not only tastes amazing but also brings back fond memories of family gatherings and celebrations.
Breakdown of Time for Grandma’s Classic Red Velvet Cake
Understanding the time required for each step in baking Grandma’s Classic Red Velvet Cake can help you plan better. Here’s a detailed breakdown of the time you’ll need for preparation, cooking, and the total time involved in creating this delightful dessert.
Prep Time
The prep time for Grandma’s Classic Red Velvet Cake is approximately 30 minutes. This includes:
- Gathering and measuring all your ingredients.
- Prepping your baking tools and greasing the cake pans.
- Sifting the dry ingredients and mixing the wet ingredients.
- Combining the wet and dry ingredients to create the batter.
Taking your time during this stage ensures that everything is ready for a smooth baking process.
Cooking Time
The cooking time for the cake itself is about 25-30 minutes. Here’s what to expect:
- Baking the cake layers in the preheated oven until a toothpick inserted in the center comes out clean.
- Allowing the cakes to cool in the pans for about 10 minutes before transferring them to wire racks.
Keep an eye on the cakes as they bake, as oven temperatures can vary. Checking for doneness a few minutes early can prevent overbaking.
Total Time
In total, you can expect to spend about 1 hour and 15 minutes to 1 hour and 30 minutes on Grandma’s Classic Red Velvet Cake. This includes:
- 30 minutes for prep.
- 25-30 minutes for baking.
- 10 minutes for cooling in the pans.
- Additional time for preparing the cream cheese frosting and assembling the cake, which can take around 15-20 minutes.
With this time breakdown, you can plan your baking session effectively. Enjoy the process, and soon you’ll have a beautiful and delicious cake to share with family and friends!
Nutritional Information for Grandma’s Classic Red Velvet Cake
Understanding the nutritional content of Grandma’s Classic Red Velvet Cake can help you enjoy it in moderation. This cake is not only a treat for the taste buds but also provides some essential nutrients. Here’s a breakdown of the nutritional information per serving, which serves about 12 people.
Calories
Each slice of Grandma’s Classic Red Velvet Cake contains approximately 400 calories. This calorie count includes the cake itself and the cream cheese frosting. While it’s a delightful indulgence, being mindful of portion sizes can help you enjoy this dessert without overdoing it.
Protein
In terms of protein, each serving offers about 4 grams. While this isn’t a high-protein dessert, it does contribute to your daily intake. Pairing the cake with a glass of milk can enhance the protein content of your snack, making it a more balanced treat.
Sodium
Each slice contains around 300 milligrams of sodium. This amount is relatively moderate, especially considering that sodium is often found in many baked goods. If you’re watching your sodium intake, it’s good to be aware of this number. However, enjoying a slice occasionally is perfectly fine for most people.
Overall, Grandma’s Classic Red Velvet Cake is a delicious dessert that can be enjoyed as part of a balanced diet. Remember, moderation is key! Whether you’re celebrating a special occasion or simply treating yourself, this cake is sure to bring joy to your table.
FAQs about Grandma’s Classic Red Velvet Cake
What makes red velvet cake red?
The vibrant red color of red velvet cake comes primarily from the addition of red food coloring. However, the original recipes used a reaction between cocoa powder and acidic ingredients like buttermilk and vinegar to create a subtle reddish hue. Today, most recipes, including Grandma’s Classic Red Velvet Cake, rely on food coloring to achieve that iconic bright red appearance.
Can I use food coloring instead of cocoa powder?
While food coloring is essential for achieving the red color in red velvet cake, cocoa powder is also a key ingredient that contributes to the cake’s flavor. It adds a hint of chocolate without overpowering the cake. If you omit cocoa powder, the cake may lose some of its unique taste. Therefore, it’s best to keep both ingredients in the recipe for the best results.
How do I store leftover red velvet cake?
To store leftover Grandma’s Classic Red Velvet Cake, first, ensure it is completely cooled. Place the cake in an airtight container or cover it with plastic wrap. You can keep it at room temperature for up to 3 days. If you want to store it for a longer period, refrigerate it, where it can last for about a week. For even longer storage, consider freezing individual slices wrapped tightly in plastic wrap and then in aluminum foil. This way, you can enjoy a slice whenever you crave it!
Can I make red velvet cupcakes instead?
Absolutely! You can easily transform Grandma’s Classic Red Velvet Cake into red velvet cupcakes. Simply follow the same recipe, but pour the batter into cupcake liners instead of cake pans. Bake at the same temperature, but check for doneness around 18-20 minutes. Once cooled, top them with the cream cheese frosting for delightful individual treats that are perfect for parties or gatherings!
Conclusion on Grandma’s Classic Red Velvet Cake
In conclusion, Grandma’s Classic Red Velvet Cake is more than just a dessert; it’s a heartfelt tradition that brings families together. With its rich flavor, stunning color, and creamy frosting, this cake has earned its place in the hearts of many. Whether you’re celebrating a special occasion or simply indulging in a sweet treat, this cake is sure to impress.
By following the steps outlined in this article, you can create a delicious cake that captures the essence of Grandma’s love and care. Remember to use quality ingredients, measure accurately, and take your time during the baking process. Each slice is a reminder of cherished memories and the joy of sharing good food with loved ones.
So, gather your ingredients, preheat your oven, and embark on the delightful journey of baking Grandma’s Classic Red Velvet Cake. Enjoy the process, savor each bite, and create new memories that will last a lifetime. Happy baking!
Grandma’s Classic Red Velvet Cake is a timeless delight.
Ingredients
Method
- Preheat oven to 350°F. Grease and flour two 9-inch round pans.
- In a bowl, whisk flour, baking soda, cocoa powder, and salt.
- Cream butter and sugar until fluffy. Add eggs one at a time.
- Mix in buttermilk, food coloring, vanilla, and vinegar.
- Gradually add dry ingredients and mix until just combined.
- Divide batter between pans and bake for 25–30 minutes.
- Let cool completely. Frost with cream cheese frosting.
Notes
- Use gel food coloring for richer red.
- Cake layers can be baked ahead and frozen.
- Decorate with cake crumbs or sprinkles for a festive touch.