Advertisement
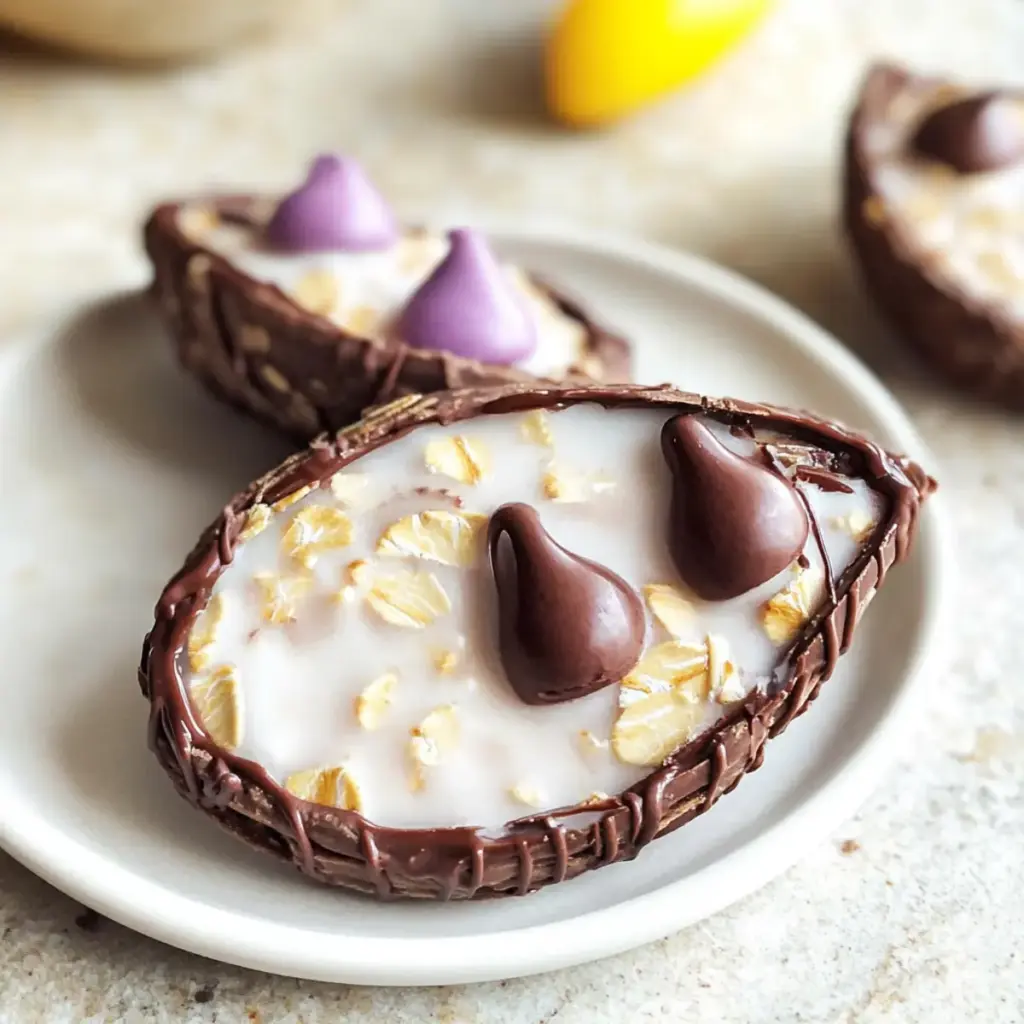
The kitchen is my favorite playground, and today, I’m excited to share a delicious adventure featuring No-Bake Chocolate Oat Cookies! In less than 30 minutes, you can whip up a batch of these delightful treats that balance wholesome oats with creamy peanut butter, making them an ideal energy-boosting snack or a sweet end to any meal. Best of all, these cookies are gluten-free and completely customizable, inviting you to play with flavors that suit your personal palate. Whether you’re a busy parent looking for a quick dessert or simply a cookie lover seeking a wholesome indulgence, this recipe has something for everyone. Curious about how to transform everyday ingredients into something irresistible? Let’s dive into the details!
Why You’ll Love These No-Bake Cookies
Quick Preparation: In just 30 minutes, these cookies are ready to satisfy your sweet tooth, making them a perfect last-minute treat.
Endless Customization: With a handful of simple ingredients, you can easily tweak flavors to suit any craving. Swap peanut butter for almond or try agave syrup instead of honey for a vegan twist!
Advertisement
Nutritious Indulgence: Packed with wholesome oats and healthy fats from nut butters, these cookies can be a guilt-free snack option. Pair them with a glass of milk or even an enticing Healthy Southwest Chicken for a balanced bite.
No Baking Required: Enjoy the bliss of cookies without the oven fuss. These no-bake wonders are ideal for warm days when firing up the oven feels too much.
Crowd-Pleaser: Everyone will love the rich chocolate flavor and chewy texture, making them a hit at gatherings, parties, or family events. Make a batch to share or keep them all to yourself!
No-Bake Chocolate Oat Cookies Ingredients
For the Cookie Base
- Oats – Rolled oats work best for structure; instant oats can lead to a softer texture.
- Peanut Butter – Adds creaminess and flavor; almond butter or sunflower seed butter are great nut-free options.
- Cocoa Powder – For a rich chocolate flavor; unsweetened cocoa gives a deeper taste that enhances indulgence.
- Honey or Maple Syrup – Acts as a sweetener and binding agent; use maple syrup for a vegan alternative.
- Vanilla Extract – Enhances overall flavor; always opt for pure vanilla for the best results.
- Salt – A pinch balances sweetness and elevates all the flavors in your cookies.
For Optional Add-ins
- Chocolate Chips – Swap out cocoa powder for chocolate chips for an extra indulgent burst of chocolate.
- Nuts or Seeds – Toss in your favorites for added crunch and nutrition; walnuts or chia seeds work beautifully.
- Dried Fruits – Include raisins or cranberries for a sweet, chewy texture that complements the chocolate.
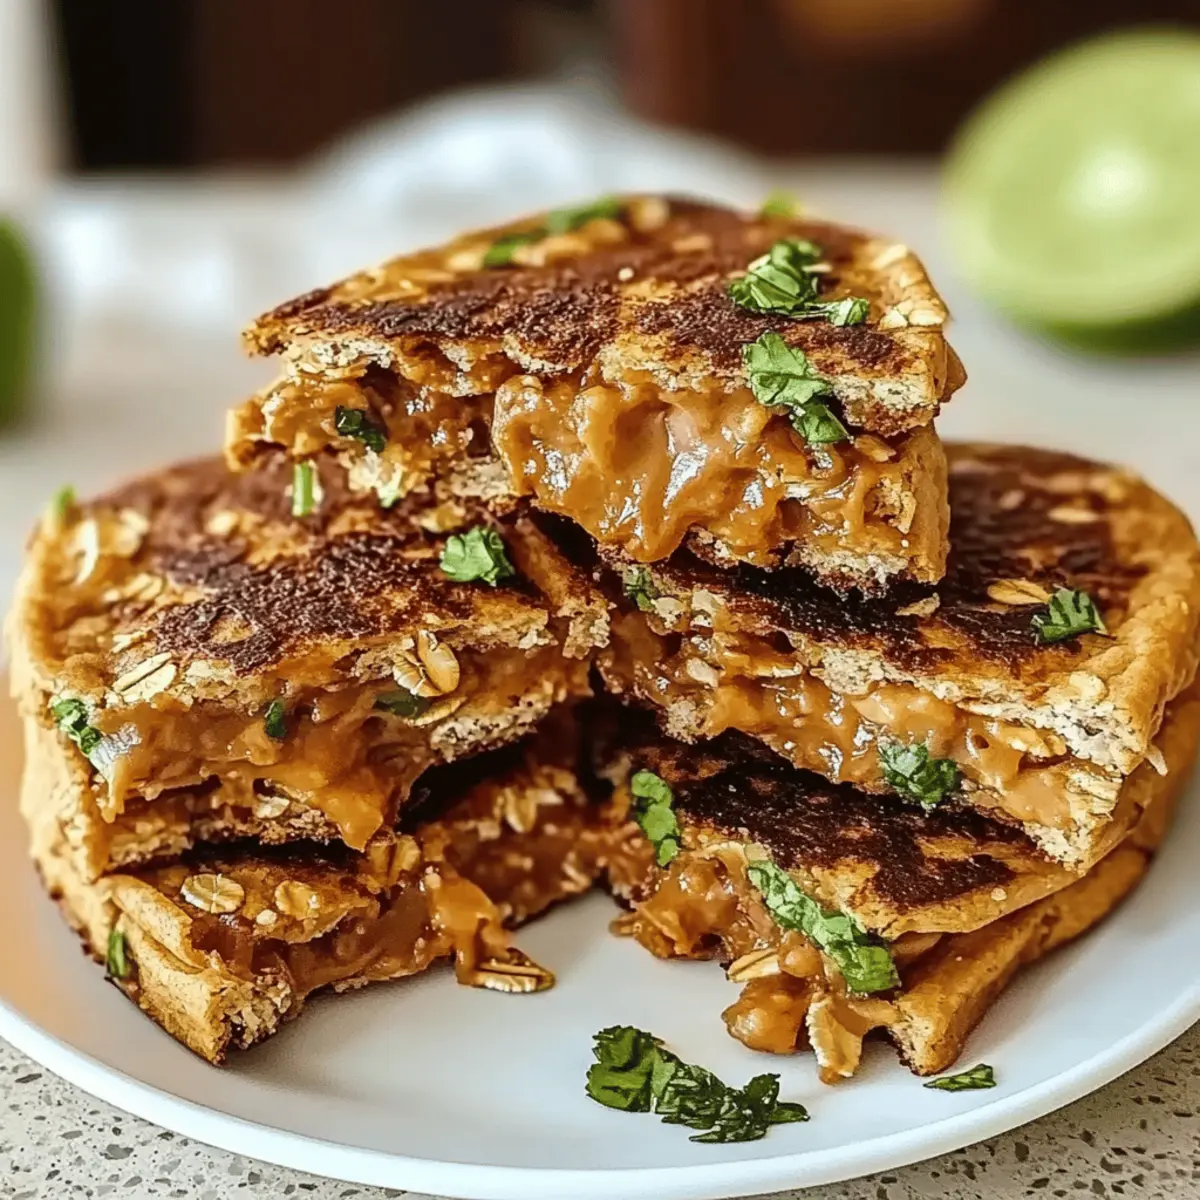
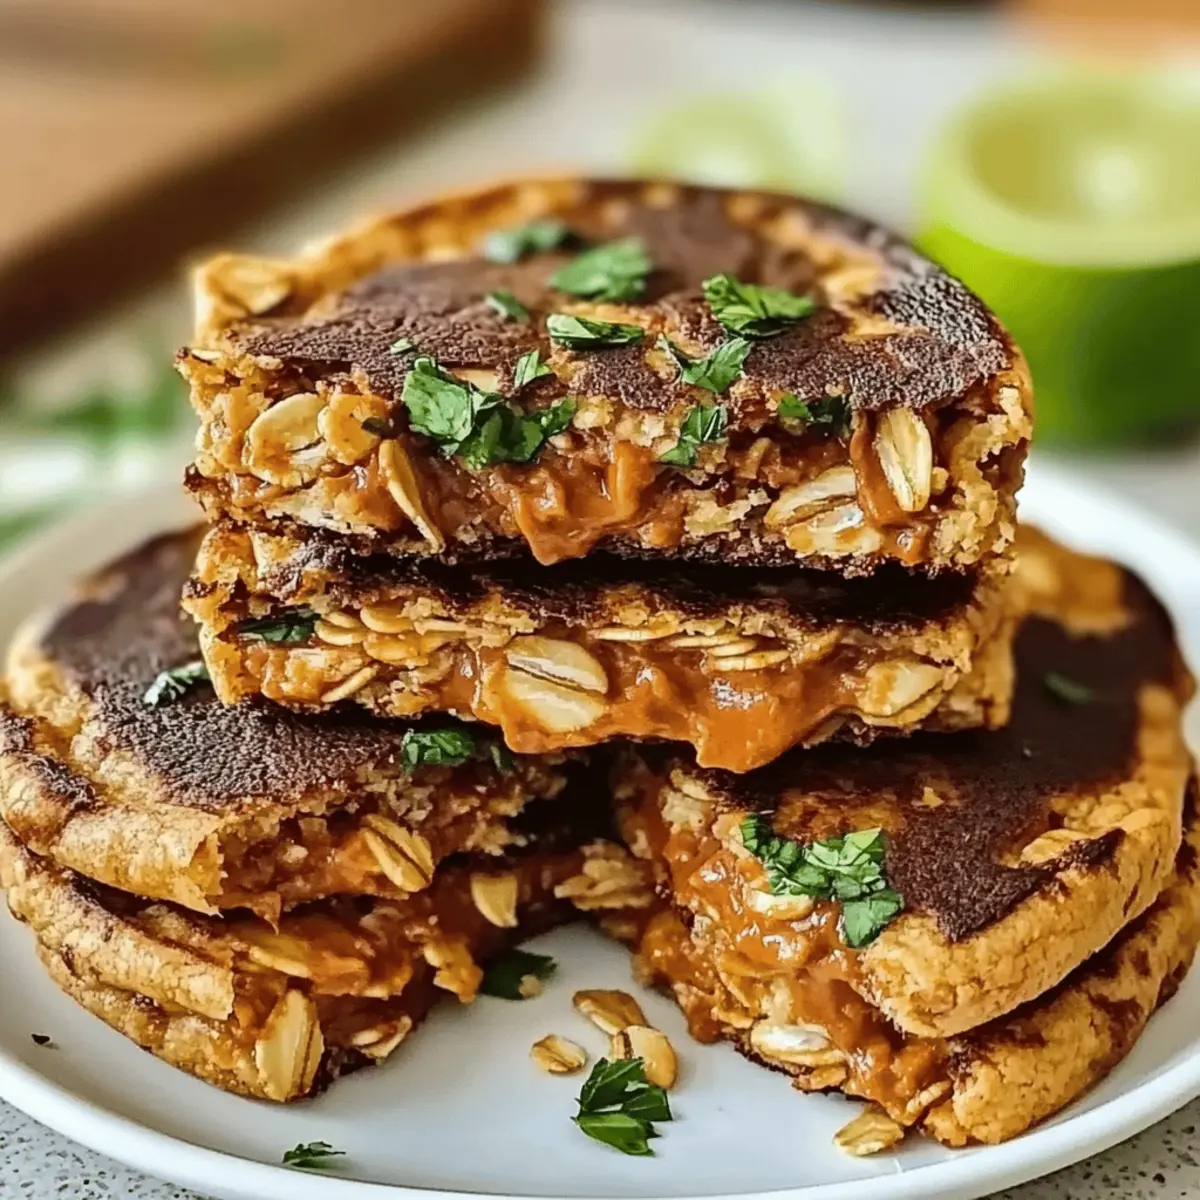
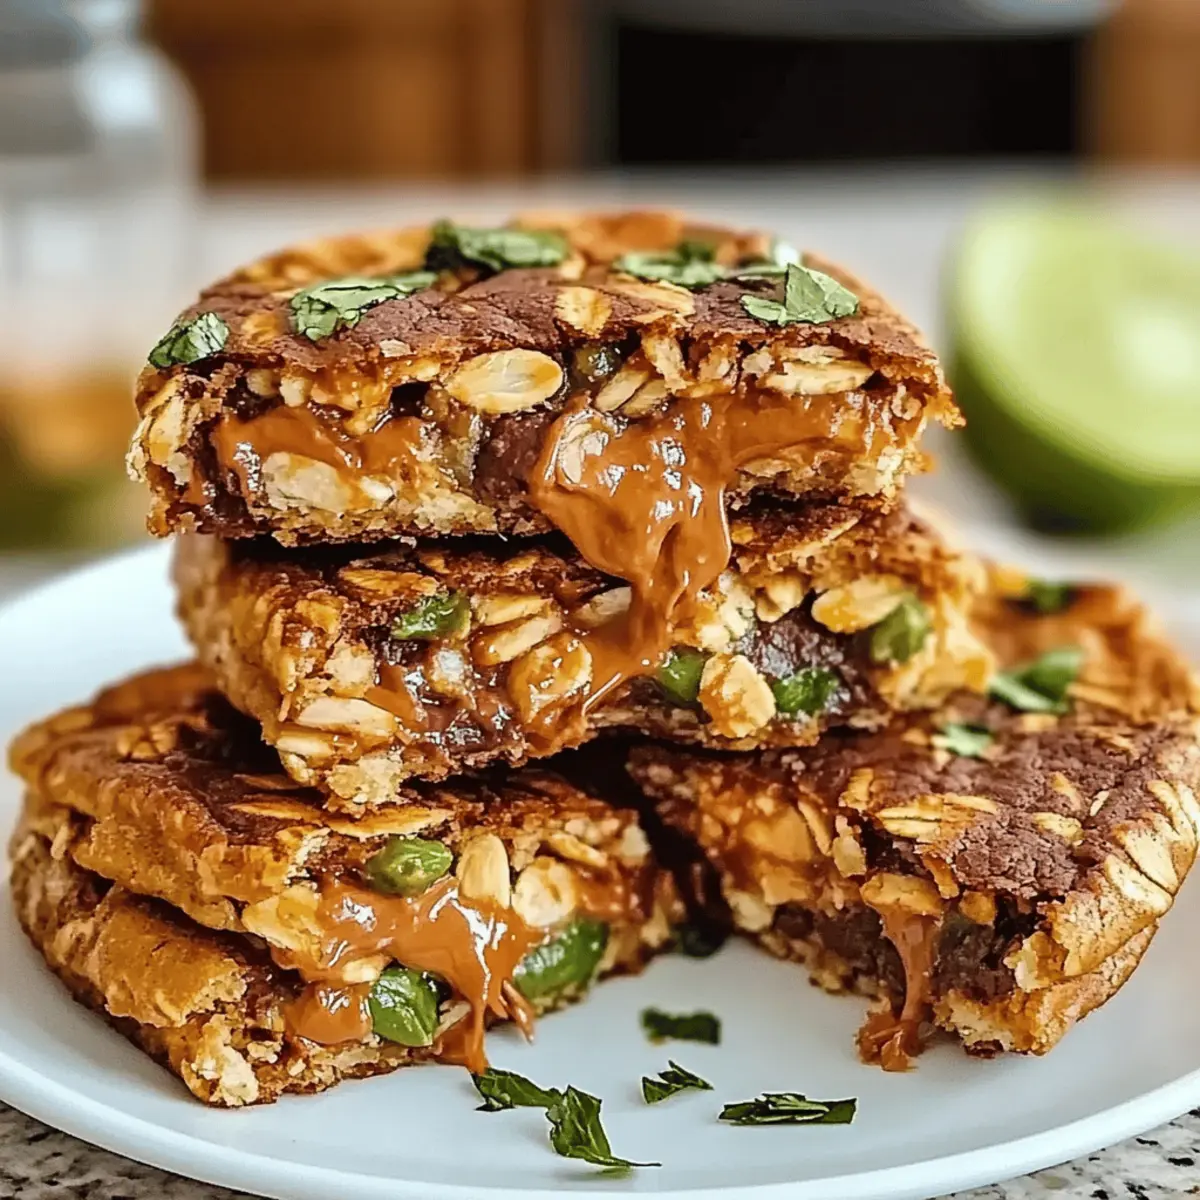
These No-Bake Chocolate Oat Cookies are a fantastic treat to whip up quickly, making your kitchen adventures a delight!
Step‑by‑Step Instructions for No-Bake Chocolate Oat Cookies
Step 1: Combine Dry Ingredients
In a large mixing bowl, combine 2 cups of rolled oats, ½ cup of cocoa powder, and a pinch of salt. Stir until the dry ingredients are well mixed, ensuring that every grain of oats is coated with cocoa. This mixture serves as the foundation of your No-Bake Chocolate Oat Cookies, providing rich flavor and texture.
Step 2: Mix Wet Ingredients
In a separate bowl, blend ½ cup of peanut butter, ½ cup of honey or maple syrup, and 1 teaspoon of vanilla extract. Use a spatula or whisk to mix until the ingredients achieve a smooth and creamy consistency. The combination of sweet and nutty flavors adds depth to your no-bake cookies, creating a delightful treat.
Step 3: Combine Mixtures
Gradually pour the wet mixture into the bowl with the dry ingredients. Stir gently with a spatula or wooden spoon until everything is fully coated and well combined. This step is crucial to ensure your No-Bake Chocolate Oat Cookies hold together nicely; avoid overmixing to maintain a chewy texture.
Step 4: Shape Cookies
Line a baking sheet with parchment paper. Using a tablespoon, scoop the cookie mixture and drop it onto the lined sheet, allowing enough space between each mound. Gently flatten each mound slightly with the back of the spoon to shape your cookies. You should see a nice, rounded form ready to set!
Step 5: Refrigerate to Set
Transfer the baking sheet to the refrigerator for about 15-20 minutes. This chilling period allows the No-Bake Chocolate Oat Cookies to firm up and hold their shape. Keep an eye on them as they set; you’ll know they’re ready when they feel solid to the touch yet remain slightly chewy on the inside.
Step 6: Serve and Enjoy
Once chilled, remove the cookies from the fridge and serve them as a delightful snack or dessert. The fudgy, chocolatey goodness combines with the satisfying crunch of oats in each bite. Store any leftovers in an airtight container in the fridge for up to a week, ensuring your No-Bake Chocolate Oat Cookies remain fresh and tasty!
No-Bake Chocolate Oat Cookies Variations
Feel free to get creative and make these delightful cookies your own with these fun and tasty twists!
-
Nut-Free: Swap peanut butter for sunflower seed butter to enjoy a delicious, allergy-friendly cookie that’s just as creamy and satisfying.
-
Vegan Delight: Use maple syrup instead of honey and choose vegan chocolate chips to keep these cookies plant-based without sacrificing flavor.
-
Different Flavors: Mix in a teaspoon of almond extract for a nutty twist that complements the chocolate, elevating your cookies to a whole new level.
-
Fruity Addition: Stir in dried cranberries or chopped apricots for a fruity burst that pairs beautifully with the chocolatey goodness.
-
Crispy Texture: For a delightful crunch, add a cup of toasted coconut flakes or chopped nuts, bringing not only great flavor but an enticing texture to every bite.
-
Spicy Kick: If you’re in the mood for a surprise, a dash of cinnamon or cayenne pepper can give your cookies an unexpected but pleasant warmth, ideal for adventurous palates.
-
Chocolate Lovers: Maximize the chocolatey goodness by mixing in chocolate chips or chunks instead of cocoa powder, because who can resist extra chocolate?
-
Protein Boost: Stir in a scoop of protein powder or ground flaxseeds for a nutritional lift, making these cookies not just a sweet treat but a satisfying energy boost.
These variations can transform your No-Bake Chocolate Oat Cookies into a personalized delight! Enjoy them with a glass of milk or as a delightful finishing touch to a meal, perhaps alongside a slice of Cheesy Chicken Roll for a well-rounded snack experience. Whatever you choose, these cookies are sure to satisfy your sweet cravings!
Make Ahead Options
These No-Bake Chocolate Oat Cookies are perfect for meal prep, allowing you to enjoy delicious treats with minimal effort! You can prepare the cookie mixture up to 24 hours in advance. Simply follow the instructions up to the point of shaping the cookies, then cover the mixing bowl tightly and refrigerate it. When you’re ready to enjoy your cookies, just scoop and shape the chilled mixture, then refrigerate for an additional 15-20 minutes to set. To maintain their quality, store any unused cookies in an airtight container in the fridge for up to one week, ensuring they stay fresh and chewy just as delightful as when freshly made.
Expert Tips for No-Bake Chocolate Oat Cookies
-
Ingredient Quality: Use natural peanut butter for a creamier texture; commercial brands often contain added sugar and oils that alter the cookie consistency.
-
Mixing Technique: Be careful not to overmix after adding wet ingredients to avoid dense cookies. Lightly folding the mixture will keep them chewy.
-
Texture Check: If the mixture seems too dry, a splash of milk or additional sweetener can help reach the right consistency for forming cookies.
-
Chill Time: Allow ample time in the refrigerator; if not firm enough, the cookies may fall apart when you try to eat them.
-
Add Unique Flavors: Experiment with different nut butters or mix in spices like cinnamon for a unique twist on the classic No-Bake Chocolate Oat Cookies.
How to Store and Freeze No-Bake Chocolate Oat Cookies
Fridge: Store your cookies in an airtight container in the refrigerator for up to one week to maintain their freshness and chewy texture.
Freezer: For longer storage, freeze the cookies in a single layer on a baking sheet, then transfer to an airtight container for up to three months.
Reheating: If you prefer a softened texture, let them thaw at room temperature for about 30 minutes before enjoying again.
Wrap Individually: For easy snacking, consider wrapping individual cookies in plastic wrap before freezing for quick treats any time you crave these delightful No-Bake Chocolate Oat Cookies!
What to Serve with No-Bake Chocolate Oat Cookies
Indulge your senses and create the perfect accompaniment to these rich, chocolatey delights that everyone will love.
-
Creamy Vanilla Ice Cream: The cool creaminess of ice cream perfectly balances the warm chocolate notes, enhancing every bite and transforming these cookies into a decadent dessert.
-
Fresh Berries: Add a handful of juicy strawberries or raspberries for a refreshing burst of flavor. Their tartness complements the sweetness of the cookies beautifully.
-
Nutty Granola Parfait: Layering these cookies with yogurt and granola results in a delicious, textured treat that’s perfect for breakfast or a sweet afternoon pick-me-up.
-
Almond Milk: Enjoy your cookies with a refreshing glass of almond milk. The nutty flavor pairs wonderfully with the oats and chocolate, creating a delightful harmony.
-
Coffee: A cup of rich coffee brings out the depth of the cocoa and is a lovely contrast to the sweetness, making for a cozy afternoon break.
-
Sliced Bananas: Serve the cookies with fresh banana slices for extra sweetness and a hint of creaminess. The banana’s natural flavor elevates the chocolate experience.
-
Chia Seed Pudding: The creamy texture of chia pudding adds a healthy twist and makes for a fantastic pairing that feels indulgent without the guilt.
-
Chocolate Milk: Indulge further by pairing these cookies with a refreshing glass of chocolate milk. The extra chocolaty flavor will surely satisfy any sweet tooth.
-
Peanut Butter Dip: For those who love a nutty twist, whip together creamy peanut butter with a touch of honey for a dip that enhances the flavors of your cookies, inviting you into a delightful snacking experience.
No-Bake Chocolate Oat Cookies Recipe FAQs
What type of oats should I use?
I recommend using rolled oats for the best texture in your No-Bake Chocolate Oat Cookies. They provide structure and a delightful chewiness. If you only have instant oats on hand, they can work in a pinch, but keep in mind that they may lead to a softer cookie.
How should I store my No-Bake Chocolate Oat Cookies?
Store your cookies in an airtight container in the refrigerator for up to one week. This keeps them fresh while retaining their chewy texture. Make sure they are fully cooled before sealing to prevent moisture buildup.
Can I freeze No-Bake Chocolate Oat Cookies?
Absolutely! For longer storage, freeze the cookies in a single layer on a baking sheet for about two hours. Once they are firm, transfer them to an airtight container or freezer bag, where they can last up to three months. When you’re ready to enjoy, let them thaw at room temperature for about 30 minutes.
What if my cookie mixture is too dry?
If you find your mixture is too dry to form cookies, add a small splash of milk (dairy or non-dairy) or a bit more sweetener (like honey or maple syrup). Mix gently until you achieve a consistency that holds together without being too sticky.
Are there any common allergies I should consider?
Yes, this recipe contains peanuts due to the peanut butter. For those with nut allergies, you can easily substitute the peanut butter with sunflower seed butter or an alternative nut-free butter. Additionally, always check that any sweeteners, like honey or maple syrup, are safe for your dietary needs.
How do I know when my cookies are ready to serve?
After refrigerating your cookies for 15-20 minutes, they should feel solid to the touch but still slightly chewy inside. If they are not firm enough yet, allow them to chill for an additional 5-10 minutes. Enjoy this delicious treat once they reach the perfect texture!
Savor the Delightful Chicken Avocado Melt Sandwich Today
Ingredients
Equipment
Method
- In a large mixing bowl, combine rolled oats, cocoa powder, and a pinch of salt.
- In a separate bowl, blend peanut butter, honey or maple syrup, and vanilla extract until smooth.
- Gradually pour the wet mixture into the dry ingredients and stir until fully combined.
- Line a baking sheet with parchment paper and scoop the cookie mixture onto it, flattening slightly.
- Refrigerate for 15-20 minutes to set.
- Serve the cookies as a snack or dessert.