Advertisement
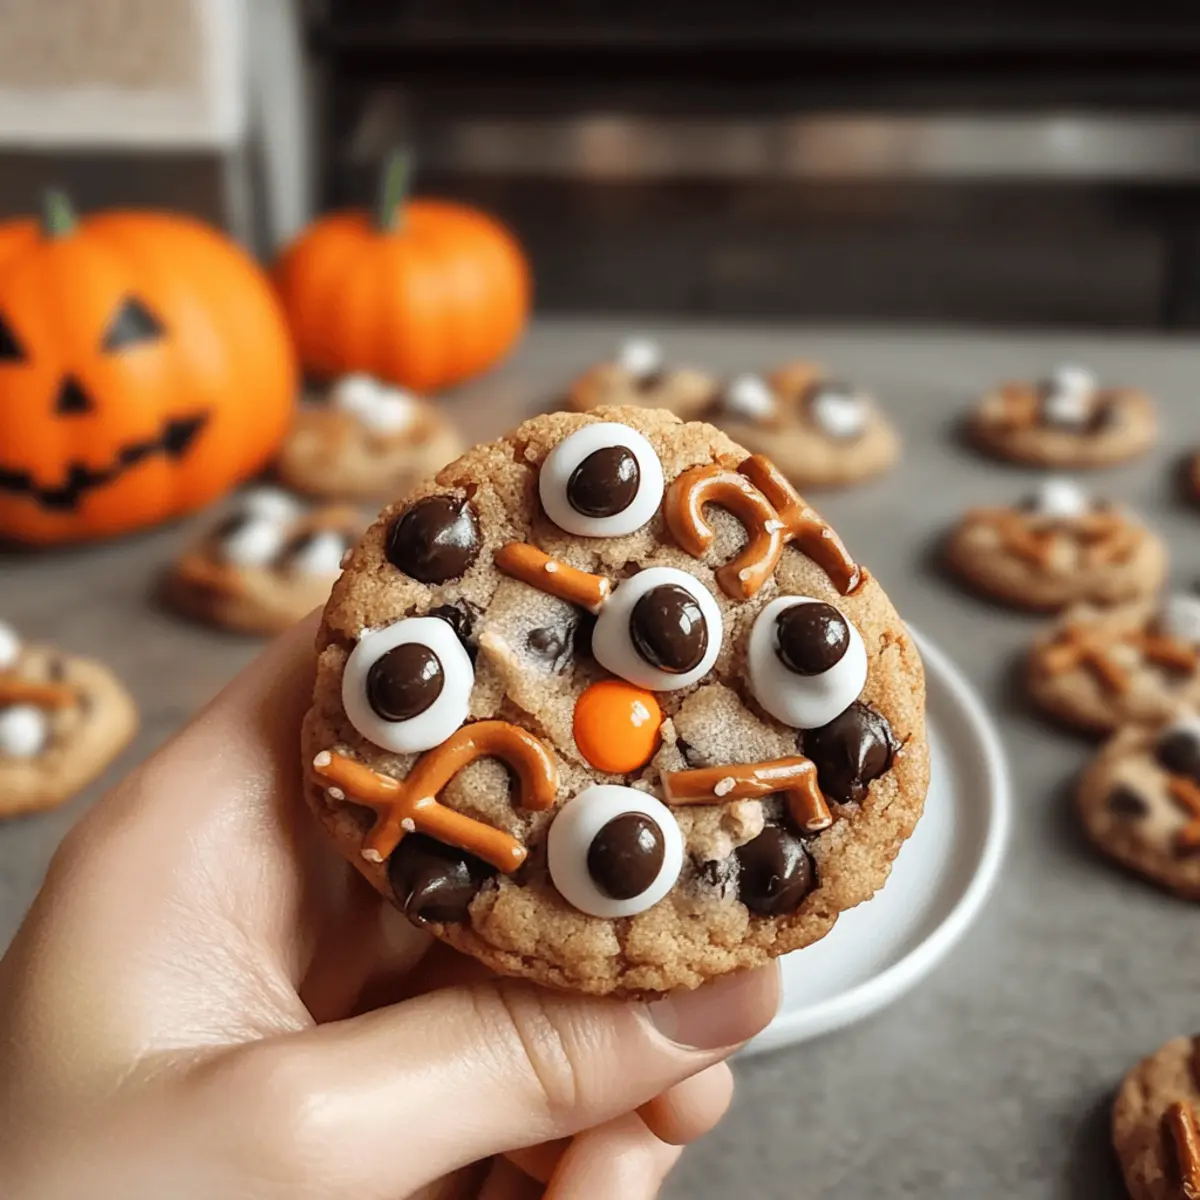
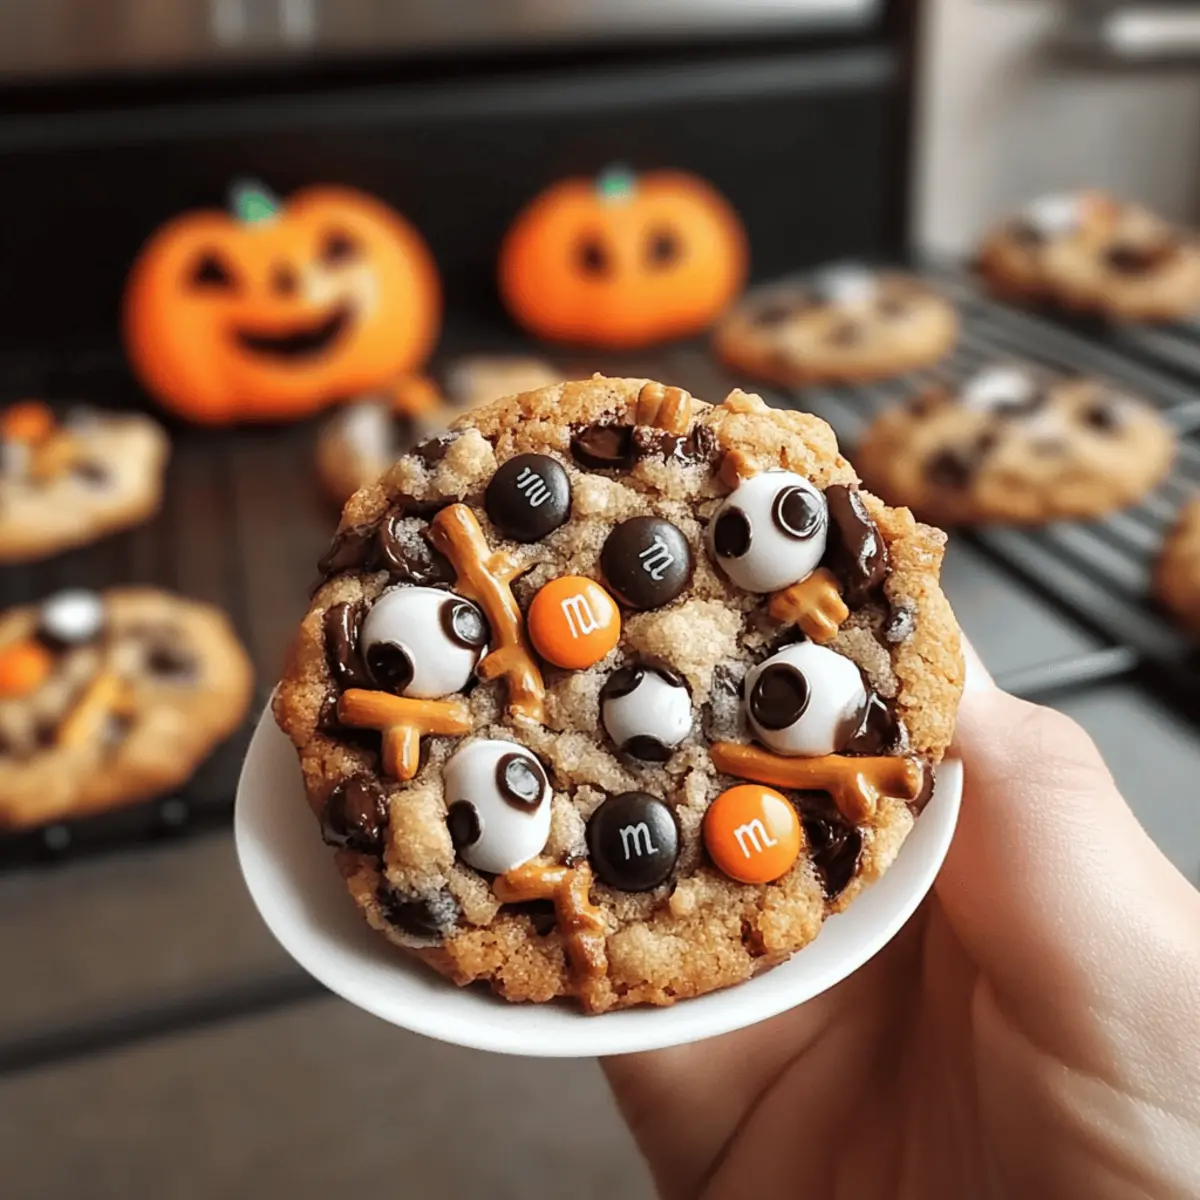
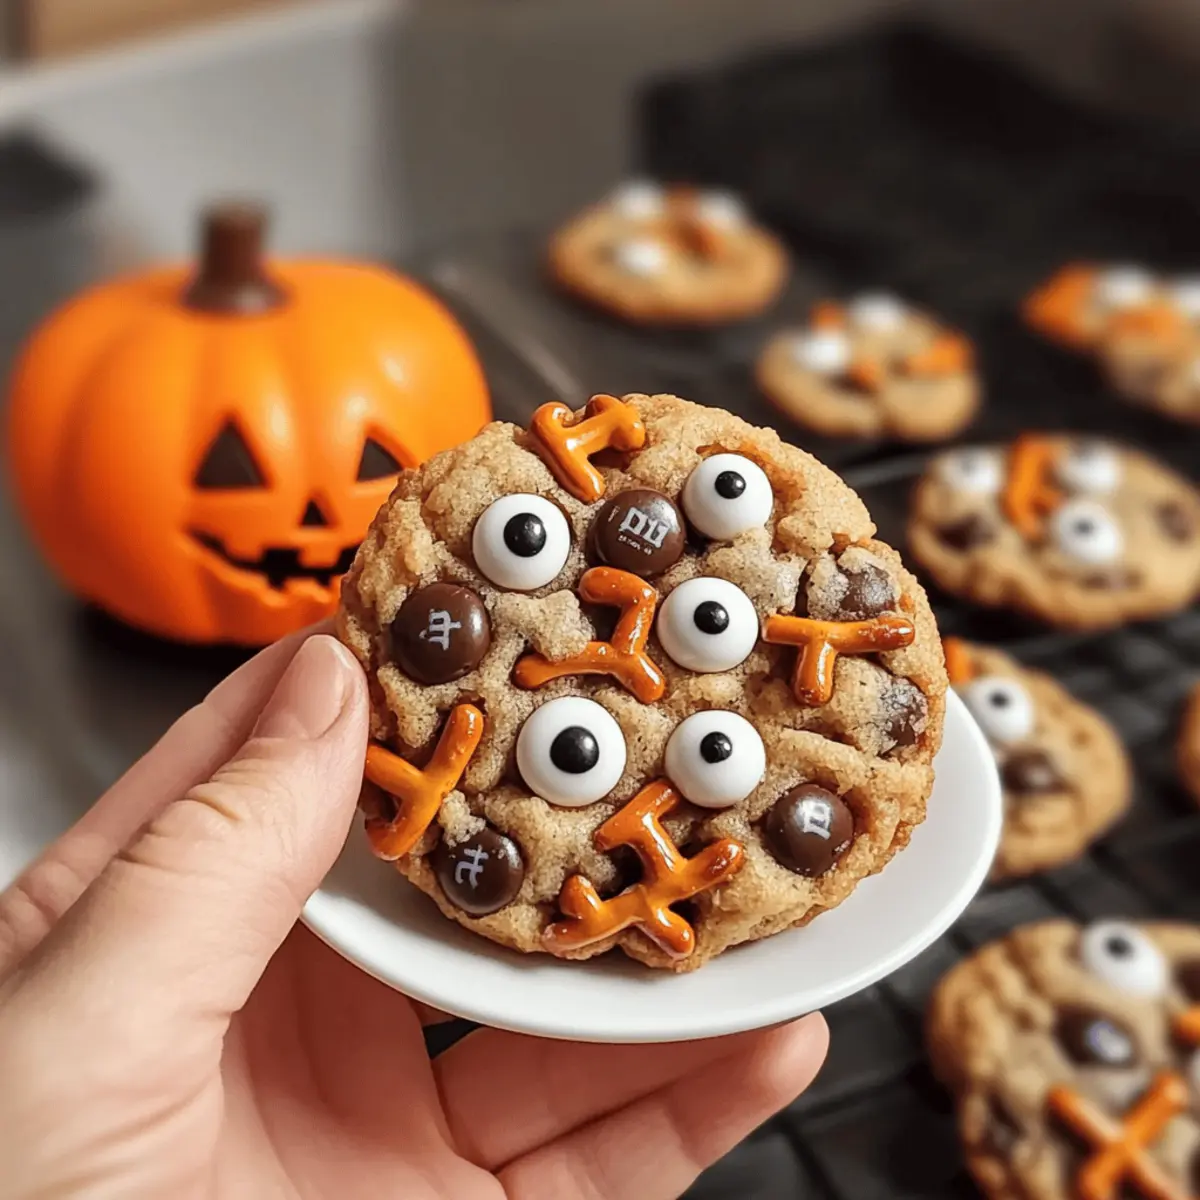
Imagine the thrill of mixing festive colors and fun textures right in your kitchen! These Halloween Monster Mash Cookies with chocolate chips are not just any cookies; they combine gooey chocolate flavors with a playful crunchy pretzel twist that kids and adults alike will adore. What sets these treats apart is their easy preparation, making them a perfect addition to your Halloween parties or fall family gatherings. Plus, they offer a delightful contrast between sweet and salty that will have everyone reaching for just one more! So, are you ready to bake some spooky delights that will bring joy to your home this Halloween season?
Why Are Halloween Cookies So Special?
Irresistible Fun: These Halloween Monster Mash Cookies fuse playful ingredients like candy eyes and pretzel sticks for a whimsical twist!
Easy to Make: With minimal steps and straightforward instructions, even novice bakers will shine in the kitchen.
Advertisement
Gooey Goodness: Featuring rich chocolate chips, these cookies promise a melty center that melts in your mouth.
Crowd Favorite: They’re perfect for parties—everyone loves the unique combination of sweet and salty flavors.
Customizable: Feel free to experiment; swap M&M’s for seasonal candies or use cookie cutters to create festive shapes.
Pair these treats with a glass of milk, or for more chocolatey goodness, check out our Peanut Butter Chocolate cookies for another delightful recipe!
Halloween Cookies with Chocolate Chips Ingredients
Get ready to bake your new favorite Halloween treat!
For the Dough
- Salted Butter – Provides richness and moisture; can substitute with unsalted if preferred, just adjust the salt.
- Dark Brown Sugar – Adds depth and moisture, enhancing the chewiness; light brown sugar can be swapped for a subtler flavor.
- Light Brown Sugar – Balances sweetness and contributes to a soft texture; using more dark brown sugar intensifies the flavor.
- Large Eggs (2 + 1 yolk) – Binds ingredients, adding moisture and richness; can omit the yolk for a thicker cookie.
- Vanilla Extract – Enhances overall flavor; pure vanilla is recommended, but imitation works in a pinch.
- All-Purpose Flour – Supplies structure; ensure it’s measured correctly (spoon then level) for the best cookies.
- Baking Soda – A leavening agent that helps cookies rise; avoid substitutions unless you’re familiar with baking chemistry.
- Baking Powder – Works with baking soda for a softer cookie texture.
- Kosher Salt – Balances out sweetness; feel free to use sea salt as a substitute.
- Old Fashioned Oats – Adds a chewy texture; quick oats are not recommended for this recipe.
For the Mix-ins
- Halloween M&M’s – Add vibrant colors and crunch; regular chocolate candies can be used if necessary.
- Mini Pretzel Sticks – Provide a delightful contrasting crunch; crush them lightly for better incorporation.
- Semi-Sweet Chocolate Chips or Chunks – Offers a rich chocolate flavor; you can swap in dark or milk chocolate if preferred.
- Candy Eyes – Totally optional but add a spooky flair perfect for Halloween festivities!
Now you’re all set to bring some spooky sweetness to your kitchen with these Halloween Cookies with Chocolate Chips!
Step‑by‑Step Instructions for Halloween Cookies with Chocolate Chips
Step 1: Preheat and Prepare
Start by preheating your oven to 350°F (175°C). While it’s heating, line a large baking sheet with parchment paper, ensuring it’s ready to catch all the gooey goodness of your Halloween Cookies with Chocolate Chips. This step is crucial for easy removal and cleanup later on.
Step 2: Cream the Butter and Sugars
In a large mixing bowl, combine the softened salted butter, dark brown sugar, and vanilla extract. Use an electric mixer at medium speed to cream these ingredients together until the mixture is light and fluffy, about 2-3 minutes. This will create a rich base for your cookies, enhancing their depth of flavor.
Step 3: Add the Eggs
Next, crack both large eggs and the additional yolk into the bowl with your butter and sugar mixture. Beat them in one at a time, making sure each is fully incorporated before adding the next. Aim for a smooth, combined batter that looks glossy and inviting—this adds moisture and richness to your Halloween Cookies.
Step 4: Mix in Dry Ingredients
Gradually sift in the all-purpose flour, baking soda, baking powder, and kosher salt. Mix on low speed until just combined, ensuring not to overmix. Once incorporated, gently stir in the old fashioned oats, which will add a delightful chewiness to your cookies.
Step 5: Fold in the Fun Ingredients
Now, fold in the colorful Halloween M&M’s, crushed mini pretzel sticks, and semi-sweet chocolate chips using a spatula until everything is evenly distributed. This is where your Halloween Cookies with Chocolate Chips take on a festive flair, with each ingredient adding its unique texture and flavor to the dough.
Step 6: Shape the Cookies
Using a cookie scoop or your hands, scoop about 1/4 cup of dough and roll it into balls. Place them about 3 inches apart on the prepared baking sheet to allow for spreading. This spacing is important to ensure your cookies don’t overcrowd and merge while baking, preserving their lovely shape.
Step 7: Bake and Rotate
Bake the cookies in your preheated oven for 8 minutes. Halfway through, carefully rotate the baking sheet to ensure even baking. Your kitchen will start to smell delightful as the cookies ooze with chocolate goodness!
Step 8: Add M&M’s and Candy Eyes
Once the first baking time is up, remove the cookies from the oven and press additional M&M’s and candy eyes on top of each cookie. This fun touch gives them a spooky look that’s perfect for Halloween celebrations.
Step 9: Final Bake
Return the cookies to the oven and bake for an additional 2-3 minutes, or until they are lightly golden at the edges but still soft in the center. Watch them closely in the last few moments to avoid overbaking, ensuring that gooey texture stays intact.
Step 10: Cool and Transfer
Remove the baking sheet from the oven and let the cookies cool for a few minutes. Once they’re set, carefully transfer them to a wire rack to cool completely. This cooling step is essential for achieving that perfect chewy texture we all love in Halloween Cookies with Chocolate Chips.
Halloween Cookies with Chocolate Chips Variations
Get ready to unleash your creativity in the kitchen with these fun twists on your Halloween Cookies!
-
Nutty Delight: Substitute half the butter with peanut butter for a deliciously nutty flavor that pairs beautifully with chocolate.
-
Festive Shapes: Instead of rolling dough into balls, use cookie cutters to create festive shapes. Think ghosts, pumpkins, or bats—perfect for spooktacular presentations!
-
Seasonal Switch-Up: Swap Halloween M&M’s for colorful Christmas candy canes or pastel Easter eggs, making this recipe suitable for any holiday gathering.
-
Hearty Texture: Add 1/2 cup of chopped nuts or seeds for an extra crunch and a delightful contrast in texture. They’ll introduce a satisfying richness to your cookies.
-
Flavor Boost: Mix in a teaspoon of cinnamon or pumpkin spice for a warm, inviting flavor that’s reminiscent of autumn. It enhances the seasonal taste you love!
-
Spicy Kick: If you enjoy heat, consider adding a pinch of cayenne pepper to the dough for a surprisingly nice spicy finish to contrast with the sweetness.
-
Grand Layering: Instead of just mixing in the chocolate chips, fold in a layer of cookie dough with marshmallows for a gooey, s’mores-inspired treat.
For more mouthwatering options, don’t miss our easy-to-make Homemade Chocolate Chip cookies or delightful Chocolate Marshmallow Swirl cookies! Let the spooky fun begin!
Expert Tips for Halloween Cookies
-
Chill the Dough: Refrigerating the dough for 30 minutes can prevent excessive spreading while baking, ensuring thick and chewy Halloween Cookies with Chocolate Chips.
-
Measure Flour Correctly: Use the spoon-and-level method to avoid packing too much flour, which can lead to dry cookies. Always have accurate measurements for the best results.
-
Use Fresh Ingredients: Make sure your baking powder and baking soda are fresh. Expired leavening agents can result in dense cookies that don’t rise properly.
-
Mix Gently: When folding in M&M’s and chocolate chips, be careful not to overmix. This keeps the dough light and ensures a delightful texture in your Halloween Cookies.
-
Customize Add-ins: Feel free to swap in your favorite candies or nuts. Personalizing these cookies can make them even more special at parties!
-
Storage Tips: Store your Halloween Cookies in an airtight container to maintain their freshness and gooey texture for up to four days.
How to Store and Freeze Halloween Cookies with Chocolate Chips
Airtight Container: Store your Halloween Cookies with Chocolate Chips in an airtight container at room temperature for up to 4 days to keep them soft and fresh.
Refrigeration: If you live in a particularly warm climate, or want to keep them extra fresh, you can refrigerate the cookies for up to 7 days. Just ensure they are in a sealed container to avoid absorbing odors.
Freezer: For longer storage, these cookies can be frozen for up to 2 months. Place them in a freezer-safe bag or container, separating layers with parchment paper to maintain their shape.
Reheating: When ready to enjoy, simply remove the desired amount and let them thaw at room temperature. For a warm treat, you can pop them in the microwave for about 10-15 seconds!
Make Ahead Options
These Halloween Monster Mash Cookies are perfect for busy home cooks looking to save time! You can prepare the cookie dough up to 2 days in advance by mixing all the ingredients and then chilling the dough in the refrigerator. This helps develop the flavors and makes for a more sumptuous cookie. Alternatively, you can freeze the rolled cookie dough balls for up to 3 months; simply place them in an airtight container, ensuring they are spaced apart to prevent sticking. When you’re ready to bake, just add a couple of extra minutes to the baking time without thawing. This way, you can enjoy fresh, gooey Halloween cookies with minimal effort, just when you need them!
What to Serve with Halloween Cookies with Chocolate Chips
Indulge in a complete Halloween feast that complements the sweet, salty crunch of these festive cookies!
-
Glass of Milk: A classic pairing, milk enhances the rich chocolate flavors, making each cookie bite even more delicious.
-
Pumpkin Spice Latte: Embrace the fall vibes with the warm spices of this seasonal favorite, which beautifully contrasts the sweetness of the cookies.
-
Crispy Apple Slices: Offering a refreshing crunch, apples add a healthy touch that balances the cookies’ gooey richness.
-
Caramel Dipping Sauce: For an extra treat, serve the cookies with a side of warm caramel for drizzling. It elevates their sweetness to new heights!
-
Roasted Cinnamon Pecans: Crunchy, spiced nuts bring in an earthy flavor that pairs wonderfully with the sweet and salty bites of the cookies.
-
Festive Fruit Salad: A colorful mix of seasonal fruits brings brightness and freshness, enhancing the overall Halloween spread.
-
Scoops of Vanilla Ice Cream: Turn your cookies into an indulgent dessert sandwich with ice cream nestled between two warm cookies for a spooky twist!
-
Warm Apple Cider: Enjoying cookies with hot apple cider invites cozy autumn warmth and matches the festive spirit of Halloween.
Halloween Cookies with Chocolate Chips Recipe FAQs
What type of butter is best for Halloween Monster Mash Cookies?
Use salted butter for richness and moisture in your dough. However, unsalted butter is also a great option; just don’t forget to adjust the salt in the recipe accordingly to maintain flavor balance.
How should I store my Halloween Cookies with Chocolate Chips?
Store your cookies in an airtight container at room temperature for up to 4 days, which keeps them soft and delicious. If you live in a warmer area, refrigerating them can extend their freshness for about a week. Just remember to seal them well to prevent absorbing any fridge odors.
Can I freeze Halloween Cookies with Chocolate Chips?
Absolutely! You can freeze your cookies for up to 2 months. To do this, place them in a freezer-safe container or bag, making sure to separate layers with parchment paper. This helps maintain their shape and texture. When you’re ready to enjoy, allow them to thaw at room temperature or heat them in the microwave for 10-15 seconds for that freshly baked taste!
What should I do if my cookies spread too much while baking?
If your cookies spread too much, don’t fret! Refrigerate the dough for about 30 minutes before baking. This will firm up the dough and result in thicker cookies that hold their shape better. It’s a simple trick I often use to ensure perfect cookies every time!
Are there any allergy considerations for these Halloween cookies?
These Halloween Cookies contain common allergens like eggs and wheat (in the flour), as well as chocolate. If serving to guests with allergies, consider using egg substitutes and gluten-free flour blends to accommodate their dietary needs. Always check ingredient labels to confirm they’re allergy-friendly.
How long does the dough last in the refrigerator if I make it ahead?
If you prepare the cookie dough ahead of time, it can be stored in the refrigerator for up to 2 days. Just make sure it’s wrapped well to prevent drying out. When you’re ready to bake, scoop dough directly from the fridge and follow the baking instructions!

Halloween Cookies with Chocolate Chips – Spooky Sweet Delights
Ingredients
Equipment
Method
- Preheat your oven to 350°F (175°C) and prepare a baking sheet with parchment paper.
- In a mixing bowl, cream together the butter, dark brown sugar, and vanilla extract until light and fluffy.
- Add the eggs and yolk one at a time, mixing until fully incorporated.
- Gradually sift in the flour, baking soda, baking powder, and kosher salt, mixing on low until just combined. Stir in oats.
- Fold in Halloween M&M’s, crushed pretzel sticks, and chocolate chips until evenly distributed.
- Scoop 1/4 cup of dough, rolling into balls and spacing them on the baking sheet.
- Bake for 8 minutes, rotating the baking sheet halfway through.
- Press additional M&M’s and candy eyes on top of cookies after the first baking.
- Return to oven for 2-3 more minutes until edges are golden but centers are soft.
- Cool for a few minutes before transferring to a wire rack.