Advertisement
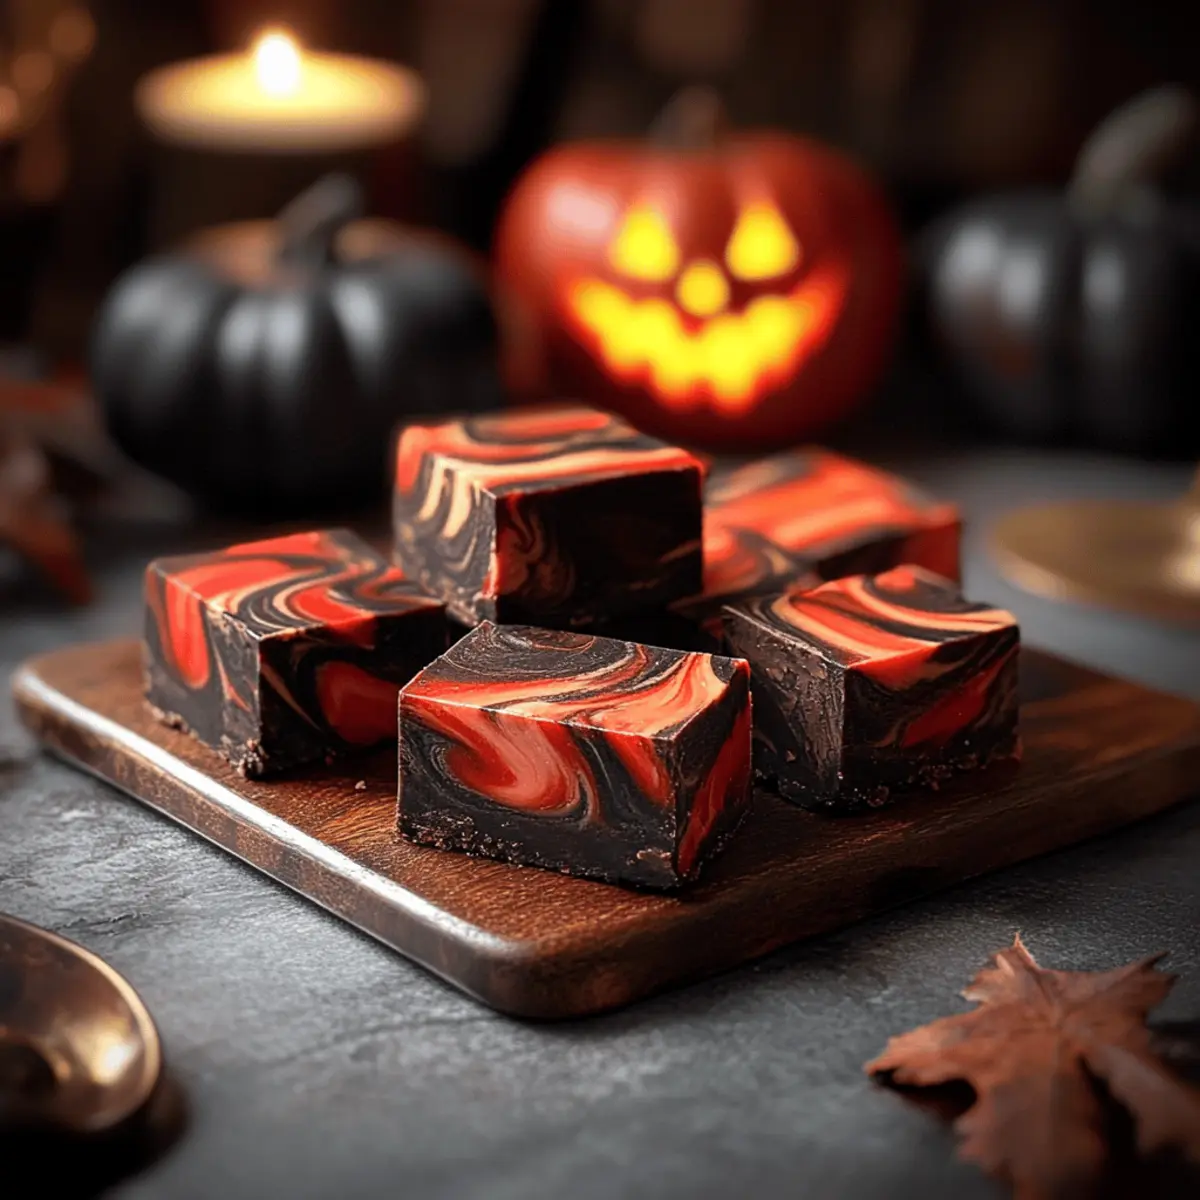
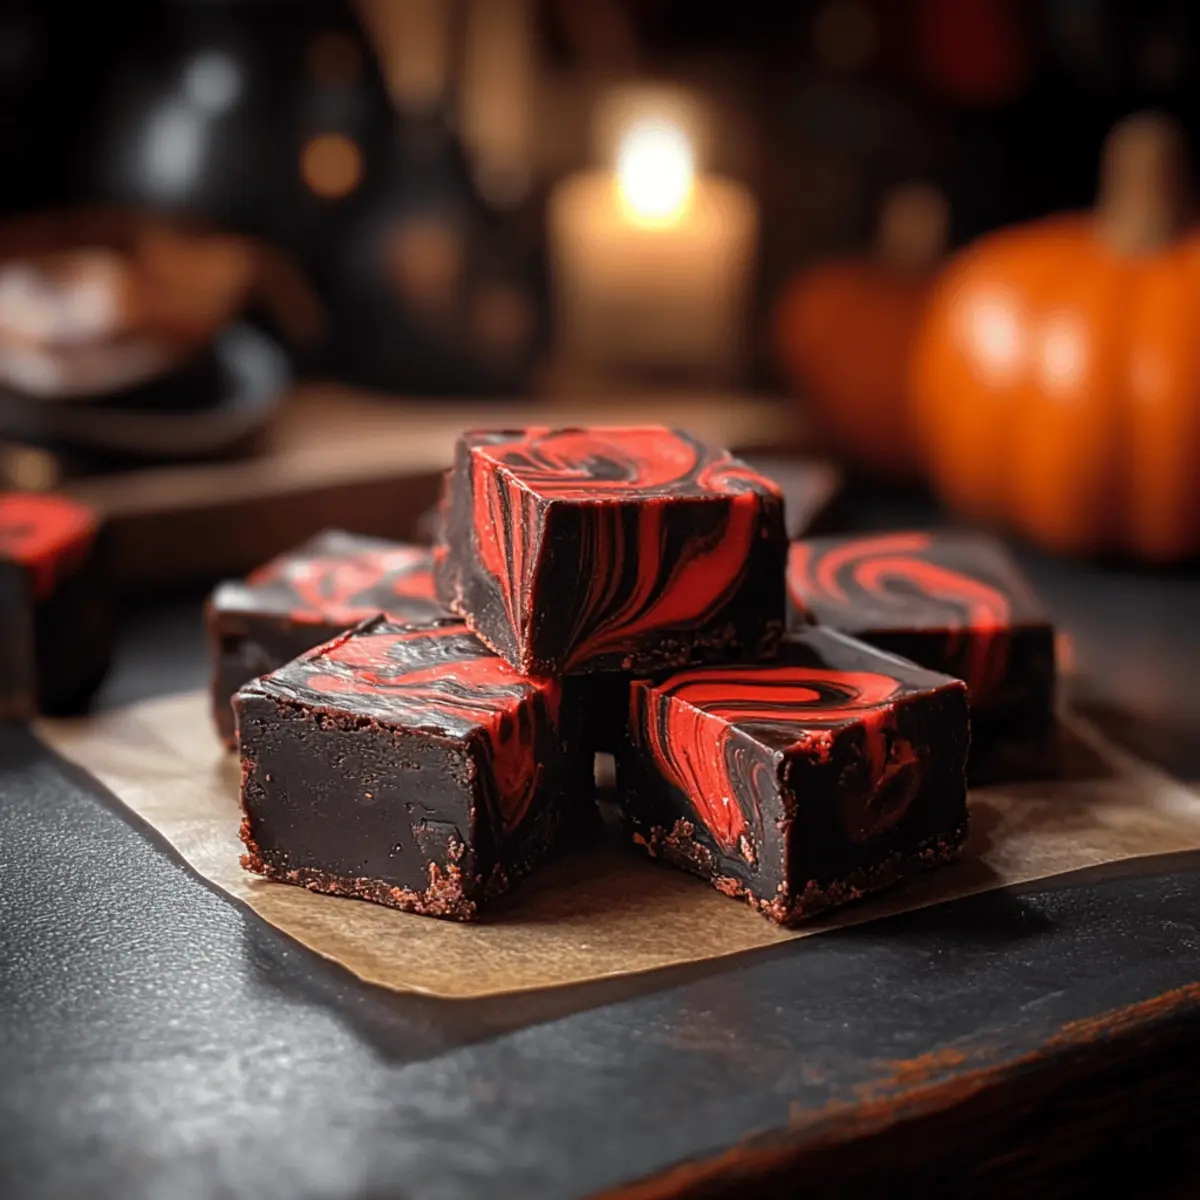
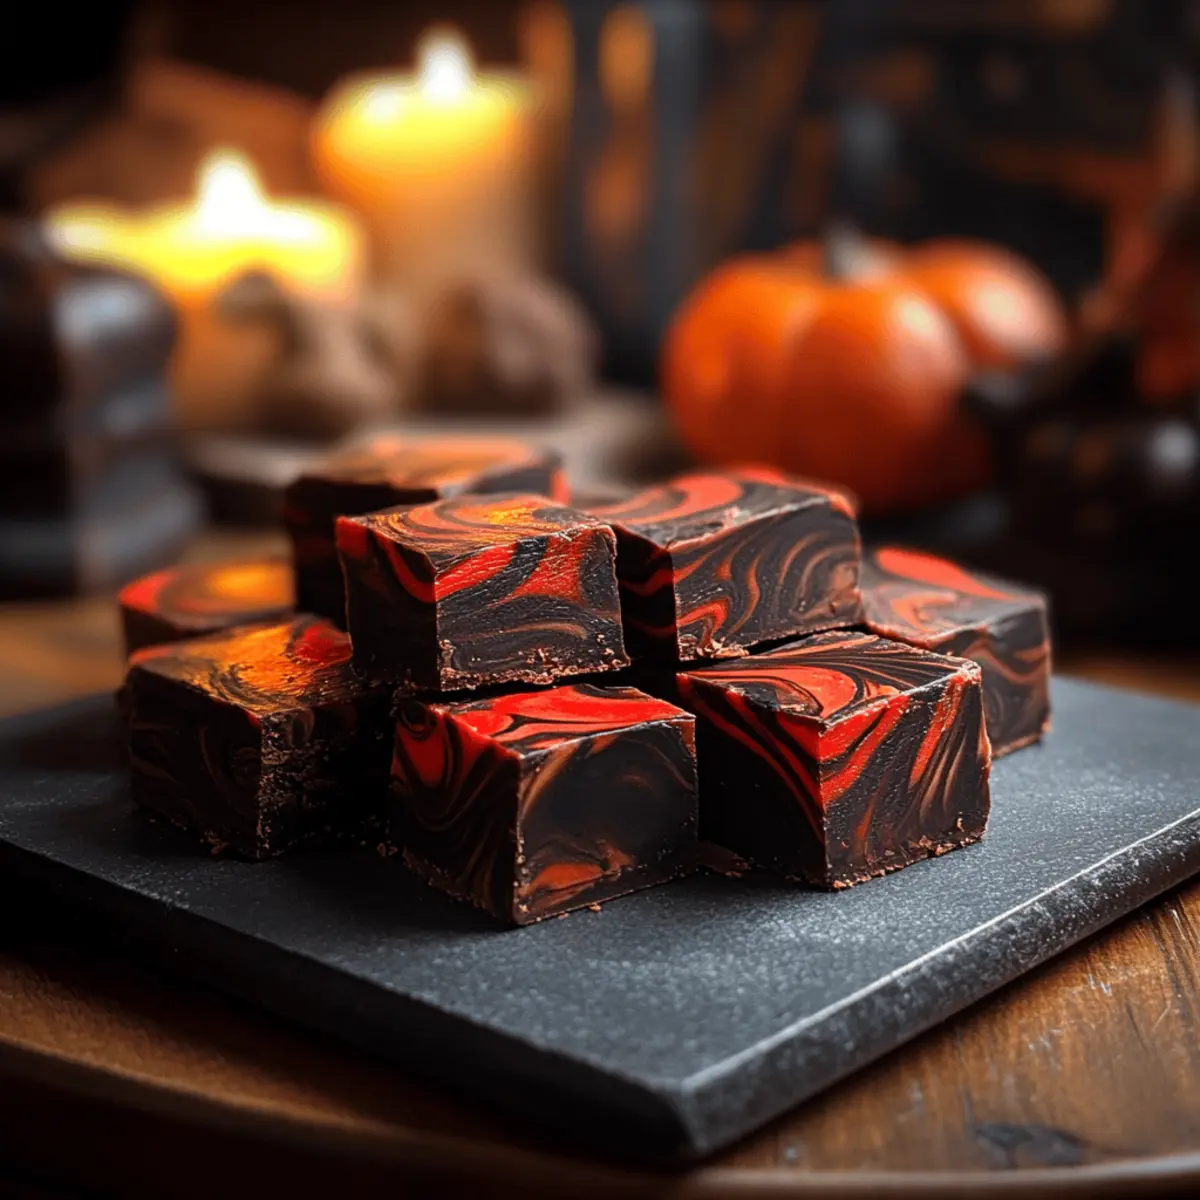
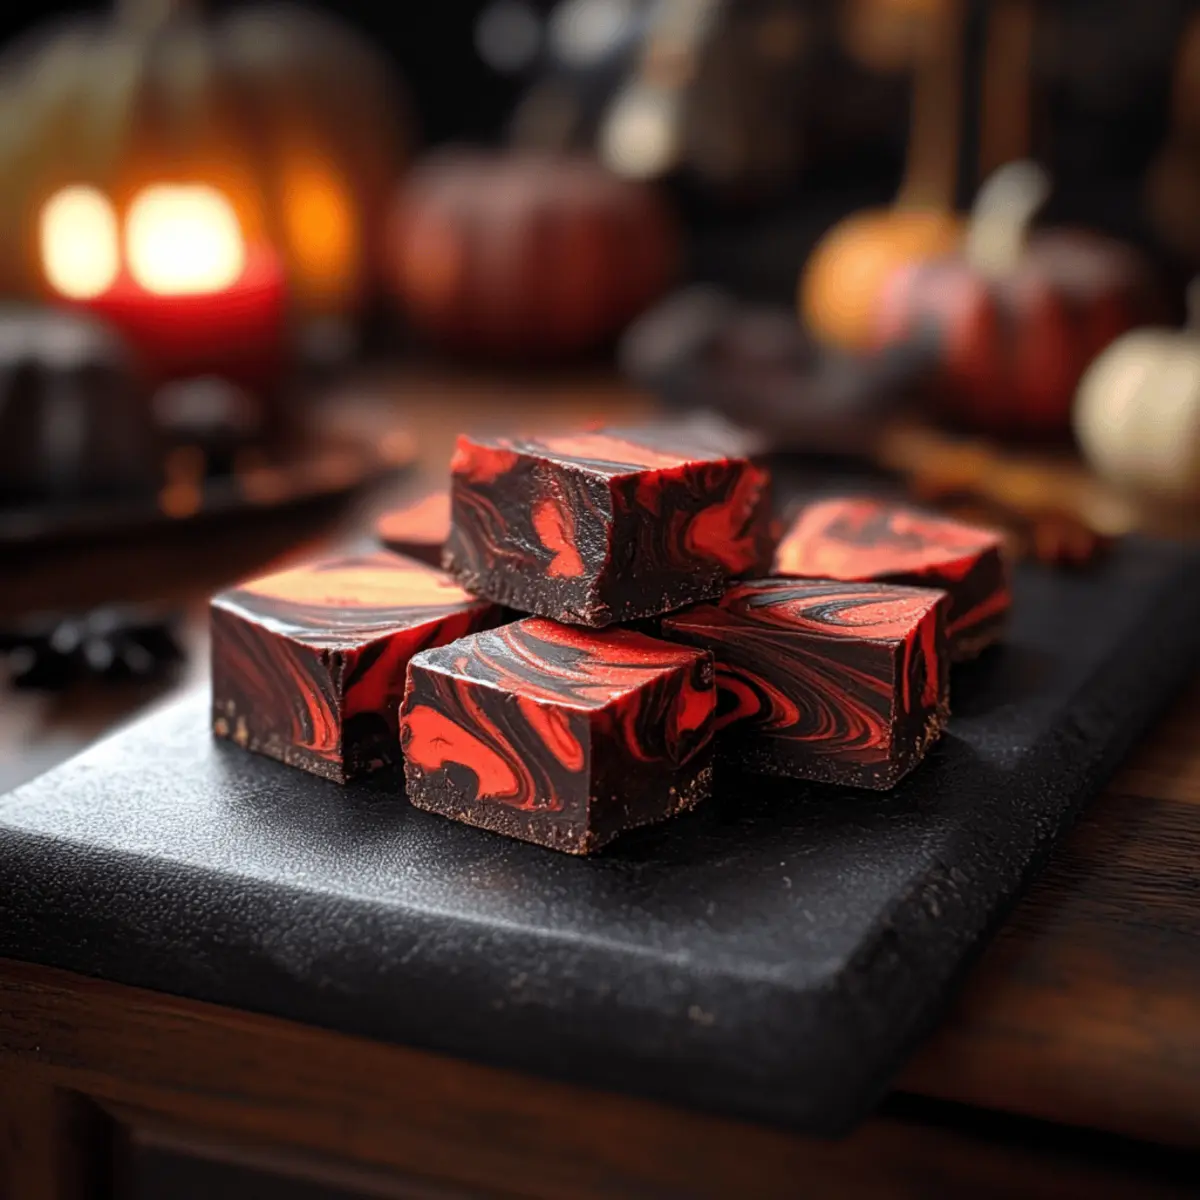
As I admired the festive spiderwebs adorning my kitchen, a little voice in my head reminded me that Halloween was just around the corner. That’s when I decided to whip up a batch of Vampire Fudge, a treat that perfectly captures the spooky spirit of the season! This indulgent Vampire Fudge Recipe pairs deliciously creamy flavors with eye-catching black and red swirls that will have your guests enchanted. Not only is it a delightful, easy-to-make confection that will satisfy last-minute cravings, but it’s also gluten-free and vegetarian, making it accessible for everyone at your Halloween gathering. So gather your candy melts and cream cheese frosting—are you ready to conjure up a batch of this ghoulishly good delight?
Why You’ll Fall for This Vampire Fudge?
Ghoulishly Good: This Vampire Fudge is a hauntingly delicious treat that captures the essence of Halloween with its spooky colors and smooth texture.
Easy to Make: With just a few simple ingredients and minimal steps, whipping up this fudge is a breeze, making it perfect for those unexpected gatherings.
Advertisement
Customizable Options: Create your own twist—replace candy melts for fun variations or add festive toppings like sprinkles for a unique flair.
Crowd Pleaser: Kids and adults alike will be charmed by its vibrant appearance and creamy flavor, ensuring your Halloween bash is a hit!
Great for Gifting: Packaged in cute boxes, these fudgy squares make for delightful Halloween treats to share with neighbors or friends; they’re sure to spread the spookiness!
Don’t forget to pair your fudge with other festive snacks, such as spooky popcorn balls or gummy worms, to create a fun dessert spread everyone will love!
Vampire Fudge Ingredients
• For the Fudge Base
- Black Candy Melts – Essential for that rich, haunting color and flavor unique to this Vampire Fudge recipe.
- Red Candy Melts – Provides a vibrant contrast, adding to the spooky allure of your Halloween treat.
- Cream Cheese Frosting – Adds a luscious creaminess; opt for vanilla frosting if you’re in a pinch.
Feel free to get creative with your choice of colors and toppings to personalize this spooky delight!
Step‑by‑Step Instructions for Vampire Fudge Recipe
Step 1: Prepare the Pan
Begin by greasing an 8″ x 8″ cake pan with cooking spray for easy removal. Next, line it with parchment paper in a cross shape, ensuring the paper hangs over the edges—this will help lift out your delicious Vampire Fudge later.
Step 2: Melt the Black Candy Melts
In a microwave-safe bowl, add the black candy melts and heat them in 30-second intervals, stirring well after each interval, for about 2 minutes total. Aim for a smooth, glossy mixture; if you see any unmelted pieces, continue microwaving in short bursts until fully melted.
Step 3: Melt the Red Candy Melts
Repeat the melting process with the red candy melts in a separate microwave-safe bowl. Heat them in 30-second intervals, stirring frequently until you achieve that silky smooth consistency, which will beautifully contrast the black fudge.
Step 4: Warm the Cream Cheese Frosting
Take your cream cheese frosting and microwave it for about 45 seconds. It should be warm but not boiling, allowing it to become easily mixable. This creamy base will blend wonderfully with the melted candy to create your luscious Vampire Fudge.
Step 5: Combine Both Mixtures
Divide the warmed cream cheese frosting evenly between the bowls of melted black and red candy. Stir each bowl until the mixtures are fully combined and smooth, creating a rich and creamy fudge base that embodies the essence of your Vampire Fudge Recipe.
Step 6: Layer the Mixtures
Now, alternatingly pour the black and red mixtures into the prepared pan to create mesmerizing layers. Start with black, followed by red, and continue until all the fudge is in the pan. The swirling effect will enhance the spooky look of your Halloween treat.
Step 7: Tap and Chill
Once all the fudge is layered, gently tap the pan on the countertop to eliminate air bubbles and even out the mixture. Cover your pan with plastic wrap and place it in the refrigerator for approximately 4 hours, allowing the fudge to set completely.
Step 8: Cut and Serve
After the chilling time, take the fudge out of the refrigerator. Carefully lift it from the pan using the parchment paper overhang, and place it on a cutting board. Use a sharp knife to cut it into delightful squares, revealing the vibrant swirls of your Vampire Fudge.
Make Ahead Options
These Vampire Fudge treats are perfect for busy home cooks looking to save time! You can melt and combine the black and red candy melts along with the cream cheese frosting up to 24 hours in advance. Simply store the melted mixtures in separate airtight containers in the refrigerator to maintain their quality, preventing unwanted texture changes. When you’re ready to assemble the fudge, just gently reheat the melts in the microwave for about 15-20 seconds until they’re smooth again. Then, proceed with layering and chilling them as instructed. This way, you’ll have a delightful dessert ready for your Halloween gathering with minimal fuss!
Expert Tips for the Best Vampire Fudge
-
Smooth Melting: Ensure candy melts are fully melted and smooth to prevent burning; microwave in short intervals and stir often for the best texture.
-
Chill Time: Be patient! Allow the Vampire Fudge to chill for at least 4 hours. This waiting period is crucial for achieving the perfect, firm texture.
-
Layering Technique: For striking swirls, alternate pouring the black and red mixtures carefully into the pan. Tapping the pan afterward helps settle and smooth out the layers.
-
Fresh Ingredients: Use fresh candy melts and frosting. Stale ingredients can affect the taste and consistency of your fudge.
-
Storing Right: Store your fudge in an airtight container in the fridge for up to a week to maintain its desired texture and flavor.
What to Serve with Ghoulishly Good Vampire Fudge?
As you dive into the realm of Halloween delights, complementing your rich and colorful Vampire Fudge with some whimsical treats will create an unforgettable dessert experience.
-
Spooky Popcorn Balls: These enticing treats add a fun crunch and a playful twist to your dessert spread, perfect for the Halloween theme.
-
Gummy Worms: The chewy, fruity flavor of gummy worms contrasts nicely with the creamy fudge while keeping those spooky vibes alive.
-
Pumpkin Spice Lattes: Warm up your gathering with this cozy beverage; the spice enhances the sweetness of the fudge and creates a festive atmosphere.
-
Bat-Shaped Cookies: Chocolate or sugar cookies in bat shapes not only mirror the spooky theme but also provide a delightful crunch alongside the soft fudge.
-
Caramel Apple Slices: The tartness of the apple combined with sweet caramel balances the sweetness of the fudge beautifully, inviting a delicious interplay of flavors.
-
Halloween-Themed Cake Pops: These adorable bites add an extra pop of color and creativity to your dessert table, making them irresistible to guests of all ages.
Let these enticing pairings elevate your Halloween gathering, transforming it into a delightful culinary adventure!
Storage Tips for Vampire Fudge
-
Room Temperature: Keep the Vampire Fudge at room temperature for up to 2 days, but note that refrigeration helps maintain its creamy texture better.
-
Fridge: Store your fudge in an airtight container for up to 1 week, ensuring it stays fresh and delicious.
-
Freezer: For longer storage, tightly wrap the fudge in plastic wrap and place it in an airtight container. It can be frozen for up to 3 months—thaw it in the fridge before enjoying again.
-
Reheating: If you prefer a softer bite, gently microwave individual squares for a few seconds to bring back that delectable creaminess!
Vampire Fudge Recipe Variations
Unleash your creativity with these fun twists to make this delectable fudge truly your own!
-
Witchy Colors: Swap out the black and red candy melts for vibrant purple and green, perfect for a witch-themed treat. Let your imagination run wild with spooky colors!
-
Nutty Crunch: Fold in some crushed nuts like walnuts or pecans for a delightful crunch that contrasts beautifully with the creamy texture of your fudge. It adds flavor and extra richness!
-
Festive Sprinkles: Top your fudge with Halloween-themed sprinkles before refrigerating for added festive flair. These tiny gems will make each square even more enchanting!
-
Caramel Drizzle: Elevate your fudge by drizzling it with salted caramel or melted chocolate. This sweet addition adds another layer of indulgence that’s hard to resist.
-
Spicy Twist: For those who love a little heat, mix in a pinch of chili powder or cayenne pepper. It creates a thrilling flavor contrast that’ll surprise your taste buds!
-
Pumpkin Spice: Incorporate pumpkin spice into the cream cheese frosting for a seasonal flavor twist that captures the essence of fall in every sweet bite. Your autumn gatherings will thank you!
-
Berry Blast: Replace the black candy melts with dark berry-flavored melts for a fruity touch that harmonizes with the rich frosting. This adds a delightful berry zing to each piece!
-
Vegan-Friendly: Use vegan cream cheese and dairy-free candy melts to create a plant-based version of this spooktacular treat. Everyone can join in on the Halloween fun with this thoughtful swap!
Don’t forget to serve your Vampire Fudge alongside other spooky snacks, like spooky popcorn balls or gummy worms, to create an unforgettable Halloween spread!
Vampire Fudge Recipe FAQs
How do I choose the right candy melts for Vampire Fudge?
Absolutely! When selecting candy melts, ensure they are fresh and free from any lumps. Look for vibrant colors with no dark spots or a hard surface. If you want to create a themed twist, consider using purple and green for a witchy vibe or sticking with classic black and red for the spooky Halloween spirit!
How should I store leftover Vampire Fudge?
Very! To maintain its creamy texture, store the Vampire Fudge in an airtight container in the fridge for up to 1 week. If leaving out at room temperature, consume it within 2 days. Just remember, refrigerating keeps it fresh and delicious longer!
Can I freeze Vampire Fudge?
Absolutely! To freeze your Vampire Fudge, wrap it tightly in plastic wrap, then place it in an airtight container. It will stay good for up to 3 months in the freezer. When you’re ready to enjoy it again, simply thaw it in the fridge overnight for the best texture and flavor.
What should I do if my fudge isn’t setting properly?
If your Vampire Fudge isn’t setting, there are a couple of tricks. First, check that you melted and mixed the candy melts completely until smooth. If you’ve followed that, it might need a longer chilling time. Place it back in the fridge for a few more hours until it firms up. Remember, a good chill is key for achieving that perfect fudge texture!
Is this recipe safe for people with dietary restrictions?
Absolutely! This Vampire Fudge recipe is both gluten-free and vegetarian, making it a great option for various dietary needs. However, always check the labels on your candy melts and cream cheese frosting to ensure they are compliant with any specific allergies or dietary restrictions, especially for dairy sensitivities.
Can I add other ingredients to customize my Vampire Fudge?
Very! You can definitely mix in your favorite additions such as crushed nuts, Halloween-themed sprinkles, or even swirl in some pumpkin spice for a seasonal flavor twist. Get creative with toppings like melted chocolate drizzles or caramel to make it even more indulgent!
Delicious Vampire Fudge Recipe to Charm Your Halloween Bash
Ingredients
Equipment
Method
- Begin by greasing an 8" x 8" cake pan with cooking spray and lining it with parchment paper.
- In a microwave-safe bowl, melt the black candy melts in 30-second intervals, stirring well until smooth.
- Repeat the melting process for the red candy melts in a separate bowl until silky smooth.
- Warm the cream cheese frosting in the microwave for about 45 seconds until easily mixable.
- Divide the warm cream cheese frosting evenly between the bowls of melted black and red candy, stirring until smooth.
- Alternatingly pour the black and red mixtures into the prepared pan to create layers.
- Tap the pan gently on the countertop to eliminate air bubbles, then cover and refrigerate for about 4 hours.
- After chilling, lift the fudge from the pan using the parchment paper and cut into squares.