
Advertisement
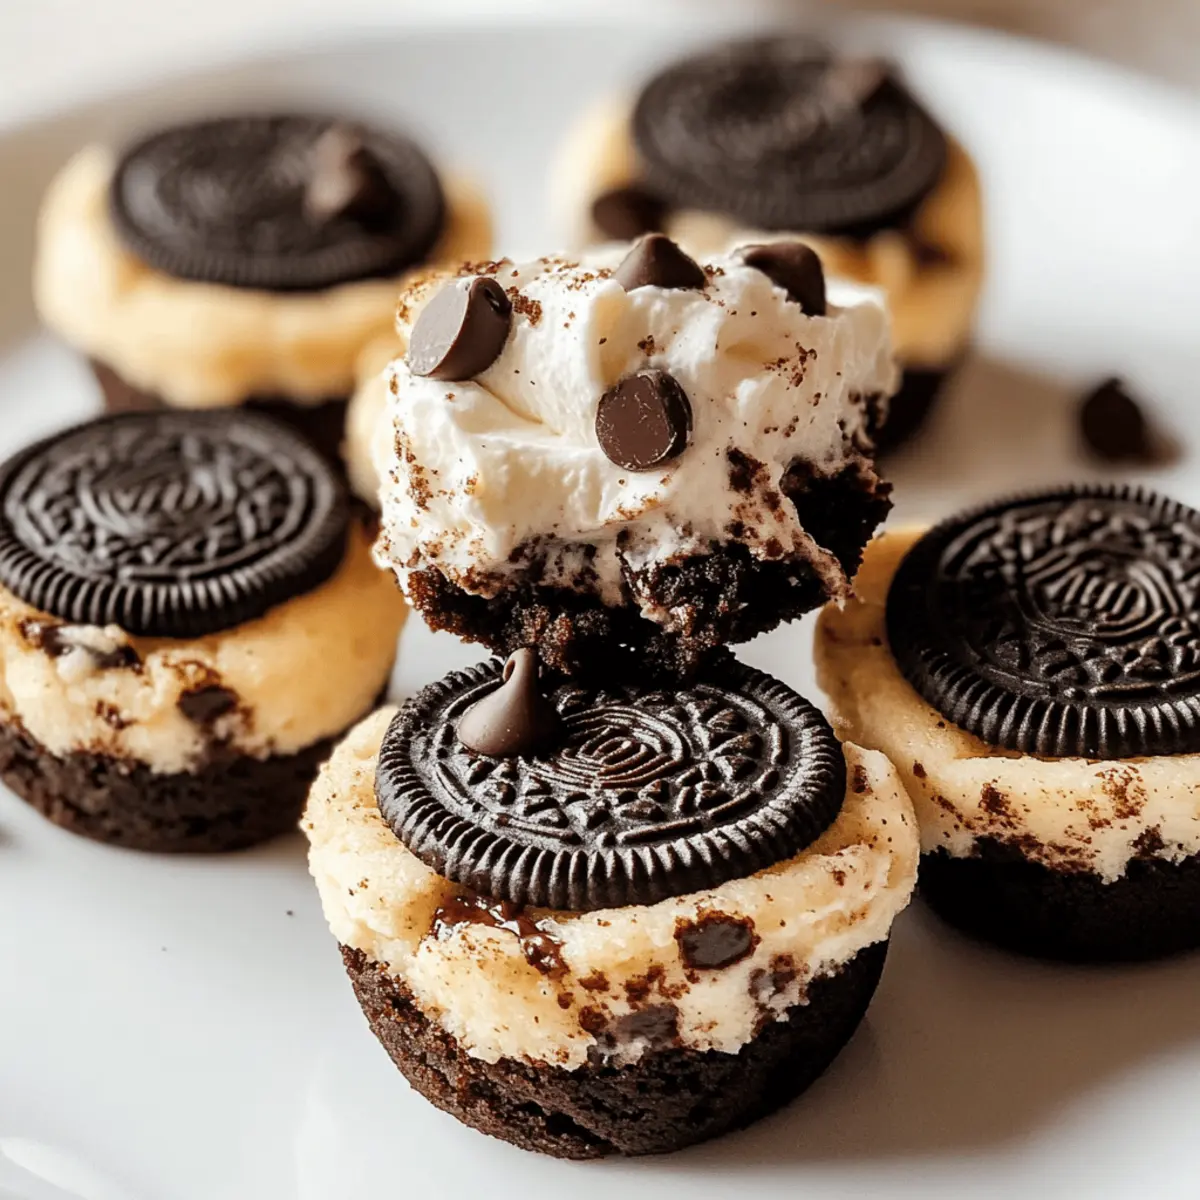
The aroma of freshly baked cookie cups wafted through my kitchen, instantly transporting me back to cherished childhood moments filled with laughter and sweetness. These Oreo Cheesecake Cookie Cups perfectly marry the beloved flavors of classic cheesecake and crunchy Oreos, creating a delightful treat that satisfies every craving. Not only are they a breeze to whip up, but they also make a stunning centerpiece for any gathering. Whether you’re celebrating a special occasion or just need a little indulgence on a weeknight, these cookie cups are your go-to dessert. Plus, they’re completely customizable—feel free to experiment with different cookie bases and toppings to make them your own! Are you ready to dive into this delectable journey? Let’s get baking!
Why Are These Cookie Cups Irresistible?
Decadent Layers: The contrast between the crunchy Oreo crust and the creamy cheesecake filling delivers an unforgettable taste experience.
Quick & Easy: Simple prep allows you to create a delicious dessert in no time, perfect for even the busiest days.
Advertisement
Endless Customization: You can swap out the Oreos for various cookies or dress them up for any occasion, keeping things exciting and fresh.
Crowd-Pleaser: These cookie cups are always a hit at gatherings, making them the perfect treat for parties or family dinners.
Don’t forget to check out Chocolate Chip Cheesecake for more delightful cheesecake inspiration!
Oreo Cheesecake Cookie Cups Ingredients
For the Crust
- Oreo Cookies – Crumbled for a classic chocolate flavor; feel free to experiment with different cookie types for a fun twist!
- Butter (Unsalted) – Binds the crust together and adds richness; substitute with coconut oil for a dairy-free option.
For the Cheesecake Filling
- Cream Cheese – Provides a creamy and tangy base; opt for full-fat cream cheese for the best texture.
- Sugar – Sweetens the filling; consider using a sugar substitute for a lower-sugar version.
- Sour Cream – Adds creaminess and a slight tang; Greek yogurt can be used as a similar alternative.
- Mini Chocolate Chips – Optional for an extra touch of sweetness; omit or switch to caramel chips for variation.
For the Topping
- Whipped Cream – Adds sweetness and decoration; whipped coconut cream works for a dairy-free version.
Dive into making your own Oreo Cheesecake Cookie Cups, and don’t forget, the fun is in the customizations!
Step‑by‑Step Instructions for Oreo Cheesecake Cookie Cups
Step 1: Preheat the Oven
Begin by preheating your oven to 350°F (175°C) to create a perfect environment for baking. While the oven heats, gather your mixing bowl and muffin tin. This step ensures your Oreo Cheesecake Cookie Cups will bake evenly, delivering that ideal creamy texture inside.
Step 2: Prepare the Cookie Crust
In a mixing bowl, crush about 20 Oreo cookies into fine crumbs until they resemble sand. Mix in 5 tablespoons of melted unsalted butter until the mixture is fully combined. The texture should hold together when pressed. This delicious base will create a crunchy foundation for your cookie cups!
Step 3: Form the Crusts in Muffin Tin
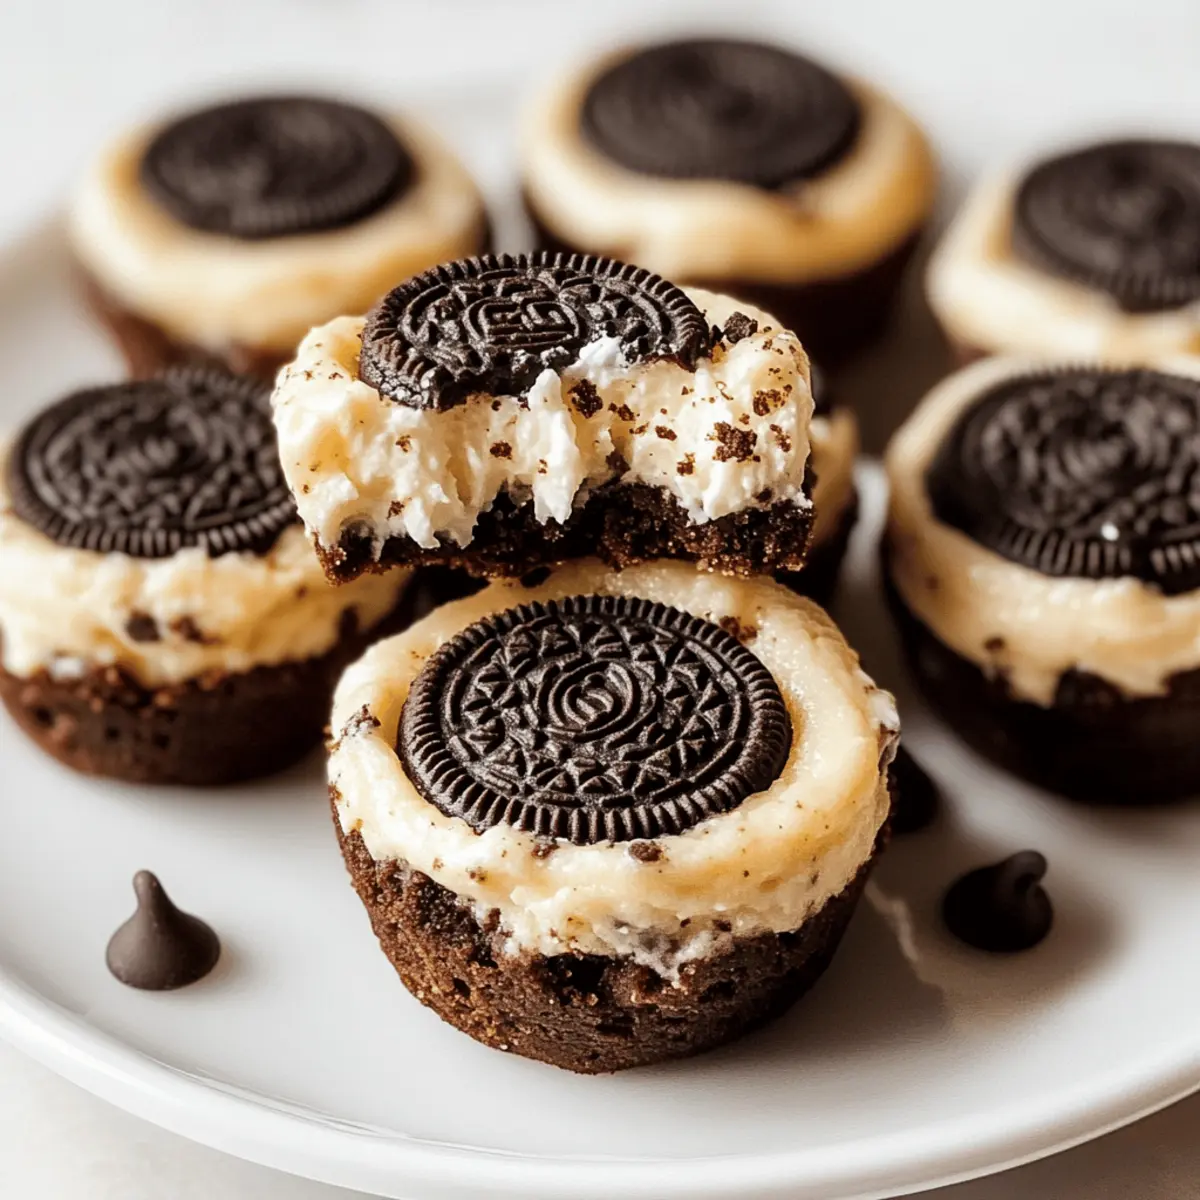
Line your muffin tin with cupcake liners to prevent sticking. Take about 1 tablespoon of the Oreo mixture and press it firmly into the bottom of each liner to form a crust. Ensure that the crust is compact and even, creating a sturdy base for the cheesecake filling to sit on.
Step 4: Make the Cheesecake Filling
In a clean mixing bowl, beat 16 ounces of softened cream cheese and 1/2 cup of sugar together until fluffy and creamy, approximately 2-3 minutes. This step is crucial for achieving a smooth filling that will melt in your mouth. Gradually blend in 1/2 cup of sour cream, mixing until fully combined.
Step 5: Add Mini Chocolate Chips (Optional)
If you’d like an extra hint of sweetness, fold in 1/2 cup of mini chocolate chips gently into the creamy filling. This addition will enhance the flavor and provide delightful bursts of chocolate within your Oreo Cheesecake Cookie Cups. Make sure they are evenly distributed throughout the mixture.
Step 6: Fill the Cookie Cups
Spoon the cheesecake filling into each cookie crust, filling almost to the top but leaving a little space to allow for any puffing during baking. This step ensures that each Oreo Cheesecake Cookie Cup is generously filled with creamy goodness, creating that perfect bite.
Step 7: Bake Your Cookie Cups
Place the muffin tin in the preheated oven and bake for 15-18 minutes. You’ll know they are done when the centers appear slightly jiggly but not liquid. This visual cue guarantees that your Oreo Cheesecake Cookie Cups will have a lovely, creamy texture when cooled.
Step 8: Cool Down
Once baked, remove the tin from the oven and let the cookie cups cool completely at room temperature. This cooling phase is essential; it helps prevent any cracks from forming. Afterward, refrigerate the cookie cups for at least 1 hour to firm up the filling and enhance the flavors.
Step 9: Add the Finishing Touch
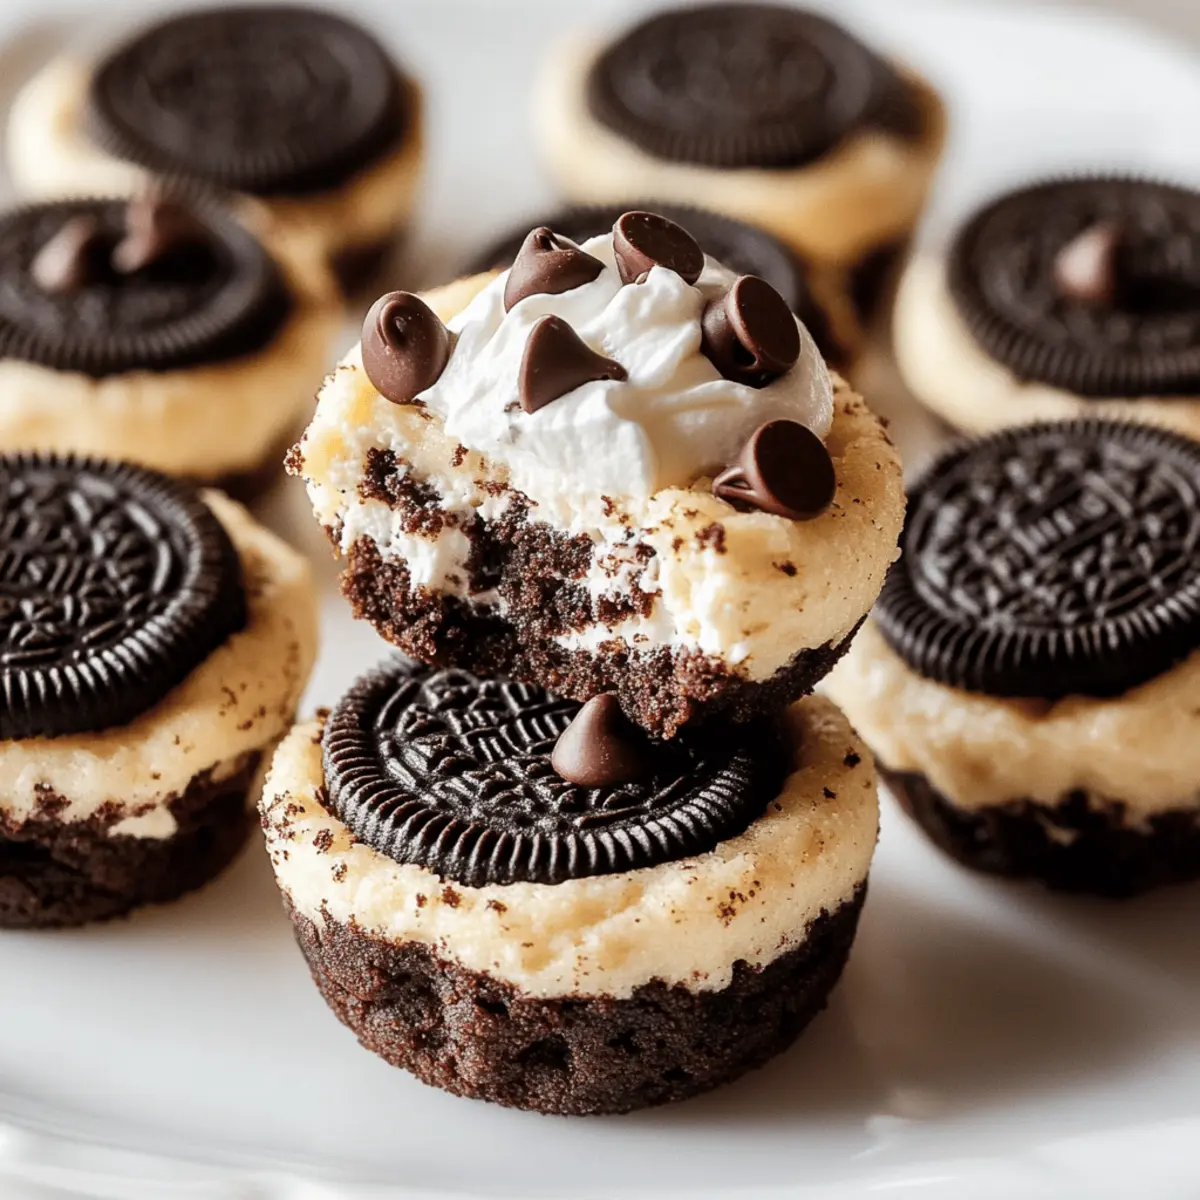
Before serving, pipe lightly sweetened whipped cream on top of each cookie cup to add a delightful finishing touch. This not only enhances the flavor but also creates an appealing presentation for your Oreo Cheesecake Cookie Cups, making them irresistible to guests!
Storage Tips for Oreo Cheesecake Cookie Cups
Fridge: Store your Oreo Cheesecake Cookie Cups in an airtight container in the refrigerator for up to 5 days. This keeps them fresh and delicious for indulging later.
Freezer: For longer storage, freeze the cookie cups for up to 2 months. Wrap each cup individually in plastic wrap before placing them in a freezer-safe bag to prevent freezer burn.
Thawing: When ready to enjoy, simply thaw the cookie cups overnight in the fridge. This ensures they maintain their creamy texture while thawing slowly.
Reheating: If you prefer a warm treat, you can gently reheat them in the microwave for 10-15 seconds. Enjoy the melty, creamy goodness!
What to Serve with Oreo Cheesecake Cookie Cups
Elevate your dessert table by pairing these cookie cups with delightful sides that tantalize the taste buds.
-
Fresh Berries: The bright acidity of strawberries or raspberries cuts through the richness, providing a refreshing contrast. Their vibrant colors also enhance the presentation, making your dessert spread enticing.
-
Chocolate Drizzle: A warm chocolate sauce adds an extra layer of indulgence. Drizzling it over the whipped cream creates a visually appealing and decadent treat that chocolate lovers will adore.
-
Coffee or Espresso: A rich cup of coffee complements the creamy texture and sweet flavor of the cheesecake. The aromatic notes of coffee enhance the overall eating experience, perfect for coffee aficionados.
-
Homemade Whipped Cream: While the cookie cups are topped with whipped cream, serving a bowl of freshly whipped cream on the side allows guests to customize their dessert experience.
-
Mini Ice Cream Scoops: A scoop of vanilla or chocolate ice cream adds a delightful creaminess and a chill that contrasts beautifully with the warm, sweet cookie base.
-
Caramel Sauce: A drizzle of rich caramel over the tops intermingles beautifully with the chocolate flavor, offering a sweet, buttery contrast that is absolutely divine.
-
Nutty Crumble: Crushed nuts or a sprinkle of granola adds crunch and earthy richness, providing a wonderful texture that complements the creamy cookie cups beautifully.
Oreo Cheesecake Cookie Cups Variations
Feel free to get creative with your Oreo Cheesecake Cookie Cups and make them uniquely yours!
-
Cookie Crust Swap: Use peanut butter cookies or graham crackers instead of Oreos for a different taste. Each variation brings a delightful new flavor to the table, transforming the whole experience.
-
Seasonal Flavors: Try Pumpkin Spice Oreos during the fall or Mint Oreos for a refreshing twist in the summer. These seasonal flavors can keep your treats exciting throughout the year!
-
Fruit Infusion: Incorporate fresh strawberries or raspberries into the cheesecake filling for a fruity burst. The natural sweetness of the berries adds a zesty yet harmonious touch.
-
Chocolate Drizzle: Top with melted chocolate or caramel sauce for extra decadence. This creates a luscious topping that elevates the presentation and flavor to new heights.
-
Nuts for Crunch: Add crushed nuts like pecans or walnuts to the crust for added texture. The nutty flavor pairs beautifully with the creamy cheesecake, giving each bite a satisfying crunch.
-
Syrupy Goodness: Drizzle with maple syrup or honey before serving for a touch of sweetness. It adds a delightful twist that complements the richness of the cheesecake.
-
Whipped Cream Variations: Swap regular whipped cream for flavored varieties like chocolate or mocha for unique taste experiences. This small change can surprise your guests and tantalize their taste buds.
Don’t forget to pair your Oreo Cheesecake Cookie Cups with some refreshing berries or a cup of coffee for a perfect finish to your dessert! If you’re up for more cheesecake inspiration, you might also enjoy trying out Dulce Leche Cheesecake or explore the delightful Lemon Raspberry Cookie Sandwiches for something different!
Make Ahead Options
These Oreo Cheesecake Cookie Cups are perfect for busy home cooks looking to save time during the week! You can prepare the cookie crust up to 24 hours in advance by mixing the Oreo crumbs and butter, then pressing the mixture into the muffin tin. Simply cover and refrigerate to keep the crust fresh and crunchy. The cheesecake filling can be made up to 3 days ahead; just store it in an airtight container in the fridge. When you’re ready to serve, fill the crusts with the chilled cheesecake mixture, bake, and add the whipped cream topping right before enjoying. This way, you’ll have delicious, ready-to-eat dessert bites with minimal effort!
Expert Tips for Oreo Cheesecake Cookie Cups
-
Measure Precisely: Accurate measurements ensure the perfect filling texture; avoid making the crust too crumbly or the filling too runny.
-
Cool Completely: Let cookie cups cool fully before refrigerating. This will prevent cracking and help maintain their creamy texture.
-
Room Temperature Cream Cheese: Always use room temperature cream cheese for a smoother filling; this makes a significant difference in achieving creaminess.
-
Don’t Overbake: Keep an eye on the baking time; underbaked is better than overbaked for a creamy, luscious Oreo Cheesecake Cookie Cups experience.
-
Experiment with Flavors: Feel free to swap Oreos or add toppings based on your taste; customizing keeps this dessert exciting for every occasion!

Oreo Cheesecake Cookie Cups Recipe FAQs
What’s the best way to select ripe ingredients for this recipe?
Absolutely! Using fresh and ripe ingredients ensures the best flavor in your Oreo Cheesecake Cookie Cups. Look for cream cheese that’s fresh and has no lumps; it should be easy to spread at room temperature. For the cookies, choose Oreos that are intact and have no cracks; avoid any packages with dark spots or signs of damage.
How should I store Oreo Cheesecake Cookie Cups once they are made?
I recommend storing your Oreo Cheesecake Cookie Cups in an airtight container in the refrigerator for up to 5 days. This keeps them fresh and ready for dessert cravings. If you’re planning to enjoy them later, make sure they are completely cool before sealing them up.
Can I freeze these cookie cups, and what’s the best method?
Certainly! You can freeze the cookie cups for up to 2 months. To do this, wrap each cookie cup individually in plastic wrap, then place them in a freezer-safe bag to prevent any freezer burn. When you’re ready to indulge, simply thaw them overnight in the fridge for a delicious treat!
What should I do if the cheesecake filling cracks during baking?
Very! This can happen if the filling bakes too long or if it cools too quickly. To avoid this, make sure not to overbake; the centers should remain slightly jiggly when you take them out. Let the cookie cups cool completely at room temperature before refrigerating to help minimize cracking. A little gentle smoothing with whipped cream can also hide any cracks after cooling!
Are these cookie cups suitable for those with dietary restrictions?
Of course! You can easily customize your Oreo Cheesecake Cookie Cups to accommodate dietary preferences. Use dairy-free alternatives such as vegan cream cheese and coconut whipped cream if you need a dairy-free option. Additionally, swap out Oreos for other cookie types that fit your dietary needs, like gluten-free cookies for gluten-sensitive individuals.
How long do these cookie cups last in the refrigerator?
These delightful Oreo Cheesecake Cookie Cups will remain fresh in your fridge for 5 days. Just remember to store them in an airtight container to maintain their luscious creaminess and avoid any absorption of other fridge odors!
Oreo Cheesecake Cookie Cups: Your New Favorite Dessert Delight
Ingredients
Equipment
Method
- Preheat your oven to 350°F (175°C).
- Crush about 20 Oreo cookies into fine crumbs and mix with 5 tablespoons of melted unsalted butter.
- Line muffin tin with cupcake liners and press about 1 tablespoon of the Oreo mixture into each liner.
- Beat 16 ounces of softened cream cheese and 1/2 cup of sugar until fluffy, then blend in 1/2 cup of sour cream.
- Fold in 1/2 cup of mini chocolate chips to the creamy filling.
- Spoon the cheesecake filling into the cookie crusts, leaving a bit of space at the top.
- Bake in the preheated oven for 15-18 minutes until centers are slightly jiggly.
- Cool completely at room temperature, then refrigerate for at least 1 hour.
- Before serving, pipe whipped cream on top of each cookie cup.


