
Advertisement
As I stared at a lonely pack of Oreos sitting on my kitchen counter, inspiration struck like a bolt of lightning. What if I turned those crunchy cookies into something unexpectedly delightful? Enter Easy Homemade Oreo Mochi, a whimsical twist on the classic Japanese treat that marries the traditional chewiness of mochi with the rich, chocolatey crunch of Oreos. It’s not just an indulgent dessert but also a super simple recipe that invites you to get creative—perfect for anyone craving a unique homemade treat without a ton of fuss. Whether you’re looking to impress friends at a gathering or rejuvenate a cozy night in, these chewy morsels are a crowd-pleaser. Ready to discover how you can whip up this playful fusion? Let’s dive into a world of flavors and textures that will leave everyone begging for seconds!
Why You’ll Love Easy Homemade Oreo Mochi
Simplicity at Its Finest: Perfect for all skill levels, this recipe requires minimal steps and ingredients, making homemade desserts a breeze.
Versatile Flavor Combinations: Feel free to experiment! Swap out Oreos for your favorite cookies or even try a vegan adaptation using plant-based sweeteners.
Advertisement
Chewy Texture Delight: The combination of mochiko and crushed Oreos creates a satisfying chewiness that’s hard to resist.
Perfect for Any Occasion: Whether it’s a casual snack or a special gathering, these mochi are guaranteed to impress and satisfy.
Creative Serving Ideas: Pair your mochi with a scoop of vanilla ice cream or a drizzle of melted chocolate for an extra indulgent treat. You might also enjoy serving alongside Breakfast Egg Muffins for a unique dessert spread!
Easy Homemade Oreo Mochi Ingredients
Unlock the secret to your new favorite dessert!
For the Mochi
- Mochiko (Sweet Rice Flour) – Key for that coveted chewy texture; don’t replace it with other types of flour.
- Sugar – Adds sweetness; feel free to use plant-based sweeteners for a vegan twist.
- Water – Essential for a smooth dough consistency; no substitutions here!
- Vanilla Extract – Enhances flavor depth; almond extract is a great alternative if you’re feeling adventurous.
For the Filling
- Oreos – The star ingredient for a delicious chocolate crunch; get creative and swap with other cookies if desired.
For Dusting
- Cornstarch – Prevents the mochi from sticking together; tapioca starch is a suitable substitute if needed.
Embrace the joy of crafting Easy Homemade Oreo Mochi with these simple ingredients!
Step‑by‑Step Instructions for Easy Homemade Oreo Mochi
Step 1: Whisk the Ingredients
In a mixing bowl, combine 1 cup of mochiko (sweet rice flour) and 1/4 cup of sugar. Gradually whisk in 3/4 cup of water until the mixture is smooth and free of lumps. The batter should be thick but pourable. Make sure to scrape down the sides to fully incorporate all ingredients, ensuring a uniform mixture for your Easy Homemade Oreo Mochi.
Step 2: Microwave the Dough
Transfer the mochi mixture into a microwave-safe bowl and cover it with a microwave-safe lid or plastic wrap. Microwave on high for 1 minute, then remove and stir thoroughly. Repeat this process, microwaving in 1-minute increments for a total of 4-5 minutes, until the mochi has thickened and become slightly translucent. You’ll know it’s done when it holds its shape but is still pliable.
Step 3: Add Flavor
Remove the bowl from the microwave, being careful as it will be hot. Stir in 1 teaspoon of vanilla extract until it is well mixed into the dough, infusing your Easy Homemade Oreo Mochi with delicious flavor. The dough should be sticky but smooth, enhancing the rich, dessert-like quality that pairs perfectly with Oreos.
Step 4: Prepare the Surface
Lightly dust a clean, flat surface with cornstarch to prevent sticking. Carefully pour the warm mochi dough onto the surface, using a spatula to release any remaining bits from the bowl. Allow the dough to cool slightly for about 5 minutes, which makes it easier to handle as you shape your Easy Homemade Oreo Mochi pieces.
Step 5: Shape the Mochi
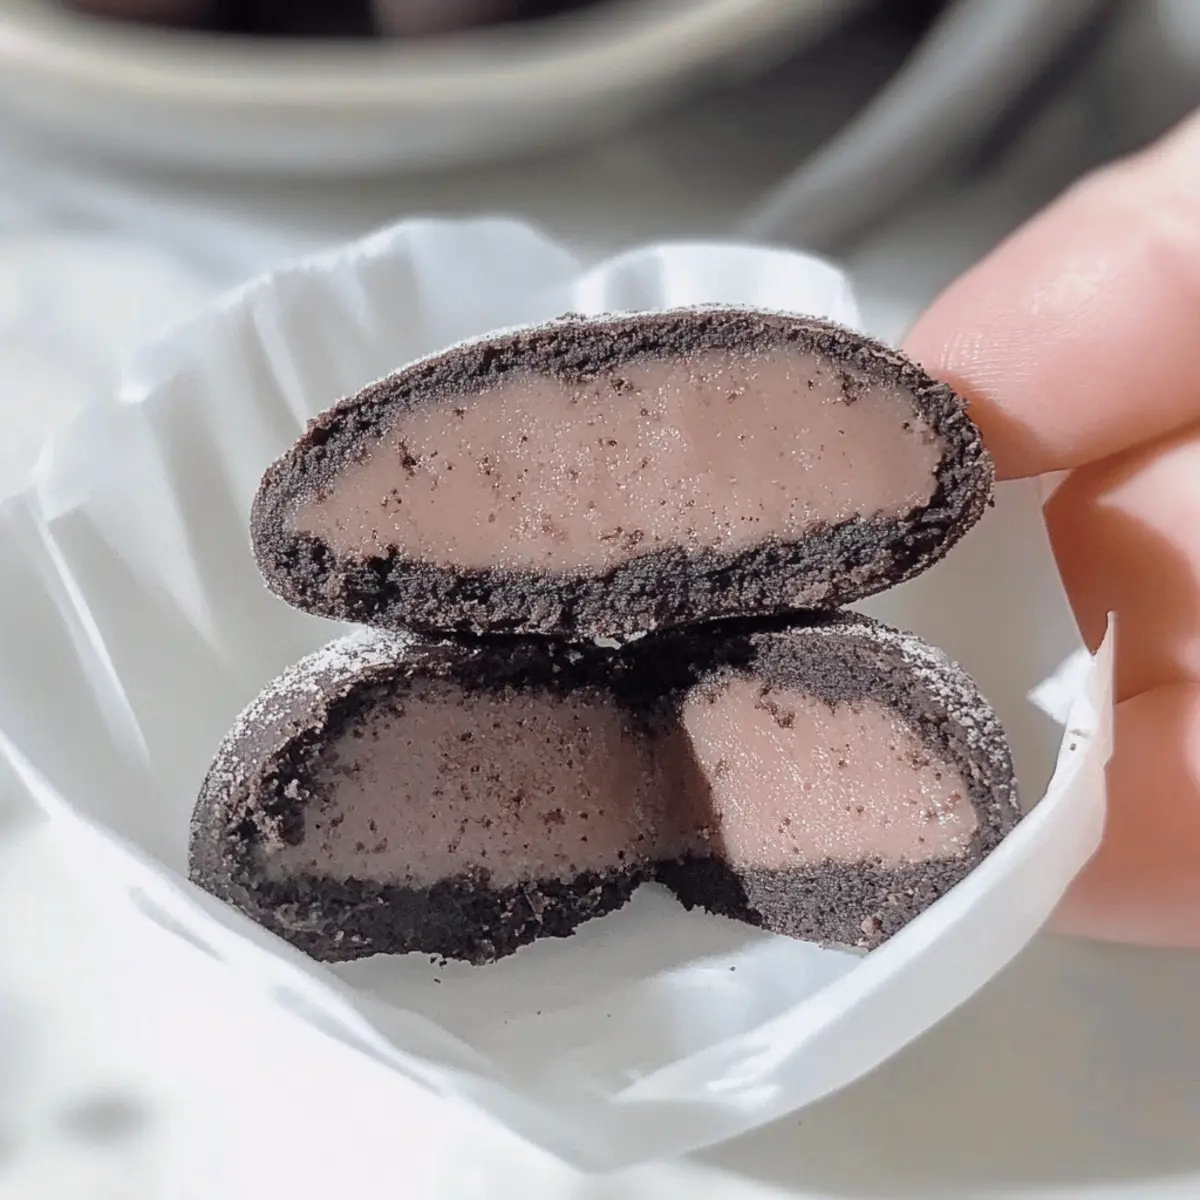
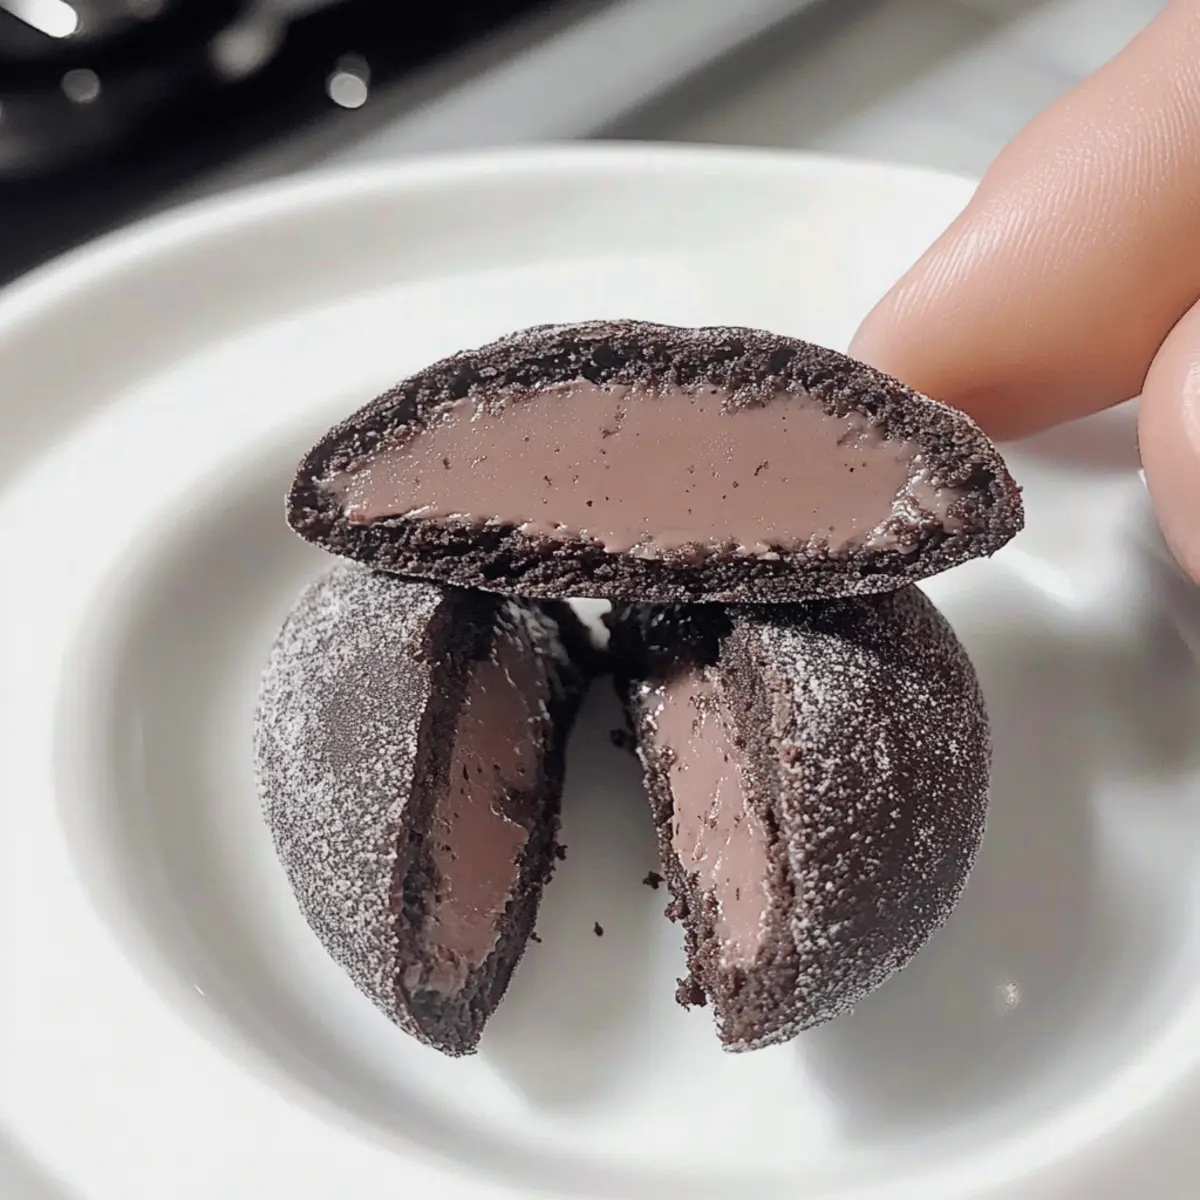
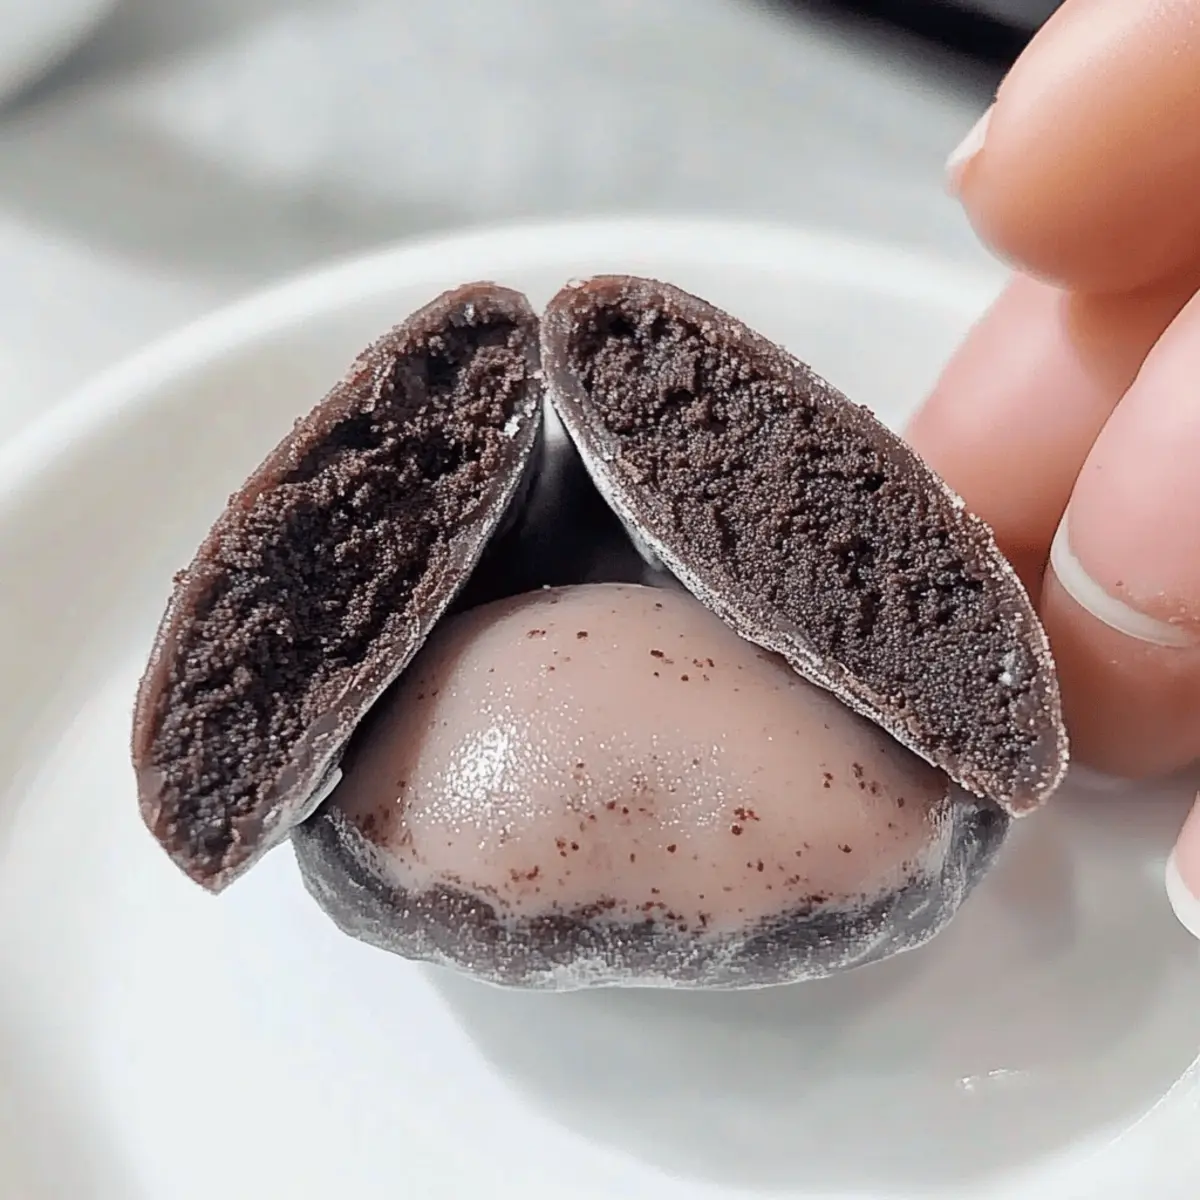
Once cool enough to handle, divide the dough into 6 equal pieces. Flatten each piece with your palms to form a small disc, approximately 3 inches in diameter. Place crushed Oreos (or cookie of choice) in the center of each disc and fold the edges around the filling to enclose it, creating a smooth ball shape.
Step 6: Dust and Chill
After shaping the mochi, dust each piece lightly with cornstarch to prevent sticking. Place the completed mochi on a plate, ensuring they are not touching. Cover with plastic wrap and refrigerate for at least 30 minutes. Chilling allows the Easy Homemade Oreo Mochi to set properly, enhancing their texture and making them perfect for serving.

Easy Homemade Oreo Mochi Variations
Feel free to play with these delicious twists on the traditional recipe; your creativity can lead to even more tasty treats!
-
Vegan Delight: Replace sugar with coconut or maple syrup and use almond milk instead of water for a fully plant-based version. This delicious swap maintains the chewy goodness while accommodating vegan diets.
-
Chocolate Chip Twist: Swap Oreos for your favorite chocolate chip cookies to introduce a delightful gooeyness. The combination of flavors will make your taste buds dance!
-
Green Tea Elegance: Add 1-2 teaspoons of matcha powder to the mochi dough for a unique earthy flavor contrast. The vibrant green adds a delightful aesthetic and a hint of bitterness that complements sweetness beautifully.
-
Nutty Surprise: Fold in chopped almonds or hazelnuts into the dough for added crunch and flavor depth. Each bite holds a delightful surprise that enhances the overall experience.
-
Fruity Fusion: Substitute Oreo filling with your favorite fruit preserves or fresh fruit, like strawberry or mango, for a refreshing twist. This variation brings a bright, juicy flavor to the chewy texture of the mochi.
-
Gluten-Free Glory: Use gluten-free sandwich cookies instead of Oreos, ensuring that everyone can enjoy these treats without dietary concerns. This simple swap makes your mochi accessible to those with gluten sensitivities.
-
Mint Chocolate Magic: Add a few drops of mint extract to the dough for a refreshing chocolate mint experience. This combination takes your mochi to an exciting new level of flavor.
For even more sweet experiments, why not serve your Easy Homemade Oreo Mochi with a scoop of vanilla ice cream or a drizzle of melted chocolate? And if you’re not quite done with the cookie theme, you could try pairing it with Homemade Chocolate Chip cookies for a fun dessert spread! Enjoy exploring the endless delicious possibilities!
Make Ahead Options
These Easy Homemade Oreo Mochi are perfect for meal prep enthusiasts! You can make the mochi dough up to 24 hours in advance; simply prepare it as directed and allow it to cool completely before wrapping in plastic wrap and refrigerating. The filling can be prepared a day ahead as well—crush your Oreos and store them in an airtight container until ready to use. When you’re ready to serve, simply shape the chilled dough around the cookie filling, dust with cornstarch, and refrigerate for at least 30 minutes for that delightful chewy texture. This way, you’ll have scrumptious mochi on hand for those busy weeknights or surprise gatherings, just as delicious and fresh!
Expert Tips for Easy Homemade Oreo Mochi
- Mochiko Matters: Use only mochiko for that authentic chewy texture; other flours won’t replicate its unique qualities.
- Prevent Sticking: Always dust your hands and the mochi dough with cornstarch to avoid any sticking mishaps while shaping.
- Chill Time: Don’t skip chilling your mochi for at least 30 minutes; it ensures the perfect chewy consistency in your Easy Homemade Oreo Mochi.
- Flavor Variations: Feel free to explore different fillings! Experimenting with flavors can make each batch unique and exciting for everyone.
- Storage Secrets: Store leftovers in an airtight container and refrigerate for 2-3 days or freeze them for up to a month to keep them fresh.
Storage Tips for Easy Homemade Oreo Mochi
Fridge: Keep your Easy Homemade Oreo Mochi in an airtight container for up to 2-3 days to maintain freshness and chewiness.
Freezer: For longer storage, wrap each mochi individually in plastic wrap and freeze for up to a month. They maintain their flavor and texture beautifully.
Thawing: When ready to enjoy, simply transfer your mochi from the freezer to the fridge and let them thaw overnight for the best results.
Reheating: If you’d like to warm them up, microwave the mochi for 10-15 seconds; this will soften them while preserving that delightful chewy texture.
What to Serve with Easy Homemade Oreo Mochi
Experience the sheer joy of delightfully chewy textures and rich chocolate flavors that can easily elevate your dessert game.
-
Vanilla Ice Cream: The creamy, cold contrast of vanilla ice cream complements the rich sweetness of Oreo Mochi, creating a delightful balance.
-
Fresh Strawberries: Their natural sweetness and tartness provide a refreshing counterpart, making for a delicious celebration of flavors. The combination not only looks beautiful on a plate but also adds a nutritious, fruity twist.
-
Drizzle of Chocolate Sauce: A touch of melted chocolate not only enhances the dessert’s visual appeal but also amplifies the decadent chocolate experience.
-
Matcha Green Tea: The earthy flavors of matcha create a wonderful contrast to the sweetness of the mochi, providing a taste of tradition that resonates with both Japanese and modern palates.
-
Coconut Whipped Cream: Light and airy, this vegan-friendly topping adds a luxurious feel to each bite, softening the rich chocolate richness without overpowering it.
-
Mint Tea: A soothing, aromatic drink that refreshes the palate between bites of mochi, enhancing the overall dessert experience with its aromatic qualities.
-
Fruit Sorbet: A scoop of sorbet introduces a fruity zing and lively texture, showcasing a balance of sweet and tangy that rounds off the meal beautifully.
-
Chilled Almond Milk: This nutty, creamy drink pairs well with the chewy mochi, providing a refreshing sip that complements its texture without overwhelming the palate.
Easy Homemade Oreo Mochi Recipe FAQs
How do I choose the right mochiko for this recipe?
Absolutely! Look for mochiko labeled as “sweet rice flour” in Asian markets or online. It’s crucial to use this specific flour, as alternatives won’t provide the chewy texture that’s essential for making Easy Homemade Oreo Mochi.
What’s the best way to store leftover mochi?
To keep your Easy Homemade Oreo Mochi fresh, store them in an airtight container in the refrigerator for up to 2-3 days. Make sure to separate layers with parchment paper to prevent sticking. For more extended storage, wrap each mochi individually in plastic wrap and freeze for up to a month.
Can I freeze Easy Homemade Oreo Mochi?
Yes, you can! To freeze, individually wrap each mochi in plastic wrap and place them in a freezer-safe bag. They’ll stay delicious for up to 3 months. When you’re ready to enjoy, simply take them out and let them thaw in the refrigerator overnight for the best flavor and texture.
What should I do if my mochi dough is too sticky?
If your dough feels overly sticky, don’t panic! Lightly dust your hands and your working surface with cornstarch to help manage the stickiness while shaping. Alternatively, try adding a bit more cornstarch to the dough as you mix until you reach the right consistency.
Can I make this recipe vegan?
Very! To make your Easy Homemade Oreo Mochi vegan, substitute the sugar with plant-based sweeteners like coconut sugar or maple syrup, and ensure that you use vegan-friendly cookies. This simple swap will keep your dessert delightful and inclusive for everyone.
Easy Homemade Oreo Mochi: Indulge in Chewy Chocolate Bliss
Ingredients
Equipment
Method
- In a mixing bowl, combine mochiko and sugar. Gradually whisk in water until smooth.
- Transfer mixture to a microwave-safe bowl and cover. Microwave on high for 1 minute, then stir. Repeat for 4-5 minutes until thickened.
- Stir in vanilla extract until well mixed.
- Dust a clean surface with cornstarch and pour the warm mochi dough onto it. Allow to cool for 5 minutes.
- Divide the dough into 6 pieces, flatten each into discs, and place crushed Oreos in the center. Fold edges to enclose the filling.
- Dust each mochi piece with cornstarch. Place on a plate, cover, and refrigerate for at least 30 minutes.


