Advertisement
As I scoured through my Halloween recipe collection, a vision of a peculiar yet delightful treat caught my eye. Enter the Cheesy Witch Hat—a playful appetizer that’s as fun to make as it is to serve! This whimsical creamy cheese spread, crowned with poppy seeds and formed into a bewitching hat, is bound to enchant your guests at any spooky gathering. It’s not only a feast for the eyes but also a creamy savory delight that requires minimal effort to whip up, making it a fantastic addition to your Halloween buffet. Whether you’re a seasoned home chef or just looking to shake things up in the kitchen, this recipe is sure to cast a spell on everyone who digs in. Are you ready to conjure up some fun? Let’s dive in!
Why Is the Witch Hat Snack Board a Must-Try?
Irresistibly Fun: This Cheesy Witch Hat is not just an appetizer; it’s a show-stopper that brings joy to your Halloween gathering. Effortless Preparation: With just a few simple ingredients, you can create this stunning centerpiece without a fuss. Versatile Flavor: The creamy cheese blend complements your favorite snacks, be it crackers or veggies. Decoration Appeal: Each hat is as delightful to look at as it is to eat! This snack board pairs wonderfully with Spicy Popcorn Snacks for an extra festive flair. Crowd Favorite: Whether it’s a party or family dinner, this dish is guaranteed to enchant and satisfy everyone!
Witch Hat Snack Board Ingredients
• Get ready to create this spooky masterpiece!
Advertisement
For the Cheese Mixture
- Cream Cheese – Provides the base of the spread, adding rich creaminess. Substitution: Flavored cream cheese will give a unique twist.
- Land O Lakes® Butter – Ensures a smooth texture with genuine flavor. Substitution: Dairy-free margarine can also work.
- Dry Italian Salad Dressing Mix – Adds savory herb notes to the mixture. Note: Replace it with a homemade herb blend if you desire a fresh taste.
- Shredded Cheddar Cheese – Delivers a sharp flavor that perfectly balances the creaminess. Note: Use mild cheddar for a subtler taste.
- Chopped Pimentos – Brings a slight tang and a pop of color. Substitution: Sweet red peppers can substitute if pimentos are hard to find.
For the Decoration
- Poppy Seeds – Offers a unique visual appeal and texture to the witch hat. Note: Black sesame seeds could be used as an alternative look.
- Carrot – Acts as the decorative hatband to enhance presentation. Substitution: Thin cucumber slices can work just as well for garnish.
Gather these ingredients and prepare to impress your guests with your enchanting Witch Hat Snack Board!
Step‑by‑Step Instructions for Witch Hat Snack Board
Step 1: Prepare the Cheese Mixture
In a large mixing bowl, combine 8 ounces of softened cream cheese, 3 tablespoons of Land O Lakes® butter, 1 packet of dry Italian salad dressing mix, 1 cup of shredded cheddar cheese, and ¼ cup of chopped pimentos. Using a hand mixer, beat the mixture at medium speed for about 2-3 minutes until it becomes creamy and well-blended. Be sure to scrape the sides to incorporate all ingredients for a smooth texture.
Step 2: Shape the Witch Hat
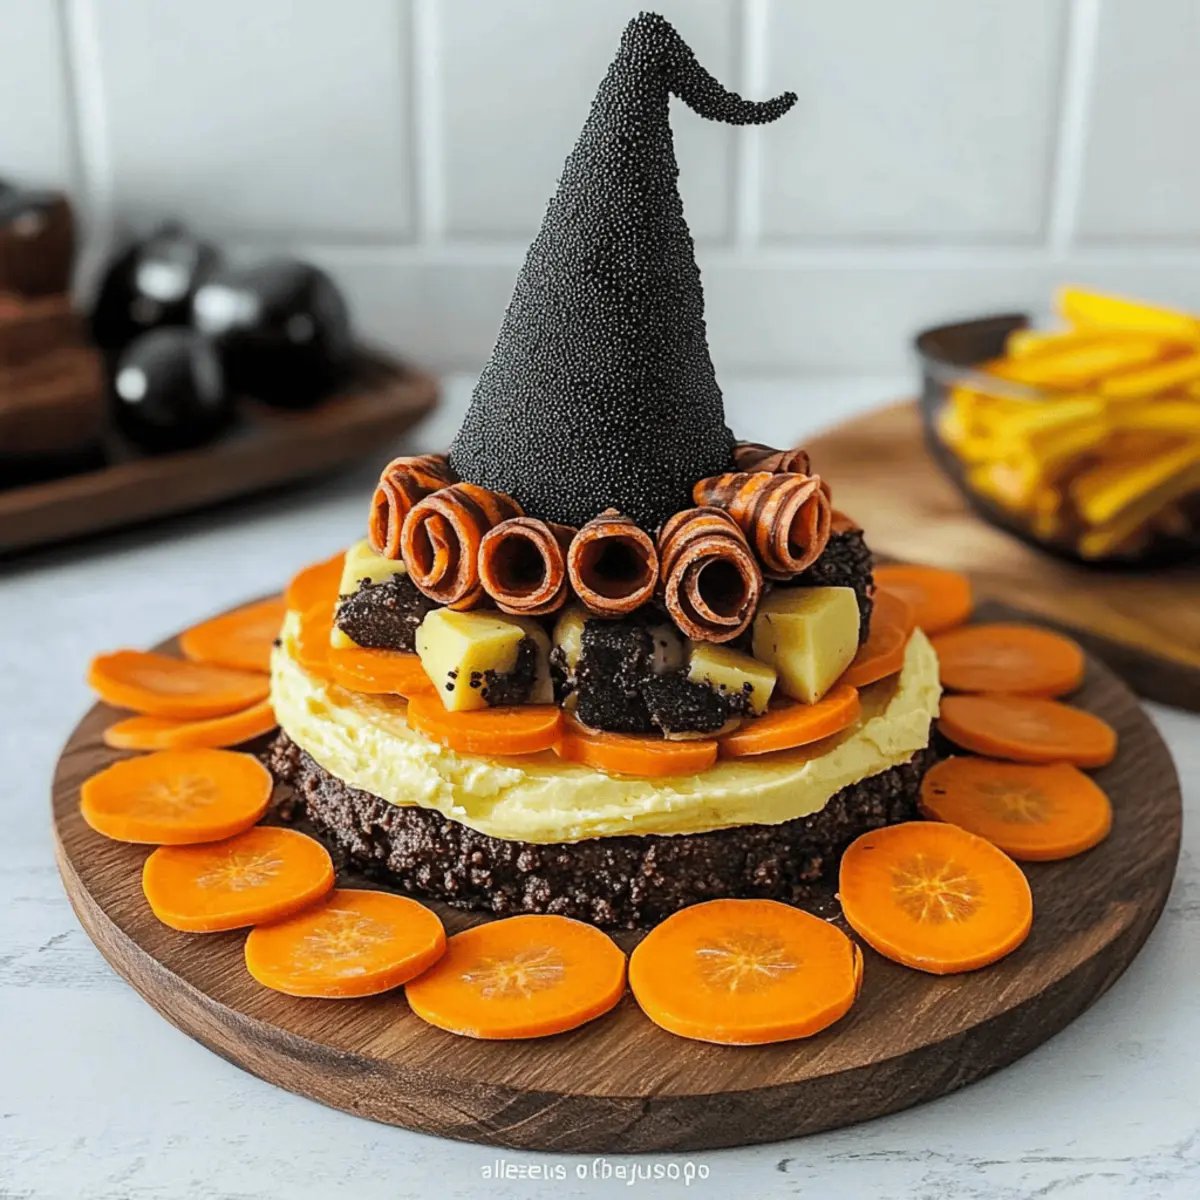
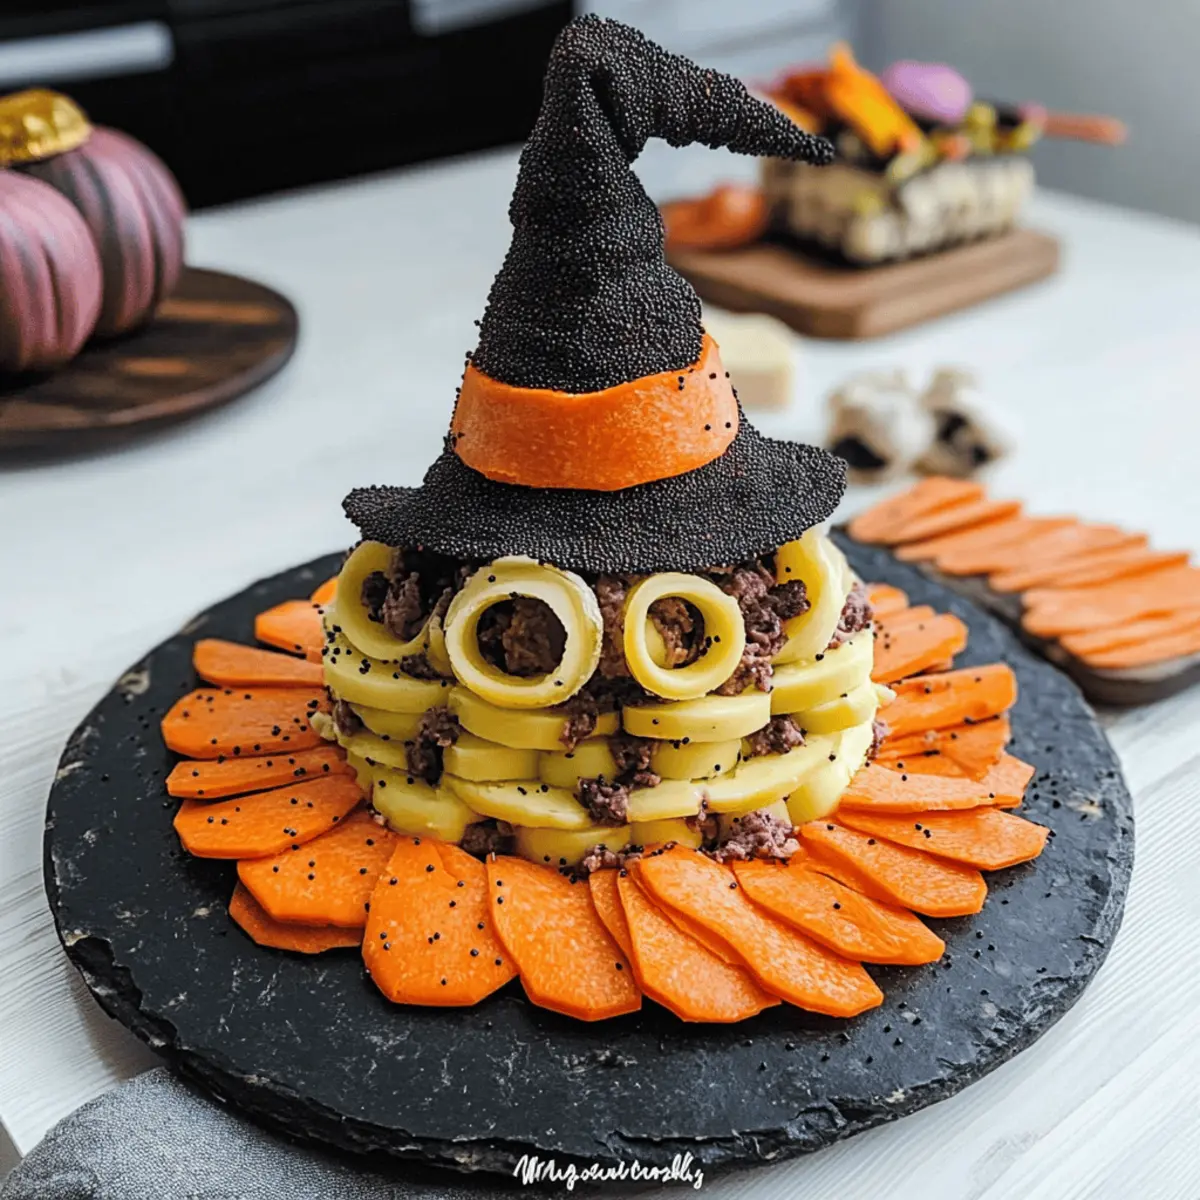
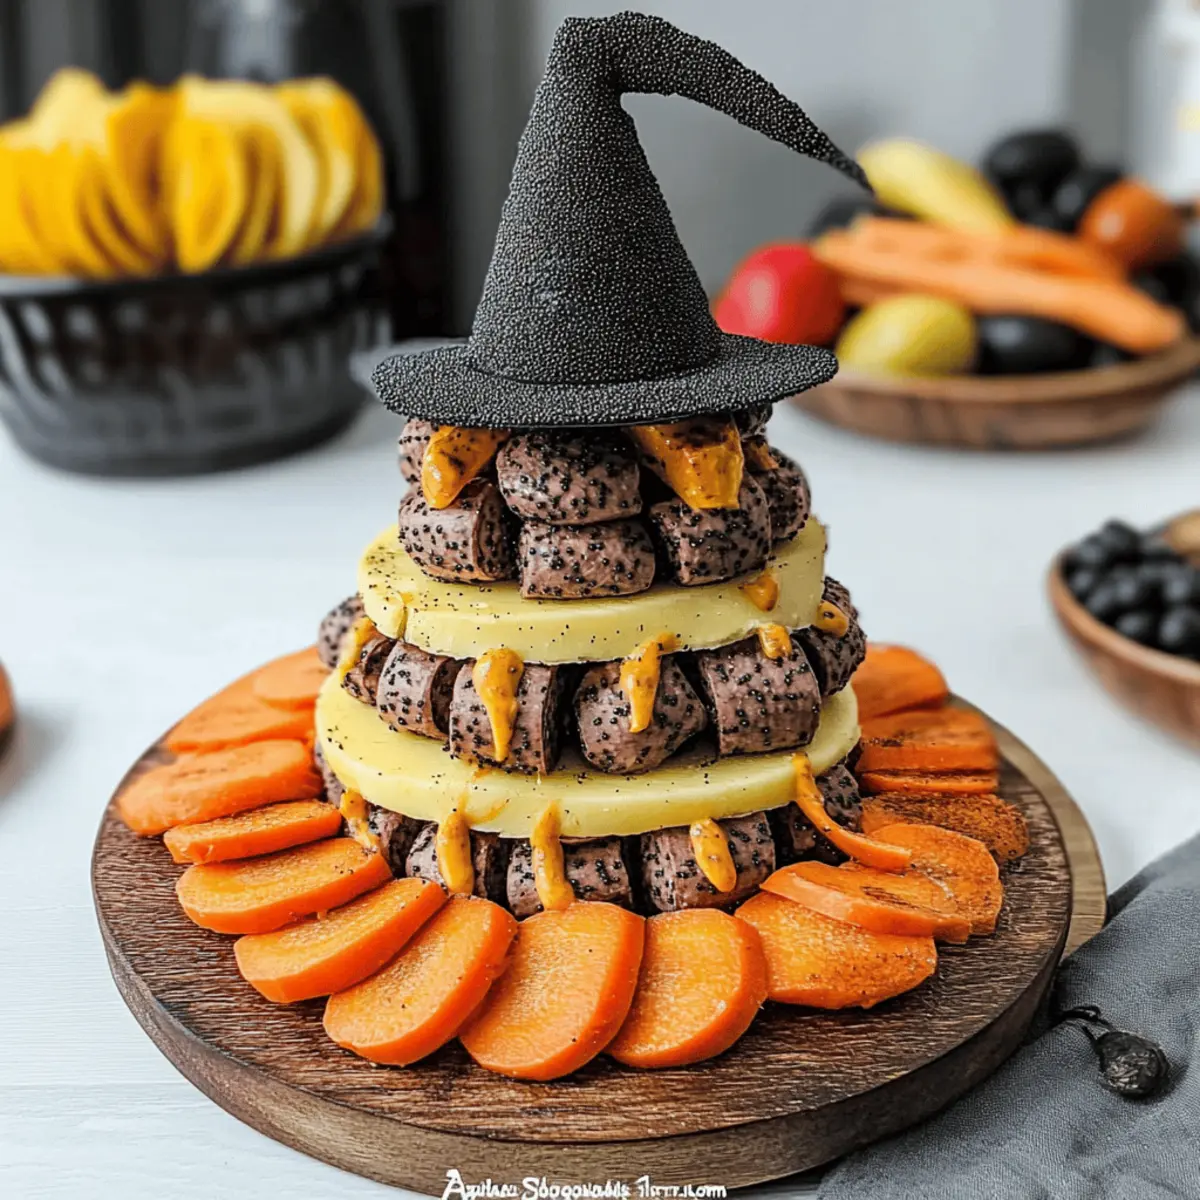
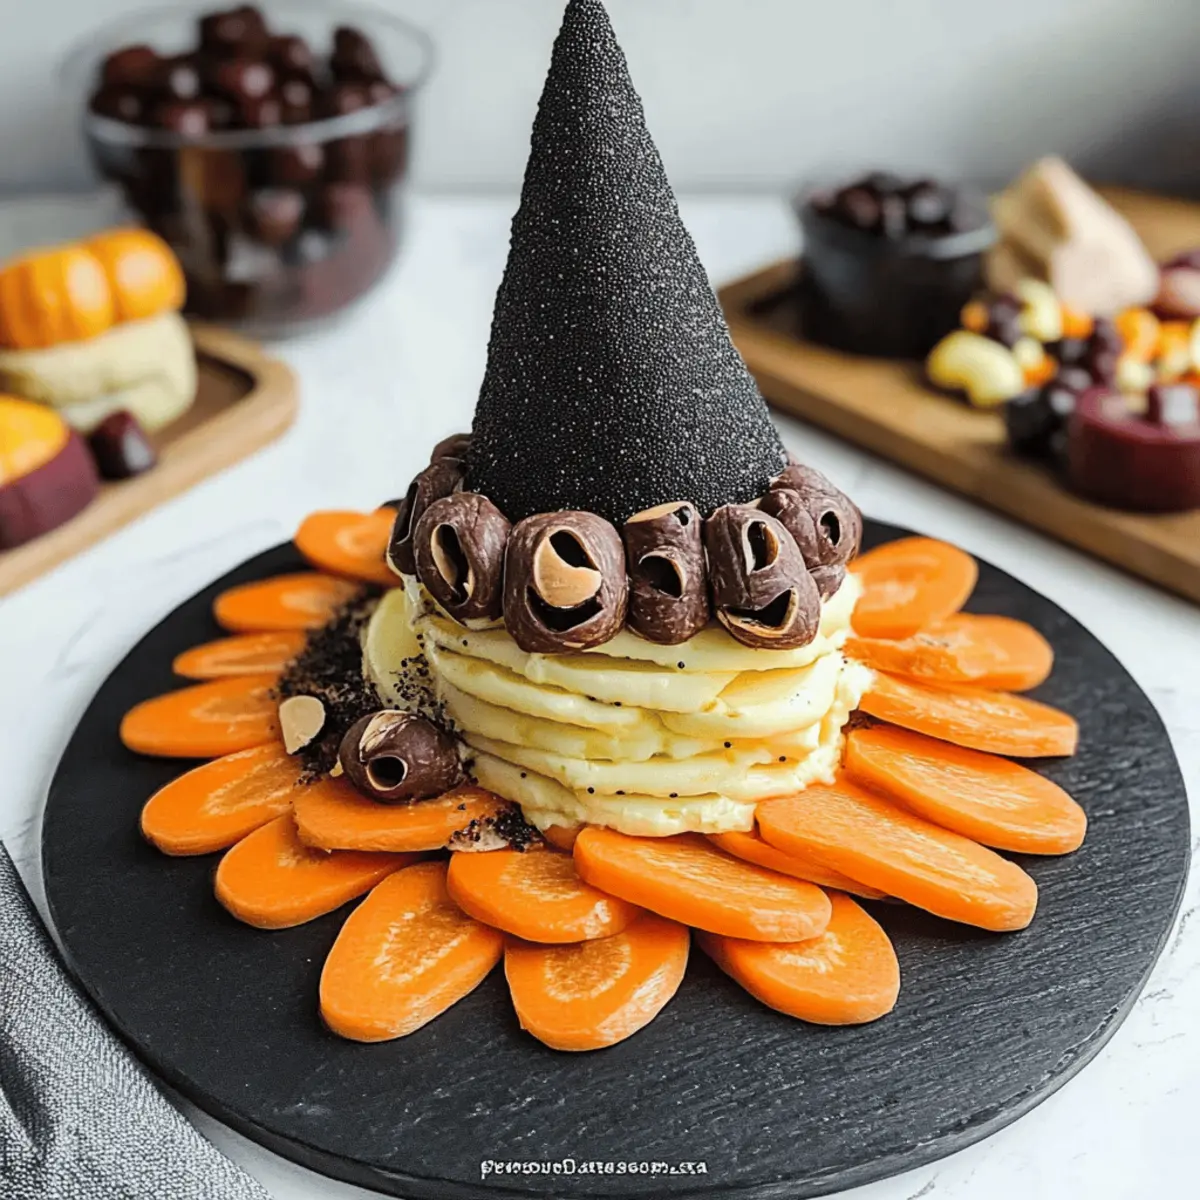
Divide the creamy cheese mixture in half, and on a large serving plate, spread one half into a circle of about 6 inches in diameter for the brim of your Witch Hat Snack Board. Shape the other half into a ball on top for the hat’s peak. Cover both shapes with plastic wrap and place them in the refrigerator for at least 1 hour to firm up and hold their shape for easy assembly.
Step 3: Assemble the Hat
After chilling, take the cheese ball out and gently mold it into a conical shape to resemble the witch’s hat. Next, position this cone atop the cheese brim you formed earlier, ensuring everything is balanced. To enhance the visual of your Witch Hat, coat the entire cone with poppy seeds, giving it a textured and spooky appearance.
Step 4: Final Touches
Using the reserved cheese mixture, attach thinly sliced carrots around the base of the conical hat to act as the hatband. This little detail adds both flavor and color to your Witch Hat. Cover the entire assembly with plastic wrap again and return it to the refrigerator for at least 2 hours, allowing the flavors to meld and the hat to set perfectly.
Step 5: Serve and Enjoy
Once your festive Witch Hat Snack Board has chilled, remove it from the refrigerator and let it sit out for 30 minutes before serving. This waiting time ensures the cheese is spreadable and at the ideal temperature. Present your delicious creation with an assortment of crackers, fresh-cut vegetables, or soft breadsticks, inviting everyone to dig in and enjoy this playful Halloween appetizer!
What to Serve with Cheesy Witch Hat
Elevate your Halloween party with delightful side dishes that perfectly accompany this whimsical creamy cheese spread.
-
Crunchy Veggie Platter: A mix of fresh carrots, bell peppers, and cucumbers adds a refreshing crunch. Their vibrant colors will make your snack board visually appealing and offer a healthy contrast to the creaminess.
-
Assorted Crackers: Choose a variety of textures and flavors—whether it’s buttery, herb-infused, or whole grain—to provide the perfect vehicle for scooping your Cheesy Witch Hat.
-
Savory Breadsticks: The crispy exterior and soft interior of breadsticks create a delightful textural complement to the creamy dip. Serve them warm for a cozy addition to your snack board.
-
Spicy Nuts: A mix of seasoned nuts can add a delightful crunch and a hint of heat, perfectly balancing the rich flavors of the cheesy hat.
-
Festive Fruit Salad: Combine apples, grapes, and berries for a light, sweet contrast that cuts through the richness. Add a squeeze of lemon for a zesty kick.
-
Chilled White Wine: A crisp Sauvignon Blanc or a light sparkling wine would beautifully enhance the flavors of the cheese while adding an elegant touch to the celebration.
Pair these delightful options with your Witch Hat Snack Board to create an unforgettable Halloween feast!
How to Store and Freeze Witch Hat Snack Board
Fridge: Keep the assembled Witch Hat Snack Board tightly wrapped in plastic wrap in the refrigerator for up to 3 days. This helps maintain its creamy texture and flavor.
Freezer: For longer storage, you can freeze the cheese mixture before shaping. Simply wrap it in plastic and store for up to a month. Thaw in the fridge overnight before use.
Reheating: This appetizer is best served chilled, so there’s no need to reheat. Let it sit at room temperature for about 30 minutes before serving to achieve the ideal spreadable consistency.
Leftover Storage: If you have any leftovers, store them in an airtight container in the fridge for up to 3 days to enjoy your delicious Witch Hat Snack Board later!
Make Ahead Options
These Cheesy Witch Hats are perfect for meal prep, saving you valuable time during your Halloween festivities! You can mix the cheese filling and shape the hat components up to 24 hours ahead. Simply prepare the creamy mixture, shape the brim and hat, and wrap them tightly in plastic wrap before refrigerating. This helps retain quality and prevents the cheese from drying out. When you’re ready to serve, assemble the hat and add the poppy seeds, then let it chill for an additional 2 hours. Just before serving, allow it to sit for 30 minutes so it’s perfectly spreadable, making your gathering stress-free and full of delicious fun!
Expert Tips for the Witch Hat Snack Board
-
Make Ahead: Prepare the cheese mixture and shape the hat a day in advance. This saves you time on the day of your event and allows flavors to meld beautifully.
-
Texture Control: Avoid excess moisture in the cheese mixture by ensuring the cream cheese and butter are well-blended. This helps maintain the perfect form for your joke-worthy Witch Hat Snack Board.
-
Chilling Time: Allow the assembled hat to chill for at least 2 hours. This step is crucial for the structure and helps achieve that fabulous display at your gathering.
-
Serving Temperature: Let the finished hat sit out for about 30 minutes before serving. This makes spreading easier and enhances the creamy texture, delighting your guests.
-
Presentation Tips: Experiment with different garnishes like colorful veggies or assorted crackers to enhance the visual appeal of your Witch Hat Snack Board—make it magical!
Witch Hat Snack Board Variations
Feel free to let your creativity shine and customize this delightful recipe to suit your taste buds!
-
Goat Cheese: Swap in goat cheese for a tangy twist that adds a delightful zing to your hat. The creaminess of goat cheese pairs beautifully with the other ingredients, making each bite a flavor explosion.
-
Herb-Infused: Mix in fresh or dried herbs like rosemary or basil for a fragrant boost. Just a teaspoon can transform your cheese mixture into a herby masterpiece, adding depth to the flavor profile.
-
Olive Medley: Incorporate chopped olives into the cheese mixture for a savory punch. Your guests will love the unexpected briny notes, taking the witch hat from spooky to sensational!
-
Crunchy Nuts: Add finely chopped nuts, such as walnuts or pecans, for added texture. This adjustment introduces a delightful crunch that contrasts with the creamy base, making every bite interesting.
-
Spicy Kick: Mix in finely chopped jalapeños or a dash of cayenne for some heat. If you’re a fan of spice, this will give your witch hat a fiery personality that guests won’t forget!
-
Alternative Pop: Switch out the poppy seeds and use black sesame seeds for that crunchy exterior. This variation also offers a unique visual appeal while keeping the festive theme intact.
-
Sustainable Veggies: Experiment with different vegetable garnishes, such as sliced bell peppers or radishes, to decorate your hat. This not only enhances the presentation but offers diverse flavors that can be refreshing to your appetizer.
For more festive inspiration, consider pairing your Witch Hat Snack Board with Spicy Popcorn Snacks to add a fun crunch alongside your creamy treat. Enjoy the process of bringing your unique flair to this Halloween classic!
Witch Hat Snack Board Recipe FAQs
What kind of cream cheese should I use for the Witch Hat Snack Board?
Absolutely! You can use regular cream cheese for the best flavor and texture. If you want to add a fun twist, try flavored cream cheese, like herb or garlic, to give your Witch Hat a unique zing!
How should I store the Witch Hat Snack Board after making it?
For optimal freshness, tightly wrap your assembled Witch Hat Snack Board in plastic wrap and keep it in the refrigerator for up to 3 days. This ensures it maintains its creamy texture and delightful flavors, making it ready for a repeat feast!
Can I freeze the Witch Hat Snack Board?
Yes! You can freeze the cheese mixture before shaping the hat. Wrap the mixture tightly in plastic wrap and store it in an airtight container for up to a month. When you’re ready to use it, just thaw it in the fridge overnight, then follow the shaping, assembling, and chilling steps.
What should I do if my cheese mixture is too loose?
Very! If your cheese mixture seems too loose, you may want to add a little extra shredded cheddar cheese, which can help thicken it. I recommend mixing it well and chilling it for 30 minutes before shaping. If needed, you can also add a small amount of powdered gelatin for extra firmness.
Are there any dietary concerns to keep in mind for this appetizer?
Definitely! If you’re serving guests with dietary restrictions, consider using dairy-free margarine instead of butter and ensure your cream cheese is dairy-free too. Also, be careful with ingredients like pimentos; check for any potential allergies or sensitivities. Always a good idea to ask your guests if they have any dietary needs!
How can I personalize the Witch Hat Snack Board?
The more the merrier! You can add in fun mix-ins to the cheese mixture, like chopped fresh herbs, olives, or different types of cheese for added flavor. Additionally, experimenting with various vegetable garnishes will not only enhance the visual appeal but also offer different textures for every bite!
Witch Hat Snack Board: A Spooky and Creamy Delight
Ingredients
Equipment
Method
- In a large mixing bowl, combine 8 ounces of softened cream cheese, 3 tablespoons of Land O Lakes® butter, 1 packet of dry Italian salad dressing mix, 1 cup of shredded cheddar cheese, and ¼ cup of chopped pimentos. Using a hand mixer, beat the mixture at medium speed for about 2-3 minutes until it becomes creamy and well-blended.
- Divide the creamy cheese mixture in half and spread one half into a circle of about 6 inches in diameter for the brim. Shape the other half into a ball on top for the hat's peak. Cover with plastic wrap and refrigerate for at least 1 hour.
- After chilling, mold the cheese ball into a conical shape resembling a witch's hat. Place this cone atop the cheese brim and coat it with poppy seeds.
- Attach thinly sliced carrots around the base of the conical hat to act as the hatband, then cover again with plastic wrap and return to the fridge for at least 2 hours.
- Before serving, let it sit at room temperature for 30 minutes. Present with an assortment of crackers, fresh-cut vegetables, or soft breadsticks.