
Advertisement
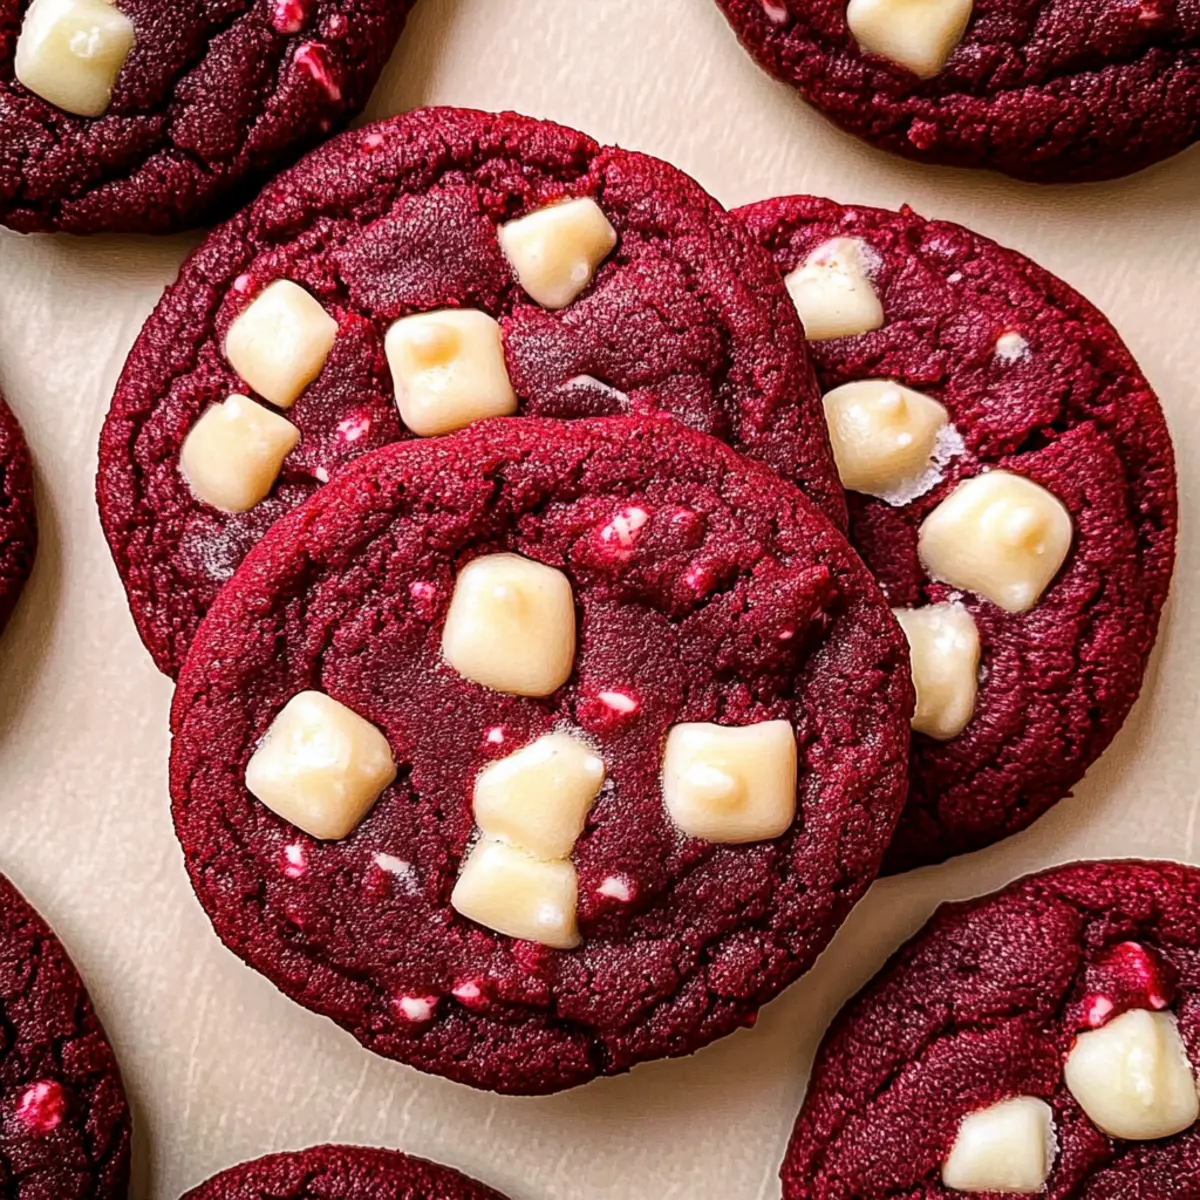
As I rummaged through my pantry, a little burst of inspiration hit me—what if I transformed classic red velvet cake into a cookie? Enter these Chewy Red Velvet Cookies with White Chocolate Chunks! They marry the soft, inviting texture of the beloved cake with the delightful convenience of a cookie, all topped off with melty white chocolate pools that just make my heart sing. The best part? They’re perfect for Valentine’s Day or any moment that needs a sweet touch, and you won’t even need to chill the dough, so you can whip them up in under 30 minutes. Who could resist a quick and easy treat that’s both beautiful and utterly delicious? Ready to bring a touch of romance to your baking? Let’s dive in!
Why Are These Cookies So Special?
Unforgettable flavor: These cookies bring the iconic red velvet taste you love to a delightful handheld treat, topped with melty white chocolate chunks that make every bite a heavenly experience.
Quick Prep Time: Forget waiting for dough to chill! With no chilling required, you can bake and enjoy these cookies in under 30 minutes—a perfect solution for last-minute cravings.
Perfect for Any Occasion: Whether it’s for Valentine’s Day or just a cozy night in, these cookies add a special touch to any gathering.
Easy to Customize: From swapping white chocolate for dark to adding nuts for crunch, there’s a fun twist available for everyone. If you love creative bakes, check out my Classic Pistachio Shortbread Cookies for another easy recipe!
Crowd Pleaser: Their vibrant color and delectable flavor make these cookies a hit with family and friends, spreading smiles and joy wherever they are served.
Red Velvet Cookies Ingredients
• Here’s everything you’ll need to create these chewy treats!
Advertisement
For the Cookie Dough
- All-Purpose Flour – Gives the cookies their structure; measure carefully to avoid too much.
- Dutch Process Cocoa Powder – Adds a rich chocolate flavor; regular cocoa can work if you’re in a pinch.
- Baking Soda & Baking Powder – Essential leavening agents; make sure they’re fresh for maximum fluffiness.
- Salt – Enhances sweetness and flavor; opt for fine salt for even mixing.
- Salted Butter – Provides moisture and richness; soften it for easier mixing, but unsalted butter works too—just add a pinch of salt.
- Light Brown Sugar & Granulated Sugar – Offer sweetness and moisture; brown sugar gives that lovely chewy texture.
- Egg Yolks – Add richness and help bind all ingredients; bring them to room temperature beforehand for better results.
- Vanilla Extract – Infuses a delightful depth of flavor; substitute with almond extract for a unique twist.
- Red Gel Food Coloring – Achieves that iconic red color; adjust the amount to your desired shade.
- Chopped White Chocolate or White Chocolate Chips – Melty pockets of sweetness; feel free to use dark chocolate if you prefer a bolder taste.
For the Topping
- Extra White Chocolate – Drizzle or sprinkle for a more indulgent treat; add a little more to really make these Red Velvet Cookies shine!
Enjoy the process and the love that goes into making these cookies—they’re sure to become a favorite!
Step‑by‑Step Instructions for Chewy Red Velvet Cookies with White Chocolate Chunks
Step 1: Preheat Oven
Begin by preheating your oven to 350°F (175°C). While the oven heats, line two baking sheets with parchment paper to ensure the cookies bake evenly and don’t stick. This step sets the stage for your delicious Chewy Red Velvet Cookies, so your kitchen starts to fill with that warm, baking aroma.
Step 2: Prepare Dry Ingredients
In a medium bowl, whisk together the all-purpose flour, Dutch process cocoa powder, baking soda, baking powder, and salt. Mixing these dry ingredients thoroughly ensures an even distribution of leavening agents, which helps the cookies rise perfectly. Set this bowl aside as we move on to the next step.
Step 3: Cream Butter and Sugars
In a large mixing bowl, use an electric mixer to beat the softened salted butter with the light brown sugar and granulated sugar for about 2 minutes. You’re aiming for a light and fluffy texture—this will add air into the dough, resulting in soft, chewy Red Velvet Cookies. Scrape down the sides of the bowl halfway through to ensure an even mix.
Step 4: Incorporate Wet Ingredients
Add the egg yolks, vanilla extract, and red gel food coloring to the butter mixture. Mix on medium speed for another 2 minutes until everything is well combined and fluffy. The vibrant red color will start to come to life as you blend, transforming your mixture into a beautiful, inviting batter.
Step 5: Combine with Dry Ingredients
Gradually sprinkle the dry ingredient mixture into the wet ingredients. Mix gently until just combined; overmixing can lead to tough cookies. The dough should be soft and slightly sticky—a clear sign that your Chewy Red Velvet Cookies are on the right track!
Step 6: Add White Chocolate
Now it’s time to fold in the chopped white chocolate or white chocolate chips. Use a spatula to gently incorporate the chocolate, ensuring that each cookie has those delightful melted pockets of sweetness. Take a moment to admire how those white chocolate chunks brighten up this red velvet dough!
Step 7: Form Cookies
Using a cookie scoop or a tablespoon, portion out the dough into 18 balls. Place them on the prepared baking sheets, making sure to space them about 2 inches apart, as they will spread while baking. This spacing is crucial for achieving perfectly shaped cookies, allowing for a little expansion without merging together.
Step 8: Bake
Slide the baking sheets into your preheated oven and bake for 10-12 minutes. If you prefer soft centers, aim for around 10 minutes; for cookies with a bit more crispness around the edges, go for the full 12. You’ll know they’re done once the edges look set and a soft sheen remains on the tops.
Step 9: Cool
Once baked, remove the cookies from the oven and let them cool on the baking sheets for 5 minutes. This allows them to firm up slightly before transferring them to a cooling rack. Afterward, let the cookies cool for an additional 5 minutes on the rack—enough time for those delightful smells to entice everyone around!
Tips for the Best Red Velvet Cookies
-
Measure Accurately: Use the spoon and level method or weigh your flour (1 cup = 125 grams) to prevent dense cookies. Overmeasuring can lead to a dry texture.
-
Room Temperature Ingredients: Ensure your egg yolks and butter are at room temperature. This helps create a fluffy dough, essential for those chewy Red Velvet Cookies.
-
Don’t Overmix: Mix the dry and wet ingredients until just combined. Overmixing can develop gluten and result in tough cookies—nobody wants that!
-
Watch Your Baking Time: Pay attention to the baking time. If you prefer softer centers, pull them out closer to 10 minutes to keep those chewy edges intact.
-
Cool Properly: Let the cookies cool on the baking sheet for a bit before transferring them to a rack. This will help them firm up without becoming too hard. Enjoy your cookies!
How to Store and Freeze Red Velvet Cookies
Airtight Container: Store leftover cookies in an airtight container at room temperature for up to 3 days to maintain their soft, chewy texture.
Fridge: If you live in a warm environment, it’s best to store the cookies in the fridge, where they will stay fresh for up to 5 days.
Freezer: For longer storage, freeze the cookies for up to 2 weeks. Wrap them individually in plastic wrap and place them in a zip-top bag for best results.
Reheating: To enjoy your cookies warm, place them in the microwave for 10-15 seconds or warm them in a 350°F (175°C) oven for 5 minutes before serving.
What to Serve with Chewy Red Velvet Cookies with White Chocolate Chunks
These cookies are such a delightful treat that they deserve to be part of a full celebration spread!
-
Rich Cream Cheese Frosting: A dollop of cream cheese frosting on top elevates the red velvet flavor and adds a creamy tang. It’s like frosting your favorite cake but in cookie form!
-
Vanilla Ice Cream: The cool, creamy vanilla perfectly complements the rich chocolatey flavor of the cookies. Serve the cookies warm with a scoop of ice cream for a comforting dessert experience.
-
Fresh Berries: Raspberries or strawberries bring a burst of freshness and tartness that balances the sweetness of the cookies. They add a beautiful color contrast that makes your dessert plate pop!
-
Chocolate-Covered Strawberries: For an indulgent pairing, serve these alongside chocolate-covered strawberries that mirror the cookie’s rich flavor and create a romantic touch for special occasions.
-
Sparkling Pink Lemonade: A bubbly, refreshing drink experience! The sweet and tangy flavors enhance the cookies while keeping your palate light and excited.
-
Chocolate Espresso: For coffee lovers, the deep and rich notes of a chocolate espresso create a delightful sensory contrast. The coffee’s bitterness beautifully balances the sweetness of the red velvet cookies.
-
Decorative Platter: Serve the cookies on a decorative platter alongside assorted treats like mini cheesecake bites or fudge for a lovely dessert table, ideal for celebrations or gatherings.
-
Red Wine: A velvety red wine merges beautifully with the cookies, emphasizing the red velvet experience while adding a sophisticated touch to your dessert spread.
-
Cheesecake Bars: The rich, creamy texture and flavors of cheesecake bars provide a lovely creamy counterpoint to the chewy cookies, making for a crowd-pleasing duet!
Make Ahead Options
These Chewy Red Velvet Cookies are perfect for meal prep enthusiasts! You can prepare the cookie dough up to 24 hours in advance, simply cover it tightly and refrigerate to keep it fresh. When you’re ready to bake, just scoop the chilled dough onto baking sheets and bake as directed. If you’ve made extra cookies, they can be stored in an airtight container at room temperature for up to 3 days or frozen for up to 2 weeks—just allow them to come to room temperature before serving. This strategy not only saves you time on busy weeknights but also ensures your cookies remain just as delicious and chewy as when they were freshly baked!
Red Velvet Cookies Variations & Substitutions
Feel free to get creative and make these cookies your own with these fun tweaks and substitutions!
-
Dark Chocolate: Swap white chocolate for dark chocolate chunks for a richer, less sweet flavor that pairs beautifully with red velvet.
-
Nutty Delight: Add chopped pecans or walnuts to the dough for a delightful crunch and a buttery, nutty flavor in every bite.
-
Flavorful Extracts: Replace vanilla extract with almond or coconut extract to introduce a unique, aromatic twist that adds depth to your cookies.
-
Adjust the Color: Experiment with different gel food colors, like blue or green, to create visually stunning cookies for themed parties or celebrations.
-
Dairy-Free: Use vegan butter and non-dairy chocolate chips to whip up a plant-based version of these cookies that everyone can enjoy.
-
Coconut Flakes: Stir in sweetened or unsweetened shredded coconut for added texture and a tropical flair that complements the red velvet beautifully.
-
Spicy Kick: Incorporate a pinch of cinnamon or cayenne pepper to introduce a hint of warmth that elevates the overall flavor profile in a surprising way.
As you adjust the recipe to your liking, don’t forget to share them with friends and family! If you’re looking for other delightful cookie inspirations, you can check out my Marshmallow Swirl Cookies or the wonderfully festive Filled Snowball Cookies. Happy baking!
Red Velvet Cookies Recipe FAQs
What kind of flour should I use for Red Velvet Cookies?
Absolutely, the recipe calls for all-purpose flour, which provides the necessary structure. Be sure to measure it correctly by using the spoon and level method to avoid using too much—about 1 cup should weigh 125 grams. This tip ensures you’ll achieve a perfect chewy texture.
How do I know when my cookies are done baking?
Very! Watch for the edges to look set while the tops remain soft and slightly shiny. If you prefer soft centers, bake for about 10 minutes. For a bit of crispness, let them go for the full 12. Your kitchen will fill with an irresistible aroma, and visually, the cookies should not be overly browned.
How should I store leftover Red Velvet Cookies?
Keep those delicious cookies in an airtight container at room temperature for up to 3 days. If you want them to last longer, you can refrigerate them for up to 5 days. Just remember, cookies in the fridge can become a bit firm, so let them sit at room temperature for a few minutes before enjoying!
Can I freeze these cookies? If so, how?
Absolutely! To freeze your Red Velvet Cookies, wrap each one individually in plastic wrap and place them in a zip-top freezer bag. They can be stored in the freezer for up to 2 weeks. When you’re ready to enjoy, simply rewarm them in the microwave for about 10-15 seconds or in a preheated oven at 350°F (175°C) for around 5 minutes.
What should I do if my cookie dough is too sticky?
If you find the dough is a bit too sticky, you can try adding a sprinkle of flour—start with a tablespoon at a time. Another trick is to ensure that the salted butter is well-softened but not melted; incorporating it properly helps the dough come together nicely. Just remember not to overmix once you add the dry ingredients, as that can create a tough texture.
Is there an allergy-friendly version of these cookies?
For those with dietary restrictions, you can use gluten-free all-purpose flour as a substitute for regular flour, making it suitable for a gluten-free diet. Additionally, if you need to avoid dairy, look for dairy-free butter options and use dairy-free chocolate chips for the white chocolate component. Always ensure to check the labels for cross-contamination if allergies are a concern.
Irresistibly Chewy Red Velvet Cookies That Wow Hearts
Ingredients
Equipment
Method
- Preheat your oven to 350°F (175°C) and line two baking sheets with parchment paper.
- In a medium bowl, whisk together the flour, cocoa powder, baking soda, baking powder, and salt.
- In a large bowl, beat the softened butter with the brown sugar and granulated sugar for about 2 minutes.
- Add the egg yolks, vanilla extract, and red gel food coloring to the butter mixture and mix for another 2 minutes.
- Gradually add the dry ingredients to the wet ingredients and mix gently until just combined.
- Fold in the white chocolate or white chocolate chips gently.
- Using a cookie scoop, portion out the dough into 18 balls and place them on baking sheets.
- Bake for 10-12 minutes; 10 for soft centers, 12 for crisp edges.
- Remove from the oven, cool on the sheets for 5 minutes, then transfer to a cooling rack for another 5.


