
Advertisement
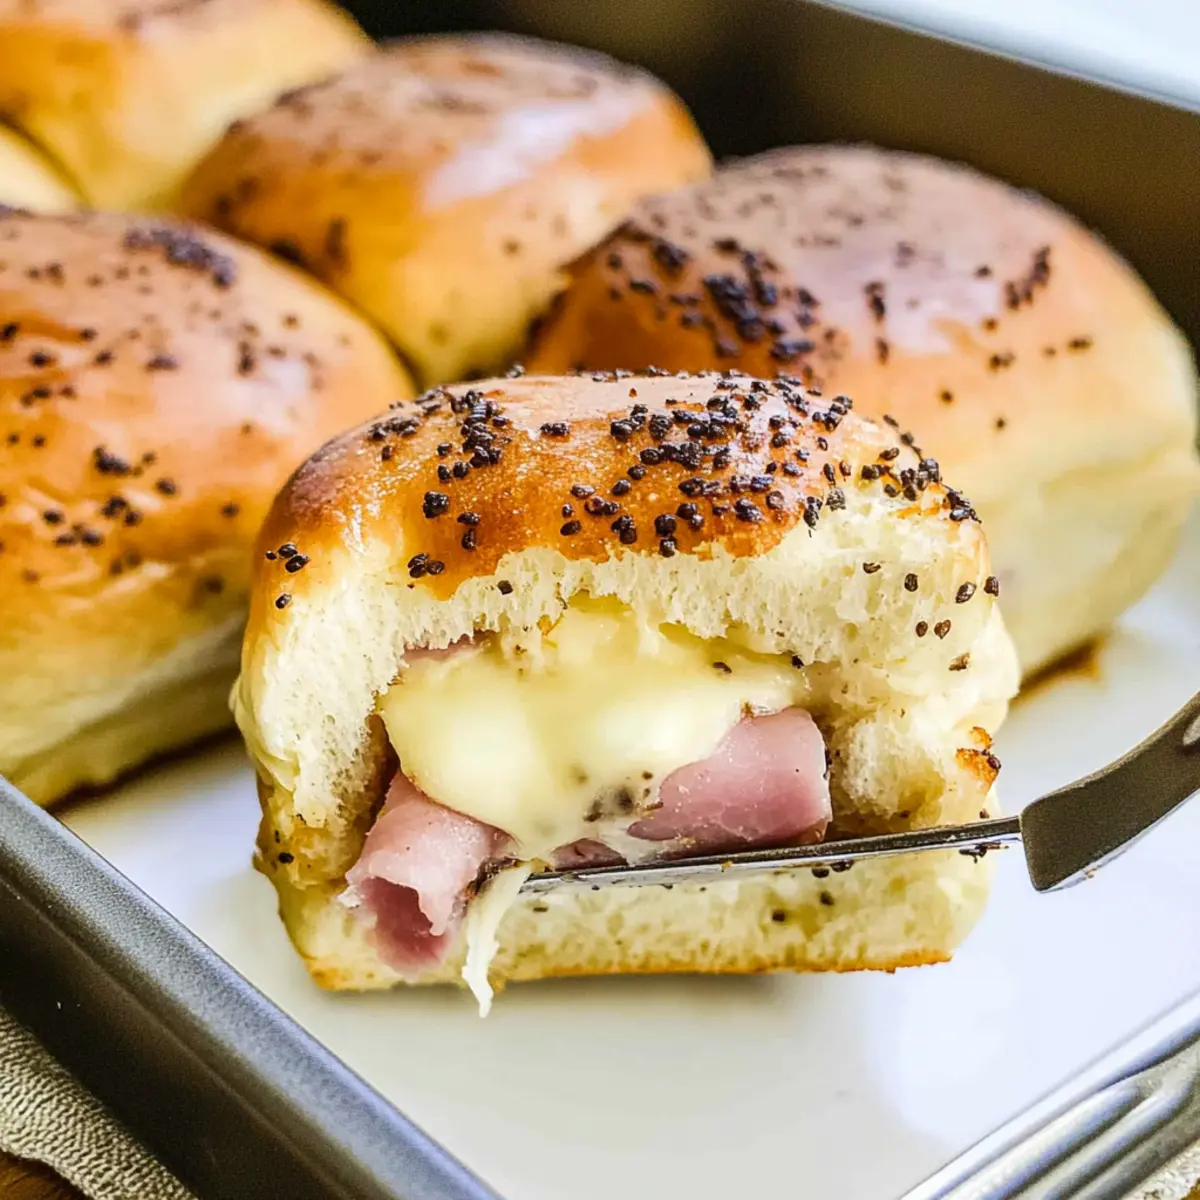
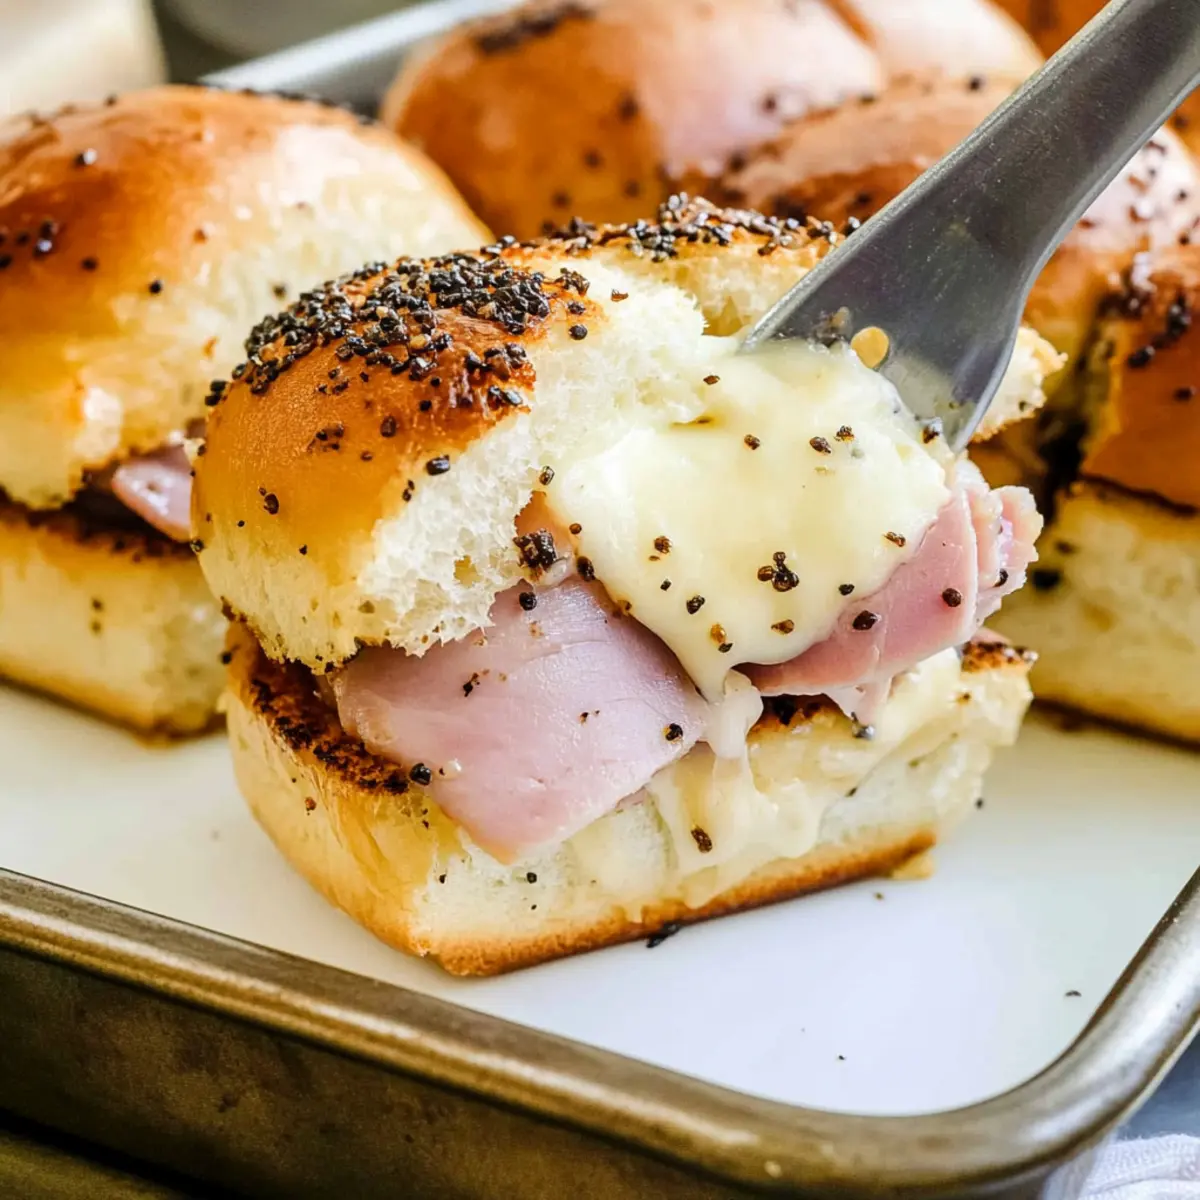
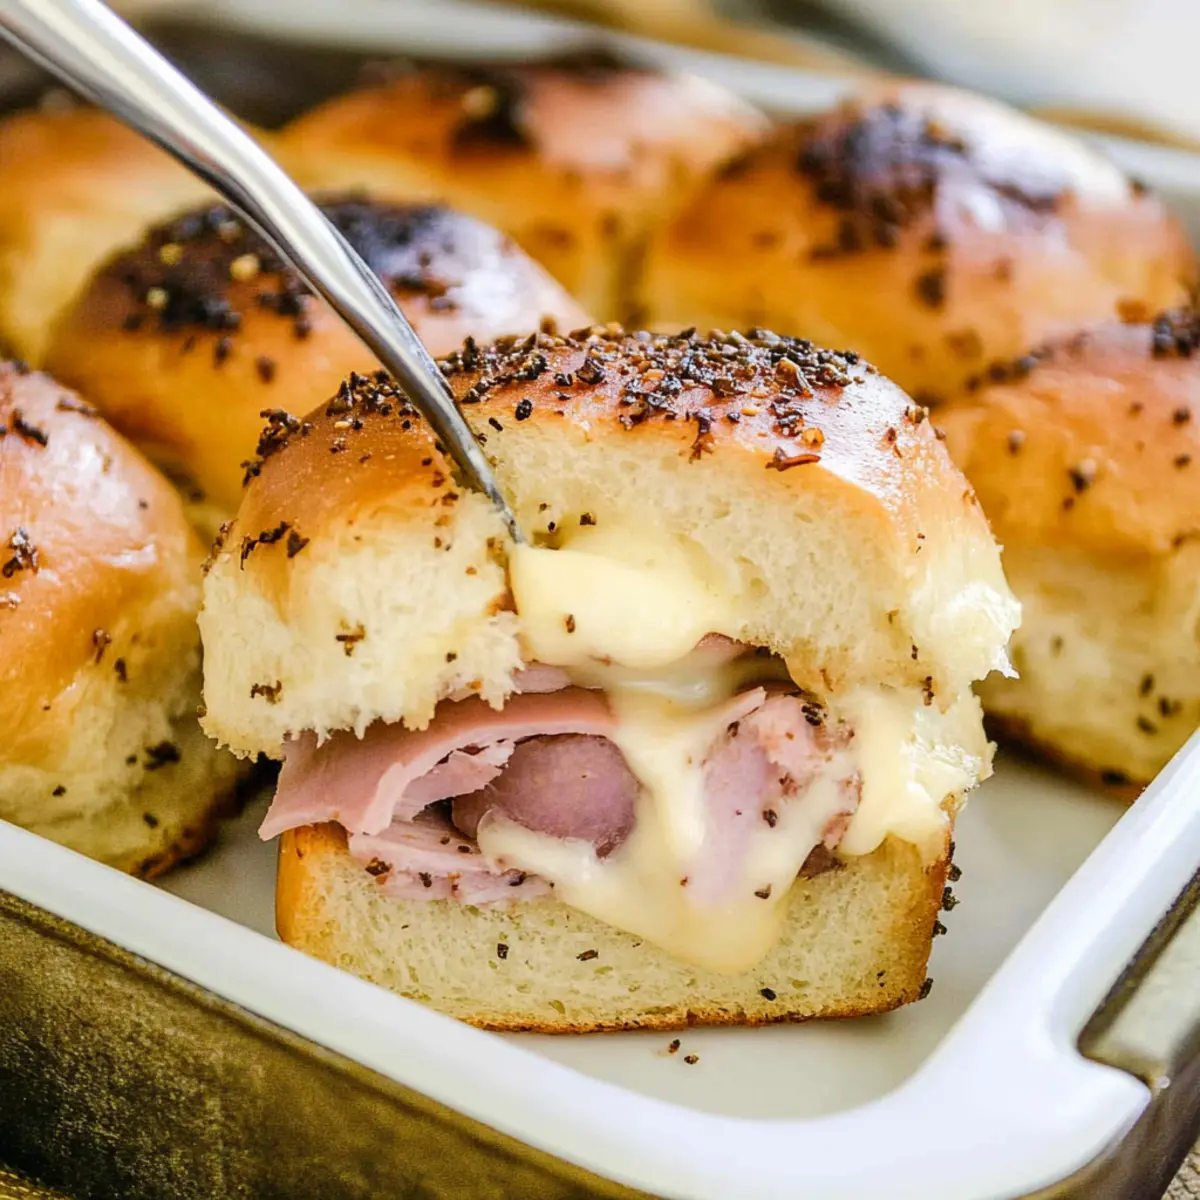
As I polished off my last savory bite of a homemade creation, a lightbulb moment struck: why not elevate our traditional Game Day snack with gluten-free flair? Enter these easy Gluten-Free Ham and Cheese Sliders—a marvelous concoction where salty, sliced ham meets zesty mayo-mustard and melty Swiss cheese, all snugly sandwiched in fluffy gluten-free Hawaiian rolls. With just a brush of buttery Dijon and poppy seeds crowning each slider, they’re not only a crowd-pleaser but also a snap to whip up, giving you more time to enjoy the excitement of your gathering. Plus, they freeze wonderfully, making them the ultimate make-ahead appetizer for any event! Ready to discover the secret to your next favorite snack? Let’s dive in!
Why Are These Sliders So Special?
Irresistible flavor: The perfect blend of salty ham and creamy Swiss cheese creates a satisfying bite you can’t resist.
Family-friendly: A hit with both kids and adults, these sliders ensure everyone feels included during Game Day.
Advertisement
Quick & Easy: Minimal prep time means you won’t miss a moment of the fun—just assemble and bake!
Freezer-Friendly: Prepare ahead of time and freeze for a quick snack anytime; simply bake straight from the freezer.
Versatile: Change up meats or cheeses effortlessly to tailor these sliders to your taste or dietary needs, just like with our delicious Turkey Grilled Cheese or the indulgent Dulce Leche Cheesecake.
Embrace the comfort of homemade goodness with a twist that everyone will love!
Ham and Cheese Sliders Ingredients
• Combine flavorful elements for the ultimate snack!
For the Sauce
- Mayonnaise – Adds creaminess and moisture to the filling; substitute with avocado oil or Greek yogurt for a healthier option.
- Dijon Mustard – Provides a zesty kick; yellow mustard works just as well if that’s your preference.
- Honey – Sweetens the sauce naturally; can be omitted or replaced with agave syrup for a vegan version.
For the Sliders
- Gluten-Free Slider Rolls – The perfect base for sliders; gluten-free Hawaiian rolls deliver the best fluffy texture and flavor.
- Swiss Cheese – Melts beautifully while adding rich flavor; feel free to experiment with any cheese of your choice for varying tastes.
- Deli Ham – The star protein ingredient, providing a savory bite; turkey or chicken make great lighter substitutes.
For the Topping
- Unsalted Butter – Enhances the flavor of the topping; can be substituted with olive oil for a delightful dairy-free option.
- Poppy Seeds – Adds a nice crunch and visual appeal; omit or swap them with sesame seeds if you don’t have any on hand.
- Worcestershire Sauce – Infuses depth to the flavor; soy sauce can offer a similar umami touch if needed.
- Onion Powder – Provides aromatic flavor; fresh onions can be used instead, but adjust the amount accordingly.
These tasty Ham and Cheese Sliders are not just a great snack for Game Day, but they’re also ideal for any informal gathering!
Step‑by‑Step Instructions for Easy Gluten-Free Ham and Cheese Sliders
Step 1: Preheat the Oven
Begin by preheating your oven to 350°F (175°C). This ensures a perfectly baked slider with a golden-brown top. While the oven heats, gather your ingredients and equipment, including a mixing bowl and a baking dish, to streamline your preparation for these delightful Ham and Cheese Sliders.
Step 2: Whisk the Sauce Together
In a mixing bowl, combine mayonnaise, Dijon mustard, and honey until they form a smooth, creamy sauce. This zesty mixture will infuse your sliders with incredible flavor. Aim for a consistency that’s easily spreadable, which will enhance the deliciousness of every bite of your gluten-free sliders.
Step 3: Prepare the Gluten-Free Rolls
Slice the gluten-free slider rolls in half horizontally, forming a top and bottom for each slider. Spread the prepared sauce evenly on the insides of each roll. Layer generous slices of Swiss cheese and ham between the rolls, ensuring every slider is loaded with flavor for your upcoming gathering or Game Day festivities.
Step 4: Assemble the Sliders
Carefully place the assembled sliders side by side in a baking dish. Ensure that the halves fit snugly together to maintain structure during baking. This step not only helps in keeping the flavors intact but also makes serving these scrumptious Ham and Cheese Sliders a breeze once they are golden and bubbling.
Step 5: Create the Topping Mixture
In a small bowl, mix melted butter, poppy seeds, Worcestershire sauce, and onion powder until well combined. This savory topping will provide a delightful crunch and flavor contrast to the soft rolls. Brush this mixture generously over the tops of the assembled sliders for added richness and visual appeal just before baking.
Step 6: Bake to Perfection
Cover the baking dish with foil and place it in the preheated oven. Bake for 15 minutes to allow the sliders to heat through and melt the cheese. Afterward, remove the foil and bake for an additional 10 minutes, or until the tops are golden brown and slightly crispy, signaling that your Ham and Cheese Sliders are ready to serve.
Expert Tips for Perfect Ham and Cheese Sliders
-
Fresh Ingredients: Use fresh gluten-free rolls to prevent soggy sliders; stale rolls won’t hold up well during baking.
-
Even Sauce Distribution: Make sure you spread the sauce evenly on the rolls for consistent flavor in every bite of your Ham and Cheese Sliders.
-
Watch the Bake Time: Since ovens can vary, adjust your baking time to prevent over-browning; keep an eye on the sliders towards the end.
-
Allow to Cool Slightly: Let the sliders cool for a few minutes before serving. This helps the cheese set slightly, making them easier to handle.
-
Customize to Taste: Feel free to swap deli ham for turkey or chicken for a lighter option; also, experiment with different cheeses to discover your favorite combination!
What to Serve with Easy Gluten-Free Ham and Cheese Sliders
These delightful sliders are more than just a snack; they shine even brighter when paired with the right sides and drinks to create a balanced meal.
-
Crispy Onion Rings:
This classic appetizer adds a crunchy contrast to the soft sliders, making every bite a delightful textural experience. -
Potato Salad:
A creamy, tangy potato salad complements the savory flavors of the sliders and adds a refreshing element to your spread. -
Air-Fried French Fries:
Golden and crispy, these fries are a perfect dipping side that enhances the overall comfort food vibe of the sliders. -
Coleslaw:
The crunch and tanginess of coleslaw balance the richness of the ham and cheese, offering a refreshing bite that brightens the meal. -
Steamed Veggies:
Lightly seasoned steamed vegetables, like broccoli or green beans, bring a pop of color and keep the meal health-conscious. -
Charcuterie Board:
For a party feel, pair the sliders with a diverse charcuterie board filled with cheeses, nuts, and dried fruits for a sophisticated touch. -
Refreshing Lemonade:
A cold glass of homemade lemonade offers a refreshing burst of citrus that cuts through the richness of the sliders perfectly. -
Chocolate Chip Cookies:
End your meal on a sweet note with freshly baked cookies, their warm, gooey goodness providing a delightful contrast to the savory sliders.
Enhancing your easy Gluten-Free Ham and Cheese Sliders with these side dishes will create a spread worthy of any gathering!
How to Store and Freeze Ham and Cheese Sliders
Fridge: Store assembled but unbaked sliders covered in the fridge for up to 24 hours. When ready to bake, just follow the original instructions without waiting!
Leftovers: If you have any baked sliders remaining, keep them in an airtight container in the fridge for 2-3 days. Reheat in the oven at 350°F (175°C) until warmed through.
Freezer: For make-ahead convenience, freeze unbaked sliders in a tightly sealed container for up to 3 months. Bake directly from frozen, adding a few extra minutes to the cooking time.
Reheating: To retain the slider’s fluffy texture, reheat baked leftover Ham and Cheese Sliders in the oven or wrap them in foil to prevent drying out.
Make Ahead Options
These Easy Gluten-Free Ham and Cheese Sliders are a fantastic choice for meal prep, saving you valuable time on busy weeknights or during game day festivities! You can assemble the sliders up to 24 hours in advance and store them covered in the refrigerator. This keeps the gluten-free rolls fresh and maintains their fluffy texture. If you’re looking to prep for a longer duration, you can freeze the assembled sliders and bake them straight from frozen—just add an extra 5-10 minutes to the baking time for perfectly melted cheese and a golden top. When you’re ready to serve, simply follow the baking instructions, and you’ll unveil delicious sliders that are just as mouthwatering as if you’d made them from scratch that day!
Ham and Cheese Sliders Variations & Substitutions
Ever thought about how you can add your special touch to these delightful sliders? Customize them for an unforgettable twist!
- Turkey Alternative: Swap ham for turkey to create a lighter version that’s just as delicious. A perfect solution for those wanting a twist on a classic.
- Cheese Choices: Experiment with cheddar or provolone to discover new flavor combinations. Each cheese brings its character, enhancing your sliders uniquely.
- Veggie Boost: Toss in sautéed mushrooms or fresh spinach for an extra layer of nutrition and depth of flavor. This simple addition transforms your sliders into a heartier meal.
- Honey-Free: If avoiding sweeteners, skip the honey entirely or substitute it with maple syrup for a different sweetness profile that still works.
- Gluten-Free Rolls: Looking for something a bit different? Try using gluten-free bagels or pita pockets for a fun twist on texture and taste!
- Creamy Substitutes: Swap mayonnaise with creamy avocado or Greek yogurt for a tasty, healthier alternative that still meets your flavor needs.
- Spice It Up: Add a sprinkle of chili flakes or sliced jalapeños for a spicy kick. It’s an exciting way to elevate the heat level your guests will talk about!
- Sweet & Savory: Drizzle some balsamic glaze before serving for a sweet contrast that pairs beautifully with the salty ham and savory cheese.
Feel free to explore options that resonate with your palate! For more ideas on delicious meals, check out our scrumptious Chocolate Chip Cheesecake or try the decadent White Chocolate Cheesecake for your dessert cravings.

Gluten-Free Ham and Cheese Sliders Recipe FAQs
How do I choose the best gluten-free slider rolls?
Absolutely! When selecting gluten-free slider rolls, look for ones that are soft and fluffy, such as gluten-free Hawaiian rolls. I often recommend checking the ingredient list for whole grains and minimal additives, as this will enhance the texture and flavor. Avoid rolls with dark spots or an unusual smell, as these can indicate staleness.
How should I store my leftover sliders?
Leftover baked Ham and Cheese Sliders can be stored in an airtight container in the fridge for up to 2-3 days. To reheat, simply place them in an oven preheated to 350°F (175°C) for about 10-15 minutes for that fresh-baked taste. If you have them unbaked, cover them and keep in the fridge for up to 24 hours, and then follow the original baking instructions when you’re ready.
Can I freeze the sliders? How do I do it?
Absolutely! For convenient make-ahead options, you can freeze unbaked Ham and Cheese Sliders. Just assemble them in a tightly sealed container or wrap them tightly in plastic wrap and then foil to prevent freezer burn. They will stay good for up to 3 months. When you’re ready to enjoy, bake them straight from the freezer, adding an additional 5-10 minutes to the baking time.
What if my sliders become soggy? How can I avoid this?
To prevent soggy sliders, always use fresh, gluten-free rolls. If your rolls are a bit stale, consider toasting them lightly before assembling. Additionally, make sure to spread the sauce evenly—excess moisture in one area can lead to sogginess. Finally, keep an eye on your baking time; overbaking can dry them out, while underbaking can leave them too moist.
Are these sliders suitable for people with dietary restrictions?
Very! These Gluten-Free Ham and Cheese Sliders can easily be tailored to accommodate various dietary needs. For a dairy-free option, substitute the butter with olive oil and use a vegan cheese alternative. If there are egg allergies or sensitivities, Greek yogurt can replace mayonnaise in the sauce. Be sure to double-check your ingredient labels to ensure they meet your dietary needs!
Irresistible Ham and Cheese Sliders for Game Day Fun
Ingredients
Equipment
Method
- Preheat your oven to 350°F (175°C). Gather your ingredients and equipment, including a mixing bowl and a baking dish.
- In a mixing bowl, combine mayonnaise, Dijon mustard, and honey until smooth and creamy.
- Slice the gluten-free slider rolls in half horizontally. Spread the prepared sauce on the insides of each roll.
- Layer Swiss cheese and ham between the rolls, ensuring every slider is loaded with flavor.
- Place the assembled sliders in a baking dish with halves snugly together.
- In a small bowl, mix melted butter, poppy seeds, Worcestershire sauce, and onion powder. Brush this mixture over the tops of the assembled sliders.
- Cover with foil and bake for 15 minutes. Remove the foil and bake for an additional 10 minutes until tops are golden brown.


