
Advertisement
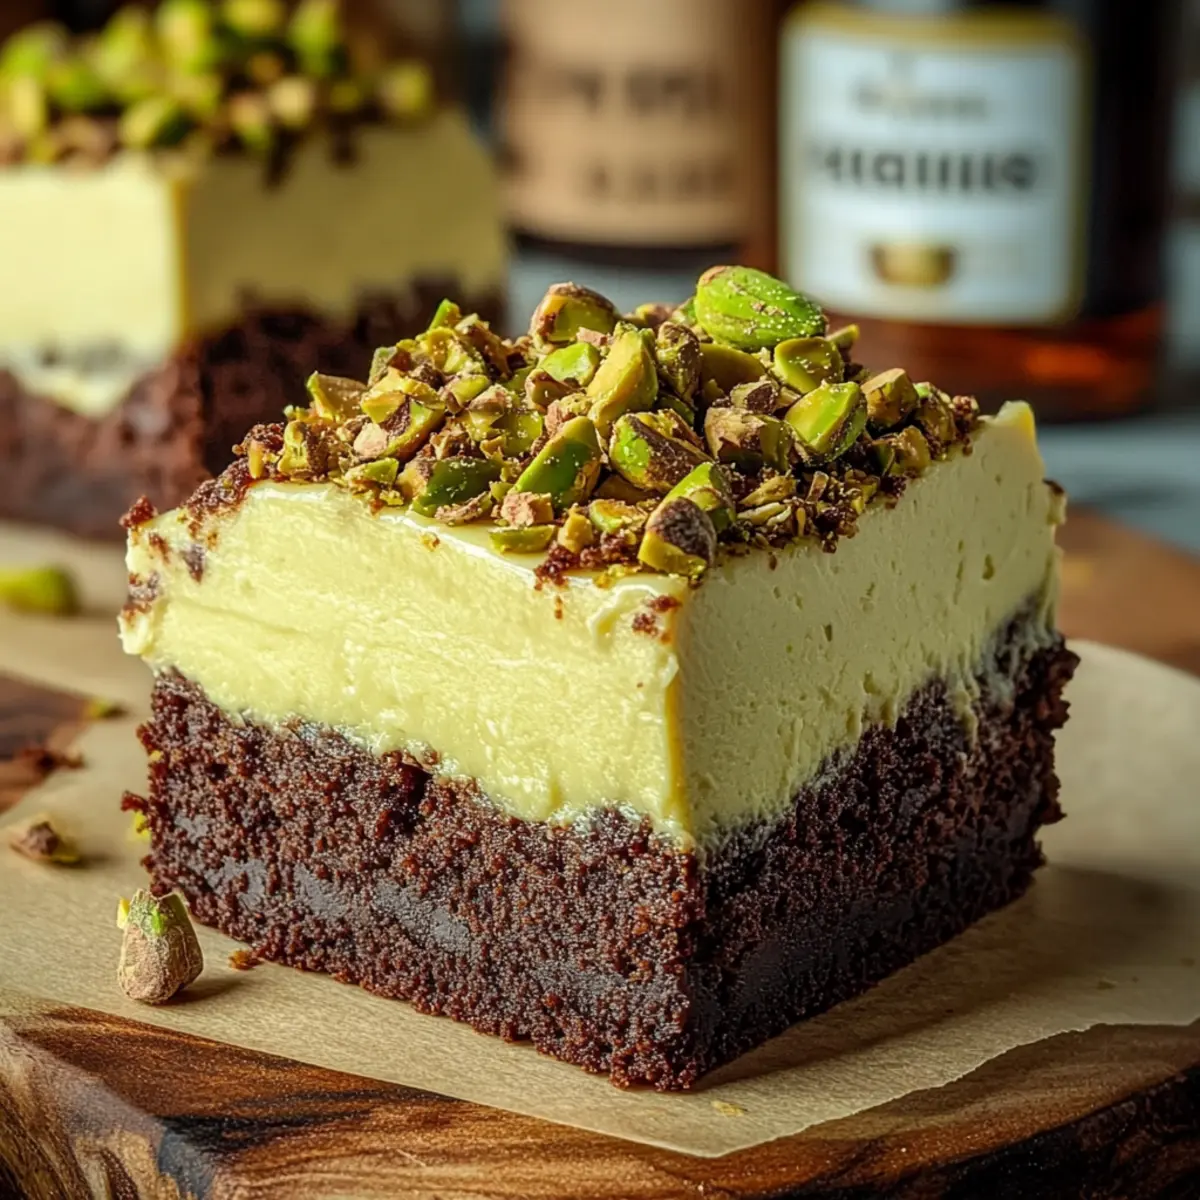
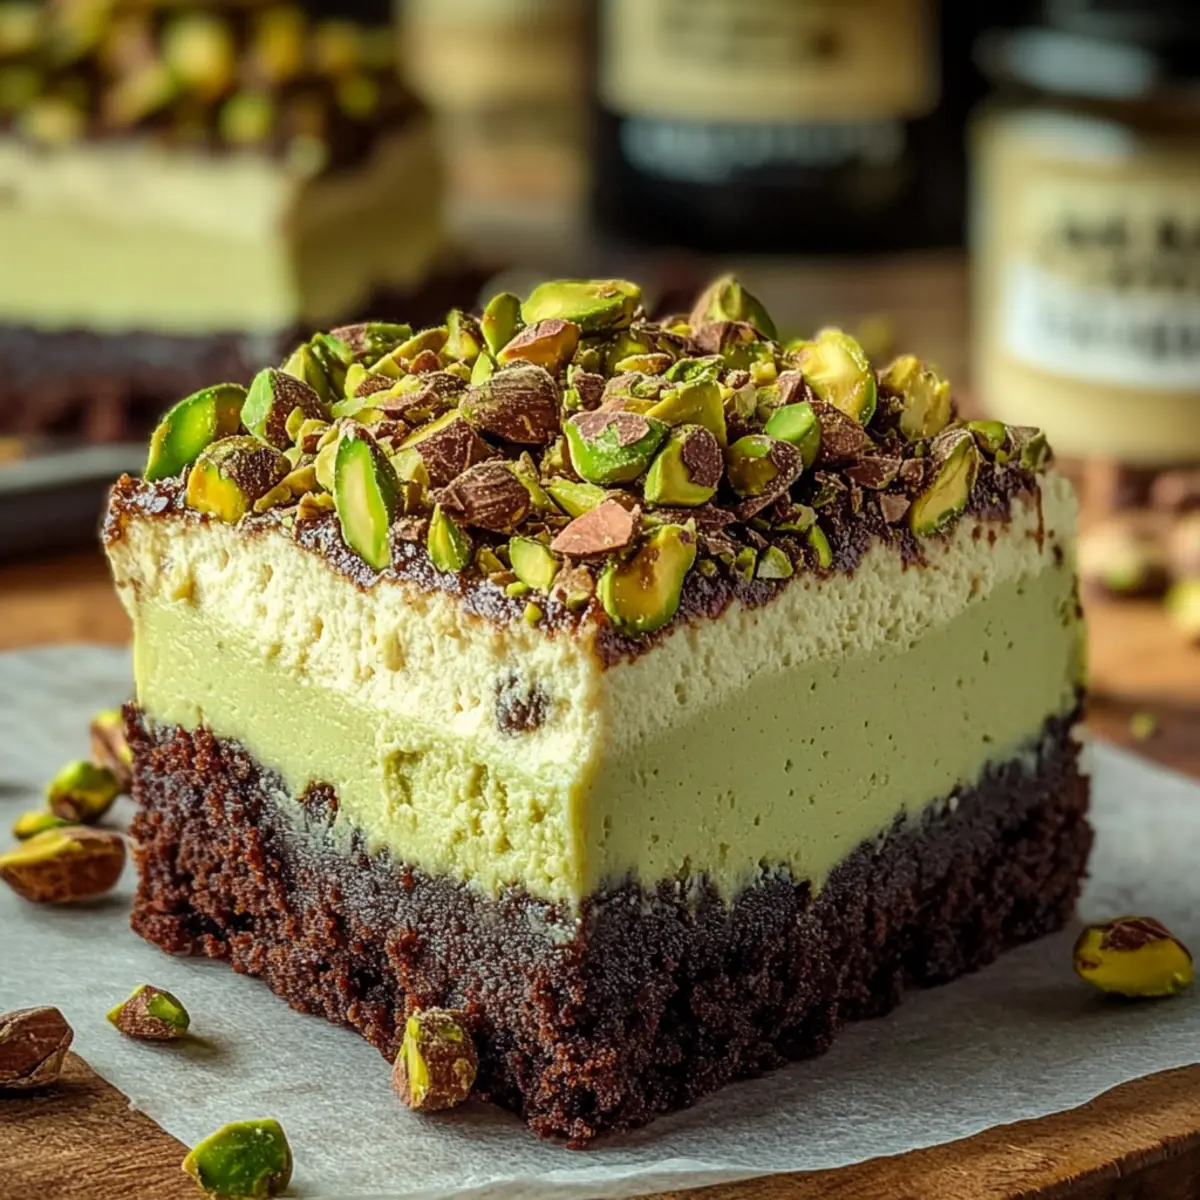
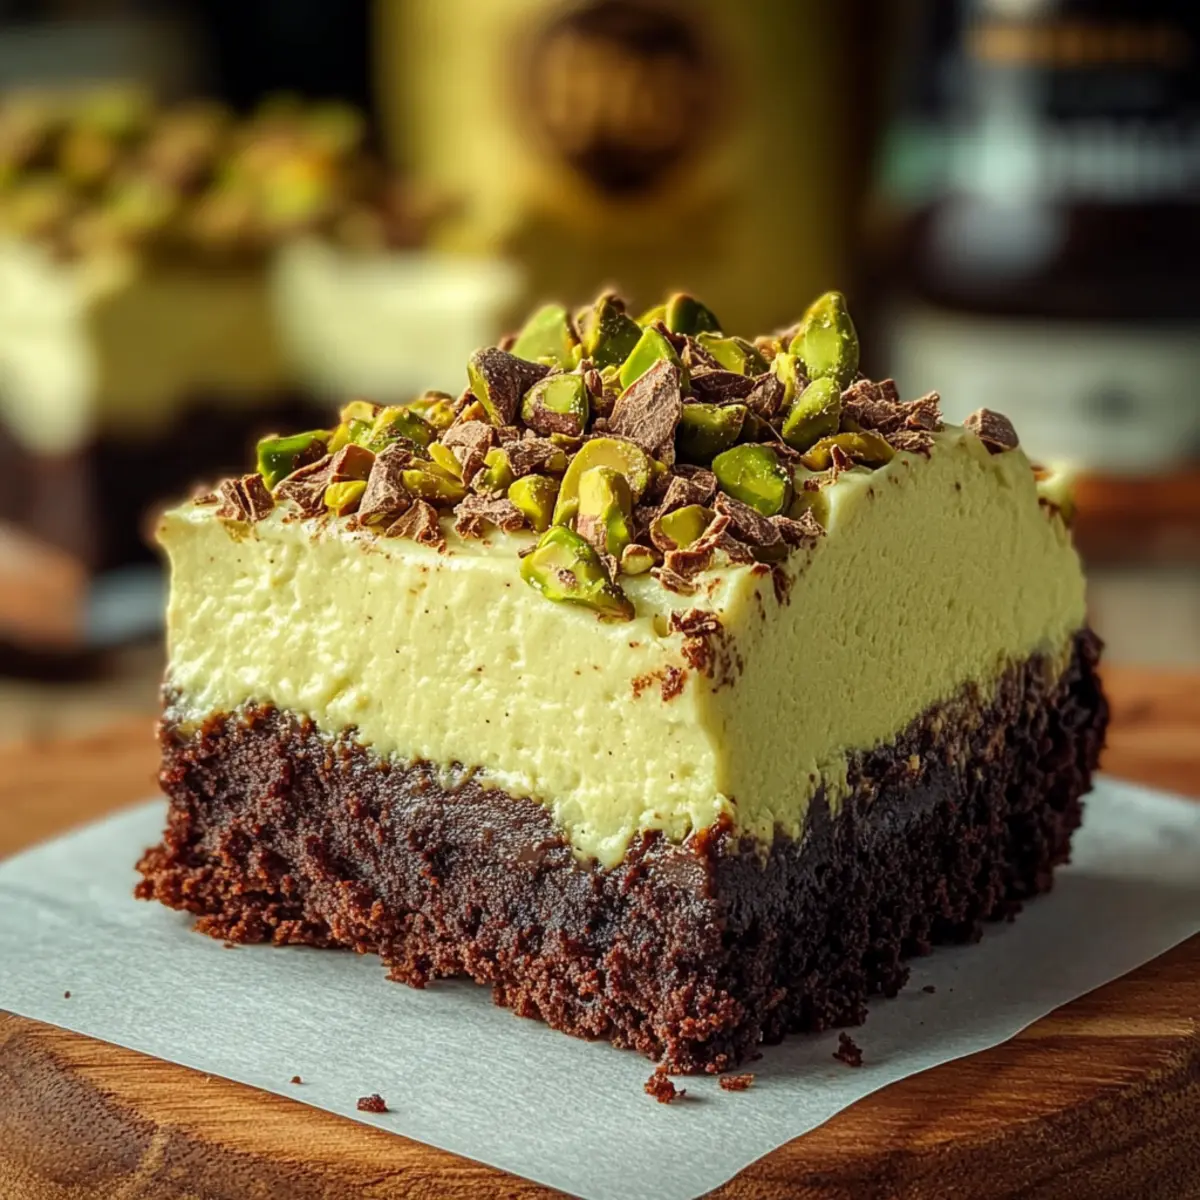
You won’t believe the incredible flavor fusion that awaits you in these Pistachio Cheesecake Brownie Bars. With each bite, you’re greeted by a fudgy brownie base that melts seamlessly into a creamy pistachio cheesecake layer—talk about a match made in dessert heaven! Not only is this dessert a true crowd-pleaser, but it’s also surprisingly simple to whip up, making it perfect for special occasions or just a sweet escape after a long day. Plus, the no-bake cheesecake element means less fuss and more time to savor the blissful combination of rich chocolate and nutty flavors. Are you ready to take your dessert game to new heights? Let’s dive in!
Why are these bars a must-try?
Indulgent and Unique: These Pistachio Cheesecake Brownie Bars perfectly marry the rich, fudgy texture of brownies with a creamy, dream-like cheesecake, offering a taste sensation you won’t find anywhere else.
No-Bake Convenience: Enjoy the best of both worlds with a no-bake cheesecake layer that saves you time and effort, letting you focus on savoring the dessert rather than stressing in the kitchen.
Advertisement
Crowd-pleasing Delight: Known for turning heads at gatherings, these bars are sure to impress friends and family, making them a go-to for parties or potlucks.
Versatile Flavor Options: Feeling adventurous? You can easily customize the flavors by swapping out pistachios for other nuts or adding a decadent chocolate drizzle on top! And if you love cheesecake bars, don’t miss out on our delicious Cookie Cheesecake Bars or Rich and Creamy Dulce de Leche Cheesecake Bars.
Perfect for Every Occasion: Whether you’re celebrating something special or simply treating yourself, this dessert is a satisfying way to indulge in something truly delicious!
Pistachio Cheesecake Brownie Bars Ingredients
For the Brownie Base
- Unsweetened Cocoa Powder – provides rich chocolate flavor; Dutch-processed cocoa can give a smoother taste.
- Granulated Sugar – adds sweetness and contributes to the fudgy texture; substitute with brown sugar for a deeper flavor.
- All-Purpose Flour – offers structure for the brownie base; gluten-free flour blends can serve as a good alternative.
- Butter – adds richness and moisture; can be replaced with coconut oil for a non-dairy option.
- Eggs – bind ingredients and create a tender texture; substitute with flax eggs for a vegan alternative.
For the Pistachio Cheesecake Layer
- Cream Cheese – forms the creamy base for the cheesecake; use dairy-free cream cheese for a vegan friendly option.
- Pistachio Paste – delivers authentic pistachio flavor and color; ground pistachios can be a suitable substitute.
- Powdered Sugar – sweetens the cheesecake layer and ensures a smooth texture; maple sugar can be used for a natural sweetening option.
- Vanilla Extract – enhances flavor; ensure it’s pure for the best results.
For Garnish
- Chopped Pistachios – add a delightful crunch and vibrant color on top of the bars before serving.
Step‑by‑Step Instructions for Pistachio Cheesecake Brownie Bars
Step 1: Preheat and Prepare
Begin by preheating your oven to 350°F (175°C). Line an 8×8 inch baking pan with parchment paper, allowing some overhang for easy bar removal later. This preparation ensures a seamless baking experience, keeping your brownies from sticking to the pan.
Step 2: Combine Dry Ingredients
In a spacious mixing bowl, sift together the unsweetened cocoa powder, granulated sugar, and all-purpose flour. Stir them well until blended and free of lumps. This dry mixture is the foundation of your brownie base, promising a rich, chocolatey flavor in your Pistachio Cheesecake Brownie Bars.
Step 3: Mix Wet Ingredients
Melt the butter in a microwave-safe bowl or on the stovetop until fully liquefied. Once melted, add the butter to your dry ingredients, mixing thoroughly. Then beat in the eggs one at a time until just combined. This creates a fudgy batter full of moisture and richness, perfect for your brownies.
Step 4: Bake the Brownie Base
Pour the brownie batter into your prepared pan, spreading it evenly with a spatula. Bake in the preheated oven for 20-25 minutes, or until the edges appear set and a toothpick inserted in the center comes out with a few moist crumbs. Allow the brownie base to cool completely in the pan on a wire rack.
Step 5: Prepare the Cheesecake Mixture
As the brownies cool, prepare the pistachio cheesecake layer. In a clean mixing bowl, combine room-temperature cream cheese, pistachio paste, powdered sugar, and vanilla extract. Beat on medium speed until the mixture is smooth and creamy, about 2-3 minutes. This delicious layer adds a unique flavor to your Pistachio Cheesecake Brownie Bars.
Step 6: Assemble the Layers
Once the brownie base is completely cool, gently spread the pistachio cheesecake mixture over the top layer. Use a spatula to create an even surface, ensuring every bite is blessed with that creamy texture. This step beautifully tops your brownies, preparing them for chilling.
Step 7: Chill Until Set
Cover the pan with plastic wrap or foil and refrigerate for at least 2 hours, allowing the cheesecake layer to set up firmly. This chilling time is essential for achieving the perfect sliceable consistency in your Pistachio Cheesecake Brownie Bars.
Step 8: Garnish and Serve
Before serving, remove the bars from the pan using the parchment overhang, and slice them into squares or rectangles. Sprinkle with chopped pistachios for an added crunch and vibrant color. This final touch enhances both presentation and flavor, making your dessert truly irresistible!
What to Serve with Pistachio Cheesecake Brownie Bars
Treat yourself to a complete dessert experience by pairing these luscious bars with delightful accompaniments that enhance every bite.
-
Fresh Berries: The tartness of raspberries or strawberries balances the richness of the bars, creating a perfect flavor contrast.
-
Whipped Cream: A dollop of fluffy whipped cream adds lightness and creaminess to each slice, turning the indulgent dessert into something extra special.
-
Vanilla Ice Cream: The cold, creamy texture of vanilla ice cream complements the warmth of the fudgy brownie base beautifully, providing a refreshing contrast.
-
Chocolate Sauce: Drizzling a rich chocolate sauce over the bars intensifies the chocolate flavor and adds an extra layer of indulgence that chocolate lovers will adore.
-
Pistachio Gelato: Keeping with the nutty theme, this creamy gelato echoes the pistachio flavor, making the dessert experience seamless and delicious.
-
Spiced Tea or Coffee: Pairing these bars with a cup of cinnamon-spiced tea or a rich coffee brings warmth and coziness, perfect for a leisurely dessert hour.
Enjoy your Pistachio Cheesecake Brownie Bars with any of these delightful options for a truly memorable treat!
Make Ahead Options
These Pistachio Cheesecake Brownie Bars are perfect for meal prep, allowing you to save time on busy weeknights! You can prepare the brownie base up to 24 hours in advance—bake, let it cool completely, and then cover it tightly before refrigerating. The cheesecake layer can be made a day ahead as well; simply mix the ingredients and spread it over the cooled brownie base. Make sure to refrigerate the assembled bars for at least 2 hours to set the cheesecake layer, and they can be kept in the fridge for up to 3 days. When you’re ready to serve, sprinkle chopped pistachios on top for that extra crunch! Your dessert will be just as delicious, with all flavors beautifully melded together.
Expert Tips for Pistachio Cheesecake Brownie Bars
-
Cool Completely: Make sure the brownie base is fully cooled before adding the cheesecake layer; otherwise, it may melt and ruin your perfect bars.
-
Room Temperature Cream Cheese: For a smooth cheesecake layer, use cream cheese that is at room temperature. This avoids lumps and ensures a creamy texture in your Pistachio Cheesecake Brownie Bars.
-
Watch the Baking Time: Do not overbake your brownie base; aim for a fudgy center. If the toothpick comes out too clean, the bars will be dry rather than rich and chocolatey.
-
Customize Your Nuts: Feel free to switch up the nuts! Substituting pistachios with almonds or walnuts can provide exciting flavor variations.
-
Easy Serving: To slice the bars neatly, use a hot knife (dip it in hot water and dry it off) after chilling. This creates clean cuts for beautiful presentation.
How to Store and Freeze Pistachio Cheesecake Brownie Bars
Fridge: Store your Pistachio Cheesecake Brownie Bars in an airtight container in the refrigerator for up to one week, ensuring they remain fresh and delicious.
Freezer: For longer storage, wrap the bars tightly in plastic wrap and then in aluminum foil. They can be frozen for up to three months without losing flavor or texture.
Thawing: To enjoy frozen bars, simply transfer them to the fridge for a few hours or leave at room temperature for about 30 minutes until softened.
Serving After Freezing: Serve chilled or at room temperature; a sprinkle of fresh chopped pistachios before serving will enhance their delightful appearance and flavor!
Variations & Substitutions for Pistachio Cheesecake Brownie Bars
Want to make these Pistachio Cheesecake Brownie Bars even more exciting? Here are some delicious ideas to customize your treat.
-
Nut Alternates: Swap out pistachios for almonds or walnuts in the cheesecake layer for a different nutty flavor. Almonds add a delicate sweetness, while walnuts provide a rich, earthy note.
-
Extra Chocolate: Drizzle your bars with chocolate ganache for an intensified chocolate experience. Simply melt chocolate and cream together for a glossy topping that adds a delightful contrast to the cheesecake.
-
Flavored Extracts: Experiment with flavored extracts like almond or orange for a unique twist. Just a few drops can significantly change the overall flavor profile, making each bite a surprise.
-
Caramel Influence: Add a swirl of caramel sauce to the cheesecake batter for a sweet, buttery finish. The caramel will complement the pistachio’s nuttiness beautifully!
-
Fruit Twist: Consider topping the bars with fresh berries like strawberries or raspberries. Their tartness pairs wonderfully with the creamy cheesecake and balances the dessert’s richness.
-
Dairy-Free Delight: To make these bars vegan, replace the cream cheese with dairy-free cream cheese and use flax eggs in the brownie base. Your friends won’t even miss the traditional version!
-
Gluten-Free Option: Opt for a gluten-free flour blend in place of all-purpose flour, ensuring everyone can join in on the indulgence without a worry.
-
Zesty Surprise: Incorporate a bit of lemon zest into the cheesecake layer for a fresh, zesty kick that brightens the creamy richness of the dessert.
For more delightful variations around cheesecake flavors, you might also adore our rich Cranberry Pistachio Snowball Cookies or explore the layers of our Strawberry Cheesecake Crunch!

Pistachio Cheesecake Brownie Bars Recipe FAQs
How do I choose the best pistachios?
Absolutely! When selecting pistachios, look for nuts that are bright green, clean, and free from dark spots or cracks. Ensure they are unsalted if you’re planning to add your own salt later in the recipe. Fresh pistachios will smell nutty and have a firm texture; avoid any with a rancid odor or overly soft texture.
How should I store the leftovers?
Very! Store your Pistachio Cheesecake Brownie Bars in an airtight container in the refrigerator for up to one week. Keeping them chilled helps maintain their freshness and creamy texture. If you’re not going to enjoy them within that timeframe, consider freezing them to enjoy later!
Can I freeze the bars?
Absolutely! To freeze your Pistachio Cheesecake Brownie Bars, wrap them tightly in plastic wrap, then in aluminum foil to prevent freezer burn. They can be stored in the freezer for up to three months. When you’re ready to indulge, simply transfer them to the fridge for several hours or let them sit at room temperature for about 30 minutes until softened.
What if my brownie base is too dry?
No worries! If your brownie base turns out too dry, it could be due to overbaking. Aim for a toothpick to come out with a few moist crumbs rather than completely clean. If you find yourself with a dry base, you can moisten them slightly with a simple syrup or serve them with whipped cream or ice cream to enhance the overall experience.
Are there any allergy considerations with this recipe?
Very! This recipe contains common allergens like eggs and gluten. For a vegan or gluten-free option, simply substitute flax eggs for regular eggs and use a gluten-free flour blend in the brownie base. Additionally, ensure you’re using dairy-free cream cheese if you’re catering to lactose-intolerant individuals. Always check labels for hidden allergens as well.
What’s the best way to slice the bars for serving?
Absolutely! For the cleanest cuts, use a hot knife. Dip the knife in hot water, dry it off, and then slice the bars. This technique will give you beautiful, neat pieces that showcase the delicious layers in your Pistachio Cheesecake Brownie Bars!
Irresistible Pistachio Cheesecake Brownie Bars to Indulge In
Ingredients
Equipment
Method
- Preheat your oven to 350°F (175°C) and line an 8x8 inch baking pan with parchment paper.
- In a mixing bowl, sift together the cocoa powder, sugar, and flour until blended.
- Melt the butter and mix it with the dry ingredients, then beat in the eggs one at a time.
- Pour the brownie batter into the prepared pan and bake for 20-25 minutes.
- In another bowl, combine cream cheese, pistachio paste, powdered sugar, and vanilla, mixing until smooth.
- Spread the pistachio cheesecake mixture over the cooled brownie base.
- Cover and refrigerate for at least 2 hours to allow the cheesecake layer to set.
- Slice into bars and sprinkle with chopped pistachios before serving.


