Advertisement
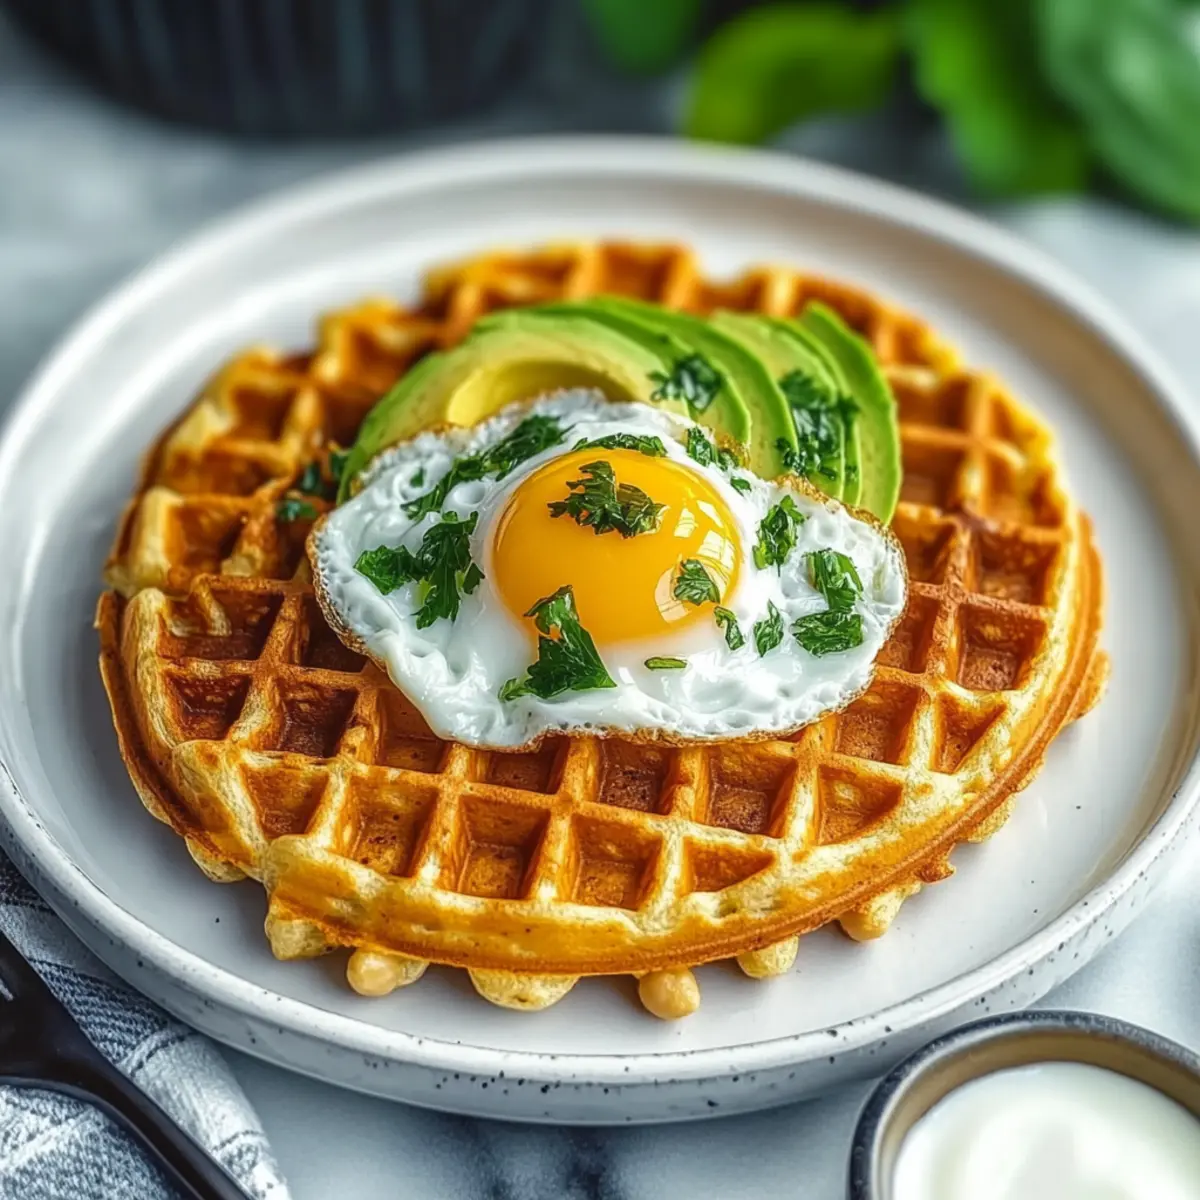
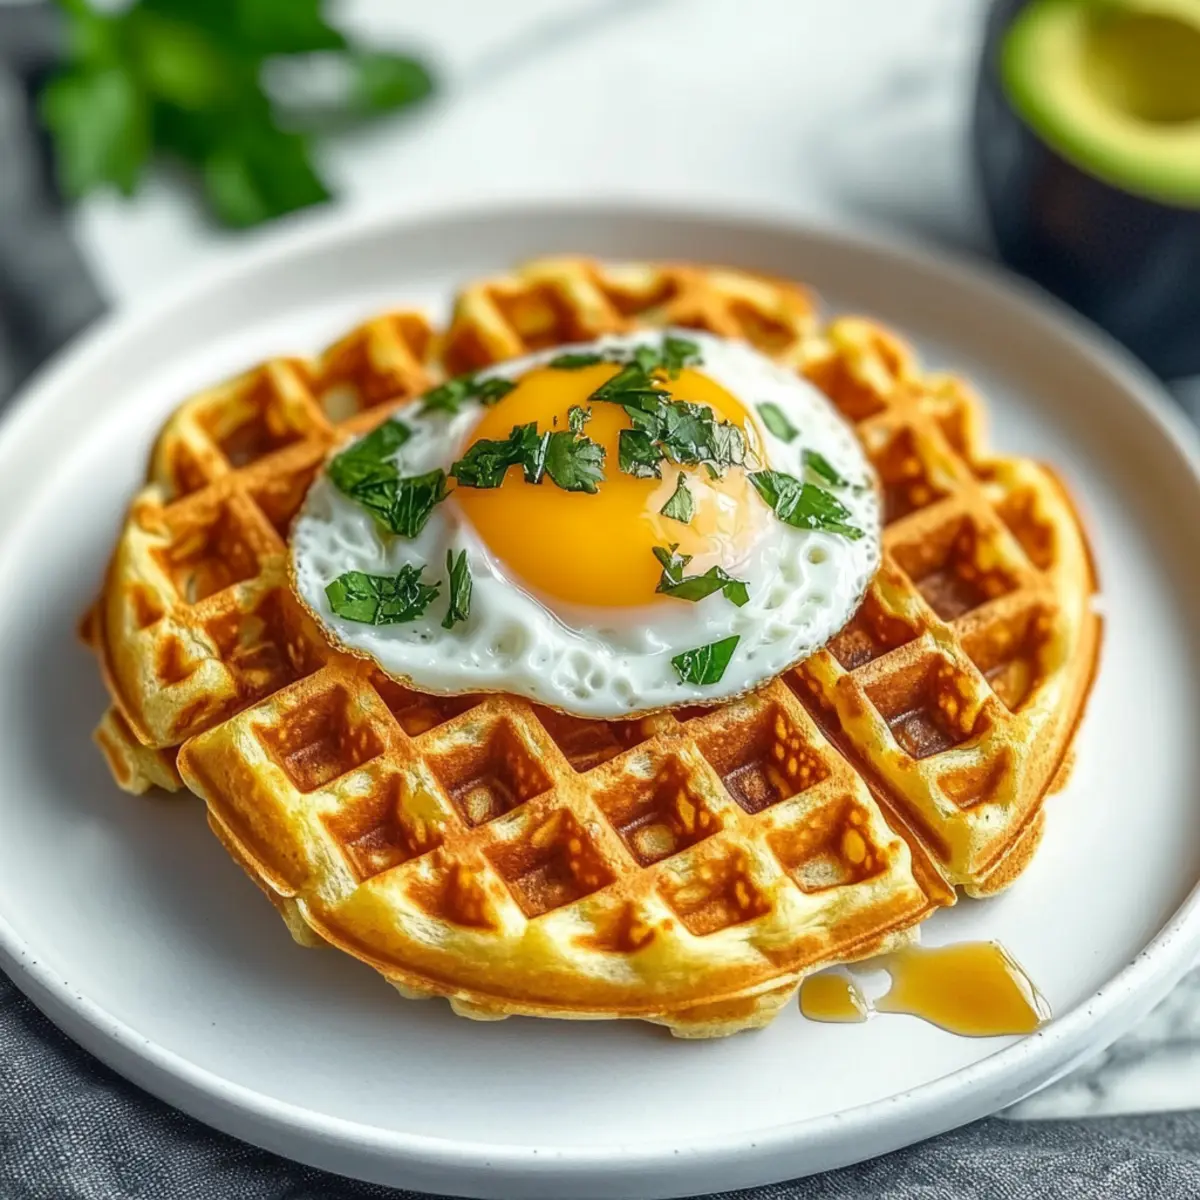
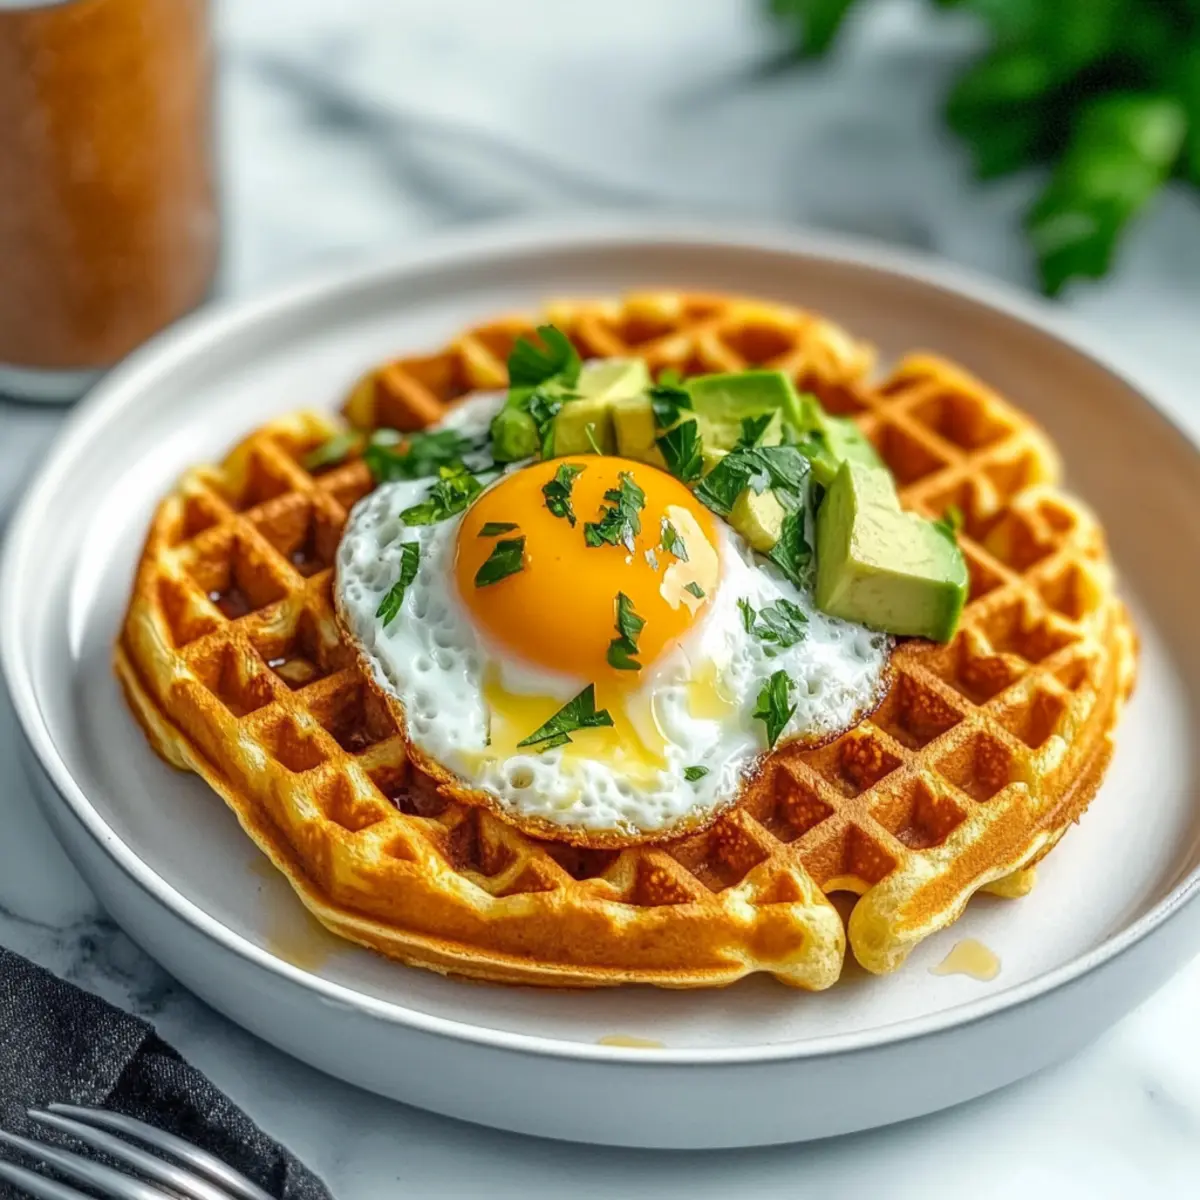
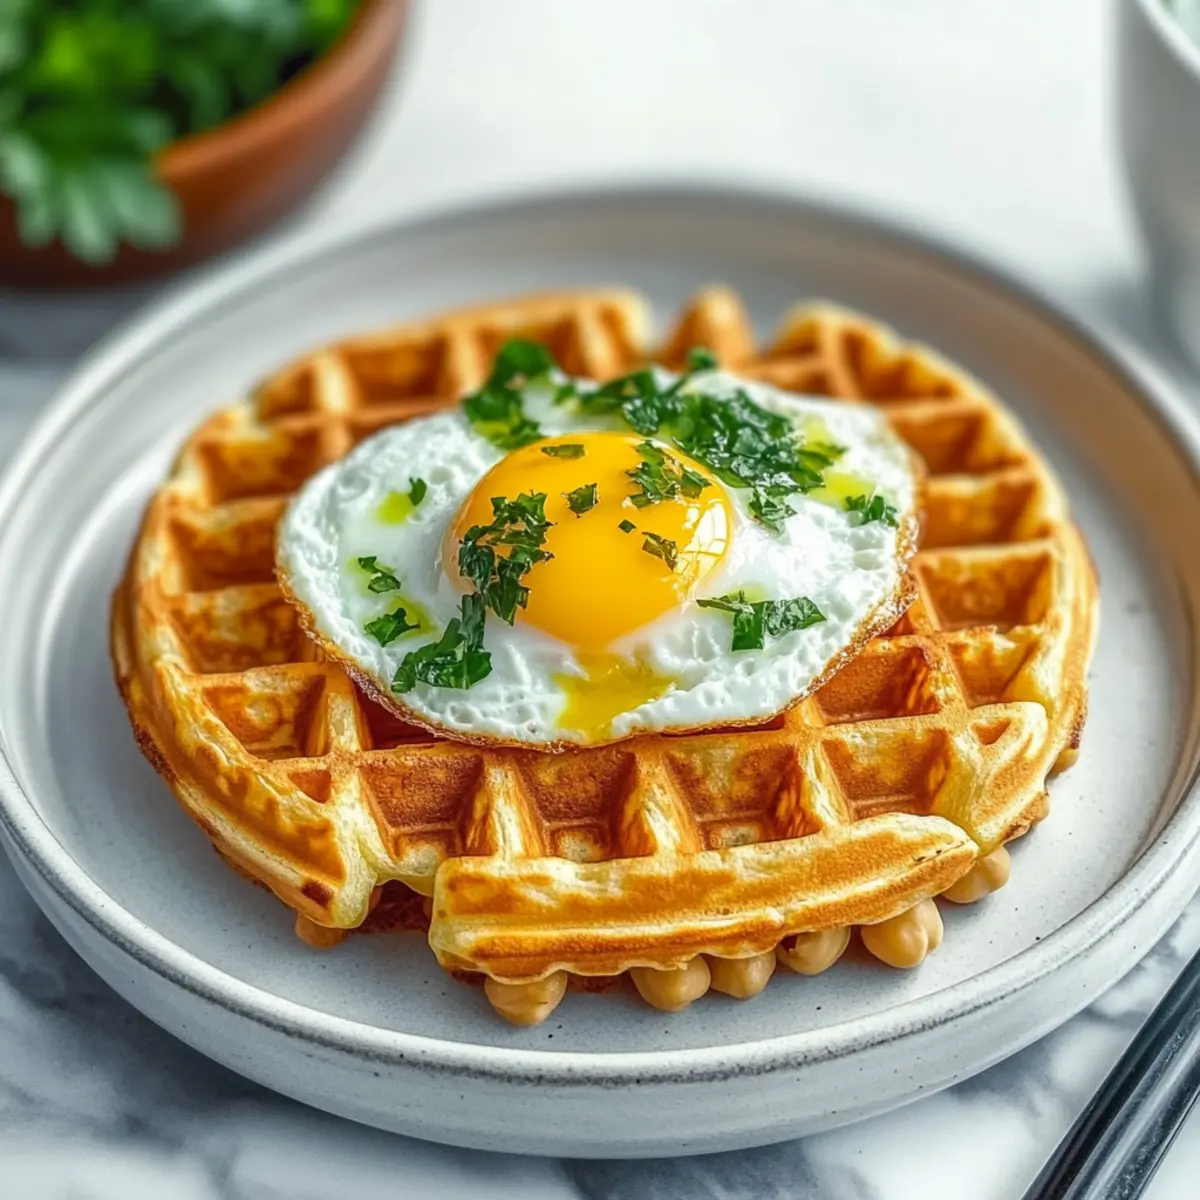
As I stood in my kitchen, the aroma of chickpeas wafting through the air, I couldn’t help but smile at the delightful creation I was about to make: Savory Chickpea Waffles. These gluten-free gems are not only packed with protein but also offer a unique nutty flavor that transforms any ordinary breakfast. Whether you enjoy them topped with a sunny-side-up egg and creamy avocado or prefer a fresh vegetable medley with a dollop of hummus, these waffles are bursting with versatility. With a quick preparation process, you’re just moments away from a healthier, satisfying meal that’s perfect for any time of day. Are you ready to discover your new favorite breakfast?
Why are Chickpea Waffles a Must-Try?
Protein-Packed: These Savory Chickpea Waffles are a fantastic source of plant-based protein, making them ideal for fueling your day.
Gluten-Free Delight: Perfect for those following a gluten-free diet, they allow everyone to enjoy a delicious breakfast without compromise.
Quick & Easy: With very little prep time, you can whip these waffles up effortlessly, ideal for busy mornings or meal prep sessions.
Customizable Toppings: Top them any way you desire—whether it’s a fresh avocado slice or a spread of hummus, the possibilities are endless!
Unique Flavor: The nutty taste from chickpea flour sets these waffles apart from any traditional recipe, offering a gourmet twist on a classic breakfast.
Chickpea Waffles Ingredients
• Prepare to create the most delicious Chickpea Waffles with this essential ingredient list!
Advertisement
For the Batter
- Chickpea Flour – The star ingredient that provides structure and a nutty flavor, ensure it’s finely ground for the best texture.
- Water – Hydrates the flour to create a smooth batter; adding gradually can help avoid lumps.
- Olive Oil – Adds moisture and enhances flavor; you can substitute it with melted coconut oil or vegetable oil if desired.
- Salt – A pinch goes a long way in enhancing the overall flavor of the waffles.
- Sugar (optional) – Adds a hint of sweetness; feel free to omit if you prefer a more savory taste.
For Serving (optional)
- Fried Egg – A sunny-side-up egg pairs perfectly, adding protein and richness to each bite.
- Avocado – Slices of creamy avocado offer a satisfying creaminess and healthy fats that balance the dish beautifully.
- Hummus – A dollop of hummus adds a wonderful earthiness and extra protein, making for a delightful topping.
- Roasted Vegetables – Add a colorful assortment of roasted veggies for a hearty and healthy complement.
Embrace the joy of cooking with these chickpea waffles and explore countless topping options!
Step‑by‑Step Instructions for Chickpea Waffles
Step 1: Prepare the Batter
In a large mixing bowl, whisk together the chickpea flour, water, olive oil, salt, and optional sugar. Stir until the batter is completely smooth and lump-free, which should take about 1-2 minutes. This chickpea waffle batter should be thick yet pourable, so adjust the water if necessary for the right consistency.
Step 2: Let it Rest
Cover the batter with a kitchen towel or plastic wrap and allow it to rest at room temperature for at least 30 minutes. This resting period is crucial as it helps improve the texture of the chickpea waffles, resulting in a lighter and fluffier texture, so be patient during this time!
Step 3: Preheat the Waffle Iron
While the batter rests, preheat your waffle iron to medium-high heat, which usually takes about 5 minutes. To prevent sticking, lightly brush the iron with a thin layer of olive oil. A well-heated waffle iron is key for achieving crispy, golden brown chickpea waffles.
Step 4: Cook the Waffles
Once preheated, pour the batter into the waffle iron according to the manufacturer’s guidelines, usually about 1/2 to 3/4 cup per waffle. Close the lid and cook for approximately 4-6 minutes. The waffles should be golden brown and slightly crispy when ready, so check them before removing.
Step 5: Serve Warm
Carefully remove the chickpea waffles from the waffle iron using a fork or spatula. Serve them warm, and feel free to top with your favorite choices, such as a fried egg, avocado slices, or hummus. The warm, savory chickpea waffles are perfect for a hearty breakfast or lunch, ready in no time!
Chickpea Waffles: Endless Customization Ideas
Dive into a world of flavors and textures as you explore easy ways to personalize these delightful chickpea waffles!
- Herb-Infused: Add fresh herbs like rosemary or thyme for elevated flavor that brings freshness to each bite. These fragrant additions can transform your breakfast into a garden of herbal goodness.
- Spicy Kick: Incorporate cayenne pepper or red pepper flakes for a fiery twist that spices things up! Just a pinch can turn an ordinary waffle into a warm, zesty delight.
- Cheesy Goodness: Fold in shredded cheese such as feta or cheddar for added savory depth. The melty goodness creates a heartwarming, comforting experience that you just can’t resist.
- Vegetable Boost: Mix in grated zucchini or chopped spinach to enhance nutrition and color. This not only boosts health benefits but also introduces a vibrant touch to your waffles.
- Mediterranean Twist: Incorporate chopped sun-dried tomatoes and olives for a robust flavor profile. The combination offers a rich taste, perfect for fans of bold Mediterranean dishes.
- Nutty Crunch: Add crushed walnuts or pecans for an extra layer of crunch and a delightful nutty flavor. This twist provides texture that complements the soft, fluffy interior beautifully.
- Sweet & Savory: Drizzle with a touch of honey or maple syrup while pairing with savory toppings like bacon. This creates a delightful balance of flavors that will resonate in every bite!
- Savory Salsa: Top with a homemade salsa or pico de gallo for a refreshing kick. The juicy burst of tomatoes and tangy elements will elevate your meal to a whole new level.
These variations and substitutions not only keep your meals interesting but also allow you to tailor your experience to fit every craving or occasion! To expand your culinary horizons further, consider checking out my Quick Meal Prep Ideas for seamless weekday cooking or discover how to use Chickpeas in Different Dishes to embrace even more deliciousness!
What to Serve with Savory Chickpea Waffles?
Crafting a delightful meal around these gluten-free waffles opens up a world of tempting flavors and textures.
-
Fried Egg: A perfect sunny-side-up egg on top adds rich protein and a creamy yolk, enhancing every bite.
-
Creamy Avocado: Slices of ripe avocado offer a luxurious creaminess and healthy fats, balancing the savory nuttiness of the waffles.
-
Hummus Delight: A dollop of hummus provides earthiness and extra protein, creating a delicious fusion of flavors that you’ll adore.
-
Roasted Vegetables: A medley of colorful roasted veggies adds vibrant freshness and texture, complementing the hearty nature of the waffles beautifully.
-
Fresh Salsa: A zesty tomato salsa with onions and cilantro brings a refreshing crunch and a tangy kick, perfect for brightening up your meal.
-
Spinach Salad: A light spinach salad with lemon vinaigrette can offer a crisp, refreshing contrast and enhance your overall dining experience.
-
Fruit Salad: For a sweet twist, a mix of seasonal fruits introduces a burst of sweetness that pairs wonderfully with the savory elements.
-
Smoothies: A berry or green smoothie adds a refreshing drink option, blending well with the waffle’s hearty nature and rounding out your meal.
Indulge in the possibilities and elevate your breakfast or brunch table with these vibrant accompaniments!
How to Store and Freeze Chickpea Waffles
Fridge: Store cooked chickpea waffles in an airtight container for up to 3 days. Make sure they are fully cooled before sealing to prevent moisture buildup.
Freezer: Freeze waffles individually wrapped in plastic wrap, then placed in a zip-top bag, for up to 2 months. This helps them remain crisp when reheated later.
Reheating: To restore the delicious crunch of your chickpea waffles, reheat them directly from frozen in a toaster or oven at 375°F (190°C) for about 5-8 minutes.
Make-Ahead Batter: If you want to prepare in advance, the waffle batter can be made up to 9 hours ahead and stored at room temperature before cooking.
Make Ahead Options
These Savory Chickpea Waffles are a fantastic choice for meal prep aficionados! You can prepare the batter up to 9 hours in advance and let it rest at room temperature to enhance the flavors. To maintain the quality, cover the bowl tightly with plastic wrap, which prevents any drying. Additionally, cooked waffles can be stored in an airtight container for up to 3 days in the refrigerator or frozen for up to 2 months; simply reheat them in the toaster or oven for a crispy texture. When you’re ready to serve, just cook the prepared batter in the waffle iron for a delightful, protein-packed breakfast that feels fresh and delicious!
Expert Tips for Chickpea Waffles
• Consistent Batter Thickness: Ensure your batter is thick yet pourable. If too thin, gradually add more chickpea flour or let it rest longer.
• Preheat for Crispiness: Always preheat your waffle iron thoroughly before pouring in the batter. This step is essential for achieving that perfect crispy texture.
• Mixing Technique: Avoid overmixing your batter. Stir just until large lumps disappear to maintain a light and fluffy waffle.
• Storing Leftovers: For best results, reheat any leftover chickpea waffles in the oven or toaster to restore their crispiness.
• Experiment with Variations: Don’t hesitate to try new flavors! Adding spices or fresh herbs can elevate your chickpea waffles beyond the ordinary.
Savory Chickpea Waffles Recipe FAQs
What type of chickpea flour is best for this recipe?
Absolutely! For the best texture in your Savory Chickpea Waffles, I recommend using finely ground chickpea flour, also known as besan or gram flour. This type of flour will yield a smooth, lump-free batter that results in light and crispy waffles.
How should I store leftover chickpea waffles?
Perfect question! After cooking, store your leftover Chickpea Waffles in an airtight container in the refrigerator for up to 3 days. Allow them to cool completely to avoid moisture buildup before sealing. If you’d like to keep them longer, freezing is a great option!
Can I freeze chickpea waffles for later use?
Yes, you can! To freeze your chickpea waffles, wrap each waffle individually in plastic wrap and place them in a zip-top bag. They can be frozen for up to 2 months. When ready to eat, simply reheat directly from frozen in a toaster or oven at 375°F (190°C) for about 5-8 minutes until crispy.
What should I do if my waffle batter is too thin?
Don’t worry! If you find your batter is too thin, there are a couple of simple fixes. First, let the batter rest longer—this can help thicken it up. Alternatively, you can gradually whisk in more chickpea flour to reach a thicker consistency. Aim for a batter that’s thick yet pourable, so it holds its shape in the waffle iron.
Are chickpea waffles safe for people with nut allergies?
Very much so! Chickpea flour is a legume-based flour and is generally safe for people with nut allergies. However, always check the packaging for any potential cross-contamination warnings. Also, if you or your guests have other dietary restrictions, it’s a good idea to check the toppings for allergens as well.
Can I make the batter in advance?
Yes, you can! You can prepare the Chickpea Waffle batter up to 9 hours in advance. Just cover it and store it at room temperature. Waiting for 30 minutes before cooking, as instructed, improves the batter’s texture, even after resting! Just remember to give it a gentle whisk before pouring it into the waffle iron.
Crispy Chickpea Waffles: A Flavorful Gluten-Free Delight
Ingredients
Equipment
Method
- In a large mixing bowl, whisk together the chickpea flour, water, olive oil, salt, and optional sugar until the batter is completely smooth and lump-free, about 1-2 minutes.
- Cover the batter with a kitchen towel and let it rest at room temperature for at least 30 minutes.
- Preheat your waffle iron to medium-high heat, which usually takes about 5 minutes. Brush with a thin layer of olive oil to prevent sticking.
- Pour the batter into the waffle iron according to manufacturer’s guidelines, usually about 1/2 to 3/4 cup per waffle. Cook for approximately 4-6 minutes or until golden brown.
- Remove the chickpea waffles from the iron using a fork or spatula. Serve warm with your favorite toppings.