
Advertisement
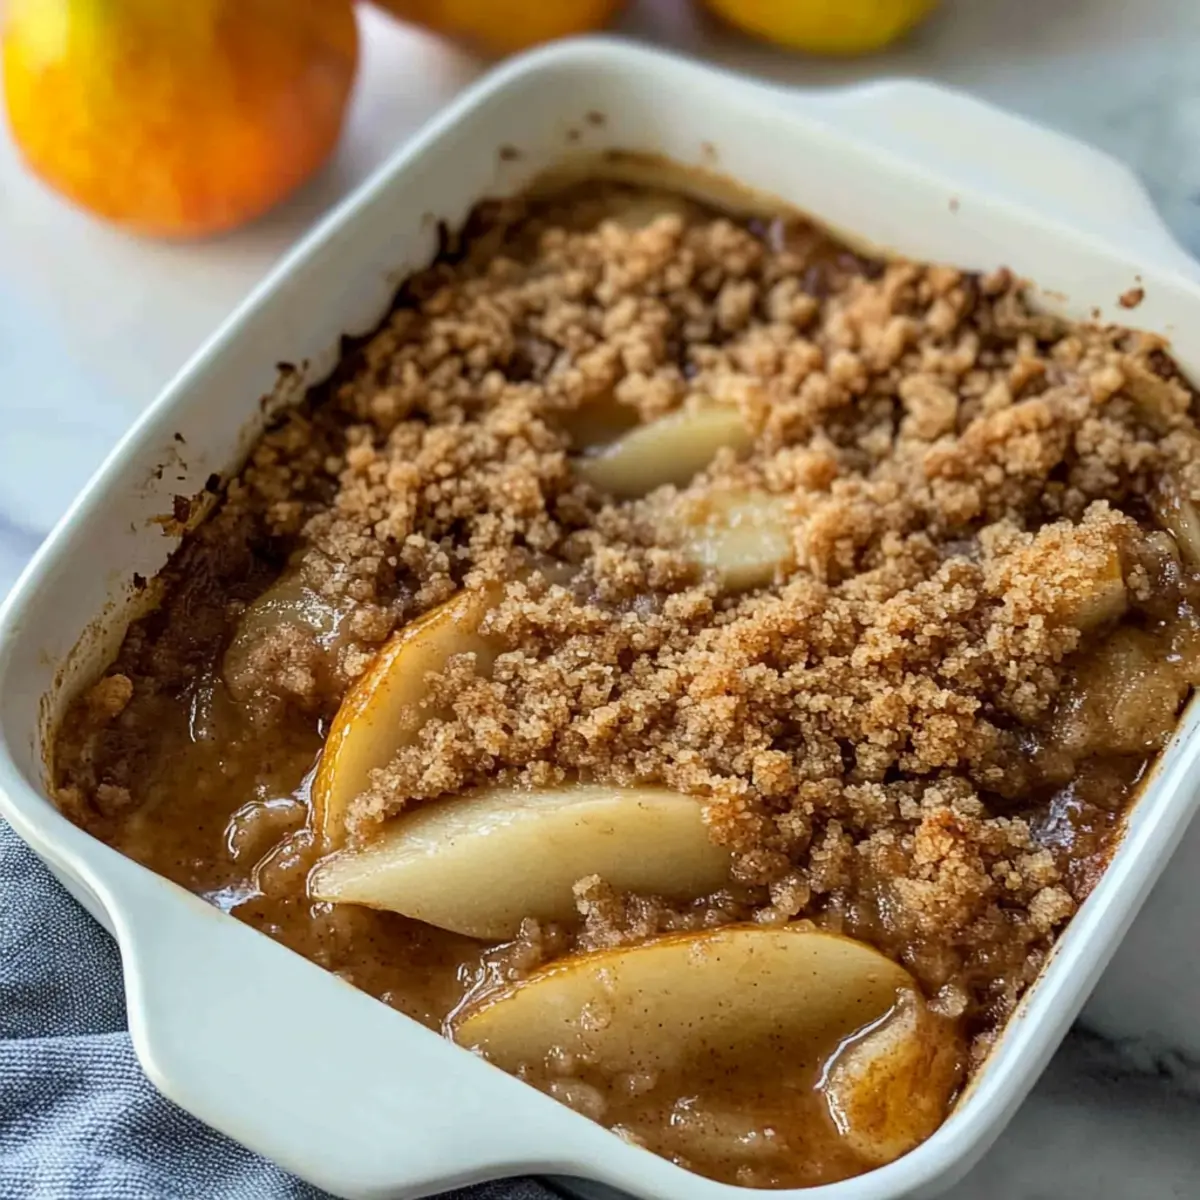
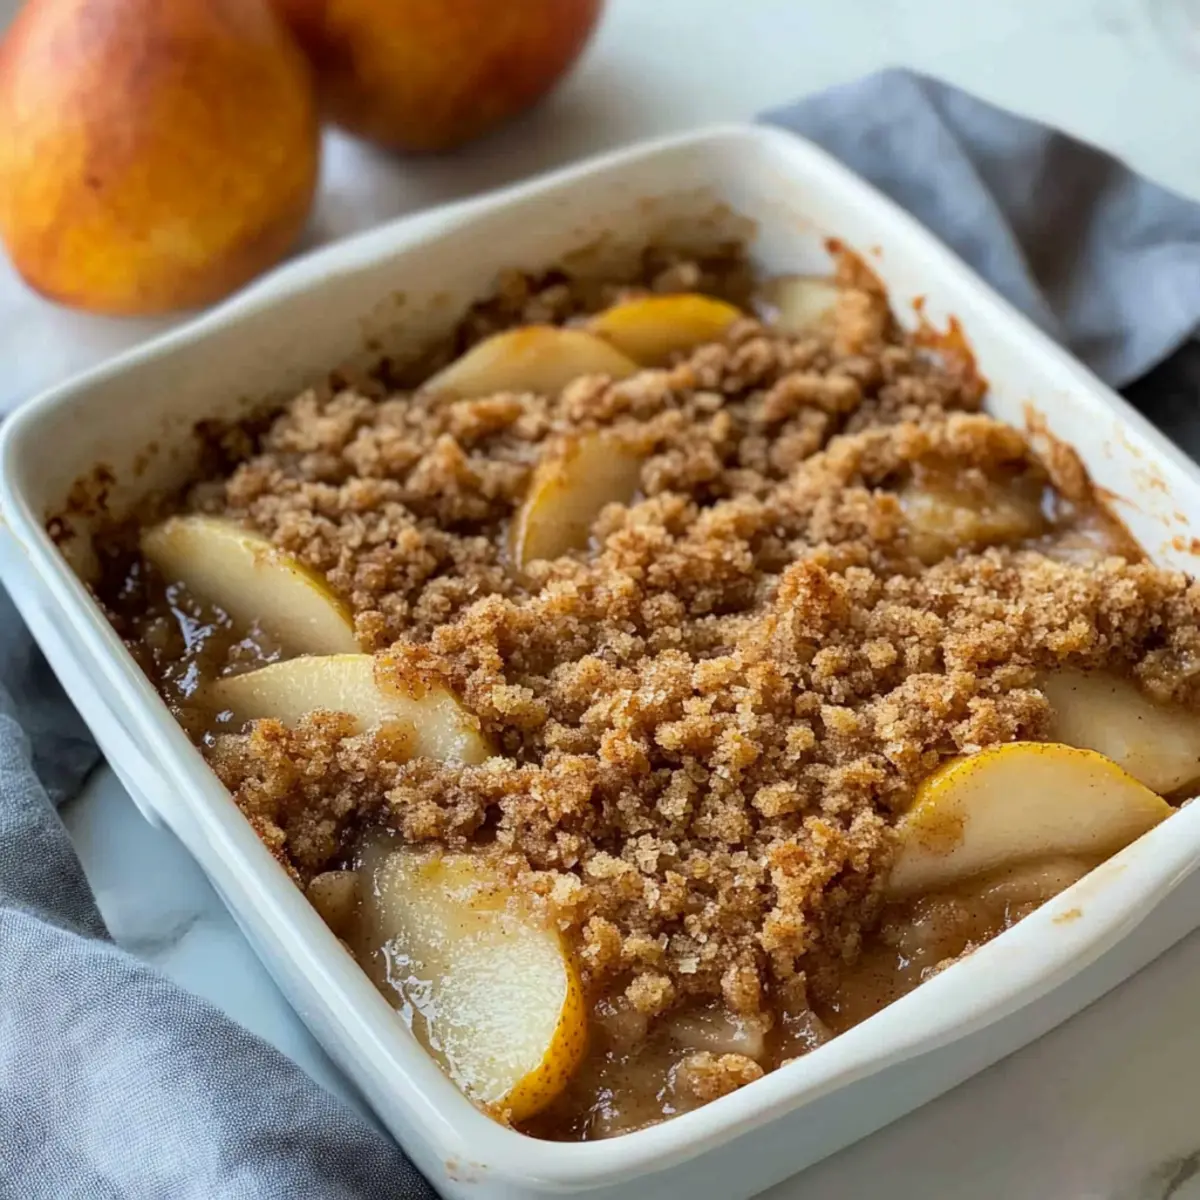
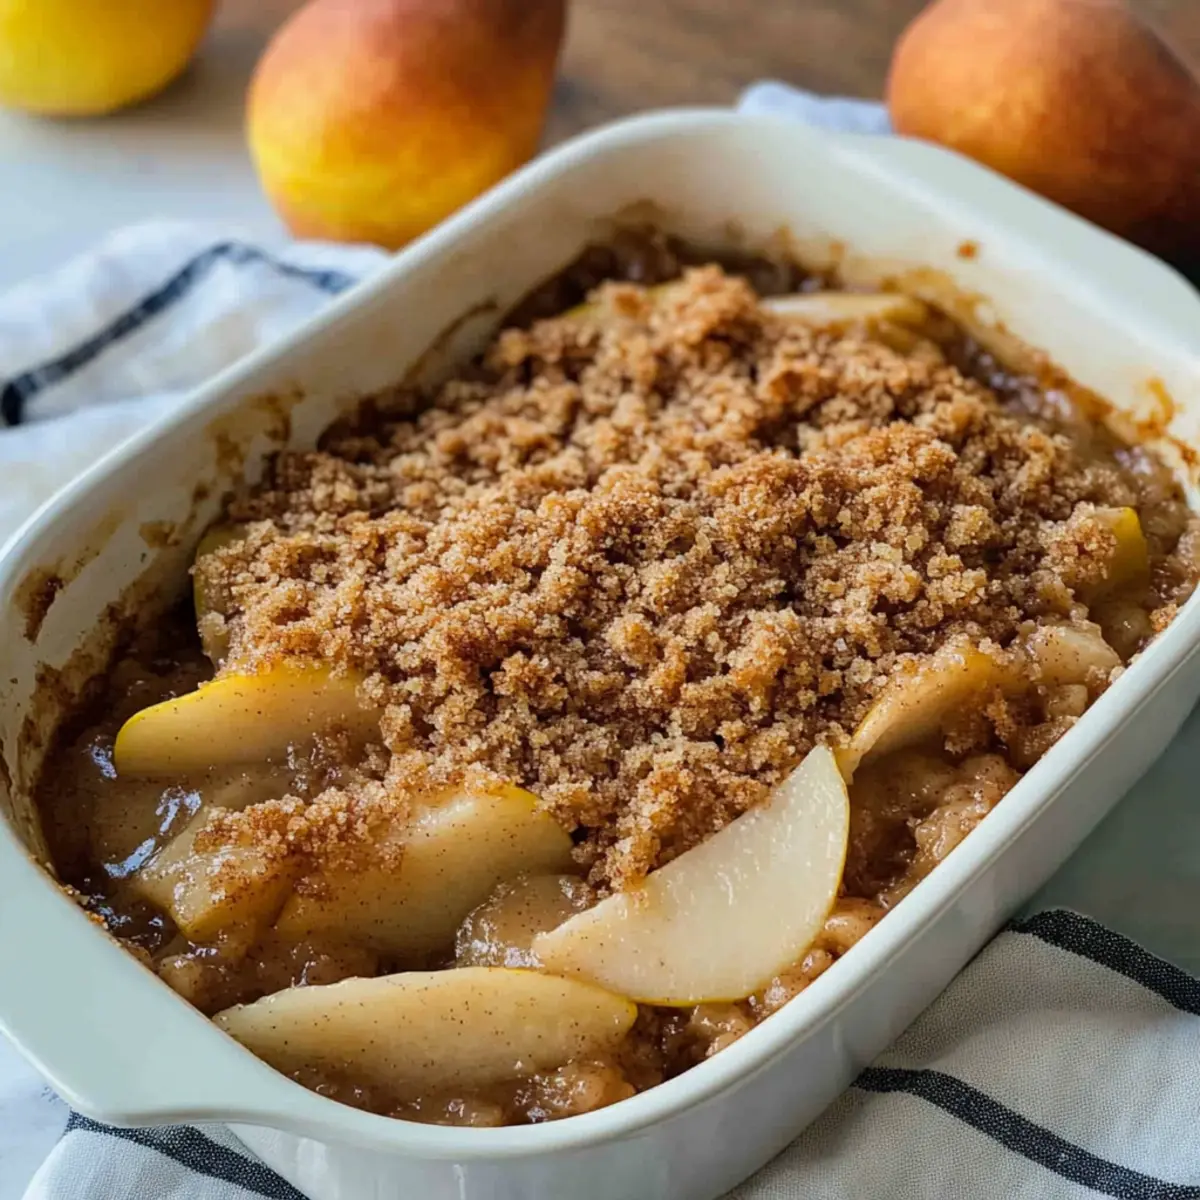
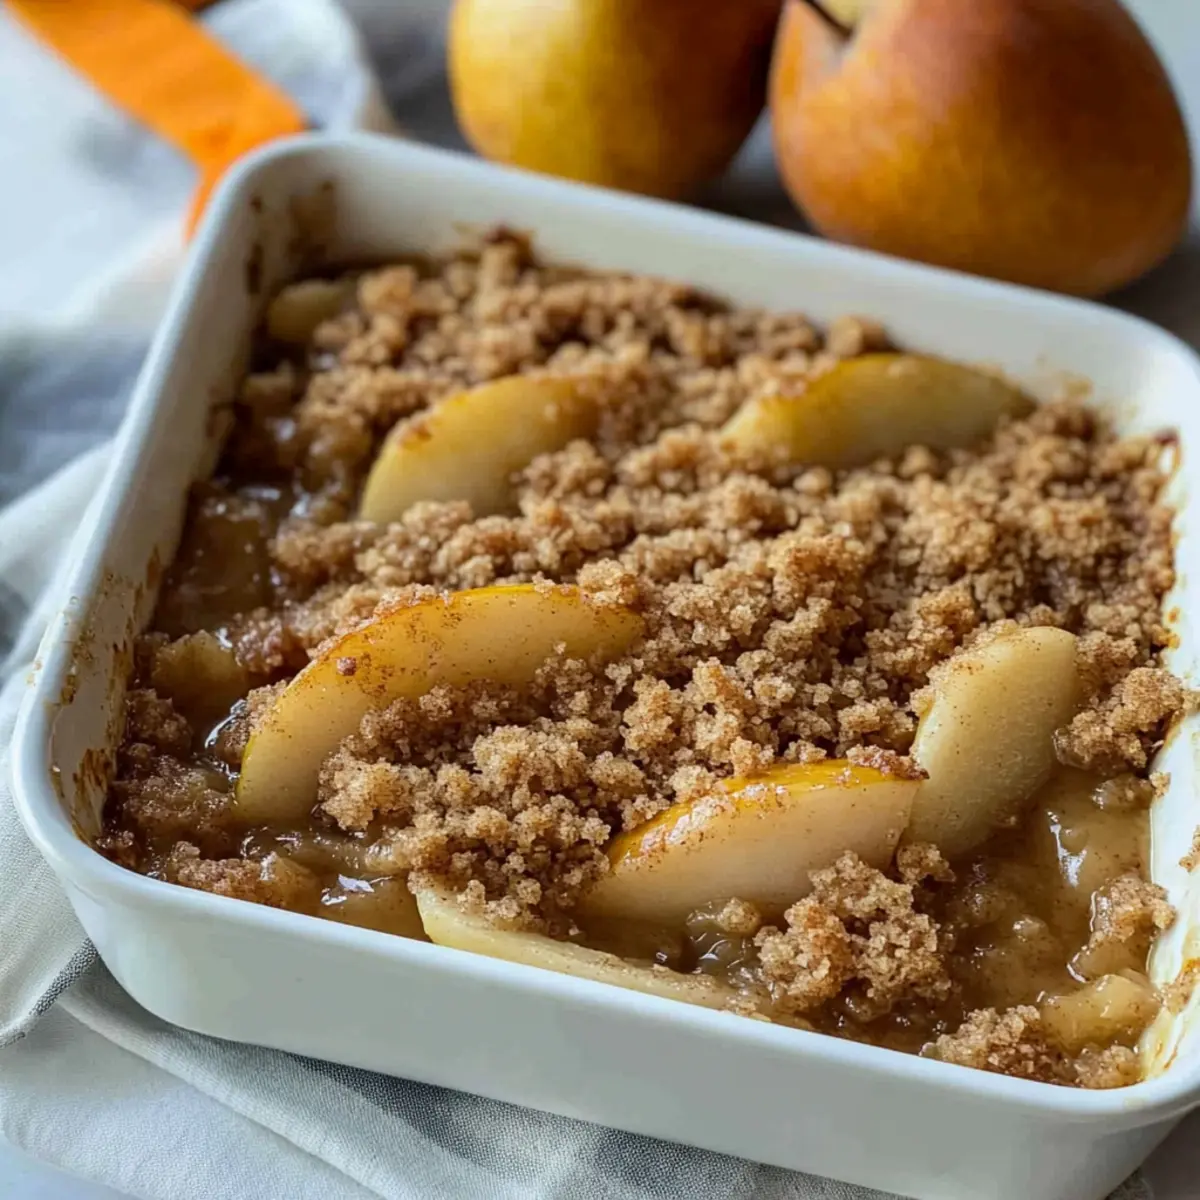
As the leaves turn and the air gets crisper, there’s something magical about the scent of sweet pears baking in the oven. This Old-Fashioned Pear Crumble not only warms your kitchen but also evokes fond memories of gatherings filled with laughter and joy. With a tantalizing cinnamon streusel topping that perfectly complements the juicy fruit beneath, it’s the ultimate autumn dessert. Plus, this simple recipe can easily be adapted for healthier preferences, making it a delightful crowd-pleaser that shines at any occasion. Whether you choose fresh pears or opt for canned ones, this comforting dish will draw your loved ones together. So, are you ready to dive into a bowl of warm goodness that’s just begging to be paired with a scoop of ice cream?
Why Is This Pear Crumble So Irresistible?
Simplicity makes it a breeze: This recipe requires minimal effort, perfect for busy weeknights or casual gatherings. Warm, Cozy Aromas fill your kitchen, creating an inviting atmosphere that sets the stage for a delicious autumn experience. Endless Versatility: Use any fresh or canned pears you have on hand, and feel free to customize with spices or add-ins. Crowd-Pleasing Delight: Whether you’re serving family or hosting friends, this crumble will be a hit amongst all age groups. Plus, for those mindful of their sugar intake, an easy sugar reduction option sits at your fingertips, ensuring everyone can indulge. So gather your loved ones and share the joy of this cozy dessert!
Pear Crumble Ingredients
• Discover the delightful components behind this classic recipe!
Advertisement
For the Filling
- Pears – Use medium ripe pears like Bartlett, D’Anjou, or Bosc for the best sweetness and moisture.
- Lemon Juice – Fresh juice helps prevent oxidation and brightens the flavor of the pears.
For the Topping
- All-Purpose Flour – Provides structure; swap for gluten-free flour if needed.
- Brown Sugar – Adds sweetness and flavor depth; can be replaced with granulated sugar if desired.
- Ground Cinnamon – Infuses warmth; adjust to match your taste preference.
- Ground Nutmeg – Optional, but recommended for a cozy autumn twist.
- Salt – Enhances the overall flavor; a crucial element for balancing sweetness.
- Cold Butter – Creates a flaky topping; make sure it’s cold for the best texture.
Enjoy creating this comforting pear crumble that’s sure to bring warmth to your home!
Step‑by‑Step Instructions for Pear Crumble
Step 1: Preheat the Oven and Prepare the Dish
Start by preheating your oven to 375°F (190°C) and greasing an 8×8-inch baking dish with a little butter or non-stick spray. This ensures a beautiful, golden crust on your old-fashioned pear crumble while preventing sticking. Set the dish aside, allowing it to be ready for the luscious filling that’s about to come together.
Step 2: Slice the Pears
Next, peel, core, and slice your medium ripe pears of choice, such as Bartlett or Bosc. Layer the sliced pears evenly in your prepared baking dish, then drizzle freshly squeezed lemon juice over them. This step not only adds brightness to the filling but also keeps your pears looking fresh and vibrant as they bake.
Step 3: Mix the Dry Ingredients
In a separate mixing bowl, combine all-purpose flour, brown sugar, ground cinnamon, optional nutmeg, and a pinch of salt. Whisk these dry ingredients together until well blended. This mixture will become the wonderfully crunchy topping for your pear crumble, providing that delightful contrast of textures that everyone loves.
Step 4: Incorporate the Butter
Remove your cold butter from the fridge and cut it into small cubes. Add the butter to the dry ingredients and use your fingers to rub it into the mixture gently. Continue until it resembles pea-sized crumbs. This is crucial for achieving a light and flaky topping on your pear crumble, so take your time with this step.
Step 5: Assemble the Crumble
Evenly distribute the crumb mixture over the sliced pears in the baking dish, ensuring a good layer covers all the fruit. The golden-streaked topping will develop a beautiful crust as it bakes, protecting the juicy goodness underneath. Be generous, so every bite of the pear crumble is packed with flavor and texture.
Step 6: Bake to Perfection
Place your assembled pear crumble in the preheated oven and bake for 30-35 minutes. Keep an eye on it as it bakes, watching for the topping to turn a luscious golden brown and the pear filling to start bubbling around the edges. This visual cue indicates that your autumn dessert is nearly ready to bring warmth to your home.
Make Ahead Options
These Pear Crumble preparations are perfect for busy home cooks! You can slice and prepare your pears up to 24 hours in advance, drizzling them with lemon juice to prevent browning. Additionally, the dry mixture for the crumble topping can be made up to 3 days ahead; simply combine the flour, sugars, and spices, then refrigerate it in an airtight container. When you’re ready to serve this comforting autumn dessert, just assemble the crumble by combining the prepared pears and topping, then bake as directed. This allows you to enjoy the mouthwatering aroma of fresh Pear Crumble without the last-minute rush!
How to Store and Freeze Pear Crumble
Fridge: Store leftovers in an airtight container for up to 5 days to keep the flavors fresh while maintaining the pear crumble’s deliciousness.
Freezer: For longer storage, wrap the crumble tightly in foil or use a freezer-safe container. It can be frozen for up to 3 months without losing its delightful taste.
Reheating: To restore the crisp topping, reheat the thawed pear crumble in a preheated oven at 350°F (175°C) for 15-20 minutes. This helps revive the crumbly texture that makes this dessert so irresistible.
Serve Warm: Enjoy your pear crumble warm for the best experience! Pair it with a scoop of ice cream or whipped cream to elevate the cozy treat.
Pear Crumble Variations & Substitutions
Feel free to make this cozy Pear Crumble your own by exploring delightful twists and substitutions!
- Dairy-Free: Replace butter with coconut oil or a dairy-free butter alternative for a deliciously rich topping.
- Gluten-Free: Swap all-purpose flour for gluten-free flour or almond flour, ensuring everyone can enjoy this treat.
- Spiced Up: Add 1/4 teaspoon ginger or allspice to the dry ingredients for a warm, fragrant flavor enhancement. Try mixing spices to create a unique twist.
- Nutty Crunch: Toss in 1/2 cup chopped walnuts or almonds into the crumble topping for added texture and a satisfying crunch. The nuts will complement the sweet pears beautifully.
- Less Sweet Option: Reduce the brown sugar in the topping to 1/2 cup for a lighter sweetness without sacrificing flavor. This is a perfect option for those watching their sugar intake.
- Mixed Fruits: Combine pears with apples or peaches for a mixed fruit crumble that brings a delightful medley of flavors. Each fruit adds its sweetness, making every bite a surprise!
- Canned Pears: If you’re in a rush, using three well-drained 15 oz cans of pears can save time while still delivering delicious results.
By experimenting with these ideas, you’ll create a personalized dessert that perfectly fits your tastebuds. You might also want to check out some of my other recipes, like a Crispy Apple Crisp or Classic Peach Cobbler, to keep the cozy vibes going all season long!
What to Serve with Old-Fashioned Pear Crumble?
The warmth of this delightful dessert invites a cozy meal that brings everyone together, especially during crisp autumn evenings.
-
Creamy Vanilla Ice Cream: A scoop of ice cream melts into the warm crumble, enhancing its flavors with creamy goodness. This dreamy pairing creates a classic dessert experience that warms the soul.
-
Whipped Cream: Light and airy whipped cream adds a touch of sweetness, balancing the cozy spices in the crumble beautifully. The blend of textures creates a dessert that feels decadent yet comforting.
-
Fresh Brewed Coffee: A rich cup of coffee pairs well, enhancing the warm spices of the pear crumble while offering a delightful energy boost for a lively gathering. Its bold flavors contrast wonderfully with the sweet dessert.
-
Spiced Chai: The aromatic spices in chai heighten the cozy feeling during autumn lunches or dinners. Serve a warm cup alongside your crumble for an inviting experience that warms both body and spirit.
-
Caramel Sauce: Drizzling warm caramel on top of your crumble gives it an extra touch of indulgence. The rich, buttery sweetness compliments the tartness of the pears beautifully, making every bite a memorable one.
-
Sautéed Apples: Adding sautéed apples creates a lovely mix of flavors and textures. The softer, caramelized apples enhance the existing fruitiness of the crumble and offer an autumn-like touch.
-
Cheese Plate: A variety of cheeses, such as aged cheddar or creamy brie, creates a delightful contrast to the dessert. The savory flavors provide a satisfying balance, making it a versatile option at gatherings.
-
Soft Ginger Cookies: These chewy cookies echo the cinnamon in the crumble while adding a different texture. The comforting flavors work together to create an unforgettable dessert experience.
-
Crisp White Wine: A chilled glass of crisp white wine like Sauvignon Blanc or a fruity Riesling provides a refreshing contrast to the warm, comforting dessert. Perfect for a cozy evening or special occasion!
Expert Tips for Pear Crumble
Choose the Right Pears: Use medium ripe pears like Bartlett, D’Anjou, or Bosc for perfect sweetness and moisture in your pear crumble.
Prevent Browning: Drizzle freshly squeezed lemon juice over the sliced pears to maintain their beautiful color and enhance the fruit’s natural flavor.
Butter Temperature Matters: Ensure your butter is cold to achieve a light and flaky topping. This is vital for the crumble’s delightful texture.
Customize with Spice: Feel free to experiment with additional spices like ginger or allspice to create unique flavor profiles in your pear crumble.
Store Properly: If you have leftovers, wrap or store them in an airtight container. Reheat in the oven for the best results, restoring the crispy topping.
Pear Crumble Recipe FAQs
What type of pears should I use for the best flavor?
For the ultimate flavor and sweetness in your pear crumble, I recommend using medium ripe pears such as Bartlett, D’Anjou, or Bosc. These varieties have a great balance of sweetness and moisture, perfect for creating that deliciously juicy filling. Be sure to choose pears that are firm yet slightly soft to the touch for optimal ripeness.
How do I store leftover pear crumble?
To keep your leftover pear crumble fresh, store it in an airtight container in the refrigerator for up to 5 days. This method helps maintain the flavors and the dish’s delightful texture. For best results, gently reheat individual servings in the oven to restore the crumble topping’s crispness before enjoying.
Can I freeze pear crumble for later?
Absolutely! To freeze your pear crumble, wrap it tightly in foil or place it in a freezer-safe container. It can be frozen for up to 3 months. When you’re ready to enjoy it, simply thaw it in the fridge overnight and reheat in a preheated oven at 350°F (175°C) for about 15-20 minutes. This will help bring back the lovely texture of the crumble.
What can I do if my crumble topping is too crumbly or dry?
If you find that your topping is too dry, you can mix in a bit more cold butter, about a tablespoon at a time, until it reaches a desirable crumbly texture. Using your fingers, gently incorporate the butter until it resembles small pea-sized crumbs. This will enhance the moisture and make your topping delightfully flaky without being overly dry.
Is this recipe suitable for those with dietary restrictions?
Yes! This pear crumble can be easily adjusted to fit various dietary preferences. For gluten-free options, simply swap regular all-purpose flour for a gluten-free blend. Additionally, if you’re looking to reduce sugar, you can decrease the amount of brown sugar in the topping to as little as½ cup without compromising too much on flavor.
How can I use canned pears in this crumble?
When using canned pears, it’s essential to drain them well, ensuring you remove excess liquid. I recommend using three (15 oz) cans and patting the pears dry with paper towels. This keeps your crumble from becoming soggy. Simply follow the recipe as usual, layering the well-drained canned pears in the baking dish.
Cozy Pear Crumble Delight: A Simple Autumn Treat
Ingredients
Equipment
Method
- Preheat your oven to 375°F and grease an 8x8-inch baking dish.
- Peel, core, and slice the pears. Layer in the dish and drizzle lemon juice.
- Mix flour, brown sugar, cinnamon, nutmeg, and salt in a bowl.
- Cut in the cold butter until the mixture resembles pea-sized crumbs.
- Evenly distribute the crumb topping over the sliced pears.
- Bake for 30-35 minutes or until the topping is golden brown.


