Advertisement
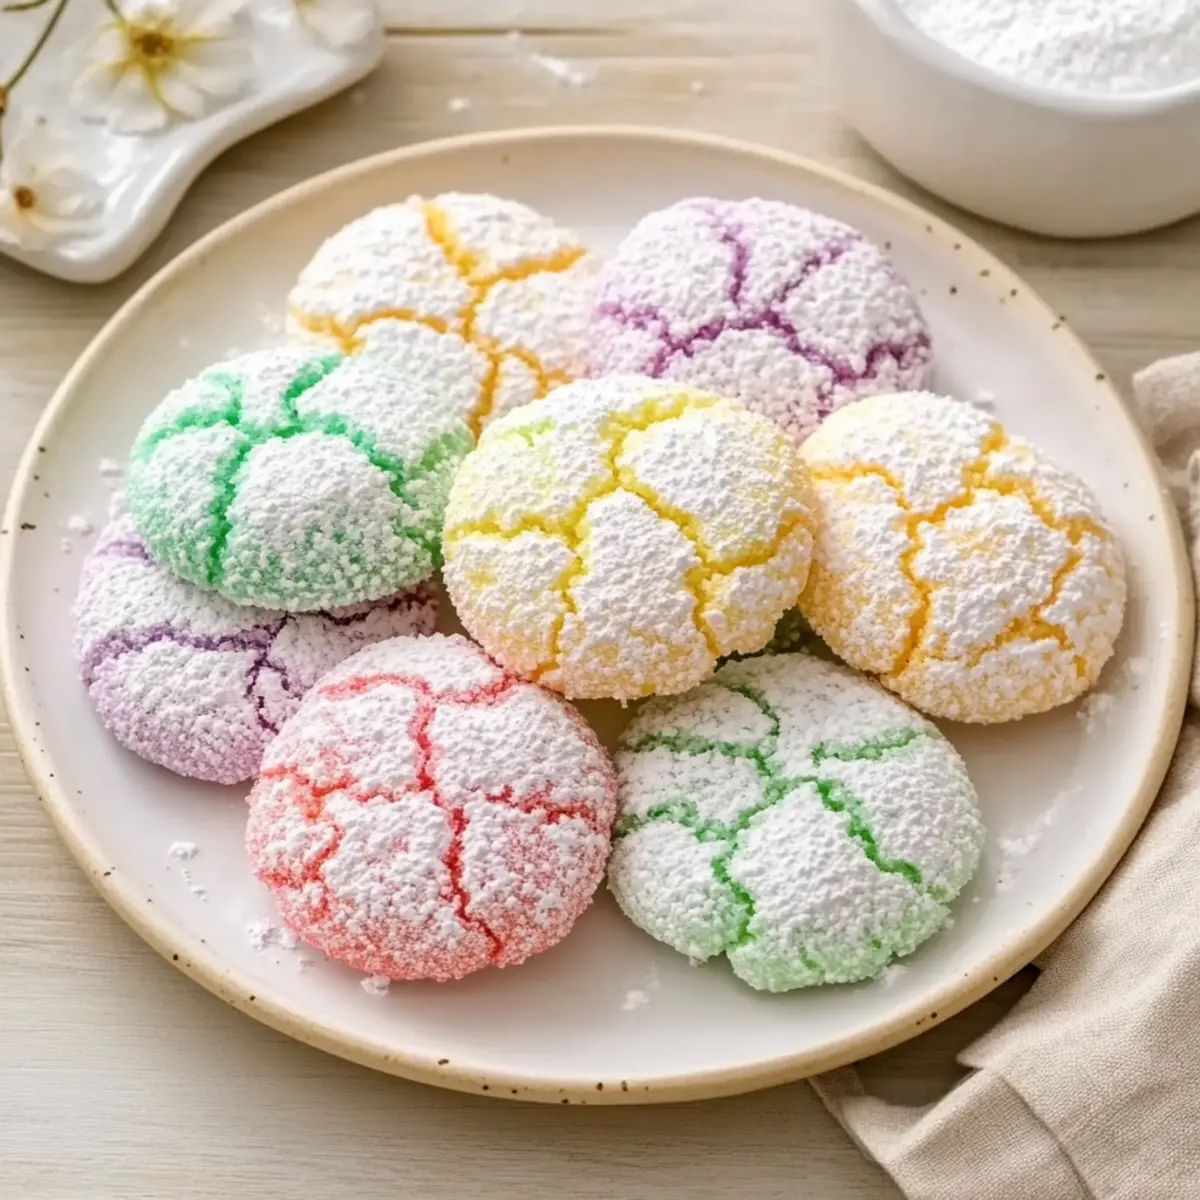
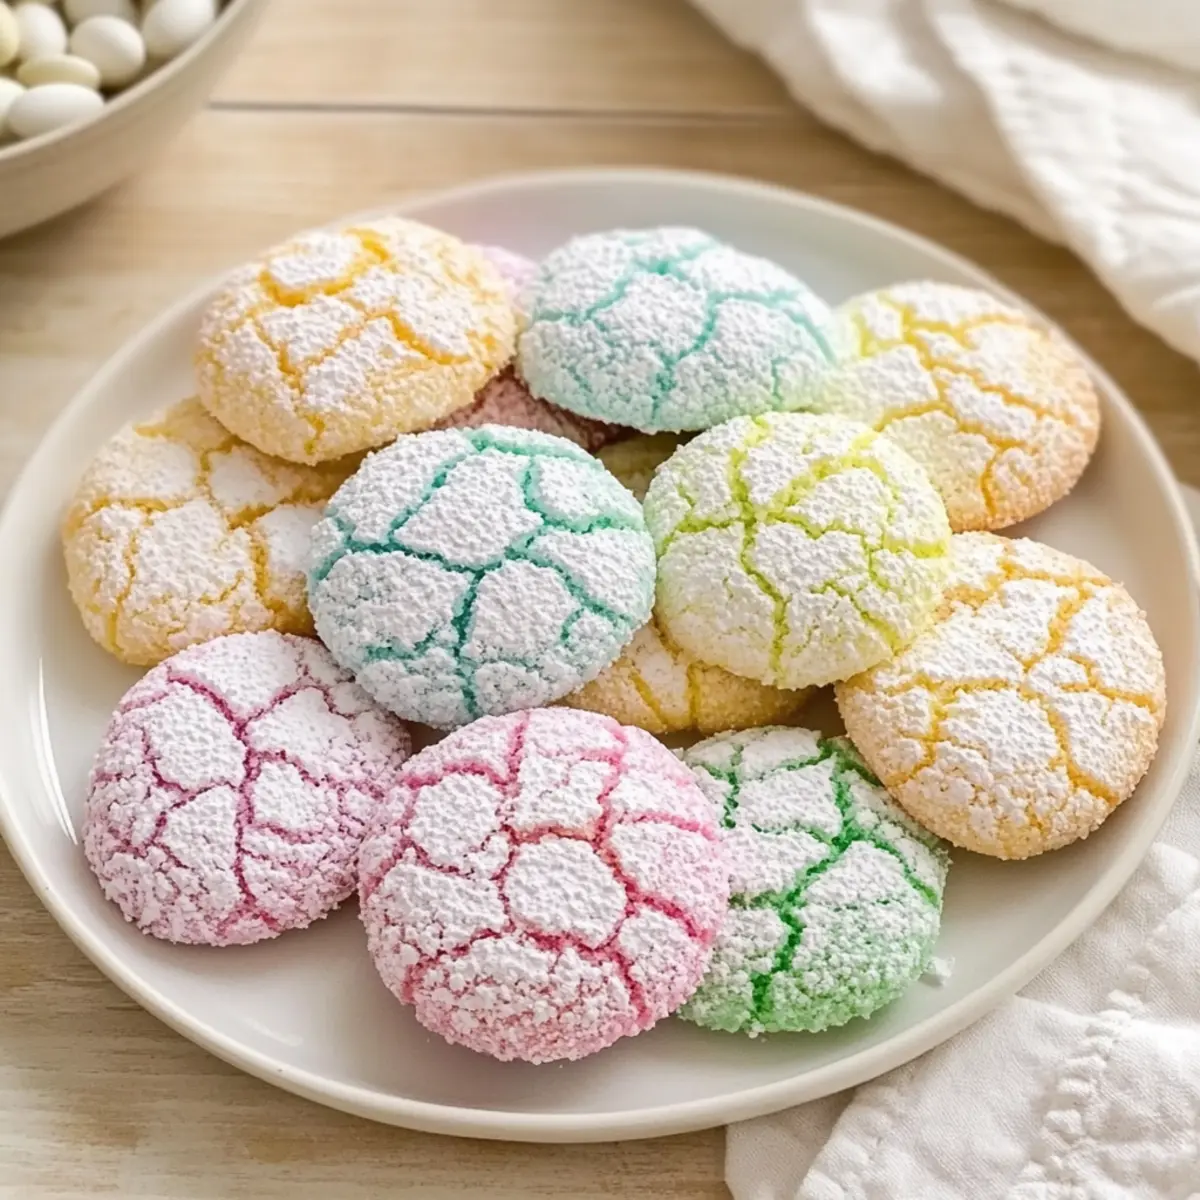
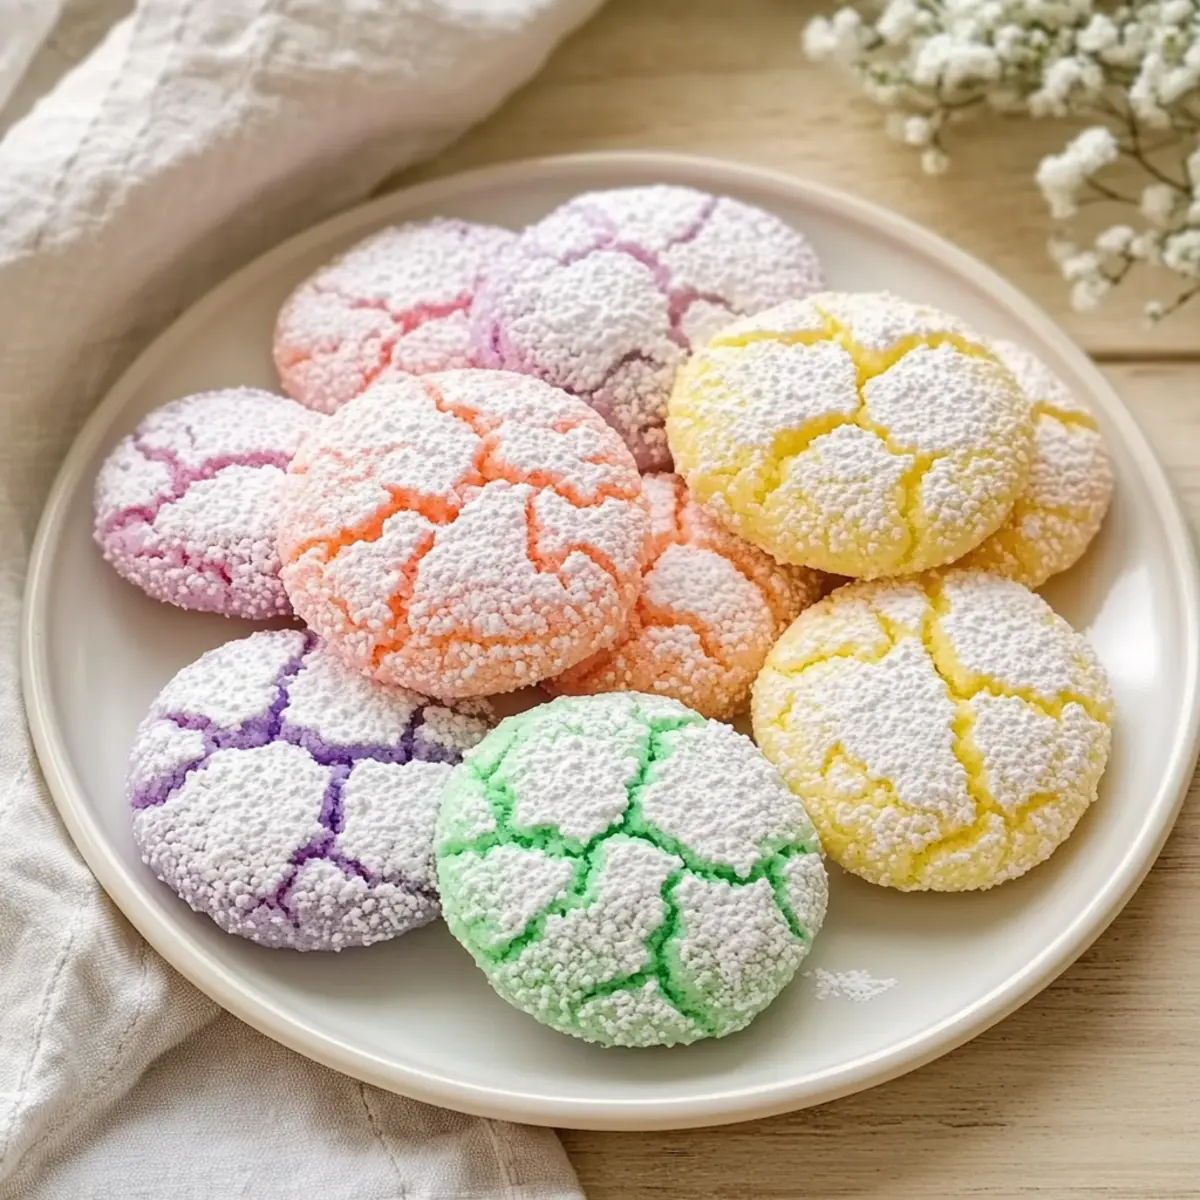
As I stood in the kitchen, sunlight streaming through the window, a vibrant idea popped into my mind: Springtime Crinkle Cookies! These delightful, pastel-hued treats exude the joy and charm of Easter, combining a soft, chewy center with a sugary crinkle that brings a smile to every gathering. This easy dessert is a beginner-friendly recipe that requires just basic ingredients—perfect for those quick baking sessions when you want to increase your treat game without the fuss. Whether you’re hosting a festive brunch or simply enjoying a sweet afternoon pick-me-up, these cookies are sure to impress with their cheerful colors and delightful flavors. Are you ready to roll up your sleeves and make some cookie magic?
Why Are Springtime Crinkle Cookies Special?
Vibrant colors: With their pastel hues, these cookies add a cheerful touch to any spring gathering or holiday celebration.
Simple ingredients: Made with just a handful of kitchen staples, anyone can whip up a batch without the stress.
Advertisement
Delightfully chewy: The combination of a soft center and crispy exterior makes each bite a blissful treat.
Versatile flavors: Feel free to swap in different extracts or add fun mix-ins like chocolate chips for a personal twist!
Quick to bake: From mixing the dough to enjoying warm cookies in under an hour, these treats are a time-saver.
Trust me, once you try these Springtime Crinkle Cookies, you’ll wonder how you ever celebrated without them! They pair wonderfully with a cup of tea or coffee, making them perfect for your next gathering. Don’t miss out on other delightful recipes like the Marshmallow Swirl Cookies or the festive Pistachio Shortbread Cookies for more sweet inspiration.
Springtime Crinkle Cookies Ingredients
• You won’t believe how easy these are to make!
For the Cookie Dough
- All-Purpose Flour – Provides structure and base for the cookies; can substitute with gluten-free flour if needed.
- Baking Powder – Essential leavening agent that helps the cookies rise; no substitutions advisable.
- Salt – Enhances flavor, making each bite delicious; you can use sea salt or kosher salt interchangeably.
- Unsalted Butter – Adds richness and moisture; can substitute with margarine or dairy-free butter if desired.
- Granulated Sugar – Sweetens the dough and helps create a crisp exterior; no substitutions recommended.
- Large Eggs – Binds the mixture and adds moisture; no other binding substitutions are advisable but a flax egg can be used for a vegan alternative.
- Vanilla Extract – Enhances overall flavor with a comforting aroma; substitute with vanilla bean paste for a different twist.
- Almond Extract (optional) – Provides a subtle nutty depth; you can omit or replace it with additional vanilla if preferred.
For the Coating
- Powdered Sugar – Creates the signature crinkle look; ensure you have plenty for a thick coating.
For the Color
- Gel Food Coloring – Adds festive pastel hues to your cookies; avoid liquid food coloring to maintain dough consistency.
Get ready to bring some colorful cheer into your kitchen with these delightful Springtime Crinkle Cookies!
Step‑by‑Step Instructions for Springtime Crinkle Cookies
Step 1: Preheat and Prepare
Begin by preheating your oven to 350°F (175°C). While the oven warms, line a baking sheet with parchment paper to prevent sticking and ensure easy cleanup. Visualize a smooth, clean baking surface, ready for your vibrant Springtime Crinkle Cookies.
Step 2: Mix Dry Ingredients
In a medium mixing bowl, whisk together the all-purpose flour, baking powder, and salt until well combined. This step helps to aerate the flour and evenly distribute the leavening agent, setting the foundation for your cookies’ delightful texture. Set this mixture aside as you move on to the wet ingredients.
Step 3: Cream Butter and Sugar
In a large bowl, use an electric mixer to cream the unsalted butter and granulated sugar together until the mixture becomes light and fluffy, around 3-4 minutes. This process incorporates air into the dough, leading to chewier Springtime Crinkle Cookies. Once you achieve that fluffy texture, add the eggs one at a time, mixing well after each addition.
Step 4: Add Flavorings
Now, stir in the vanilla extract and optional almond extract into your creamy mixture, allowing those wonderful aromas to bloom. This step is crucial for enhancing the overall flavor of your cookies. After the extracts are blended in, it’s time to slowly incorporate the dry mixture into the wet ingredients.
Step 5: Combine Wet and Dry Ingredients
Gradually fold the dry ingredients into the wet mixture until a thick dough forms. Use a spatula or wooden spoon to gently mix until you don’t see any streaks of flour. This step ensures a smooth and cohesive dough, crucial for the signature texture of the Springtime Crinkle Cookies.
Step 6: Chill the Dough
Divide the cookie dough into portions, then tint each with your desired gel food coloring to create vibrant pastel hues. After coloring, wrap the dough in plastic wrap and chill it in the refrigerator for at least 30 minutes. Chilling is essential to prevent spreading during baking, ensuring beautiful cookie shapes.
Step 7: Roll and Coat
Once chilled, scoop tablespoon-sized portions of the cookie dough and roll them into balls. Then, generously coat each ball in powdered sugar until they are fully covered. This sugary layer will create the distinctive crinkle effect as they bake. Arrange the dough balls about 2 inches apart on the prepared baking sheet.
Step 8: Bake to Perfection
Place your baking sheet in the preheated oven and bake the Springtime Crinkle Cookies for 10-12 minutes. Watch for the tops to crack and feel the edges set while the centers remain soft. This is the moment you’ll know they’re done.
Step 9: Cool and Enjoy
After baking, allow the cookies to cool on the baking sheet for a few minutes before transferring them to a wire rack. This gentle cooling period helps to set the cookies while keeping them chewy inside. Once completely cooled, they’re ready to enjoy or serve at your spring gatherings!
Tips for the Best Springtime Crinkle Cookies
-
Chill the Dough: Make sure to chill the dough for at least 30 minutes; this prevents excessive spreading and ensures beautiful crinkles.
-
Use Gel Food Coloring: Stick with gel food coloring for vibrant pastel hues. Liquid coloring can alter dough consistency and affect final textures.
-
Properly Coat in Sugar: Roll cookie balls generously in powdered sugar. A thick layer is key for achieving that signature crunchy exterior.
-
Check Oven Temperature: Always preheat your oven and use an oven thermometer if unsure. An accurate temperature ensures perfectly baked Springtime Crinkle Cookies.
-
Avoid Overbaking: Watch the edges closely; remove cookies when they’re set but still soft in the center for that delightful chewy texture.
-
Store Correctly: Keep cookies in an airtight container at room temperature for up to 5 days, preserving their freshness and chewy goodness.
Springtime Crinkle Cookies Variations & Substitutions
Feel free to explore delightful twists and turns for your Springtime Crinkle Cookies, perfect for tailoring them to your taste buds!
- Nut-Free: Omit almond extract and opt for additional vanilla for a nut-free flavor. Perfect for those with nut allergies!
- Gluten-Free: Substitute all-purpose flour with a gluten-free flour blend to enjoy a batch that everyone can savor. Just make sure to check your baking powder too.
- Vegan: Use dairy-free butter and replace eggs with a flax egg. Mix 1 tablespoon of flaxseed meal with 2.5 tablespoons of water, letting it sit until it thickens for a perfect binding agent.
- Chocolate Lovers: Incorporate mini chocolate chips or cocoa powder into the dough for an exciting chocolatey twist. The combination of chocolate with that chewy texture is utterly divine!
- Citrus Zest: Add lemon or orange zest for a vibrant citrus zing that enhances the cookie’s flavor; the fresh aroma will brighten your baking experience.
- Sprinkles Galore: Mix in colorful sprinkles for a festive touch that adds fun and cheerful vibes! These cookies become a party favorite in no time.
- Spicy Kick: For a surprising twist, add a pinch of cayenne pepper or cinnamon for warmth. It may sound unusual, but it elevates the flavor profile beautifully!
- Seasonal Twists: Change up the food coloring according to the occasion—pastels for spring, bold colors for birthdays, or even autumn shades for festive gatherings.
With these variations, the Springtime Crinkle Cookies can fit every palate and occasion! And if you’re looking for more delicious ideas, consider trying out the Cosmic Brownie Cookies or the delightful Cream Stuffed Cookies. Happy baking!
Make Ahead Options
These Springtime Crinkle Cookies are perfect for busy home cooks looking to save time without sacrificing flavor! You can prepare the cookie dough up to 24 hours in advance. Simply mix the dough, color it with gel food coloring, and wrap it tightly in plastic wrap before refrigerating. When you’re ready to bake, remove the dough from the fridge and let it sit at room temperature for about 10 minutes to make it easier to roll into balls. Coat the balls in powdered sugar, place them on a baking sheet, and bake as instructed for cookies that are just as delightful! For even longer storage, you can freeze the dough for up to 3 months. Just thaw it overnight in the refrigerator before rolling and baking, ensuring those delectable pastel treats are ready in a pinch!
How to Store and Freeze Springtime Crinkle Cookies
Room Temperature: Store your Springtime Crinkle Cookies in an airtight container at room temperature for up to 5 days to maintain their delightful chewiness and flavor.
Freezer: For longer storage, freeze the cookies in a single layer on a baking sheet, then transfer them to an airtight container for up to 3 months. Thaw at room temperature when ready to enjoy.
Dough Storage: You can chill the cookie dough wrapped tightly in plastic wrap in the refrigerator for up to 24 hours before baking to prep ahead of time.
Reheating: To enjoy cookies warm again, pop them in the microwave for 10-15 seconds. This will restore some of that fresh-baked goodness!
What to Serve with Springtime Crinkle Cookies
Brighten your springtime celebrations by pairing these delightful treats with delicious accompaniments that will elevate your gathering.
- Fresh Berries: The natural sweetness and tartness of strawberries, blueberries, or raspberries provide a refreshing contrast to the cookies’ sweetness.
- Lightly Sweetened Whipped Cream: A dollop of fluffy whipped cream adds a soft, creamy texture that enhances each bite of the chewy cookies.
- Herbal Iced Tea: A chilled glass of mint or herbal iced tea brings a refreshing, soothing element, perfect for warm-weather enjoyment.
- Fruit Salad: A vibrant medley of seasonal fruits, like melons and citrus, adds freshness while balancing the cookies’ richness.
- Lemonade: The zesty citrus flavors of homemade lemonade offer a bright and tangy complement to the sweet, buttery cookies.
- Vanilla Ice Cream: Serve these cookies warm alongside a scoop of vanilla ice cream; the melted edges and chewy centers create a perfect pairing.
- Cheese Plate: Soft cheeses like brie or goat cheese can be paired on a platter, offering a whole new take on dessert cheese. The creaminess beautifully contrasts with the crinkle cookies’ texture.
- Sparkling Water: A fizzy glass of sparkling water with a twist of lemon is a great, refreshing drink option that cleanses the palate between sweet bites.
Combining these delightful pairings with your Springtime Crinkle Cookies will create an unforgettable dessert experience, enticing friends and family to return for more!
Springtime Crinkle Cookies Recipe FAQs
What kind of flour is best for Springtime Crinkle Cookies?
For these delightful cookies, all-purpose flour is recommended as it provides the best structure. If you’re gluten-sensitive, you can substitute it with a gluten-free flour mix—just ensure it has a 1:1 substitute ratio for optimal results.
How should I store Springtime Crinkle Cookies?
Store your cookies in an airtight container at room temperature for up to 5 days. This will keep them fresh and chewy! If you want to enjoy them longer, consider freezing. Just place them in a single layer on a baking sheet to freeze for a couple of hours, then transfer them to a freezer-safe container for up to 3 months.
Can I freeze the dough for Springtime Crinkle Cookies?
Absolutely! You can wrap the unbaked dough tightly in plastic wrap and refrigerate it for up to 24 hours before baking. Alternatively, for longer storage, freeze the dough portions after rolling them into balls and coating them in powdered sugar. Just thaw them in the fridge overnight before baking; it’s a wonderful time-saver!
What if my cookies spread too much while baking?
If you find that your cookies spread excessively, check your flour measurement. Too little flour can lead to flat cookies. Additionally, ensure your dough has been chilled for at least 30 minutes before baking, as this helps maintain their shape and enhances the crinkle texture. If all else fails, a quick trip to the freezer for about 10-15 minutes will help before baking.
Can I modify the flavor of Springtime Crinkle Cookies?
Absolutely! These cookies are very versatile. Feel free to swap almond extract for other flavor extracts like coconut or hazelnut to create a unique twist. You can also mix in chocolate chips, sprinkles, or even dried fruit to add extra fun and flavor! Just remember to keep the balance of dry and wet ingredients in mind.
How do I prevent my dough from sticking when rolling?
Dust your hands with powdered sugar to easily roll the dough without it sticking. If the dough is too cold and hard to work with, let it sit at room temperature for about 10 minutes to soften slightly. This will make rolling a breeze and help you create even-sized cookie balls!

Delicious Springtime Crinkle Cookies to Brighten Your Day
Ingredients
Equipment
Method
- Preheat your oven to 350°F (175°C) and line a baking sheet with parchment paper.
- Whisk together the flour, baking powder, and salt in a medium bowl.
- Cream the butter and sugar together until light and fluffy, then add eggs one at a time.
- Stir in the vanilla and almond extract.
- Gradually fold the dry ingredients into the wet mixture until a thick dough forms.
- Divide the dough and tint with gel food coloring, then chill for 30 minutes.
- Roll tablespoon-sized portions into balls and coat in powdered sugar.
- Bake for 10-12 minutes until the tops crack but centers remain soft.
- Cool on baking sheet for a few minutes before transferring to a wire rack.