Advertisement
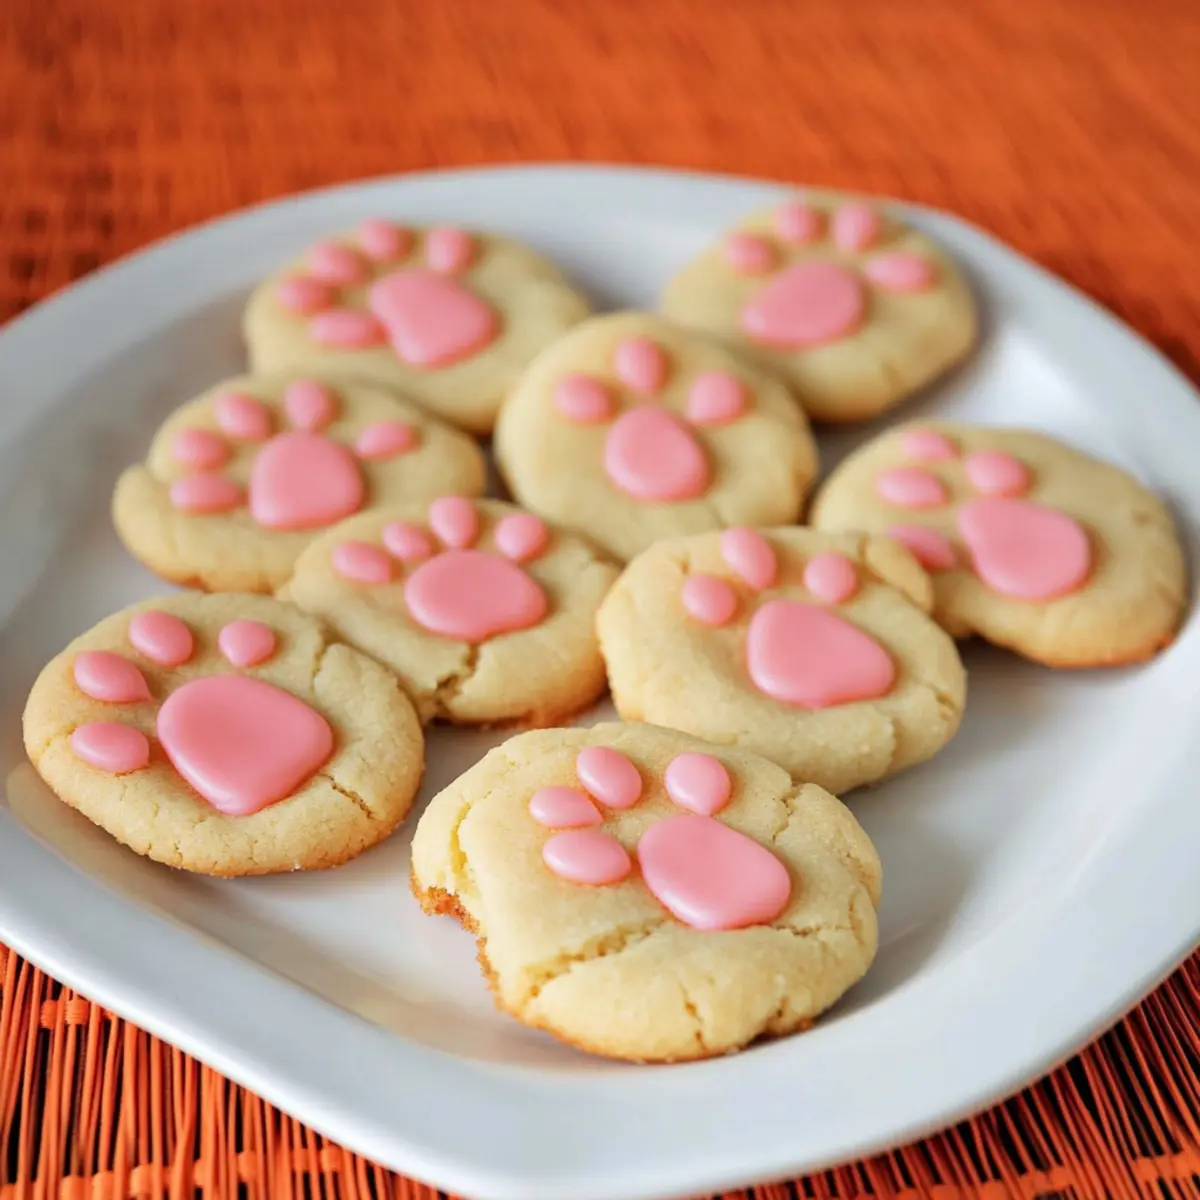
As I walked through the local market, the vibrant colors of spring began to ignite my culinary creativity. It was the perfect moment to whip up some Bunny Paw Thumbprint Cookies, a recipe that captures the joyful spirit of Easter while being incredibly easy to craft. These adorable treats are not only a visual delight with their charming paw print design, but they also make for a fantastic family baking activity, inviting kids to join in on the fun. With just a cookie mix as the base, you can prepare these sweet morsels in no time, making them a quick go-to for any last-minute celebrations. Are you ready to create some sweet memories in the kitchen this Easter?
Why Are Bunny Paw Cookies So Fun?
Baking with Kids: These Bunny Paw Thumbprint Cookies are a fantastic activity for the entire family. Kid-friendly and engaging, they allow little hands to help shape and decorate these adorable treats. Quick Preparation: With a cookie mix base, you can whip them up in a flash—perfect for those unexpected guests or spontaneous Easter celebrations. Visual Appeal: The charming paw print design makes them a delightful centerpiece, sure to impress both kids and adults alike. Customizable Fun: Feel free to experiment with different colors for the icing, making them suitable for any festive occasion. For more fun ideas, check out these delicious Marshmallow Swirl Cookies or Cosmic Brownie Cookies that are also great baking projects!
Bunny Paw Thumbprint Cookies Ingredients
• Needed to create these adorable Bunny Paw Thumbprint Cookies.
Advertisement
For the Dough
- Betty Crocker Sugar Cookie Mix – The essential base for a delightful and sweet cookie.
- 1 Egg – Binds ingredients for a perfectly chewy texture.
- 1 Stick of Butter (4 oz) – Adds richness and depth; ensure it’s softened at room temperature for easier mixing.
For the Icing
- 1 Cup of Powdered Sugar – Provides the ideal sweetness and texture for your icing.
- 3.5 Teaspoons of Milk – Helps achieve the perfect icing consistency; almond milk is a great dairy-free alternative!
- Dash of Vanilla Extract – Elevates flavor; can substitute with any other extract you enjoy.
- Red Food Color – Adds a pop of color for decorating; feel free to explore other shades for variety.
- Ziploc or Decorating Bag – A must-have for piping your icing onto the cookies with precision.
Step‑by‑Step Instructions for Bunny Paw Thumbprint Cookies
Step 1: Preheat Oven
Start by preheating your oven to 375°F (or 350°F for dark or nonstick baking sheets) to ensure a perfectly baked Bunny Paw Thumbprint Cookies. This step is key as a pre-heated oven helps the cookies rise and bake evenly. While the oven warms up, gather your baking sheet and line it with parchment paper for easy cookie removal.
Step 2: Prepare Dough
In a mixing bowl, combine the Betty Crocker Sugar Cookie Mix, room temperature butter, and egg. Use a hand mixer or wooden spoon to blend these ingredients until they form a smooth dough, which will take about 2-3 minutes. Watch for a cohesive texture that remains slightly sticky—this means you’re ready for the next exciting step.
Step 3: Shape Cookies
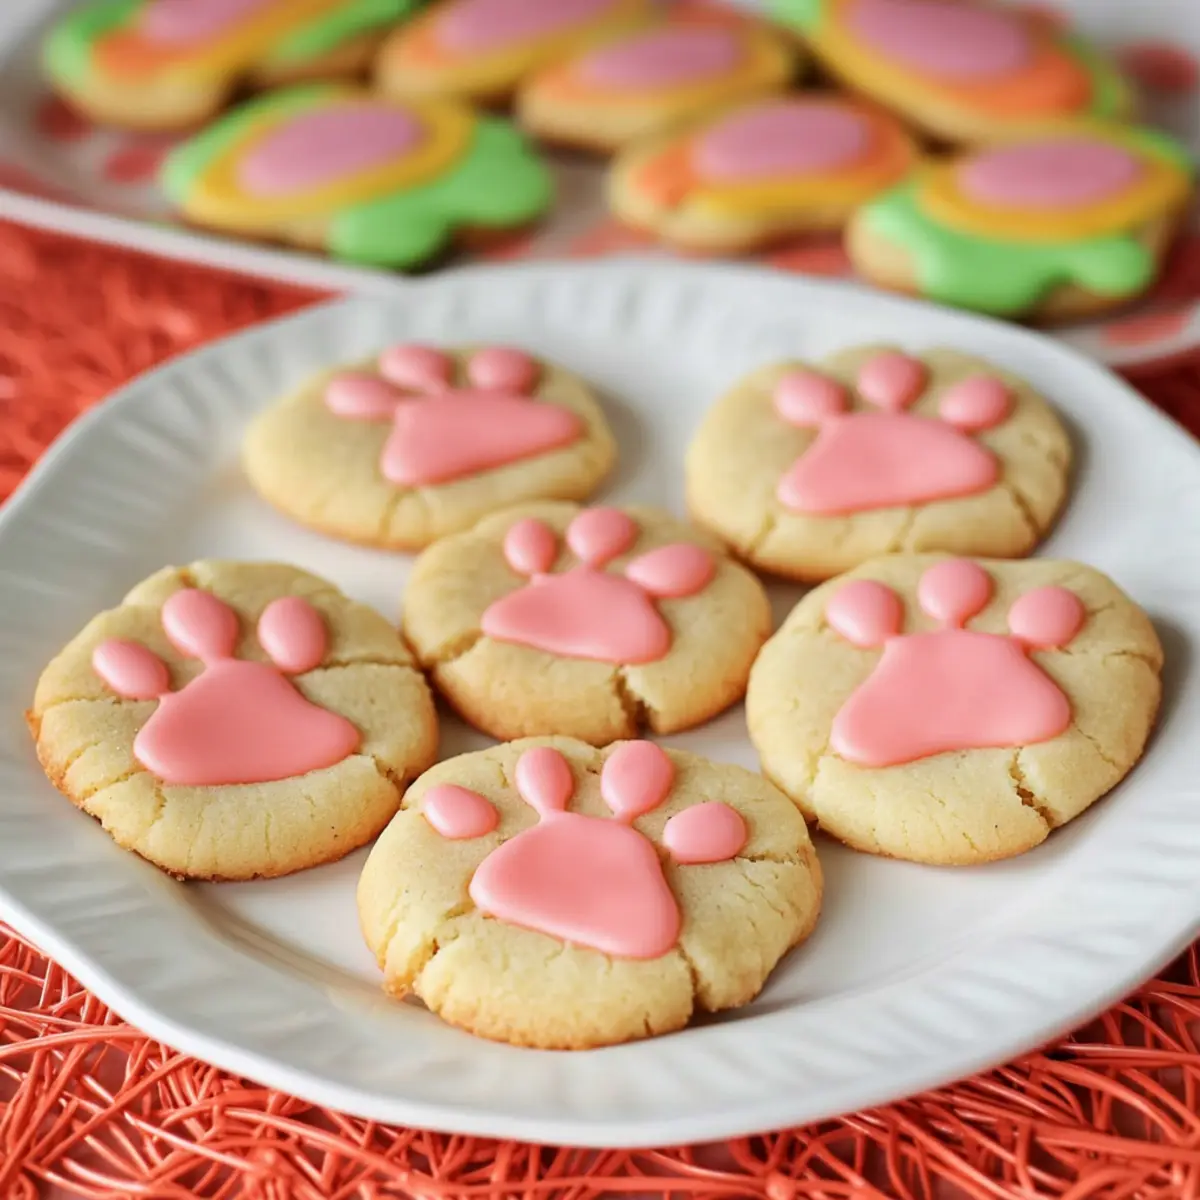
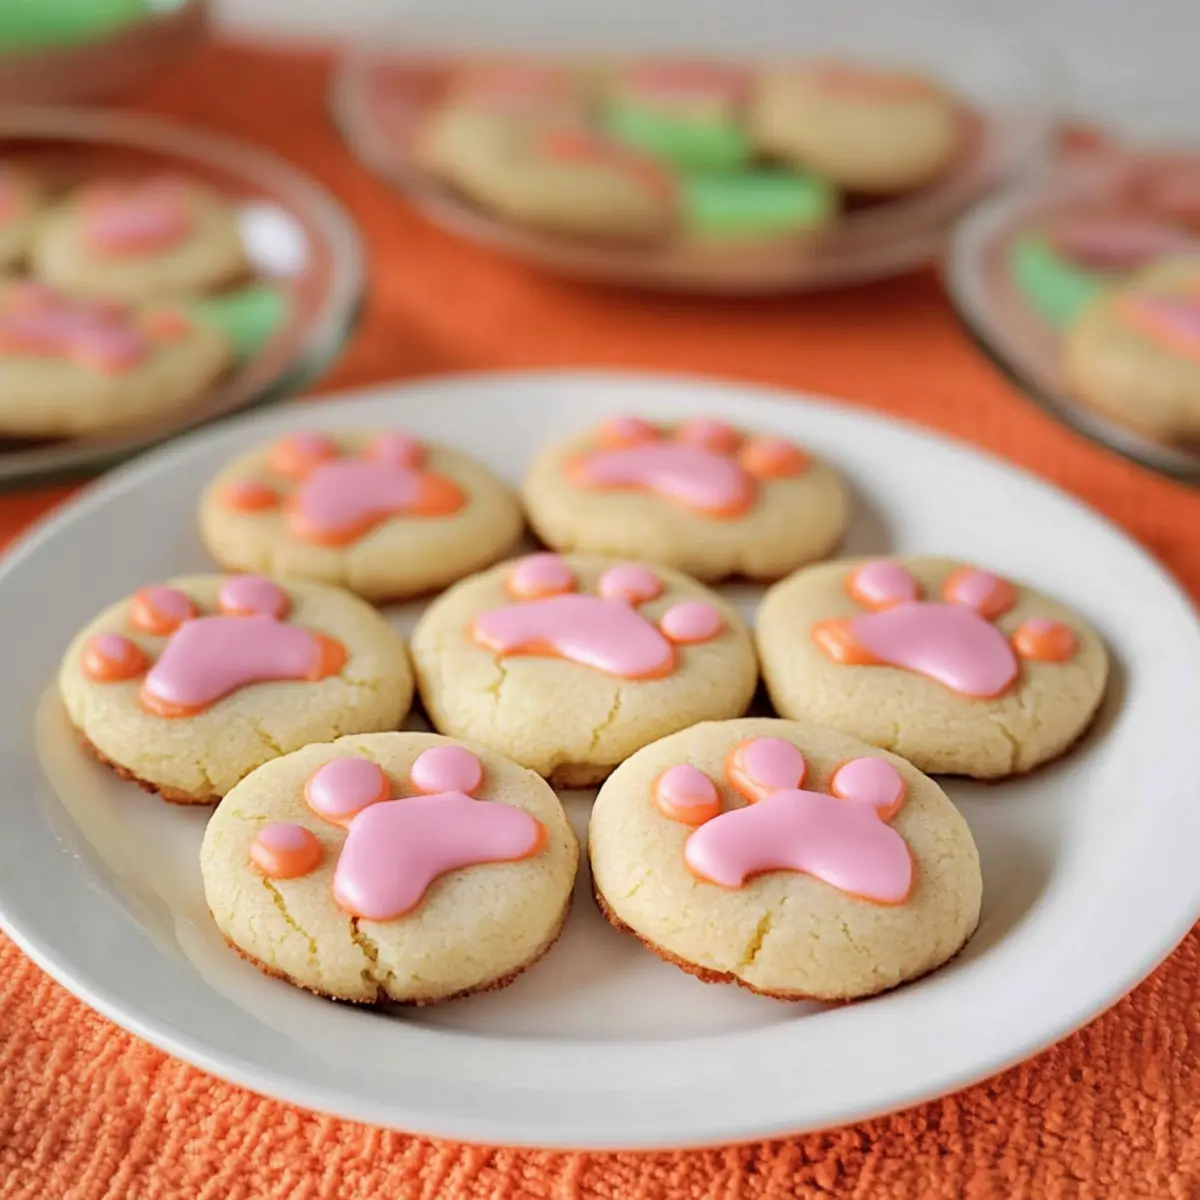
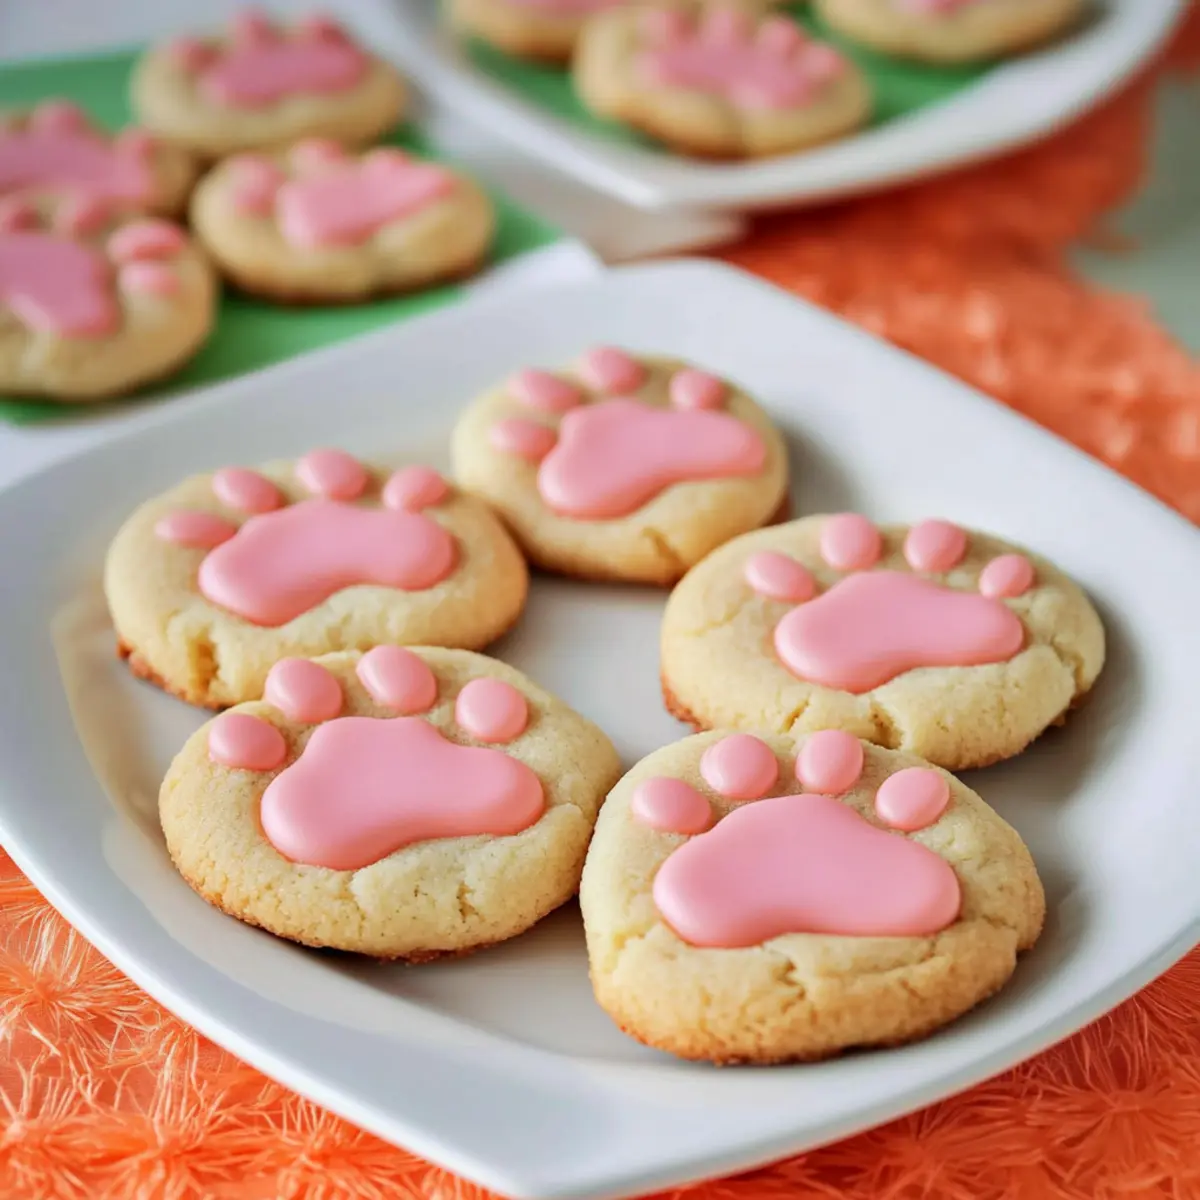
Now comes the fun part—shaping the cookies! Scoop out dough and roll it into balls, roughly the size of a tablespoon. To create the adorable paw print design, divide each ball into three smaller pieces for the toes and one larger piece for the paw. Flatten the larger ball slightly so your Bunny Paw Thumbprint Cookies can really shine.
Step 4: Bake
Place your shaped cookies on the lined baking sheet, ensuring they are spaced about 2 inches apart. Slide them into the preheated oven and bake for 6-9 minutes, or until they turn golden brown around the edges. As they bake, keep an eye out for that lovely golden color, which signals they’re ready!
Step 5: Create Indents
Once your Bunny Paw Thumbprint Cookies are out of the oven, immediately use a measuring spoon (or your thumb) to gently press into the center of each cookie, forming indents for the icing. This is a crucial step that should be done while they’re still warm to maintain their shape and make icing easier later.
Step 6: Decorate
Allow the cookies to cool slightly before decorating. In a separate bowl, mix together the powdered sugar, milk, and vanilla extract until smooth. Transfer this icing into a Ziploc or decorating bag, and pipe it into the indents of your Bunny Paw Thumbprint Cookies. Let them sit until the icing firms up, showcasing your adorable paw print design!
What to Serve with Bunny Paw Thumbprint Cookies
Imagine a sun-drenched afternoon, where the scent of freshly baked cookies mingles with laughter, and every bite brings a touch of sweetness and joy.
- Bright Fruit Salad: A medley of colorful fruits adds a refreshing hint that perfectly contrasts the sweetness of the cookies.
- Melted Chocolate Dipping Sauce: Rich and indulgent, this sauce brings a luxurious touch to your Bunny Paw Thumbprint Cookies for those who crave extra sweetness.
- Vanilla Ice Cream: A scoop of creamy vanilla ice cream creates a delightful temperature contrast, making every bite of cookie experience a fun treat.
- Milk or Almond Milk: Classic pairings that balance the sweetness; milk makes every cookie feel nostalgic and cozy, while almond milk adds a unique nutty flavor.
- Carrot Sticks with Hummus: For a healthy balance, serve crunchy carrot sticks with creamy hummus for a fun way to get some veggies in while enjoying your cookies.
- Lemonade or Iced Tea: Refreshing beverages that can cool down warm cookie moments and add a zesty note to your gathering, enhancing the cheerful bakery atmosphere.
Make Ahead Options
These Bunny Paw Thumbprint Cookies are a fantastic candidate for meal prep, helping you save time during busy baking sessions! You can prepare the cookie dough up to 24 hours in advance and refrigerate it until you’re ready to bake. Simply roll the dough into balls and shape them for the paw prints before storing in an airtight container. When you’re ready to enjoy your cookies, bake them directly from the fridge (add a minute or two to the baking time if they’re very cold), and follow the finishing steps for decorating with icing. This method allows for fresh, delicious cookies with minimal effort, ensuring they’re just as delightful as when made fresh!
Bunny Paw Thumbprint Cookies Variations
Customize your Bunny Paw Thumbprint Cookies to suit your taste and make them even more delightful!
-
Chocolate Twist: Swap the sugar cookie mix for chocolate chip cookie mix for a rich, chocolatey version. Perfect for sweet tooths!
-
Peanut Butter Delight: Use peanut butter cookie mix instead for a nutty flavor that pairs wonderfully with the icing. Kids will love the change!
-
Dairy-Free Icing: Substitute regular milk with almond or oat milk in the icing for a dairy-free alternative, allowing everyone to indulge.
-
Vibrant Colors: Play with different food coloring to create bright, festive icings for various holidays or parties. How about pastel shades for Easter?
-
Sprinkle Surprise: Add sprinkles to the icing while it’s still wet to give these cookies a whimsical and colorful touch. Sprinkles always bring smiles!
-
Nuts for Crunch: Fold in chopped nuts like walnuts or pecans into the dough for an unexpected texture twist and a nutty flavor enhancement.
-
Flavored Extracts: Experiment with different extracts in your icing such as almond or lemon for a unique flavor profile that surprises the taste buds.
-
Cocoa Powder: Incorporate a spoonful of unsweetened cocoa powder into the dough for a cocoa-infused cookie that chocolate lovers will adore.
For additional baking inspiration, these delightful Pistachio Shortbread Cookies and Filled Snowball Cookies are also fantastic additions to your holiday treats!
Expert Tips for Bunny Paw Thumbprint Cookies
-
Butter Temperature: Ensure your butter is softened at room temperature; this helps create a smooth dough and proper texture in your Bunny Paw Thumbprint Cookies.
-
Indenting Method: Press into the cookies while warm to create perfect indents; this preserves their shape and makes it easier to add icing.
-
Small Batches: Bake in small batches for better monitoring of doneness; this reduces the risk of overbaking your delicious cookies.
-
Icing Consistency: Adjust the milk in your icing for desired thickness; a thicker icing is better for holding its shape in the cookie indents.
-
Storage Tip: Store iced cookies in an airtight container to keep them fresh, but eat within a few days for the best icing texture.
How to Store and Freeze Bunny Paw Thumbprint Cookies
Room Temperature: Store your Bunny Paw Thumbprint Cookies at room temperature in an airtight container for up to 1 week to maintain their delightful texture and flavor.
Fridge: If you prefer your cookies chilled, they can be kept in the fridge for up to 2 weeks, but be aware that this may slightly alter their texture.
Freezer: To freeze, place the cooled cookies in a single layer on a baking sheet, freeze until solid, then transfer to a freezer bag. They can be stored for up to 3 months.
Reheating: When ready to enjoy, thaw cookies in the fridge overnight before serving. For a warm treat, pop them in the microwave for about 10 seconds!
Bunny Paw Thumbprint Cookies Recipe FAQs
What is the best way to choose ripe ingredients for my Bunny Paw Thumbprint Cookies?
Absolutely! When selecting your butter, make sure it’s at room temperature before mixing; this ensures a smooth dough. If you’re substituting milk, a day or two before baking, pick up some almond milk or any milk option you prefer. Fresh ingredients always elevate your cookies!
How should I store Bunny Paw Thumbprint Cookies to keep them fresh?
Store your Bunny Paw Thumbprint Cookies in an airtight container at room temperature for up to 1 week. I usually place a piece of parchment paper between layers to prevent sticking, giving your cookies a longer shelf life and maintaining their delightful texture!
Can I freeze Bunny Paw Thumbprint Cookies?
Yes, you can freeze your Bunny Paw Thumbprint Cookies! To do this, let them cool completely, then place them in a single layer on a baking sheet. Freeze until solid, which usually takes about 1-2 hours. After that, transfer them to a freezer bag or container for up to 3 months. When you’re ready to enjoy, just thaw in the fridge overnight or give them a quick zap in the microwave for 10 seconds for a warm treat.
What should I do if my cookies spread too much when baking?
Very! If your Bunny Paw Thumbprint Cookies spread too much, it might be due to the dough being too warm. Ensure your butter is adequately softened but not melted, and consider chilling the dough for 20-30 minutes before baking. This will help control the spreading and maintain their adorable shape!
Are Bunny Paw Thumbprint Cookies suitable for people with allergies?
It’s important to be mindful! These cookies contain gluten and dairy due to the cookie mix and butter. If you’re baking for those with allergies, consider using a gluten-free cookie mix and substituting the butter with a dairy-free alternative like coconut oil or margarine. Always check package labels for potential allergens, especially if serving others.
How can I adjust the icing recipe if I want a different flavor?
Of course! To make a flavored icing for your Bunny Paw Thumbprint Cookies, you can simply substitute the vanilla extract with another flavoring, like almond or lemon extract. Just add about 1/2 teaspoon of your chosen extract to the icing mixture along with the milk and powdered sugar. This gives you the freedom to customize the flavor—have fun with it!
Bunny Paw Thumbprint Cookies: Cute Treats for Family Fun
Ingredients
Equipment
Method
- Preheat your oven to 375°F (or 350°F for dark or nonstick sheets). Line a baking sheet with parchment paper.
- Combine the cookie mix, butter, and egg in a bowl. Mix until a smooth dough forms, about 2-3 minutes.
- Scoop out dough, roll into balls, and shape them into paw prints by dividing each ball.
- Bake for 6-9 minutes until golden brown around the edges.
- Make indents in the center of each cookie while warm using a spoon or thumb.
- Mix icing ingredients together and pipe into the cookie indents. Let them sit until icing firms.