Advertisement
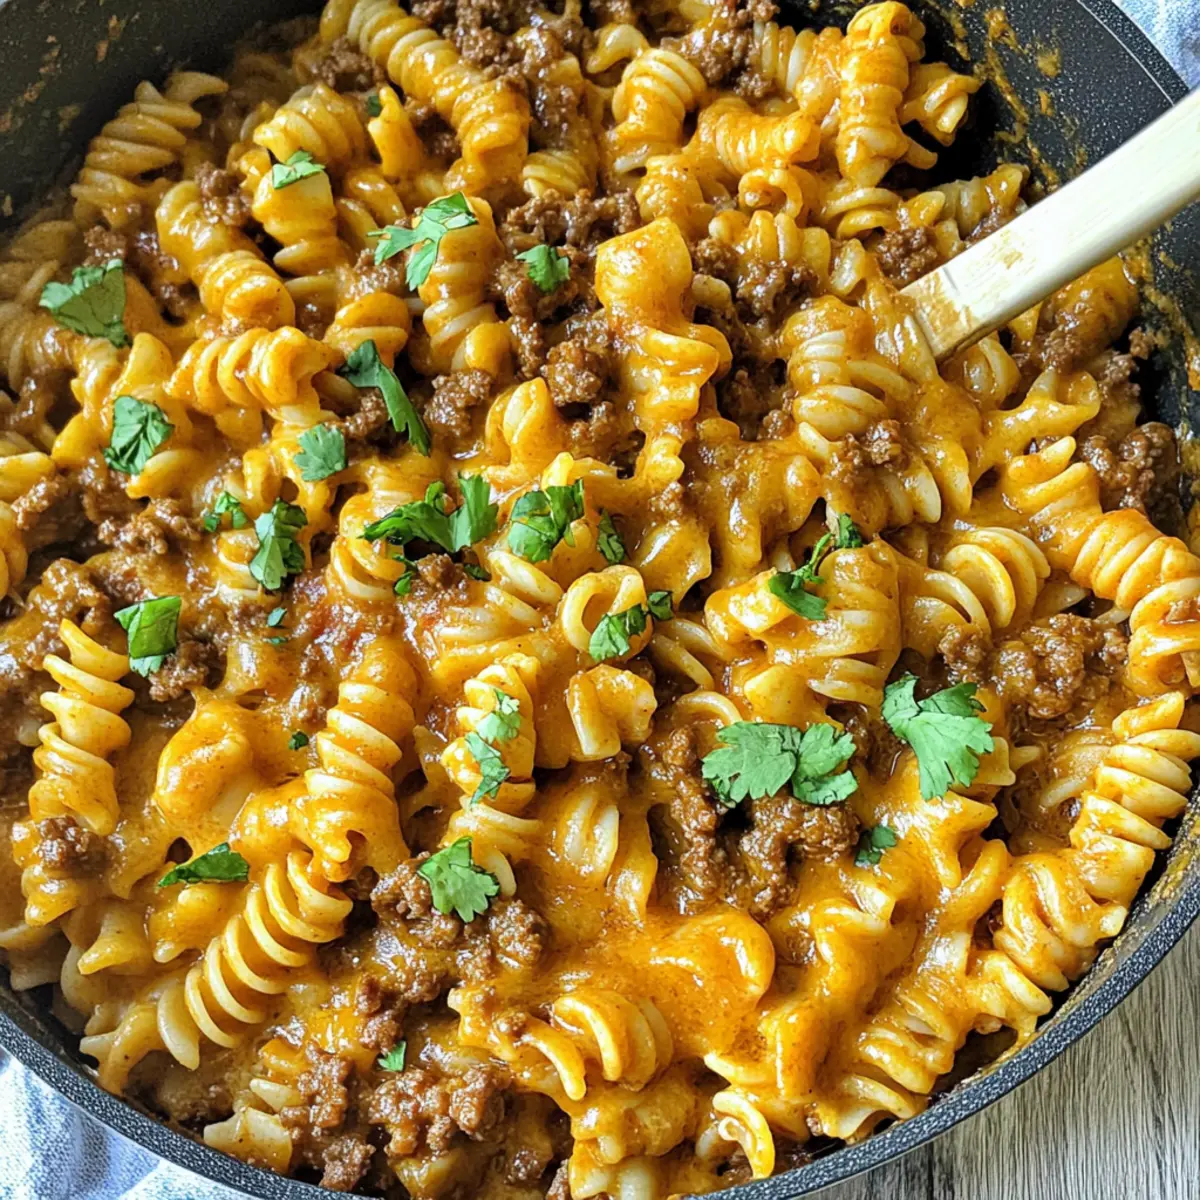
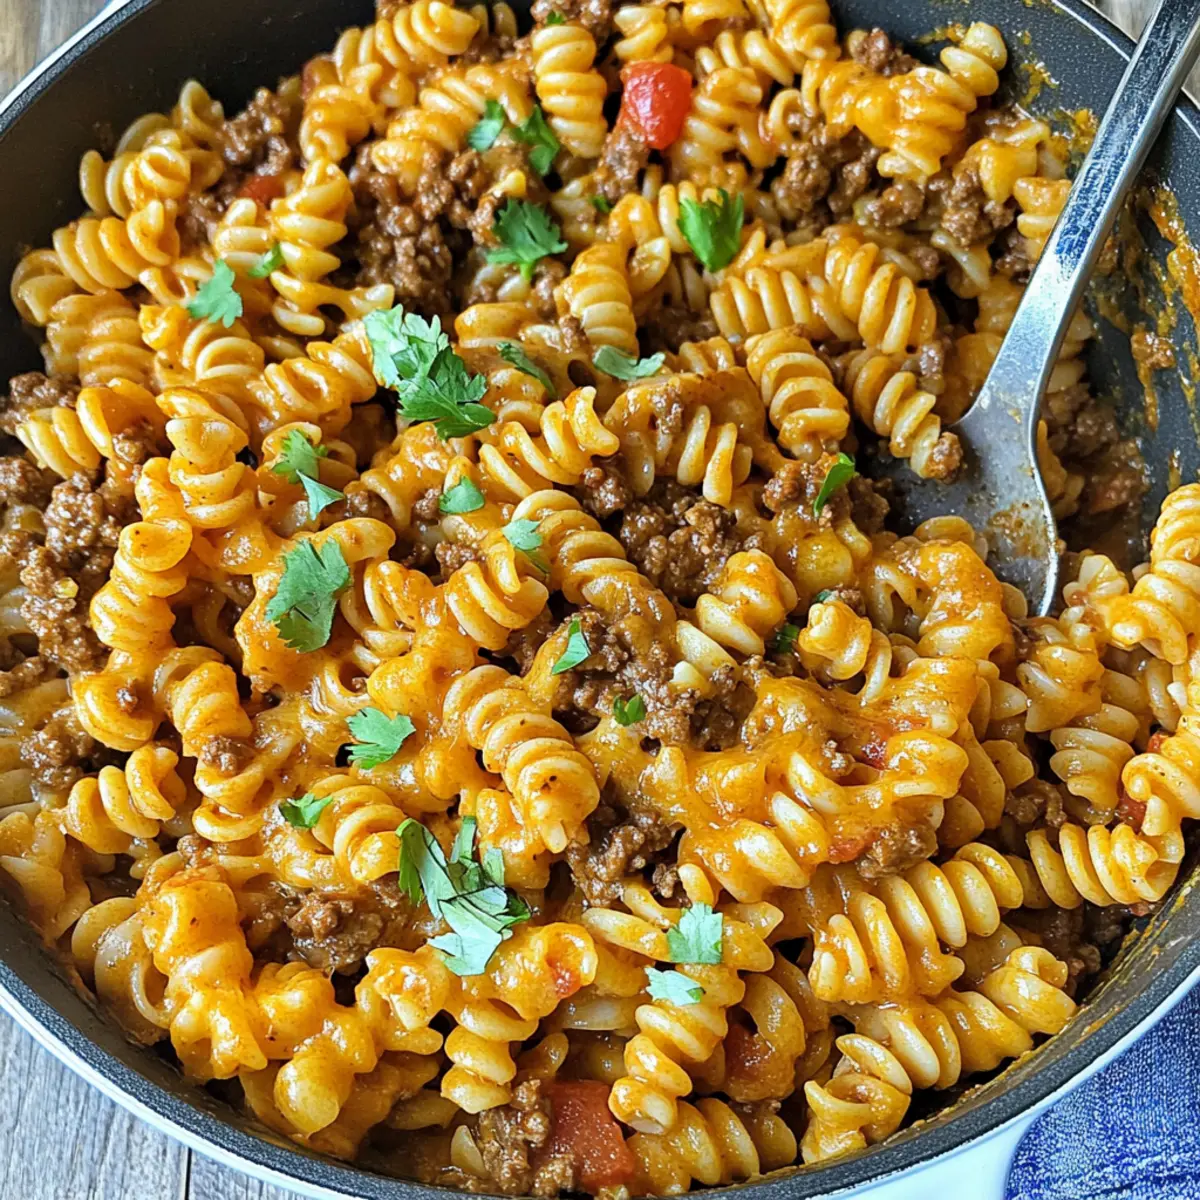
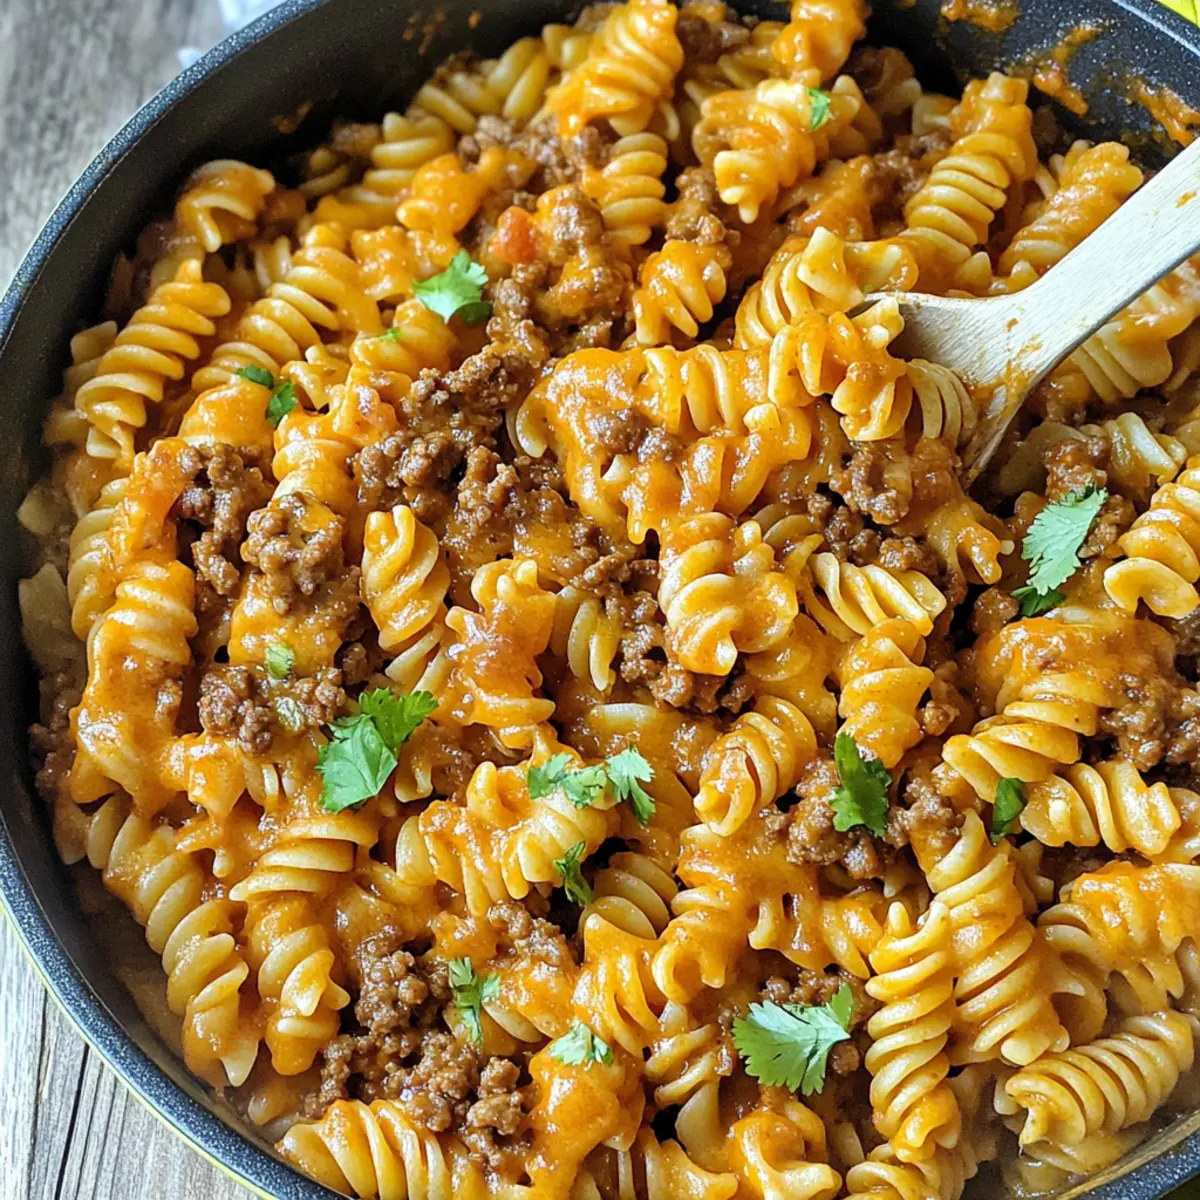
As the sun dips below the horizon, the hustle of the day gives way to the comforting aroma of a simmering dish that feels like a warm hug. Enter my One-Pot Cheesy Taco Pasta, a savory symphony where ground beef dances with cheesy goodness and a zesty taco twist. This quick meal comes together in just around 30 minutes, making it a lifesaver for busy weeknights or spontaneous family gatherings. Plus, its one-pot magic means your cleanup is as easy as enjoying the last bite — a true win-win! Get ready to impress both kids and adults alike with this creamy, hearty creation that’s sure to become a family favorite. What’s your favorite topping for a taco-inspired dish?
Why is One-Pot Cheesy Taco Pasta a Must-Try?
Simplicity: This recipe offers the ease of one-pot cooking, perfect for weeknight dinners when time is limited.
Bursting with Flavor: The blend of savory beef, spices, and melty cheese creates a deliciously rich experience.
Advertisement
Quick & Convenient: Whip it up in about 30 minutes, making it a fantastic option for busy schedules.
Family-Friendly: Kids love the comforting, cheesy goodness, and you can customize with fun toppings like chopped tomatoes or avocado.
Versatile: Whether you prefer ground turkey for a lighter meal or adding veggies for extra nutrients, this dish adapts to your needs. For similar flavors, check out my Cheesy Loaded Meatloaf or Golden & Savory Cheesy Sausage Bites for more cheesy inspiration!
Cheesy Taco Pasta Ingredients
• Here’s everything you need to create this delightful Cheesy Taco Pasta!
For the Pasta
- Ground Beef – a hearty protein that you can swap with ground turkey for a lighter option.
- Rotini Pasta – holds onto the creamy sauce beautifully; feel free to use other short pasta shapes if you like.
For the Sauce
- Mild Salsa – adds tangy flavor; brands like Pace or Ortega work well here.
- Water – hydrates the pasta while cooking; essential for a perfect texture.
For Seasoning
- Taco Seasoning – infuses the dish with classic taco flavors; homemade seasoning (3 ½ tbsp recommended) can elevate the taste.
- Salt – enhances all the flavors; adjust according to your preference.
- Black Pepper – a pinch adds subtle heat; use freshly ground for the best flavor.
For the Creaminess
- Mexican-Style Cheese – offers rich, creamy goodness, but feel free to substitute with cheddar or a vegan option.
Optional Toppings
- Chopped Tomatoes – adds freshness and color to your dish.
- Avocado – provides creamy texture and a rich taste.
- Crushed Tortilla Chips – for added crunch and a fun twist.
- Chopped Cilantro – brightens flavors with a fresh finish.
Gather these ingredients, and let the one-pot magic begin!
Step‑by‑Step Instructions for One-Pot Cheesy Taco Pasta
Step 1: Preheat and Brown the Beef
Begin by placing a large deep skillet over medium heat. Once the skillet is hot, add the ground beef, seasoning it lightly with salt and pepper. Cook for about 5–7 minutes, stirring frequently until the beef is fully browned and no longer pink. Drain any excess grease from the skillet to keep your Cheesy Taco Pasta lighter and healthier.
Step 2: Add the Flavor Makers
Now that the beef is perfectly cooked, stir in the taco seasoning, ensuring every morsel of meat is coated in those vibrant spices. Pour in 2 cups of water and 1 cup of mild salsa, mixing well. Next, add 12 ounces of uncooked rotini pasta, stirring it into the flavorful mixture to incorporate all elements of your One-Pot Cheesy Taco Pasta.
Step 3: Bring to a Boil
Raise the heat slightly to bring the mixture to a gentle boil, watching closely for bubbles to form on the surface. Once boiling, cover the skillet with a lid and reduce the heat to a simmer. Allow the pasta to cook for about 15 minutes, stirring occasionally to prevent sticking and ensure even cooking as it absorbs all the delicious flavors.
Step 4: Check the Pasta
After 15 minutes, carefully remove the lid and check if the pasta is tender and cooked through. You want it al dente, with a slight firmness in the center. If necessary, allow it to simmer for an additional few minutes, keeping a close eye to prevent overcooking while your Cheesy Taco Pasta takes shape.
Step 5: Melt the Cheese
Once the pasta is just right, take the skillet off the heat. Stir in 1 ½ cups of shredded Mexican-style cheese until it beautifully melts and blends into the creamy sauce. Taste your Cheesy Taco Pasta, adjusting with more salt and pepper as needed to fit your family’s palate, ensuring it’s as flavorful as possible.
Step 6: Serve with Toppings
Spoon your decadent One-Pot Cheesy Taco Pasta into serving bowls, allowing everyone to customize their dish. Set out a variety of optional toppings like chopped tomatoes, avocado, crushed tortilla chips, and fresh cilantro for added texture and vibrant flavors. Gather your loved ones, and enjoy a cozy meal together!
Storage Tips for Cheesy Taco Pasta
-
Fridge: Store leftover Cheesy Taco Pasta in an airtight container; it will keep fresh for up to 3 days. This makes it easy to enjoy the flavors again.
-
Freezer: If you want to save it for later, freeze the pasta in a freezer-safe container for up to 3 months. Thaw overnight in the fridge before reheating.
-
Reheating: Reheat leftovers in the microwave or on the stovetop. Add a splash of water or milk to revive the creamy texture and prevent drying out.
-
Storing Toppings: Keep optional toppings like chopped tomatoes or avocado separate until you’re ready to serve, ensuring they stay fresh and crisp.
Expert Tips for One-Pot Cheesy Taco Pasta
Simmer Properly: Allow the dish to simmer covered without stirring too much; this helps pasta absorb the rich taco flavors fully.
Avoid Grease: Drain the ground beef well after browning to remove excess fat, resulting in a lighter version of Cheesy Taco Pasta.
Customize Spice Levels: For an extra kick, consider adding spices like garlic powder or cayenne, catering to both adults and kids.
Check Pasta Texture: Don’t overcook the pasta; it should be tender yet firm in the center. You want that delightful al dente bite!
Creative Toppings: Upgrade your cheesy dish by offering fun toppings like crushed tortilla chips, which add crunch and a burst of flavor.
What to Serve with One-Pot Cheesy Taco Pasta
As you gather around the table with this cheesy masterpiece, envision a spread that complements its rich flavors and textures, making for a delightful meal.
-
Simple Side Salad: A light mix of greens with a tangy vinaigrette offers a refreshing contrast to the creamy pasta and adds a pop of color to your plate.
-
Warm Tortilla Chips: Crispy and golden, these are perfect for scooping up extra cheesy goodness while adding satisfying crunch with every bite.
-
Grilled Corn on the Cob: Sweet and smoky, this classic side pairs beautifully with the savory notes of your dish, creating a taste sensation everyone loves.
-
Guacamole: The creamy avocado dip enhances the taco vibe with its freshness, making every forkful a delicious journey of flavors.
-
Mexican Street Corn Salad: This zesty side brings corn, lime, and cotija cheese together for a vibrant addition that echoes the warmth of taco seasonings.
-
Pina Colada Mocktail: Treat yourself to a tropical beverage that offsets the spice with its sweet coconut notes, making your mealtime feel festive and fun.
-
Chocolate Chip Cookies: End on a sweet note with these warm, gooey cookies that everyone will adore. What a great way to wrap up a family feast!
Make Ahead Options
Preparing your One-Pot Cheesy Taco Pasta in advance is a fantastic time-saver for busy weeknights! You can brown the ground beef and mix in the taco seasoning up to 24 hours ahead. Just store the mixture in an airtight container in the refrigerator. You can also measure out the pasta and salsa separately for easy assembly. When it’s time to enjoy your meal, simply reheat the beef mixture in your skillet, stir in the water, and add the rotini. Cook until the pasta is tender, then melt in the cheese for that creamy goodness. This way, you’ll have a delicious and hearty meal ready with minimal effort—just as satisfying as if you made it from scratch!
Cheesy Taco Pasta Variations & Substitutions
Feel free to have fun with this recipe and make it your own with these tasty twists!
-
Ground Turkey: Swap ground beef for ground turkey for a leaner yet still flavorful option.
-
Veggie Boost: Toss in diced bell peppers and spinach for a colorful, nutrient-packed meal that’s deliciously satisfying.
-
Pasta Swap: Use penne or fusilli instead of rotini for a fun change in texture and shape; both hold sauce wonderfully.
-
Spicy Kick: Add diced jalapeños or a sprinkle of red pepper flakes to bring a fiery kick to your cheesy dish.
-
Different Cheese: Experiment with pepper jack cheese for creaminess with a spicy twist, or try mozzarella for a milder flavor profile.
-
Cilantro-Lime: Stir in fresh lime juice and chopped cilantro before serving for a refreshing burst that brightens every bite.
-
Creamy Vegan Option: Use a plant-based ground meat alternative and dairy-free cheese to create a fully vegan version that doesn’t skimp on flavor.
-
Salsa Variations: Change up the salsa with a smoky chipotle salsa or a corn salsa for different flavor notes; your taste buds will thank you!
If you enjoy cheesy concoctions, you might also love my Cheesy Chicken Roll and Ground Beef Pasta for more excitement in the kitchen!
One-Pot Cheesy Taco Pasta Recipe FAQs
How do I choose the right ground beef for this recipe?
Absolutely! Look for 80/20 ground beef, which offers a good balance of flavor and fat. This ensures your Cheesy Taco Pasta has delicious richness without being overly greasy. If you prefer a leaner option, ground turkey works wonderfully and can lighten the dish’s calorie count.
What is the best way to store leftover Cheesy Taco Pasta?
After enjoying your meal, transfer any leftovers into an airtight container. This dish stays fresh in the refrigerator for up to 3 days. When ready to enjoy again, simply reheat in the microwave or stovetop, adding a splash of water or milk to revive its creamy texture.
Can I freeze One-Pot Cheesy Taco Pasta?
Very! To freeze your Cheesy Taco Pasta, allow it to cool completely before placing it into a freezer-safe container. It can last for up to 3 months. When you’re ready to eat, thaw it overnight in the fridge and reheat gently on the stove or microwave. A little extra liquid may help maintain its creaminess.
What should I do if my pasta turns out mushy?
If you find your pasta has become mushy, it may be that it cooked for too long. Next time, check the pasta a minute or two earlier, ideally around the 15-minute mark. The key is to remove it from heat just as it becomes al dente. Remember, it’s all about that perfect, slightly firm texture!
Are there any dietary considerations for this recipe?
Definitely! For those with allergens, be cautious about the cheese and check if gluten-free pasta is needed for gluten sensitivities. If you’re catering to kids, feel free to adjust the taco seasoning to be milder or skip spicy toppings entirely. And remember, a bit of creativity with optional toppings can make the meal fun for everyone!
Can I add vegetables to this dish?
Absolutely! You can enhance your Cheesy Taco Pasta by sautéing bell peppers, spinach, or even corn with the ground beef. Adding veggies not only boosts the nutritional content but also brings vibrant colors and textures to your one-pot creation. Just make sure to keep an eye on the cooking time so everything is perfectly cooked!
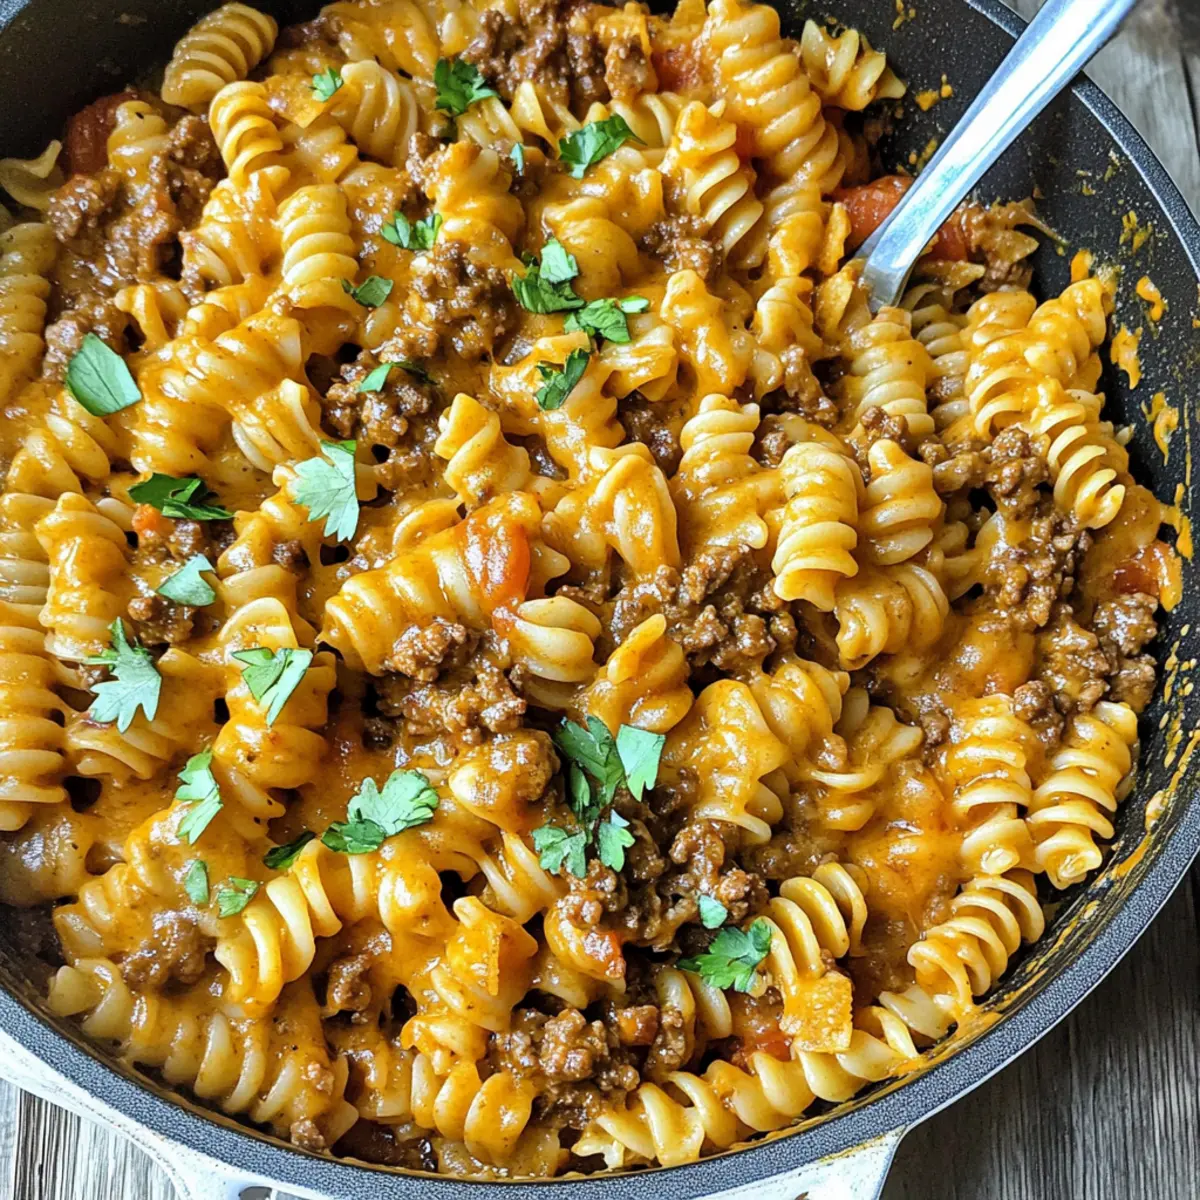
Cheesy Taco Pasta One-Pot Delight for Busy Families
Ingredients
Equipment
Method
- Preheat and Brown the Beef: Place a large deep skillet over medium heat. Add the ground beef, lightly seasoning with salt and pepper. Cook for about 5–7 minutes until fully browned, then drain excess grease.
- Add the Flavor Makers: Stir in taco seasoning, then pour in the water and mild salsa. Mix well before adding the uncooked rotini pasta.
- Bring to a Boil: Increase heat to bring the mixture to a gentle boil. Cover with a lid, reduce heat to a simmer, and cook for about 15 minutes, stirring occasionally.
- Check the Pasta: After 15 minutes, remove the lid and check if the pasta is tender and cooked al dente. Simmer a few more minutes if needed.
- Melt the Cheese: Off heat, stir in the shredded Mexican-style cheese until melted and blended into a creamy sauce. Adjust seasoning as needed.
- Serve with Toppings: Spoon into serving bowls and let everyone customize with optional toppings like tomatoes, avocado, tortilla chips, and cilantro.