Advertisement
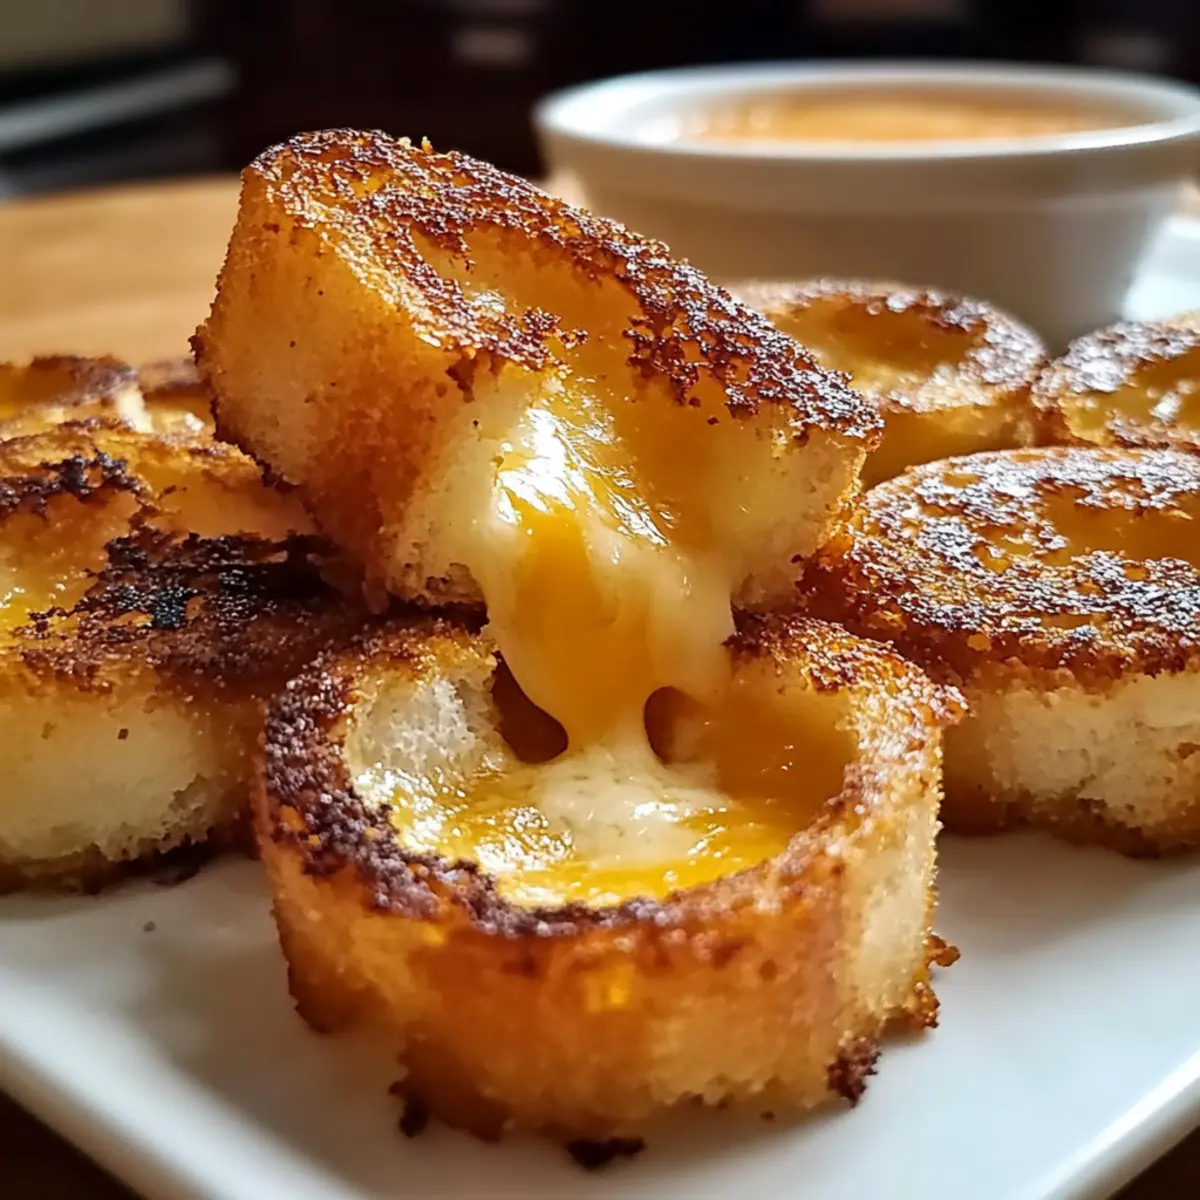
As I flipped through my recipe journal, a delightful memory struck me: the scent of grilled cheese sandwiches wafting through the kitchen while my family gathered around the table, eager for a bite. Inspired by that nostalgic comfort, I whipped up these Mini Grilled Cheese Dippers, turning a classic favorite into an irresistible appetizer that’s perfect for sharing. Whether it’s game day or a cozy afternoon snack, this recipe is quick to prepare and sure to delight both kids and adults alike. Plus, it’s easily customizable with a gluten-free option, making it a versatile hit for any gathering. Curious how these dippers can elevate your next meal? Let’s dive in!
Why Are Mini Grilled Cheese Dippers So Irresistible?
Comforting Nostalgia: These dippers take the beloved grilled cheese sandwich and transform it into a playful, shareable treat that evokes fond childhood memories.
Quick Prep Time: In just minutes, you can whip up this crowd-pleaser, making it an ideal choice for unexpected guests or a speedy meal after a busy day.
Advertisement
Customizable Flavors: Feel free to experiment with different cheese combinations or delightful toppings like pesto or turkey to suit your palate.
Perfect for Dipping: Enjoy these dippers with your favorite soups or sauces, enhancing the flavor experience with every bite. Elevate your snacking with other delicious options like Cream Cheese Chicken or serve alongside crispy Mini Blueberry Muffins for a sweet finish!
Gluten-Free Adaptable: With a straightforward substitution, your gluten-free friends can savor the same cheesy goodness enjoyed by everyone else!
Mini Grilled Cheese Dipper Ingredients
Here’s everything you’ll need to whip up your own delicious Mini Grilled Cheese Dippers!
For the Dippers
- Bread – Choose sturdy sandwich bread to avoid sogginess; gluten-free bread is a great alternative!
- Cheese – Use a blend of 2/3 sharp cheddar (for flavor) and 1/3 provolone (for meltability) to create that gooey, irresistible center.
- Fat for Frying (e.g., butter or mayo) – Important for achieving that golden, crispy exterior; a thin layer works wonders!
Step‑by‑Step Instructions for Mini Grilled Cheese Dippers
Step 1: Prepare the Bread
Begin by cutting your sturdy sandwich bread into quarters or your desired size for dippers. Aim for bite-sized pieces that will hold up well when grilled and dipped. Arrange them on a clean surface, ready for assembly. Take a moment to appreciate the texture and aroma of the fresh bread as you prepare for the next delicious steps.
Step 2: Assemble the Sandwiches
Layer your cheese between two pieces of bread to create mini sandwiches. For optimal flavor and meltiness, use a blend of two-thirds sharp cheddar and one-third provolone. Ensure the cheese is well-distributed and check for even edges to maintain structural integrity while grilling. This step is crucial for the gooeyness that makes Mini Grilled Cheese Dippers irresistible.
Step 3: Top the Sandwiches
If you like an extra cheesy delight, feel free to add more cheese or even thin toppings like a slice of ham or a smear of pesto between layers. This personalization not only enhances flavor but also makes your dippers even more unique. As you top off your sandwiches, think about the variety of flavors that will complement the melted cheese beautifully.
Step 4: Grill the Sandwiches
Heat your fat of choice, whether butter or mayo, in a non-stick skillet over medium-low heat. Once the fat is sizzling nicely, place your assembled sandwiches in the pan, making sure not to overcrowd. This allows each sandwich to crisp up nicely on all sides. Take in the enticing smell as they begin to grill to golden perfection.
Step 5: Cook to Golden Perfection
Grill the sandwiches for about 3-4 minutes on one side until they turn a beautiful golden brown and the cheese begins to melt. Keep an eye on them, adjusting the heat as needed to prevent any burning. The crunch of the bread should be audible as you prepare for the next flip that will reveal their deliciously toasted side.
Step 6: Flip and Finish
Carefully flip each sandwich, letting the other side cook for an additional 3-4 minutes. A spatula works best here to ensure an even flip without losing any cheesy goodness. The goal is to achieve a perfect, golden crust that holds the warm, melted center securely, ensuring each Mini Grilled Cheese Dipper is enticing.
Step 7: Rest and Slice
Once both sides are perfectly grilled, remove your Mini Grilled Cheese Dippers from the skillet and let them rest for a minute. This cooling period helps ensure that the cheese stays deliciously gooey but doesn’t burn your fingers when slicing. After resting, use a sharp knife to cut each sandwich into dippers, making them ready for dipping.
Step 8: Create the Dippers
Arrange the sliced sandwiches neatly on a serving platter, showcasing your golden and crispy creations. Keep them close together for a delightful presentation, and perhaps sprinkle some herbs or spices on top for a garnish. This is the moment to admire the appealing sight of your Mini Grilled Cheese Dippers before they are devoured.
Step 9: Serve Immediately
Serve your Mini Grilled Cheese Dippers immediately for the best experience, ideally with warm tomato soup or your favorite dipping sauces. Enjoy the combination of creamy, cheesy bites with the delightful contrast of your dipping trio. Watch as your family or guests delight in this comforting, nostalgic snack!
Make Ahead Options
These Mini Grilled Cheese Dippers are ideal for meal prep, effortlessly fitting into your busy schedule! You can assemble the sandwiches (without grilling) and refrigerate them up to 24 hours in advance. Simply layer the cheese between the bread and store them in an airtight container to prevent drying out. On the day you plan to serve, just heat your skillet and grill the assembled dippers for about 3-4 minutes per side until golden and gooey. This way, you can enjoy these delicious treats with minimal effort and time, ensuring they remain just as delightful as when freshly made!
Mini Grilled Cheese Dippers Variations
Feel free to unleash your creativity and customize these delightful dippers to suit your tastebuds!
-
Gluten-Free: Substitute gluten-free bread to enjoy this classic without compromising on flavor.
-
Cheese Swap: Use mozzarella for a milder taste or experiment with Gruyère for a nutty twist. The melting possibilities are endless!
-
Flavor Boost: Add thin slices of ham, turkey, or even prosciutto between cheese layers for an irresistible savory punch that elevates your dippers.
-
Herb Infusion: Mix in fresh herbs like basil or thyme into the cheese for an aromatic lift that dances on your palate. Each bite transforms into a garden delight!
-
Spicy Kick: Incorporate jalapeño slices or a dash of hot sauce into your sandwiches for heat lovers. This fiery twist will leave delightful tingles that keep you reaching for more.
-
Creamy Addition: Spread a layer of cream cheese or herbed cheese on the bread before adding the cheese. This creamy base adds depth and richness that’s simply divine.
-
Sweet Twist: For a unique dessert-style option, drizzle honey or add a sprinkle of cinnamon sugar to the grilled cheese before serving. Pair it with a side of fruit preserves for a sweet finishing touch!
-
Mini Versions: Use small slider buns or even tortillas to create tiny bites-sized dippers, perfect for parties or kids! These little treats are fun to make and even more enjoyable to munch on.
Don’t forget to serve your dippers with the warm, comforting flavors of homemade tomato soup or your favorite dipping sauces, like the ones you’d find with my creamy Cream Cheese Chicken or even some crunchy Mini Blueberry Muffins for a sweet sidekick! The possibilities are as endless as your imagination – enjoy experimenting!
What to Serve with Mini Grilled Cheese Dippers?
Warm up your kitchen and gather your loved ones for a cozy meal experience that beautifully complements these delightful bites!
-
Tomato Soup: A classic combination, this warm, savory soup enhances the cheesy richness and provides a creamy dip for added flavor.
-
Marinara Sauce: The tangy taste of marinara perfectly balances the savory dippers, allowing each bite to dance with delicious contrasts.
-
Garlic Aioli: This creamy, garlicky dip adds an exciting twist, inviting your taste buds to explore new flavor heights with every savory dunk.
-
Crispy Veggie Sticks: Fresh and crunchy, carrot and cucumber sticks add a refreshing element, creating a delightful textural contrast to each cheesy bite.
-
Chips or Crackers: Pairing with salty chips or crunchy crackers brings in satisfying crunch and enhances the overall snacking experience.
-
Sweet Chili Sauce: For a hint of sweetness and heat, this sauce makes for a fun dipping option, making your taste buds sing.
-
Creamy Coleslaw: Adding a side of coleslaw introduces a refreshing, crunchy element, staying true to flavors while cooling down the cheese’s richness.
Enjoy these Mini Grilled Cheese Dippers alongside any of these sides, transforming simple moments into cherished culinary gatherings!
Storage Tips for Mini Grilled Cheese Dippers
Fridge: Store leftover dippers in an airtight container in the refrigerator for up to 2 days to maintain freshness and flavor.
Freezer: For longer storage, wrap individual dippers tightly in plastic wrap and place them in a freezer-safe bag. They can last up to 2 months.
Reheating: To enjoy crispiness when reheating, use a non-stick skillet over medium-low heat or an air fryer at 370°F (185°C) for about 4-5 minutes.
Cooking Tip: Avoid sogginess by ensuring the dippers are completely cooled before storing to maintain that gooey goodness inside your Mini Grilled Cheese Dippers.
Helpful Tricks for Mini Grilled Cheese Dippers
-
Bread Choice: Use sturdy sandwich bread that can withstand grilling, preventing sogginess. Gluten-free versions work beautifully too!
-
Cheese Quality: Opt for high-quality cheese instead of pre-shredded varieties, ensuring a creamy melt. A blend of cheddar and provolone is ideal.
-
Even Goldenness: Grill on medium-low heat to achieve a perfect golden crust without burning the bread or leaving the cheese unmelted.
-
Spacing Matters: Avoid overcrowding the skillet while grilling. Leaving space between the dippers allows for even cooking and crisping.
-
Dipping Pairings: Enhance your experience by serving with warm tomato soup, marinara, or your favorite sauces for an irresistible flavor combination!
Mini Grilled Cheese Dippers Recipe FAQs
How do I choose the right bread for Mini Grilled Cheese Dippers?
Absolutely! The key to the perfect Mini Grilled Cheese Dippers is using sturdy sandwich bread that prevents sogginess. Look for bread with a good crust that will hold up well during grilling. Gluten-free sandwich bread is a fantastic alternative, ensuring everyone can enjoy this delicious treat without concern.
What’s the best way to store leftover Mini Grilled Cheese Dippers?
Very! For short-term storage, keep leftover dippers in an airtight container in the refrigerator for up to 2 days. This helps to maintain the flavor and texture. To reheat, use a non-stick skillet on medium-low heat or your trusty air fryer to get that golden crispiness back.
Can I freeze Mini Grilled Cheese Dippers?
Absolutely! To freeze, wrap each cooled Mini Grilled Cheese Dipper tightly in plastic wrap and then store them in a freezer-safe bag. They will stay fresh for up to 2 months. When you’re ready to enjoy them, simply reheat directly from the freezer—either in a skillet or air fryer at 370°F (185°C) for about 4-5 minutes until heated through.
What should I do if my dippers do not achieve a golden crust?
Don’t worry, it happens! If you find your Mini Grilled Cheese Dippers aren’t browning properly, ensure you’re using medium-low heat for even cooking. If the heat is too high, the bread might burn while the cheese remains unmelted. Give each side about 3-4 minutes to develop that lovely golden color. Also, make sure not to overcrowd the skillet; this allows air to circulate and helps with even browning.
Are Mini Grilled Cheese Dippers suitable for individuals with dietary restrictions?
Very much so! This recipe can easily accommodate dietary needs. Substituting regular bread with gluten-free sandwich bread allows those with gluten sensitivities to enjoy the cheesy goodness. Additionally, you can swap out cheese for dairy-free alternatives, making this dish accessible for various diets while still being delicious.
What types of cheese work best for these dippers?
The cheese you choose can make a big difference! I highly recommend a blend of 2/3 sharp cheddar for its robust flavor and 1/3 provolone for fantastic meltability. However, feel free to get creative! Other melting cheeses like Monterey Jack or Gruyère can also be great in this recipe.
Mini Grilled Cheese Dippers: Your New Favorite Comfort Snack
Ingredients
Equipment
Method
- Cut the sturdy sandwich bread into quarters or your desired size for dippers, arranging them on a clean surface.
- Layer cheese between two pieces of bread to create mini sandwiches, ensuring even cheese distribution.
- Add more cheese or toppings like ham or pesto if desired.
- Heat butter or mayo in a non-stick skillet over medium-low heat and place assembled sandwiches in the pan.
- Grill sandwiches for 3-4 minutes on one side until golden brown and cheese begins to melt.
- Flip each sandwich carefully and cook the other side for an additional 3-4 minutes.
- Let the grilled sandwiches rest for a minute, then slice into dippers.
- Arrange sliced sandwiches on a serving platter and serve immediately with warm tomato soup or your favorite sauces.