Advertisement
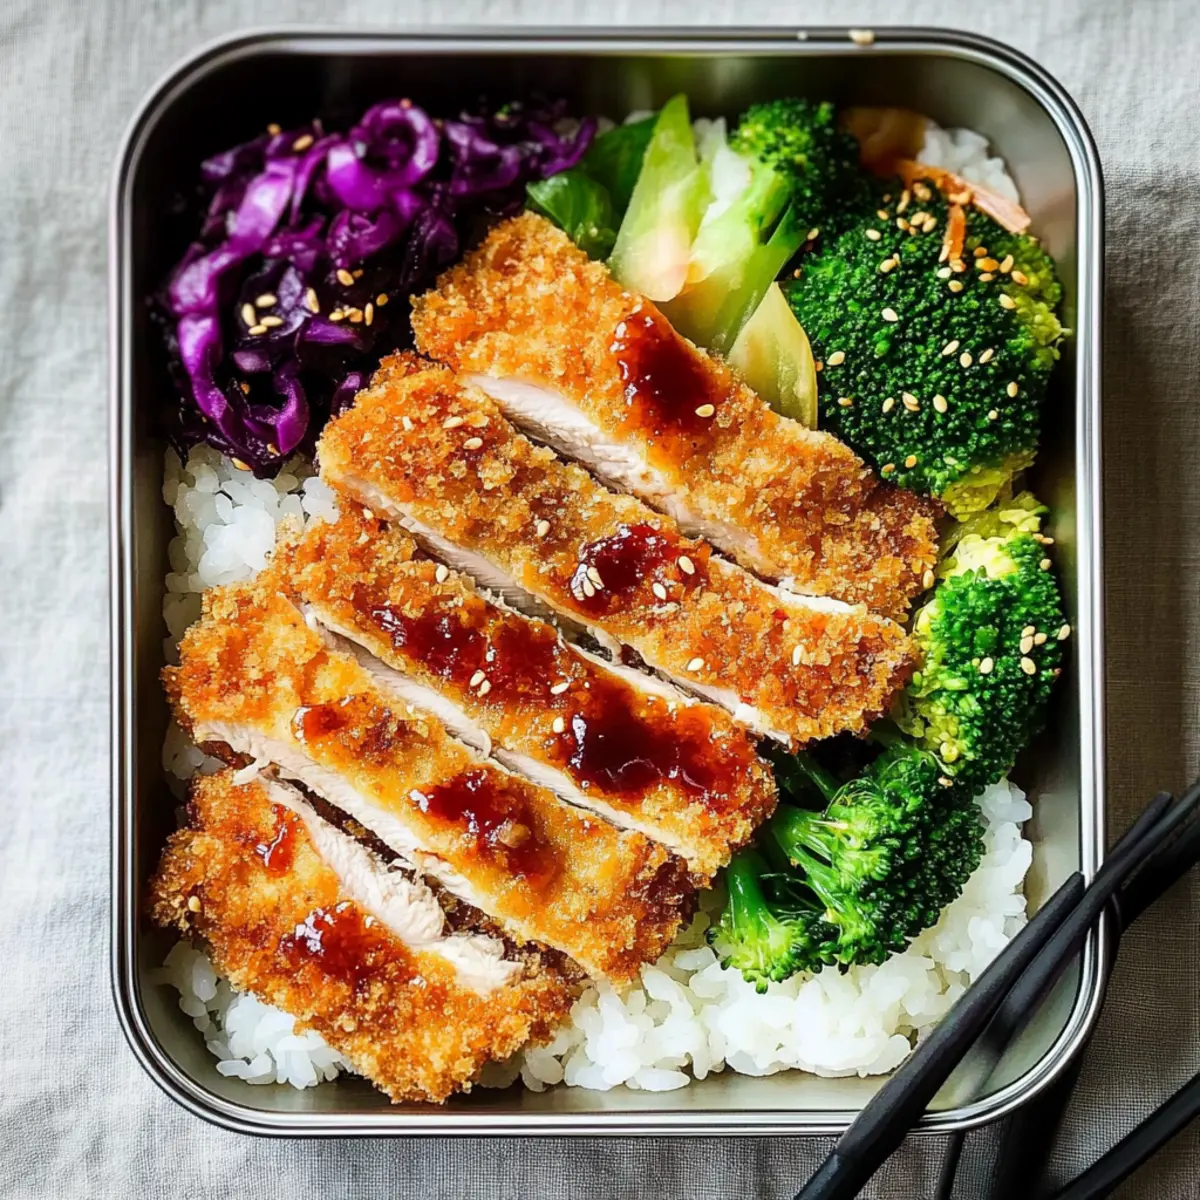
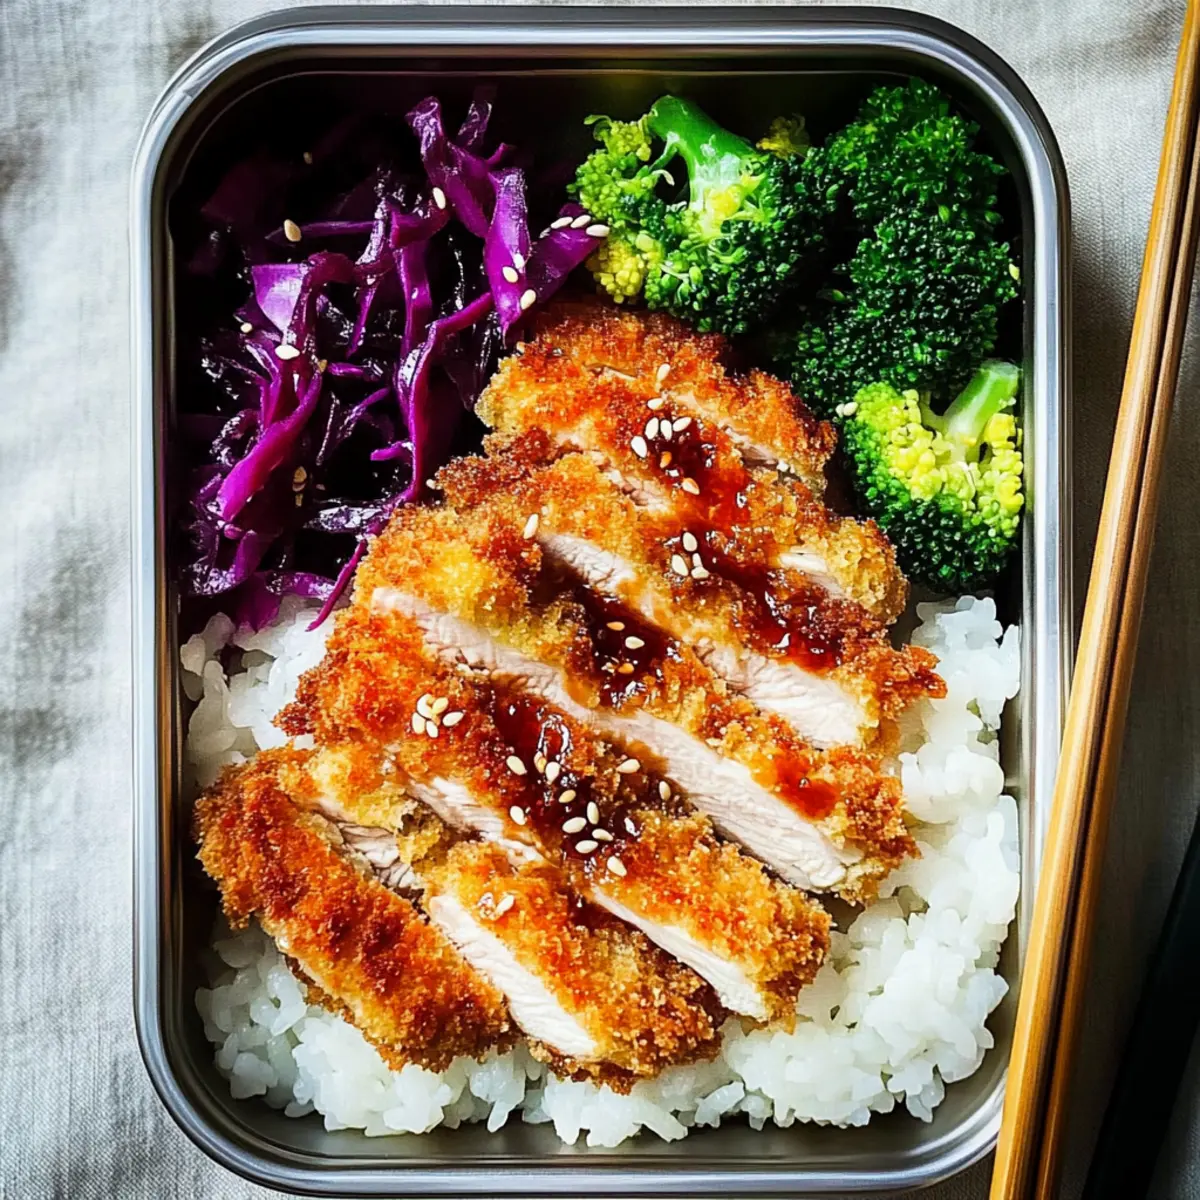
As I was packing my lunch for a busy week ahead, a wave of nostalgia hit me—those delightful bento lunches I used to crave during my time in Japan. Today, I’m thrilled to share my take on the Chicken Katsu Bento Box, a colorful masterpiece that’s as satisfying to eat as it is to look at. This easy lunch idea showcases crispy golden chicken cutlets alongside fluffy furikake rice, vibrant steamed broccoli, and tangy pickled cabbage, all drizzled with rich tonkatsu sauce. Not only does this dish come together in under an hour, making it perfect for meal prep, but it also offers a customizable experience; swap in crispy tofu for a vegan twist or experiment with your favorite sides like vegetable curry. Ready to elevate your lunch game? Prepare to be amazed at how simple and scrumptious homemade bento can be!

Why is Chicken Katsu Bento Box Irresistible?
Satisfying Comfort: The combination of crispy chicken or tofu, fluffy rice, and vibrant veggies creates a balanced meal that’s perfect for any lunch break.
Quick to Prepare: Whip up this delightful bento box in under an hour, making it an ideal option for busy weekdays.
Advertisement
Customizable Delight: Feel free to swap sides or proteins; try Cream Cheese Chicken or a hearty vegetable curry to match your cravings!
Visually Appealing: Layers of color and texture make it as pleasing to the eye as it is to the palate—great for impressing family or friends.
Culinary Adventure: Transport your taste buds to Japan with each bite, enjoying a dish that’s rich in history and flavor. Dive into your own bento-making adventure today!
Chicken Katsu Bento Box Ingredients
For the Chicken
• Chicken Breasts – Choose small breasts (170g each) for the perfect portion in your bento.
• All-Purpose Flour – This is your breading base for crispiness; gluten-free flour can work as a great substitute.
• Large Egg – Acts as the binder for the breadcrumbs; a vegan egg substitute can easily replace it.
• Panko Breadcrumbs – Creates a light and crispy coating; feel free to swap with regular breadcrumbs if you need.
• Vegetable Oil – Essential for frying; can be substituted with canola or peanut oil for different flavors.
• Salt – Simple yet essential for enhancing the chicken’s flavor.
• Pepper & Garlic Powder – Adds the perfect seasoning, giving the chicken that irresistible taste.
For the Rice and Vegetables
• Cooked Rice – The comforting base of your bento; brown rice packs in extra nutrition.
• Furikake – A delightful Japanese seasoning for your rice; it’s optional but truly enriches the flavor.
• Broccoli Florets – Not just nutritious, they also add a splash of color; you can replace them with green beans or snap peas for a twist.
• Sesame Oil & Seeds – A flavor enhancer for your broccoli; these are optional but bring a lovely nuttiness.
• Red Cabbage – Provides a nice crunch and acidity; swap with green cabbage or carrots if desired.
• Rice Vinegar – Essential for pickling the cabbage; apple cider vinegar can be used as a substitute.
For Serving
• Tonkatsu Sauce – The perfect richly flavored dressing; serve it drizzled on the chicken or on the side for dipping.
Get ready to whip up a delicious Chicken Katsu Bento Box that is not only a feast for the senses but also filled with the warmth of homemade goodness!
Step‑by‑Step Instructions for Chicken Katsu Bento Box
Step 1: Prepare the Chicken
Begin by placing the chicken breasts between two sheets of plastic wrap and pound them to an even thickness of about 1 cm. This ensures uniform cooking. Season both sides generously with salt, pepper, and garlic powder, allowing the flavors to infuse while you set up your breading station.
Step 2: Set Up the Breading Station
Prepare a simple three-part breading station: in one shallow dish, add all-purpose flour; in the next, beat the large egg until frothy; and in the third, place the panko breadcrumbs. This will streamline the coating process for the Chicken Katsu, making it quick and efficient.
Step 3: Dredge the Chicken
Now, take each seasoned chicken breast and dredge it first in the flour until well coated, shaking off any excess. Next, dip it into the beaten egg, ensuring it’s fully covered, and finally press it into the panko breadcrumbs, coating it thoroughly while lightly pressing to adhere.
Step 4: Fry the Chicken
Heat about half an inch of vegetable oil in a large skillet over medium heat until shimmering, reaching a temperature of 350°F (175°C). Carefully add the breaded chicken to the pan, cooking for 3–4 minutes on each side until golden brown and cooked through, with an internal temperature of 165°F (75°C).
Step 5: Alternative Cooking Methods
For a healthier alternative, preheat your air fryer to 375°F (190°C) and air fry the chicken for 15-20 minutes, flipping halfway through. Alternatively, you can bake the chicken in a preheated oven at 400°F (200°C) until crispy and fully cooked, ensuring to flip halfway for even browning.
Step 6: Prepare the Rice
While the chicken cooks, prepare your rice. If using pre-cooked rice, fluff it up in a bowl and allow it to cool slightly. Once cooled, sprinkle furikake over the rice, lightly mixing it in for added flavor. This rice acts as a delicious base for your Chicken Katsu Bento Box.
Step 7: Pickle the Cabbage
Thinly slice the red cabbage and place it in a bowl. Drizzle with rice vinegar and toss to evenly coat. Allow it to pickle for about 10-15 minutes, which will enhance its crunchiness and tanginess, perfectly balancing the flavors in your bento box.
Step 8: Prepare the Broccoli
Bring a pot of water to a boil and blanch the broccoli florets for 1-2 minutes until they are bright green and tender-crisp. Immediately transfer them to an ice bath to stop the cooking process, then drain and toss with a little sesame oil and seeds for a nutty finish.
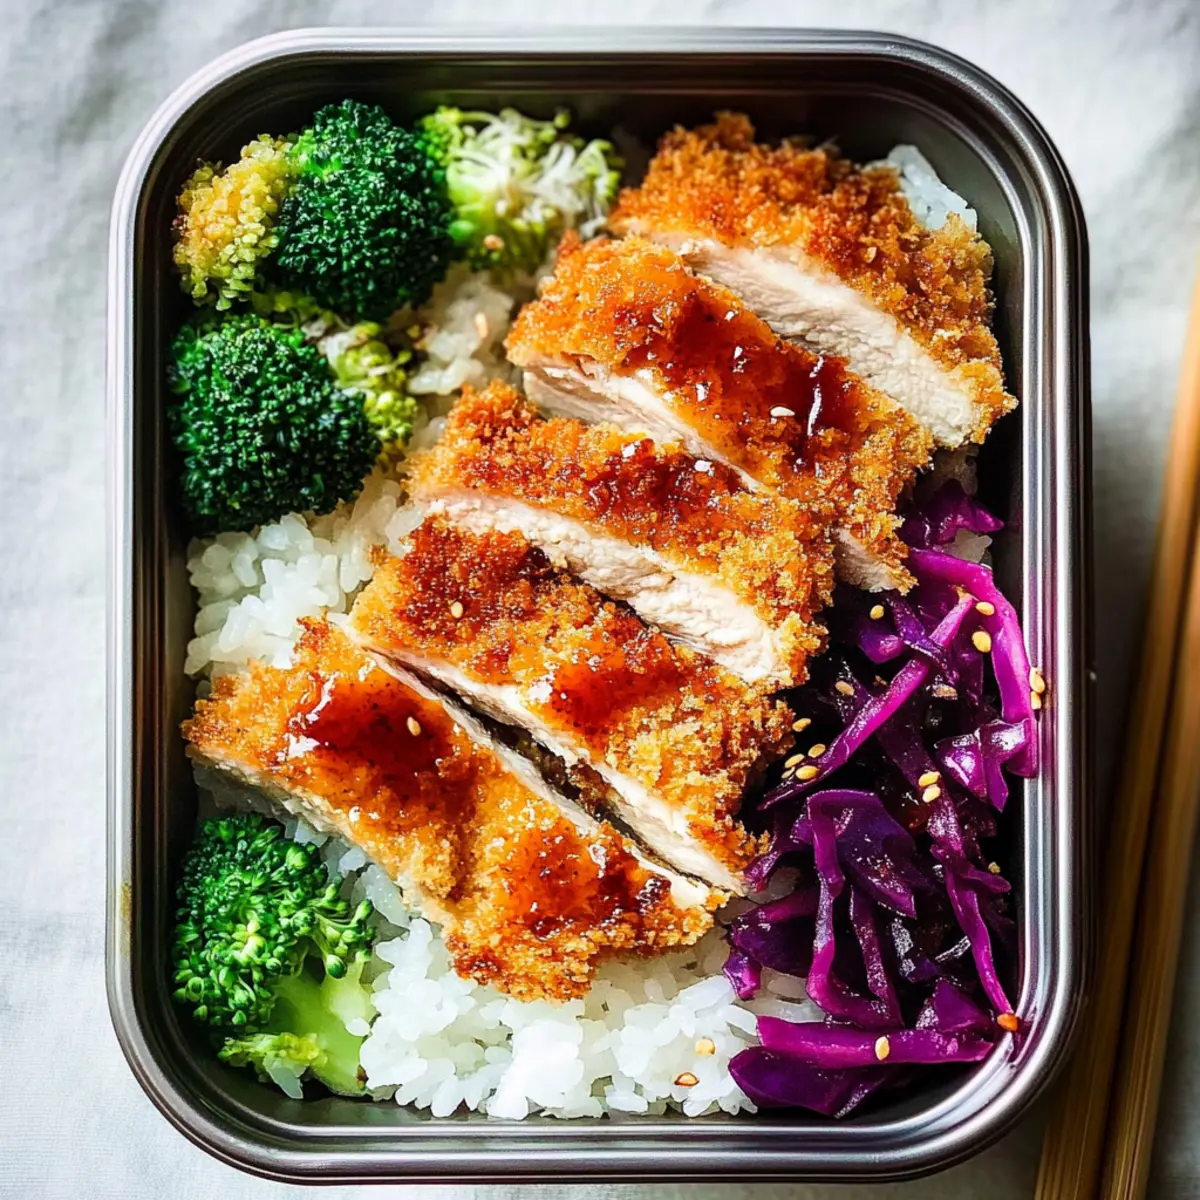
Step 9: Assemble the Bento Box
To assemble your Chicken Katsu Bento Box, start by placing a generous scoop of furikake rice in one section. Next, slice the crispy chicken cutlet and lay it next to the rice. Add the steamed broccoli and a portion of pickled cabbage, along with a few cherry tomatoes to add color. Drizzle tonkatsu sauce over the chicken or keep it on the side for dipping, completing your delightful bento creation.
Make Ahead Options
These Chicken Katsu Bento Boxes are perfect for meal prep enthusiasts! You can prepare the chicken by breading it and refrigerating it up to 24 hours in advance, ensuring crispiness upon frying. Additionally, make the pickled cabbage and steamed broccoli ahead of time—they’ll stay fresh in airtight containers in the fridge for up to 3 days. The rice can also be cooked and stored, but allow it to cool completely before refrigerating to prevent clumping. When you’re ready to assemble, simply fry the chicken (or air fry/bake for a healthier option) and warm the rice slightly. This way, you’ll have a quick and delicious Chicken Katsu Bento Box ready to enjoy in no time!
How to Store and Freeze Chicken Katsu Bento Box
Fridge: Store assembled Chicken Katsu Bento Box components separately in airtight containers for up to 24 hours. This keeps each element fresh and prevents sogginess.
Freezer: For longer storage, freeze the breaded chicken cutlets before frying. Wrap them tightly in plastic wrap and then in foil to maintain quality for up to 2 months.
Reheating: To reheat chicken, bake from frozen in a preheated oven at 400°F (200°C) for about 20-25 minutes until heated through and crispy.
Rice Preservation: If you’ve made extra rice, it can also be stored in the fridge for up to 3 days in an airtight container. Fluff and reheat in the microwave or on the stove.
Helpful Tricks for Chicken Katsu Bento Box
-
Perfect Thickness: Always pound the chicken breasts to an even thickness to ensure uniform cooking. This helps avoid dry spots and ensures tenderness.
-
Temperature Check: When frying, maintain the oil at 350°F (175°C). You can test the heat by tossing a few breadcrumbs in; they should sizzle immediately.
-
Crispiness Guarantee: Allow fried chicken to rest on paper towels after cooking. This removes excess oil and keeps the coating light and crispy.
-
Rice Mixing: Cool the rice slightly before adding furikake. This prevents clumping and ensures even seasoning throughout your Chicken Katsu Bento Box.
-
Fresh Pickling: Serve pickled cabbage shortly after preparation to maintain its crunch. A few hours in the fridge can lead to sogginess.
What to Serve with Chicken Katsu Bento Box
Elevate your Chicken Katsu Bento Box with delightful side dishes and refreshing drinks that enhance its charm and flavors.
-
Miso Soup: A warm bowl of miso soup offers a comforting, umami-rich complement to your bento, creating a harmonious dining experience.
-
Japanese Pickles: These tangy, crunchy pickles add a burst of flavor that contrasts beautifully with the crispy chicken.
-
Cucumber Salad: A light cucumber salad dressed in rice vinegar provides a refreshing crunch, balancing the richness of the katsu.
-
Gyoza: These savory dumplings filled with meat or vegetables can be a delightful addition, creating a heartier meal that’s still easy to enjoy.
-
Fresh Fruit: Slices of juicy melon or citrus fruits are a perfect sweet ending, cleansing your palate after the savory bento.
-
Green Tea: A chilled or hot green tea enhances the meal with its gentle earthiness, offering a traditional touch to your Japanese-inspired lunch.
Imagine sitting down to a feast that tantalizes your taste buds while filling your kitchen with warmth; each bite is comfortingly familiar yet refreshingly unique.
Chicken Katsu Bento Box Variations
Feel free to get creative with your Chicken Katsu Bento Box, transforming it into a personalized delight that suits your tastes!
-
Vegan Option: Substitute chicken with crispy tofu and use a plant-based egg alternative for a delicious twist. It’s a fantastic way to enjoy the same textures without compromising on flavor.
-
Flavor Booster: Swap the tonkatsu sauce with a homemade sesame dressing. Just whisk together soy sauce, sesame oil, and a hint of sugar for an extra punch of flavor.
-
Rice Swap: Use fluffy quinoa instead of rice as a nutritious alternative. Quinoa adds a lovely nutty flavor and works beautifully with the rest of the bento ingredients.
-
Crunchy Extras: Add a handful of roasted seaweed snacks on the side for a fun, crispy texture. They bring an authentic touch to your Japanese-inspired meal!
-
Seasonal Vegetables: Embrace seasonal veggies by replacing broccoli with asparagus or snap peas. This keeps your bento fresh and in tune with nature’s offerings.
-
Spicy Kick: If you love heat, mix a little sriracha into your tonkatsu sauce. Alternatively, drizzle with chili oil for a vibrant spicy touch that elevates your meal.
-
Texture Transition: For a unique bite, consider adding a layer of crunchy fried onions on top of your chicken or vegetables. They can really elevate your bento with their delightful crispiness.
-
Surprise Sides: Instead of traditional pickled cabbage, try serving with a side of cucumber salad or boiled edamame for a refreshing crunch that complements the katsu perfectly.
Remember, the beauty of the Chicken Katsu Bento Box lies in its flexibility. Don’t hesitate to explore the possibilities—like trying out a delicious asparagus frittata or a hearty Oven Baked Chicken on the side. Enjoy crafting your ideal bento masterpiece!
Chicken Katsu Bento Box Recipe FAQs
How do I choose ripe chicken breasts for my Chicken Katsu Bento Box?
Absolutely! Look for chicken breasts that are pinkish in color with a firm texture. Avoid any that have dark spots or an unpleasant odor, as these can indicate spoilage. Fresh chicken breasts should have little to no liquid in their packaging.
What is the best way to store my Chicken Katsu Bento Box?
I recommend storing the components separately in airtight containers for up to 24 hours in the fridge. This prevents sogginess and keeps the crispy chicken intact. Just assemble your bento box right before you eat for the best texture!
Can I freeze the Chicken Katsu for later use?
Yes, you can! To freeze, wrap the breaded chicken cutlets tightly in plastic wrap, followed by aluminum foil, which helps keep their quality for up to 2 months. When ready to eat, bake from frozen in a preheated oven at 400°F (200°C) for about 20-25 minutes until heated through and crispy.
What if my chicken katsu doesn’t turn out crispy?
Very important to ensure your oil is at the right temperature (350°F/175°C) while frying. If it’s too cool, the chicken will absorb oil and become soggy. For an extra crunch, allow the fried chicken to rest on paper towels to absorb any excess oil after cooking.
Are there any dietary considerations for this recipe?
Indeed! If you’re looking for a vegan option, swap out chicken for crispy tofu and use a plant-based egg substitute. Additionally, check that your ingredients, like panko breadcrumbs and sauces, are certified gluten-free if you have gluten sensitivities.
How long does leftover rice last?
Leftover rice can be stored in the fridge in an airtight container for up to 3 days. When ready to use, simply fluff and reheat in the microwave or on the stove, adding a splash of water to keep it from drying out.
Savor the Best Chicken Katsu Bento Box for Quick Weekday Lunches
Ingredients
Equipment
Method
- Prepare the Chicken: Pound chicken breasts to an even thickness of about 1 cm, season with salt, pepper, and garlic powder.
- Set Up the Breading Station: Prepare a three-part station with flour, beaten egg, and panko breadcrumbs.
- Dredge the Chicken: Coat the seasoned chicken first in flour, then egg, and finally panko breadcrumbs.
- Fry the Chicken: Heat vegetable oil in a skillet until shimmering. Fry chicken for 3–4 minutes on each side until golden brown.
- Alternative Cooking Methods: Air fry at 375°F (190°C) for 15-20 minutes or bake at 400°F (200°C) until crispy.
- Prepare the Rice: Fluff cooked rice, sprinkle with furikake, and mix lightly.
- Pickle the Cabbage: Thinly slice red cabbage, drizzle with rice vinegar, and let pickle for 10-15 minutes.
- Prepare the Broccoli: Blanch broccoli florets in boiling water for 1-2 minutes, then cool in an ice bath.
- Assemble the Bento Box: Layer rice, sliced chicken, broccoli, pickled cabbage, and drizzle with tonkatsu sauce.