Advertisement
As the leaves begin to fall and the air turns crisp, there’s a unique charm in gathering the family for some festive fun in the kitchen. These Halloween Mini Pizzas are a delightful way to embrace the spooky season while enjoying delicious, homemade food. They’re not just quick to prepare in under 25 minutes; they also offer endless customization options, making them the perfect kid-friendly treat for parties or a cozy night in. With a little creativity, you can transform simple ingredients into eerie ghost faces or enchanting jack-o’-lanterns that spark joy and creativity in everyone involved. Ready to make dinner a little more magical this Halloween? Let’s dive into the fun!
Why Are Halloween Mini Pizzas Perfect?
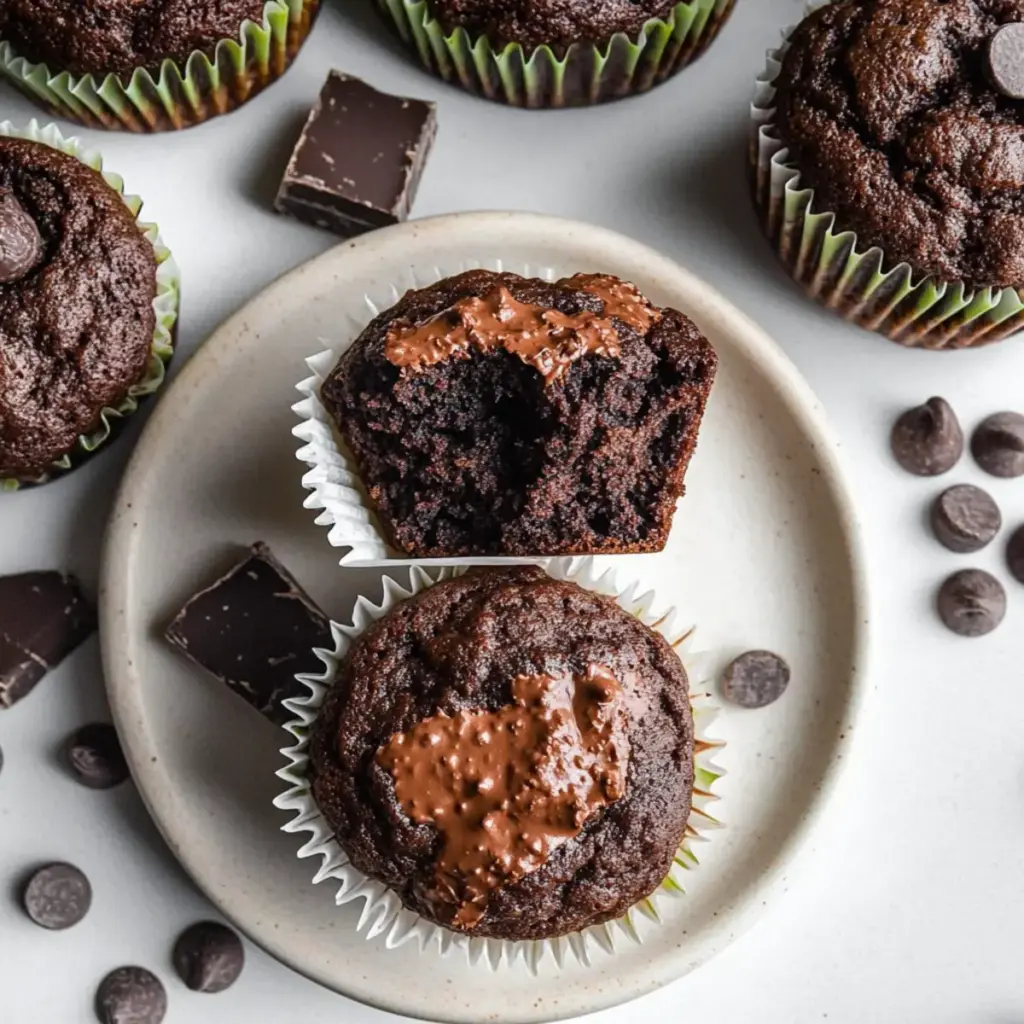
Easy to Customize: Halloween Mini Pizzas allow for endless topping possibilities, catering to every taste. Kid-Friendly Fun: Involve the little ones in creating spooky faces, turning mealtime into a joyful experience. Quick Preparation: Ready in under 25 minutes, these treats are a lifesaver for busy nights. Party Showstopper: Their festive appearance makes them a hit at any Halloween gathering. Balanced Snack: Pair with veggies or fruit for a nutritious side that complements the fun – perfect for both kids and adults! If you love festive treats, you might also enjoy these Orange Creamsicle Mini treats or Mini Blueberry Muffins for more delicious fun.
Halloween Mini Pizzas Ingredients
• For the Base
Mini Pizza Crusts – You can use store-bought for convenience or whip up a homemade version for a personal touch.
Advertisement
• For the Sauce
Pizza Sauce – This adds moisture and flavor; try substituting with pesto or garlic butter for a twist.
• For the Cheesy Goodness
Shredded Mozzarella Cheese – Provides that classic stretchy texture; perfect for pizza lovers.
Mozzarella Slices – Cut them into ghost shapes for a spooky vibe; any cheese can be used in its place.
• For the Toppings
Pepperoni Slices – Create adorable “ghost faces” with these; veggies can replace them for a healthier option.
Black Olives – Great for eyes on your ghostly pizzas; consider capers for a bolder flavor.
Orange Bell Pepper – Use cut-outs for jack-o’-lantern faces; feel free to mix in other colored peppers too.
These Halloween Mini Pizzas are not just a feast for the eyes; they’re customizable to cater to every taste bud around the table! Enjoy creating your festive masterpiece!
Step‑by‑Step Instructions for Halloween Mini Pizzas
Step 1: Preheat the Oven
Begin by preheating your oven to 400°F (200°C). While the oven heats, line a baking sheet with parchment paper to prevent sticking and ensure easy cleanup. This step sets the stage for creating delicious and crispy Halloween Mini Pizzas that everyone will love.
Step 2: Prepare the Crusts
Once your oven is preheated, place the mini pizza crusts on the lined baking sheet. Using a spoon or spatula, evenly spread your favorite pizza sauce over each crust, leaving a small border for the crust. This will create a flavorful base for your delightful Halloween Mini Pizzas.
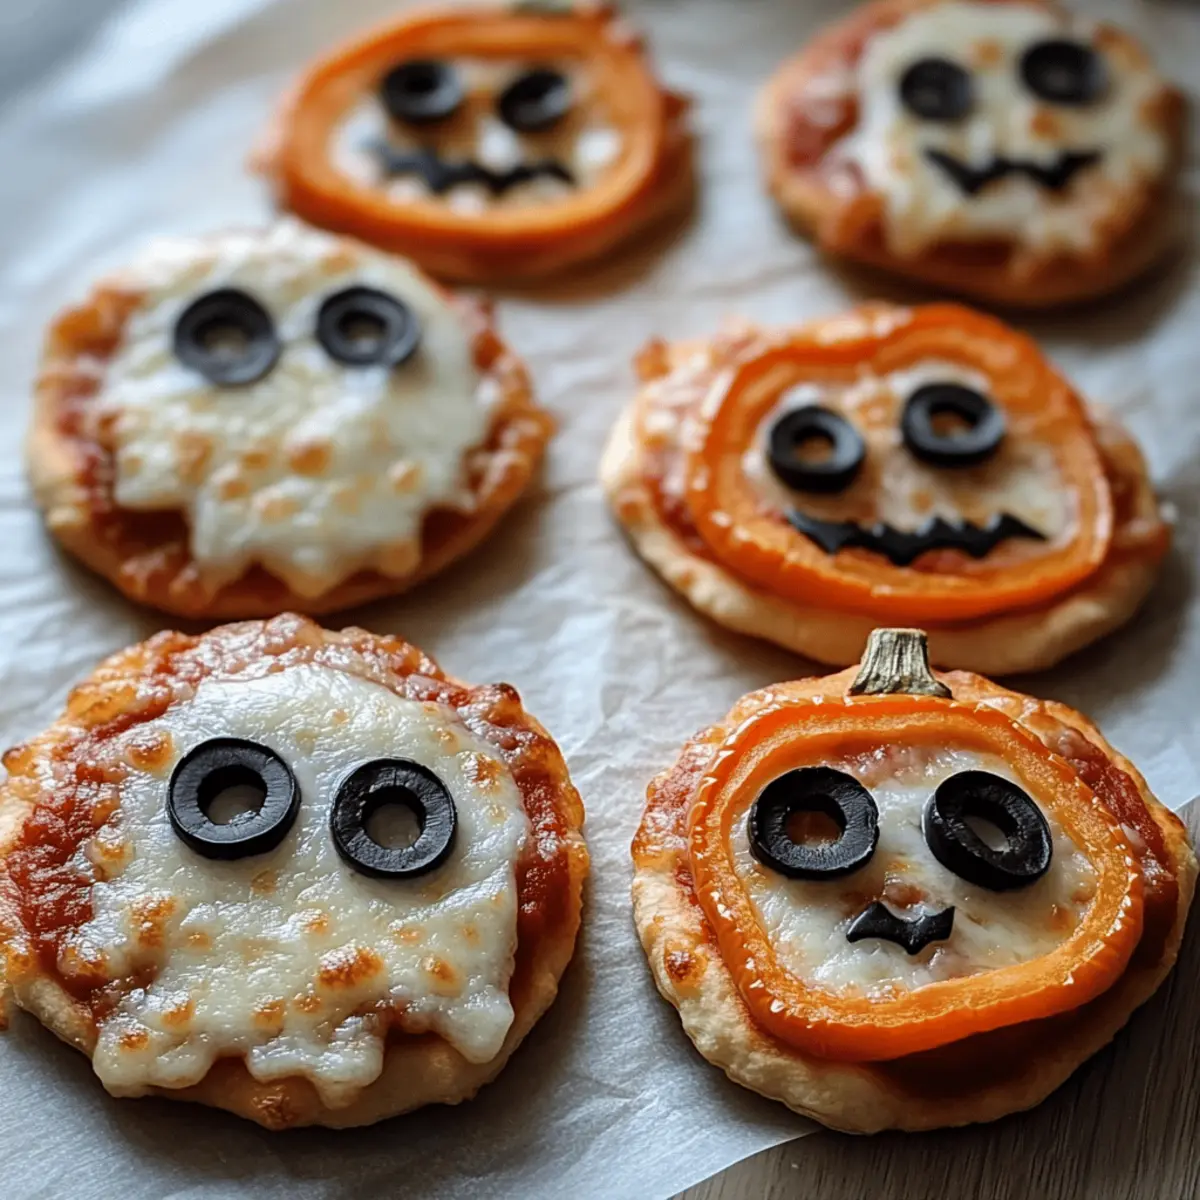
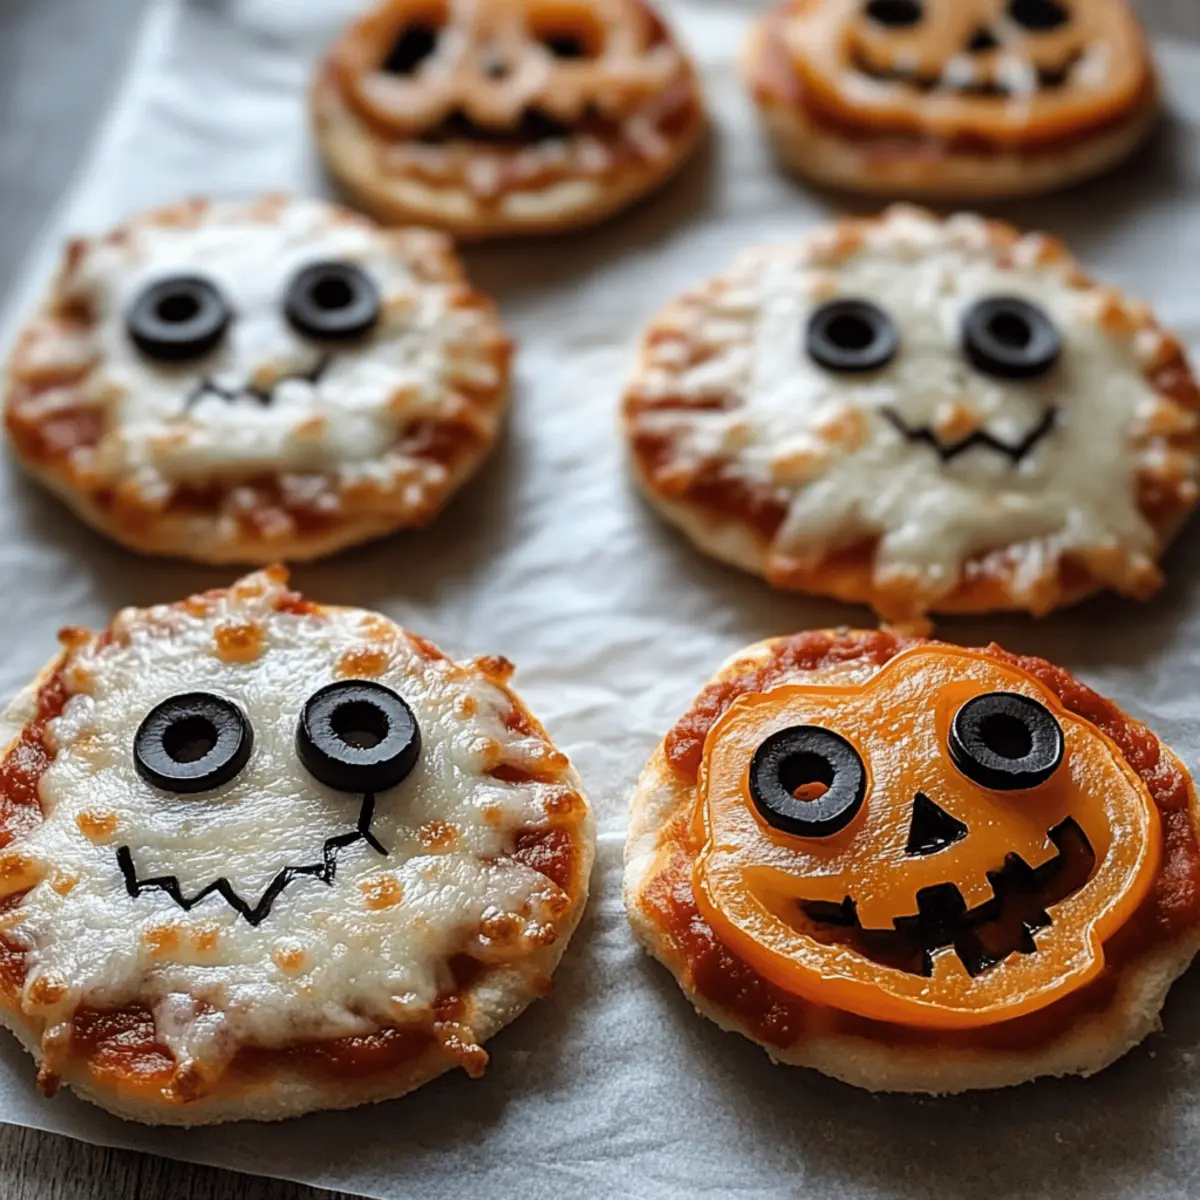
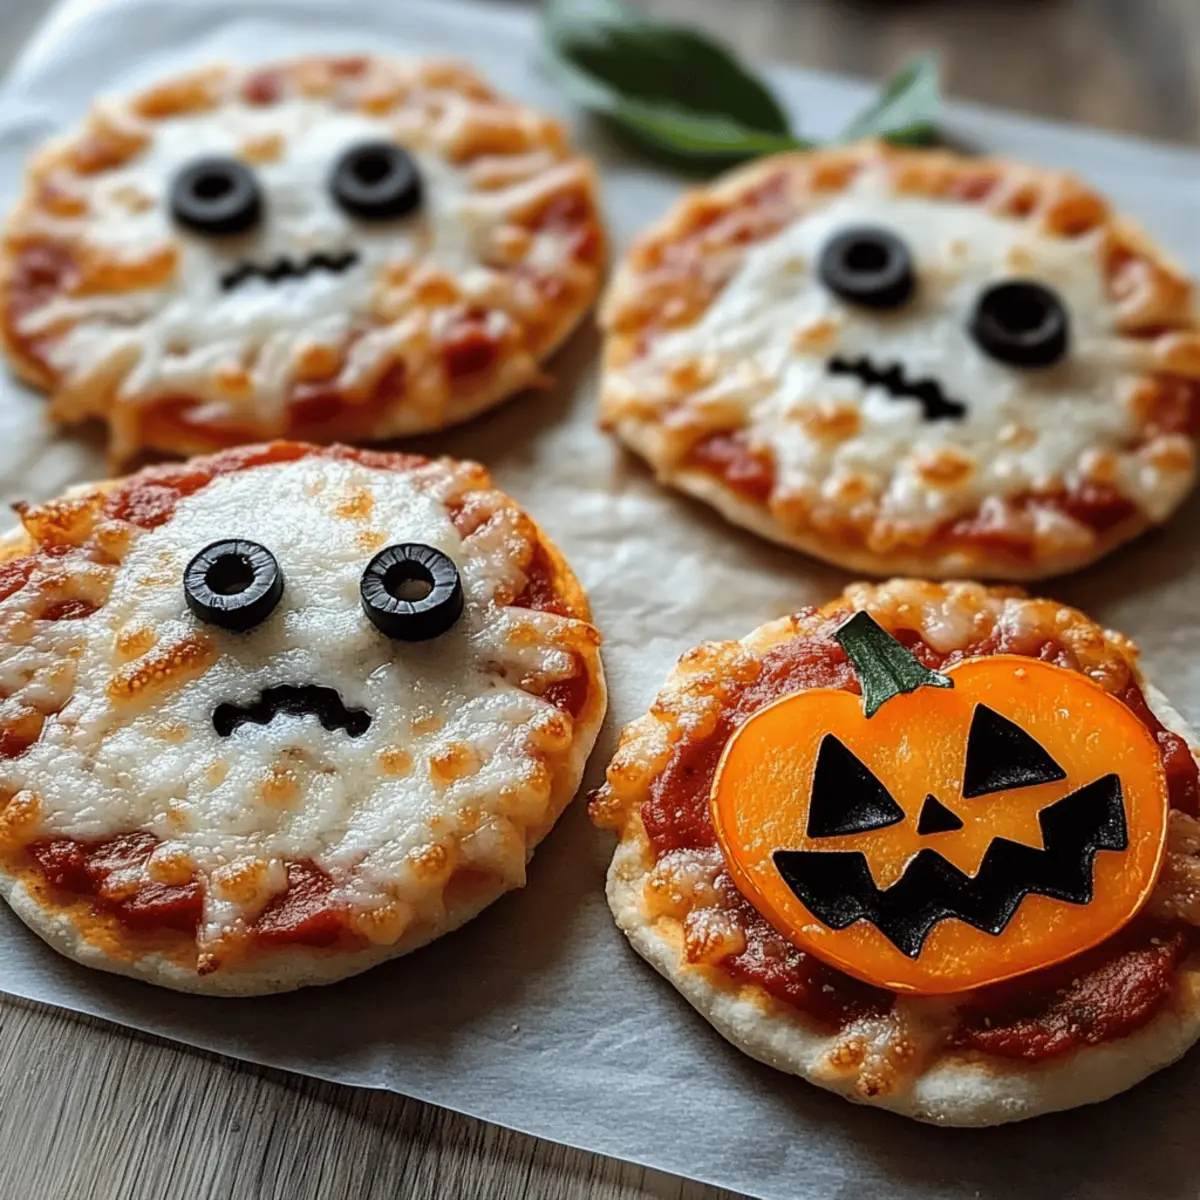
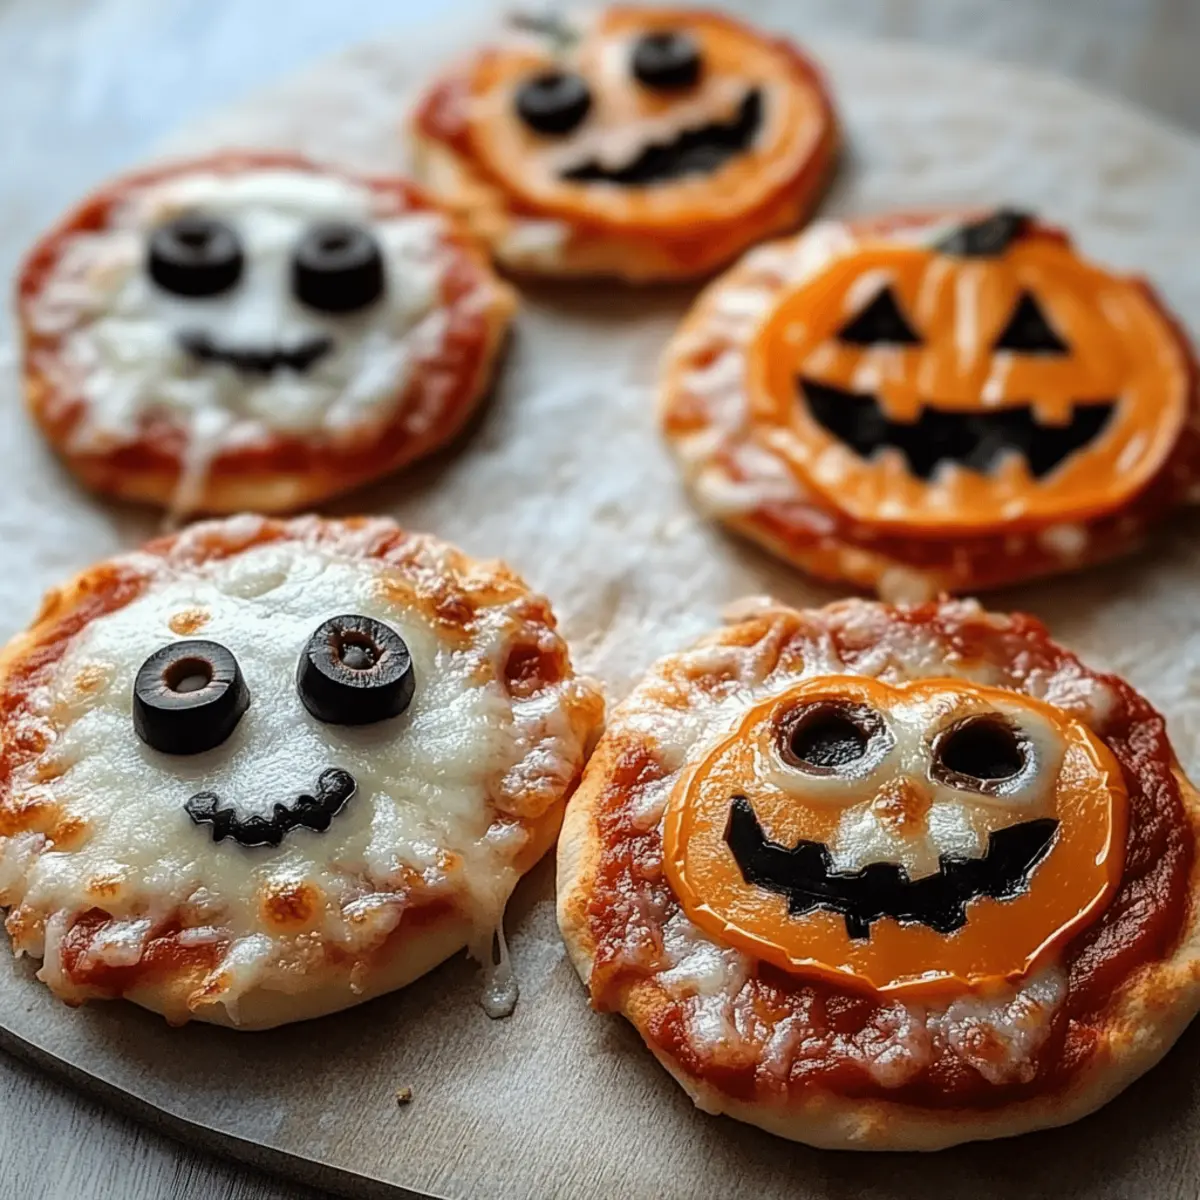
Step 3: Create Ghost Pizzas
For the ghost-themed pizzas, take slices of mozzarella cheese and cut them into ghost shapes using a cookie cutter or knife. Arrange these ghost shapes on top of the sauce-covered crusts, and use small pieces of black olives to create eyes. This step brings a whimsical element to your Halloween Mini Pizzas!
Step 4: Assemble Mummy Pizzas
Next, let’s make the mummy pizzas! Layer mozzarella cheese strips criss-cross on top of the sauce for that mummy look. Then, add olive slices for the eyes, ensuring they peek out from the cheesy bandages. This step adds a fun and spooky twist to your Halloween Mini Pizzas.
Step 5: Design Jack-O’-Lantern Pizzas
To create jack-o’-lantern pizzas, sprinkle a generous amount of shredded mozzarella cheese over the sauce. Then, arrange cut-out slices of orange bell pepper to form playful pumpkin faces. This vibrant orange color will make your Halloween Mini Pizzas festive and fun, perfect for a party!
Step 6: Bake the Pizzas
Carefully place the baking sheet with all your assembled pizzas in the preheated oven. Bake for about 8-10 minutes, or until the cheese is bubbly and the crust turns a delightful golden brown. Keep an eye on them to avoid burning, ensuring your Halloween Mini Pizzas are perfectly cooked.
Step 7: Serve and Enjoy
Once out of the oven, let the pizzas cool for a few minutes before serving. The Halloween Mini Pizzas are now ready to be enjoyed warm and gooey! Gather your friends and family to share these spooky treats, adding extra fun to your Halloween celebration.
Halloween Mini Pizzas Variations
Feel free to get creative with these Halloween Mini Pizzas and customize them to suit your taste and dietary needs!
-
Gluten-Free Crust: Use gluten-free mini pizza crusts to cater to gluten sensitivities. Everyone can join in on the spooky fun!
-
Vegan Cheese: Swap shredded mozzarella for dairy-free cheese alternatives, ensuring all your guests can enjoy these festive treats. A creamy vegan cheese can still offer that enchanting melty goodness.
-
Sweet Halloween Treats: Try adding sliced strawberries or banana pieces with a drizzle of honey or chocolate sauce for a fun dessert variation that still stays within the Halloween theme.
-
Spicy Twist: Add a sprinkle of crushed red pepper flakes to your pizzas for an enjoyable kick that might surprise your guests! It’s a delightful contrast to the kiddie-friendly toppings.
-
Veggie Faces: Replace pepperoni slices with a colorful array of veggies like bell peppers, zucchini, and cherry tomatoes to create vibrant, healthy designs. This adds a crunch to your festive creations!
-
Cheesy Bats: Use sliced provolone or aged cheddar to cut out bat shapes and place them atop your pies. A creative twist that’s sure to impress!
-
Pumpkin Sauce: For a unique spin, replace traditional pizza sauce with pumpkin puree mixed with spices for a warm autumn flavor that complements the season.
-
Herb Infusion: Sprinkle fresh herbs like basil or oregano atop the cheese before baking to enhance flavor and add a fresh aroma. It brings another layer of excitement to your Halloween festivities!
Don’t forget to serve these delightful mini pizzas alongside some Orange Creamsicle Mini treats for an extra festive touch or some Mini Blueberry Muffins for a sweet finish!
Make Ahead Options
These Halloween Mini Pizzas are perfect for meal prep! You can prepare the mini pizza crusts and assemble them with sauce and cheese toppings up to 24 hours in advance. Simply layer your chosen sauce on the crusts, sprinkle with shredded mozzarella, and even cut out your ghost, mummy, or jack-o’-lantern shapes. Cover them tightly with plastic wrap or store in an airtight container to prevent drying out. When you’re ready to serve, just pop them in the oven for about 10 minutes until they are warm and the cheese is bubbly. This approach saves time on busy weeknights while still delivering creepy, delicious fun that’s just as tasty as fresh!
What to Serve with Halloween Mini Pizzas
Elevate your spooky dinner night with delightful sides and treats that complement the festive fun of your mini pizzas.
-
Crispy Garlic Bread: This crunchy side adds a buttery aroma, perfect for dipping into pizza sauce and enhancing the mealtime experience. A warm, golden slice will draw everyone to the table.
-
Fresh Veggie Platter: A colorful assortment of bell peppers, carrots, and cucumbers offers a refreshing crunch while balancing the richness of the cheesy pizzas. Serve with a zesty dip for an extra splash of flavor!
-
Witch’s Brew Punch: This fun and fruity drink can be a hit among kids and adults alike, adding a festive touch with a memorable name. Consider a blend of fruit juices and soda for a fizzy refreshment.
-
Chilling Monster Juice: A non-alcoholic green drink made from limeade and lemon-lime soda, this spooky beverage is just the right touch to quench thirst while continuing the Halloween theme.
-
Chocolate Pumpkin Muffins: These soft, sweet muffins bring in a seasonal flavor, giving a delightful end to the meal. A touch of chocolate will please dessert lovers and create a balance with the savory pizzas.
-
Spooktacular Fruit Kabobs: Assemble fun fruit skewers using grapes, melon, and strawberries shaped like ghosts and pumpkins. They’re not only playful but also a healthy nibble that kids will love.
With these enchanting pairings, your Halloween Mini Pizzas will shine even brighter at the dinner table, ensuring a festive and memorable occasion!
Expert Tips for Halloween Mini Pizzas
-
Golden Crust Warning: Ensure adequate baking time to achieve a perfectly golden crust without burning. Your Halloween Mini Pizzas deserve that crispiness!
-
Non-Stick Advantage: Use light-colored, non-stick baking sheets to prevent the pizzas from sticking, ensuring even cooking. Nobody wants a pizza mishap!
-
Topping Flexibility: Customize toppings according to dietary preferences or availability. This increases appeal and allows for creative expression in your Halloween Mini Pizzas!
-
Involve the Kids: Engage children in the assembly process; it makes cooking a fun family activity. They’ll love crafting their spooky masterpieces!
-
Cheese Choices: For a vegan option, swap shredded mozzarella with dairy-free cheese alternatives. Everyone should enjoy these festive treats!
How to Store and Freeze Halloween Mini Pizzas
Fridge: Place leftover Halloween Mini Pizzas in an airtight container and store in the fridge for up to 3 days to maintain freshness.
Freezer: For longer storage, wrap the mini pizzas in plastic wrap and then in aluminum foil before placing them in the freezer. They can last up to 2 months.
Reheating: When ready to enjoy again, reheat in the oven at 350°F (175°C) for about 10-15 minutes until warmed through and the cheese is melted. Avoid microwaving for the best texture!
Assembly Tip: For quick assembly, consider freezing uncooked mini pizzas; just add toppings and bake them straight from the freezer when you’re ready to treat your family!
Halloween Mini Pizzas Recipe FAQs
How do I select the best mini pizza crusts?
Absolutely! When choosing mini pizza crusts, look for those that are golden and firm without any dark spots. Freshness is key, so check the expiration date. You can opt for store-bought convenience or even make your own dough for a personal touch!
How long can I store leftover Halloween Mini Pizzas?
Leftover Halloween Mini Pizzas can be stored in an airtight container in the fridge for up to 3 days. Always ensure they’re cooled before sealing the container to maintain their crispy texture.
Can I freeze Halloween Mini Pizzas? How do I do it?
Very! To freeze your Halloween Mini Pizzas, wrap each one tightly in plastic wrap, then in aluminum foil. This helps prevent freezer burn. They can last in the freezer for up to 2 months. When you’re ready to enjoy, simply bake them from frozen at 400°F (200°C) for about 10-15 minutes until they’re heated through and the cheese is bubbling.
What if my cheese doesn’t melt properly?
If you notice your cheese isn’t melting well, it may be due to using low-moisture cheese or baking at too low of a temperature. For the best results, I recommend using fresh mozzarella and ensuring your oven is properly preheated to 400°F (200°C). Also, keep an eye on your pizzas while they bake to prevent any over-browning.
Are there any dietary restrictions I should consider?
Absolutely! For those with dietary restrictions, you can use gluten-free pizza crusts, or substitute dairy-free cheese for the mozzarella. If you’re catering to kids with allergies, be cautious with toppings like pepperoni and olives. Always double-check the packaging for potential allergens!
Can I prepare Halloween Mini Pizzas ahead of time?
Yes, indeed! You can assemble the pizzas and keep them in the refrigerator before baking. Just cover them with plastic wrap to prevent drying out. They can be baked straight from the fridge, though you might need to add a minute or two to the baking time to ensure they’re heated through and cheese is melted. This makes meal prep a breeze for busy nights!
Halloween Mini Pizzas: Fun to Make and Delicious to Eat
Ingredients
Equipment
Method
- Preheat your oven to 400°F (200°C) and line a baking sheet with parchment paper.
- Spread pizza sauce over each mini pizza crust, leaving a border for the crust.
- Cut mozzarella cheese into ghost shapes and place them on the sauce, using olives for eyes.
- Layer mozzarella cheese strips on another crust for a mummy look, adding olive slices for eyes.
- Top with shredded mozzarella cheese and orange bell pepper for jack-o'-lantern faces.
- Bake for 8-10 minutes until cheese is bubbly and crust is golden brown.
- Let cool for a few minutes before serving and enjoy the spooky treats.