Advertisement
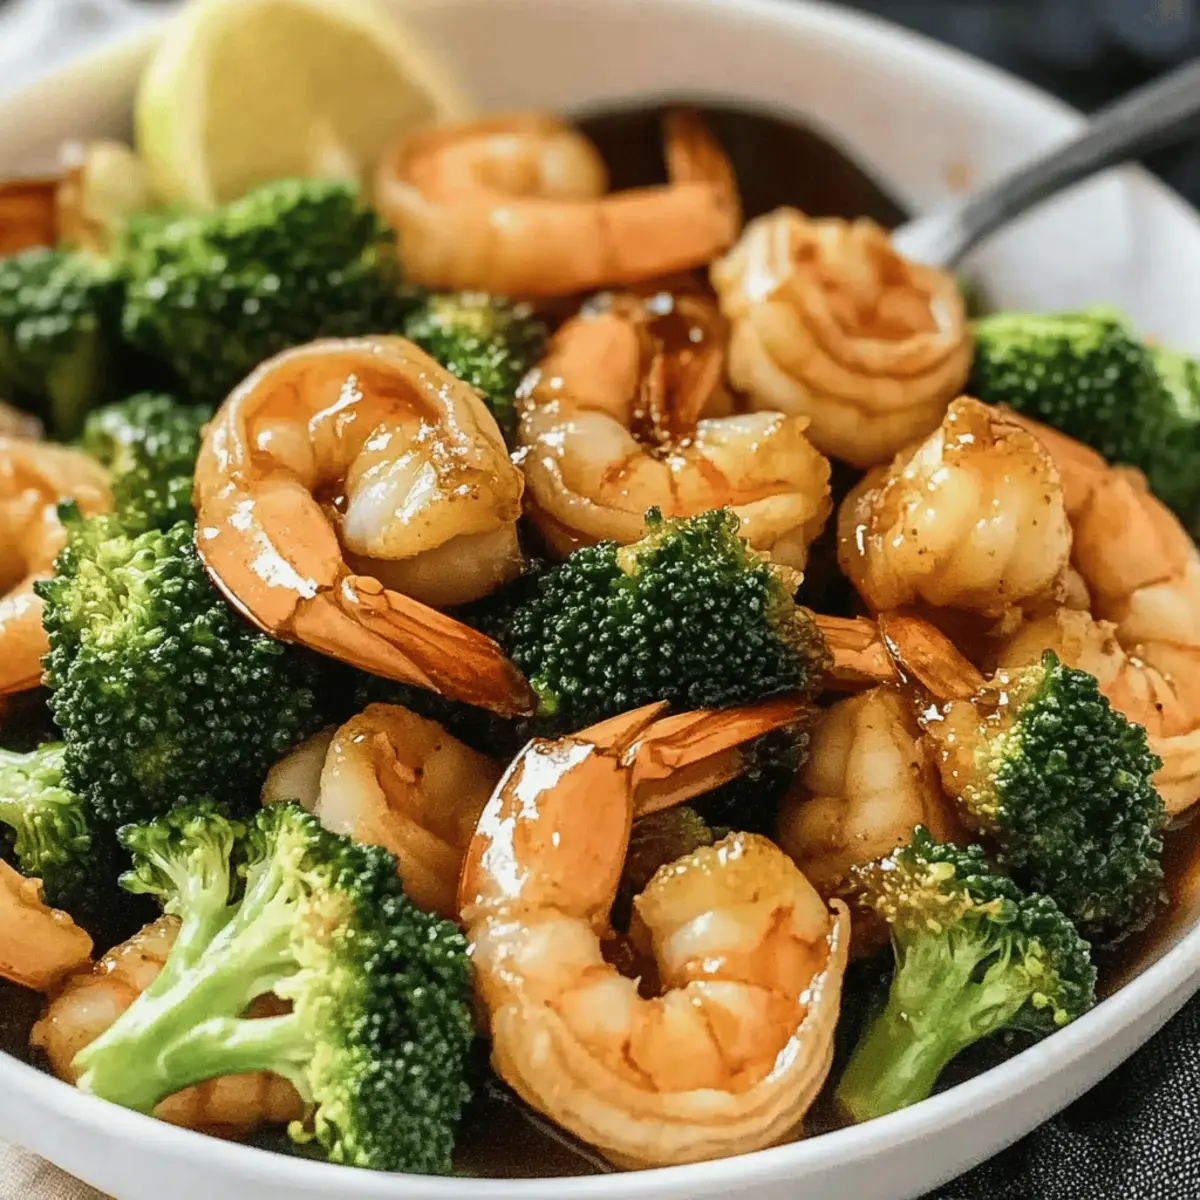
The sizzle of shrimp hitting a hot skillet evokes memories of lively hibachi restaurants, and today, I’m excited to bring that energy right into your kitchen with my Easy Hibachi Shrimp recipe. In just 10 minutes, you’ll be savoring tender shrimp paired with vibrant broccoli, all enhanced by a silky soy sauce and zesty lemon that will make your taste buds dance. This quick and simple dish is not only a feast for the senses but also a healthy choice perfect for busy weeknights. Imagine treating yourself and your loved ones to a restaurant-quality meal without stepping foot outside. Are you ready to uncover the secrets of this delightful dish?
Why is Easy Hibachi Shrimp a Must-Try?
Speedy Preparation: This recipe is a true lifesaver for busy nights, taking just 10 minutes from start to finish.
Customization Galore: Feel free to swap in your favorite veggies or proteins, making it versatile enough for everyone at the table.
Advertisement
Health Conscious: Low-calorie yet satisfying, it delivers 220 calories and 26g of protein per serving, enhancing your weeknight meals without guilt.
Flavor Explosion: The combination of buttery soy sauce and fresh lemon juice results in a mouthwatering taste that rivals any hibachi restaurant dish.
For a delicious side, consider pairing it with Cinnamon Roll Breakfast or a refreshing homemade salad for a complete meal!
Easy Hibachi Shrimp Ingredients
For the Shrimp
- Large Shrimp – Key protein source; use 41-50 count shrimp, peeled and deveined for optimal texture. Ensure they’re dried well to prevent steaming.
- Kosher Salt – Enhances shrimp flavor. Adjust amount based on personal taste.
- Black Pepper – Adds subtle heat. Freshly cracked is recommended for best flavor.
For the Broccoli
- Broccoli Florets – Provides crunch and nutrition. Can use fresh or pre-cut for convenience.
- Water – Necessary for steaming broccoli; ensures tenderness without overcooking.
For the Sauce
- Butter – Adds richness; essential for flavor. Don’t skip for best results.
- Soy Sauce – Key seasoning for umami flavor; low-sodium option can be used for a healthier choice.
- Fresh Lemon Juice – Brightens the dish; crucial for deglazing the pan. This helps lift flavors off the bottom of the pan and enhance overall taste.
Step‑by‑Step Instructions for Easy Hibachi Shrimp
Step 1: Prepare Shrimp
Begin by cleaning your large shrimp, making sure they are peeled and deveined. Pat them dry thoroughly with a paper towel, ensuring there’s no moisture left; this is crucial for achieving that perfect sear. Set the shrimp aside while you heat your skillet.
Step 2: Steam Broccoli
In a large skillet over medium-high heat, add the broccoli florets along with a splash of water. Cover the skillet with a lid and steam for about 1-2 minutes until the broccoli is bright green and slightly tender but still crisp. Once ready, remove the broccoli and set it aside on a plate.
Step 3: Cook Shrimp
Return the skillet to the heat and melt 1 tablespoon of butter until it’s bubbling and fragrant. Add the shrimp in a single layer, seasoning generously with kosher salt and freshly cracked black pepper. Leave the shrimp undisturbed for 1 minute to develop a nice, golden sear.
Step 4: Flip & Flavor
After the initial minute, carefully flip the shrimp using tongs. Pour in the soy sauce and continue to cook for an additional minute. The shrimp should turn pink and opaque, indicating they are cooked through and have absorbed the savory flavor of the soy sauce.
Step 5: Combine
Once the shrimp are done, return the steamed broccoli to the skillet and drizzle in any remaining soy sauce. Stir everything together and cook for an extra minute to ensure the flavors meld beautifully. Squeeze fresh lemon juice over the mixture, deglazing the pan and lifting all those tasty bits from the bottom.
Step 6: Serve
Transfer the vibrant Easy Hibachi Shrimp onto warm plates immediately. For an extra touch, feel free to sprinkle some sesame seeds on top for crunch and visual appeal. This tasty dish is now ready to be enjoyed while it’s still hot and fresh from the skillet!
Easy Hibachi Shrimp Variations & Substitutions
Feel free to personalize this Easy Hibachi Shrimp recipe to suit your taste buds and dietary needs!
-
Vegetable Swap: Replace broccoli with zucchini, bell peppers, or snap peas for a colorful twist that adds crunch.
-
Umami Boost: Add Mushrooms: Sliced mushrooms bring a deep, earthy flavor that elevates the overall dish.
Think of them as little flavor bombs that enhance the savory goodness of your shrimp.
-
Protein Twist: Chicken or Tofu: Swap shrimp with diced chicken breast or firm tofu for a hearty alternative that absorbs the flavors beautifully.
Both options offer a satisfying balance without sacrificing taste.
-
Spicy Kick: Red Pepper Flakes: Sprinkle in red pepper flakes or a dash of Sriracha for a delightful heat that awakens your senses.
It’s a simple addition that makes your meal unforgettable!
-
Herb Enhancement: Garnish with Fresh Herbs: Fresh cilantro or green onions add a pop of flavor and color, making each bite more vibrant.
The freshness brightens the dish entirely.
-
Different Citrus: Lime or Orange Juice: Swap lemon juice for lime or orange for a unique flavor profile that brings a refreshing note to the dish.
Each citrus option offers a different zestiness you might adore!
-
Soy Alternatives: Teriyaki Sauce or Coconut Aminos: Experiment with teriyaki sauce or coconut aminos for a sweeter, different twist on the traditional flavor.
These alternatives can give your hibachi shrimp a fun and unique flair.
For more exciting options, consider pairing this dish with Bacon Egg Breakfast or explore ways to enhance your next family meal!
Make Ahead Options
These Easy Hibachi Shrimp are perfect for meal prep enthusiasts! You can steam the broccoli and clean the shrimp up to 24 hours in advance, storing them separately in airtight containers in the refrigerator to maintain their freshness. Just before serving, quickly sauté the shrimp with butter and soy sauce, and toss in the previously steamed broccoli for a seamless finish. Make sure to dry the shrimp well after thawing, as this prevents steaming and ensures they sear beautifully. This way, you can enjoy a delicious hibachi-style meal in mere minutes on busy weeknights, saving precious time without compromising on flavor!
Expert Tips for Easy Hibachi Shrimp
- Dry the Shrimp: Moisture can cause shrimp to steam instead of sear. Ensure they are patted dry to achieve that perfect golden crust.
- Don’t Overcrowd: If your skillet is too full, the shrimp won’t brown nicely. Cook in batches if necessary for the best results.
- Monitor Broccoli: Steam just until bright green to maintain its crunch. Overcooked broccoli can lose its vibrant color and texture.
- Quality Ingredients Matter: Using high-quality soy sauce elevates the dish’s umami flavor. Look for low-sodium options to keep it healthier.
- Serve Immediately: This dish is best enjoyed fresh from the skillet. Plate it hot for optimal taste and texture that mimic a hibachi experience.
What to Serve with Easy Hibachi Shrimp
Imagine a vibrant table filled with delightful textures and flavors, each dish complementing the savory notes of your Easy Hibachi Shrimp.
-
Hibachi Fried Rice: This classic side offers a comforting, savory companion, featuring fragrant garlic and plump peas that balance perfectly with the shrimp’s zest.
-
Crispy Spring Rolls: Light and crunchy, these delightful rolls introduce a crispy texture and fresh vegetable crunch, enhancing the overall hibachi experience.
-
Cucumber Salad: A refreshing side dish, this salad’s crunch and tangy dressing provide a cool contrast to the richness of the shrimp and buttery sauce.
-
Miso Soup: Warm and soothing, a bowl of miso soup adds depth and umami flavors, making it a traditional accompaniment to your hibachi-inspired meal.
-
Sesame Noodles: These chewy noodles tossed in a sesame dressing offer a delicious contrast to the shrimp and are delightful with every bite.
-
Green Tea: A soothing pot of green tea serves as a perfect beverage, cleansing the palate while complementing the meal’s flavors beautifully.
-
Chocolate Mousse: For dessert, this creamy treat adds a decadent touch to the end of your meal, wrapping it up with an indulgent, yet light finish.
How to Store and Freeze Easy Hibachi Shrimp
Fridge: Store leftovers in an airtight container for up to 3-4 days. This keeps the Easy Hibachi Shrimp fresh while preventing moisture loss.
Freezer: For longer storage, freeze the cooked shrimp and broccoli in a freezer-safe container for up to 3 months. Allow to cool completely before freezing to maintain texture.
Reheating: To reheat, thaw in the fridge overnight, then gently warm in a skillet over medium heat until heated through, adding a splash of water or soy sauce to revive moisture.
Easy Hibachi Shrimp Recipe FAQs
What type of shrimp is best for this recipe?
Large shrimp, specifically the 41-50 count size, are ideal for this Easy Hibachi Shrimp recipe. Make sure they are peeled and deveined for the best texture. To avoid steaming, ensure they’re thoroughly dried before cooking.
How should I store leftovers, and how long do they last?
Store any leftover Easy Hibachi Shrimp in an airtight container in the refrigerator for up to 3-4 days. This helps maintain its flavors and textures, making it perfect for a quick meal later in the week. Reheat gently to avoid overcooking the shrimp.
Can I freeze Easy Hibachi Shrimp? If so, how?
Absolutely! To freeze Easy Hibachi Shrimp, allow it to cool completely first. Then, place the cooked shrimp and broccoli in a freezer-safe container or freezer bag. It can be stored for up to 3 months. When you’re ready to enjoy it again, thaw in the fridge overnight and reheat in a skillet with a splash of water or soy sauce to bring back moisture.
What should I do if my shrimp are not browning?
If your shrimp aren’t browning as expected, there may be too much moisture. Ensure they’re dried well before cooking, and avoid overcrowding the skillet, as this can cause steaming. Cooking in batches will help achieve that beautiful sear we all love.
Are there any dietary considerations I should know?
Great question! This Easy Hibachi Shrimp dish can be made gluten-free by using a gluten-free soy sauce alternative. Always double-check ingredient labels for allergens if you’re serving someone with food allergies. It’s also a light dish with low calories, but be sure to adjust if you’re including different proteins or additional sauces!
Can I use other vegetables instead of broccoli?
Very! This recipe is quite versatile. You can swap broccoli for zucchini, bell peppers, or snap peas based on your taste preferences. Each vegetable brings a different flavor and texture, making it easy to create your own version of Easy Hibachi Shrimp!
Savor the Taste of Easy Hibachi Shrimp in Just 10 Minutes
Ingredients
Equipment
Method
- Begin by cleaning your large shrimp, making sure they are peeled and deveined. Pat them dry thoroughly with a paper towel.
- In a large skillet over medium-high heat, add the broccoli florets along with a splash of water. Cover and steam for about 1-2 minutes until bright green.
- Return the skillet to the heat and melt 1 tablespoon of butter until bubbling. Add the shrimp in a single layer, seasoning with salt and pepper. Cook undisturbed for 1 minute.
- Carefully flip the shrimp using tongs. Pour in the soy sauce and cook for an additional minute until pink and opaque.
- Return the steamed broccoli to the skillet and drizzle in any remaining soy sauce. Stir and cook for an extra minute. Squeeze fresh lemon juice over the mixture.
- Transfer the Easy Hibachi Shrimp onto warm plates immediately. Optionally sprinkle sesame seeds for crunch.