Advertisement
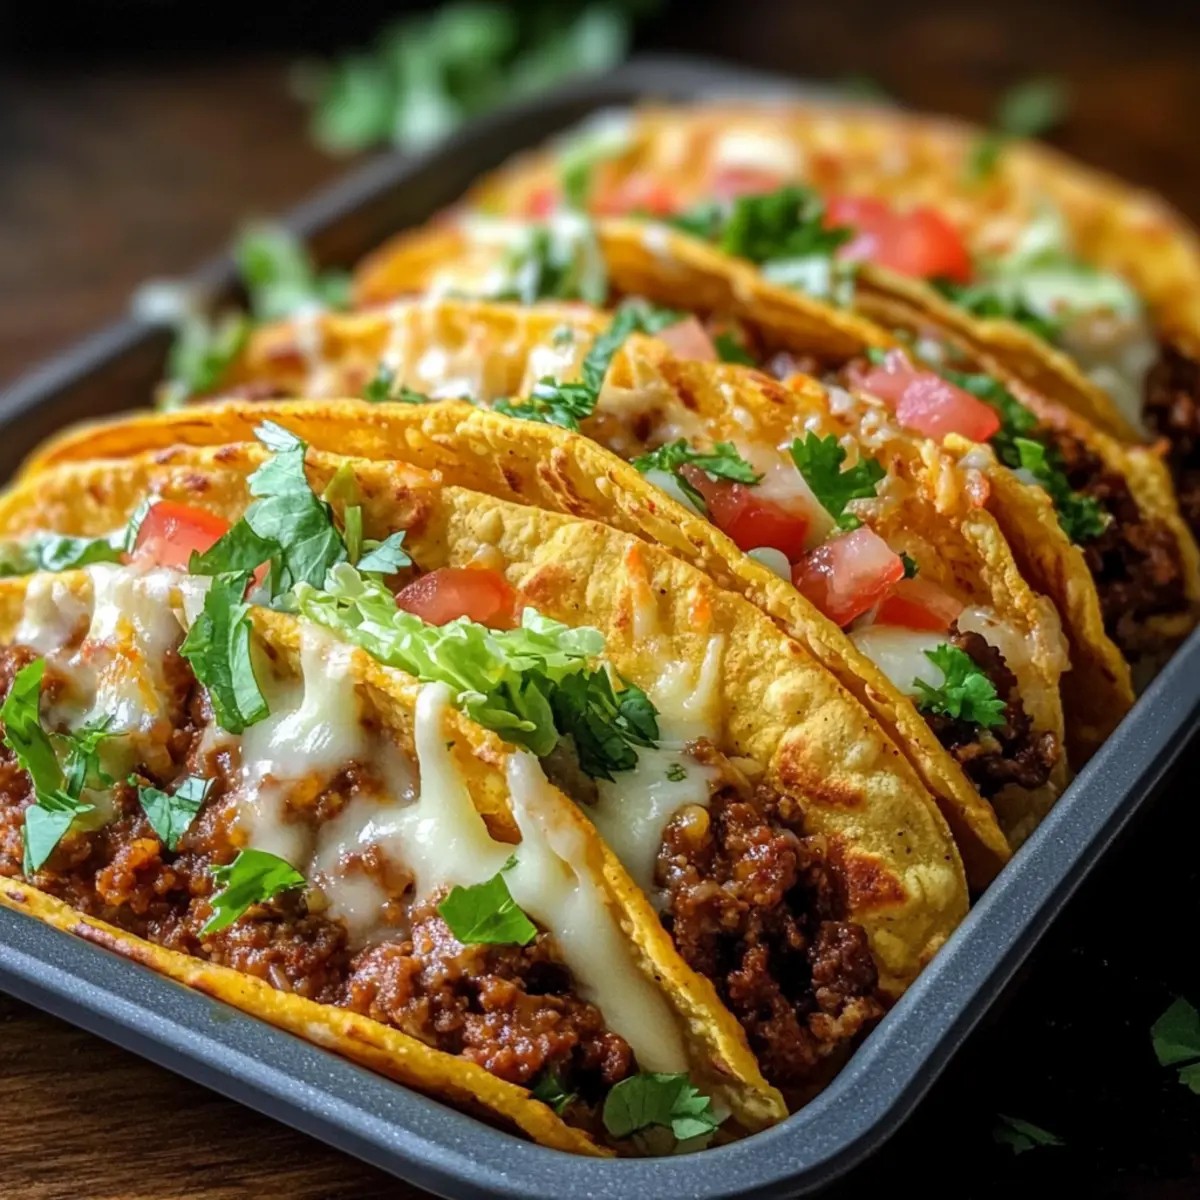
Sifting through piles of takeout menus, I found myself craving the vibrant flavors of homemade food. It was time for a culinary adventure that didn’t involve the microwave. Enter my Oven-Baked Cheesy Tacos—an easy weeknight meal that brings crispy taco shells loaded with a savory filling right to your dinner table in just 30 minutes. Not only are these tacos a fantastic crowd-pleaser, but they’re also gluten-free and infinitely customizable, allowing you to get creative with toppings and protein choices. Whether you prefer classic ground beef, tender chicken, or a plant-based twist, each bite is a celebration of savory bliss. Are you ready to elevate your taco game and embrace the aroma of baked goodness? Let’s dive in!
Why Are These Tacos a Must-Try?
Irresistible flavor: The combination of crispy taco shells and savory, cheesy filling creates a mouthwatering experience that will have everyone asking for seconds.
Quick & Easy: Whip up these Oven-Baked Cheesy Tacos in just 30 minutes, making them perfect for busy weeknights or last-minute gatherings.
Advertisement
Customizable: Choose your favorite protein—ground beef, turkey, chicken, or even a plant-based option—for a dish tailored to your taste.
Family-Friendly: With vibrant toppings like fresh lettuce and ripe tomatoes, even picky eaters can join in on the fun!
Satisfying Crunch: Each bite delivers a perfect balance of textures, combining crispy shells and gooey cheese that keeps you coming back for more.
Elevate your taco night with these delicious tacos, and if you’re a fan of cheesy dishes, check out our Cheesy Loaded Meatloaf or Cheesy Chicken Roll-Ups for more cheesy inspiration!
Oven-Baked Cheesy Tacos Ingredients
For the Filling
• Ground Beef – Provides protein and flavor; can be substituted with ground turkey, chicken, or beans for a plant-based option.
• Diced Onion – Adds sweetness and depth to the meat filling; shallots or green onions make great alternatives.
• Garlic (minced) – Enhances flavor beautifully; fresh garlic is ideal, but garlic powder works in a pinch.
• Taco Seasoning – Blends spices for flavoring; a homemade mix can replace store-bought varieties.
• Tomato Sauce/Salsa – Adds moisture and tang; swap for diced tomatoes or hot sauce if you prefer a kick.
For the Taco Shells
• Taco Shells – Ensure a sturdy base to hold your fillings; consider gluten-free options for dietary needs.
For the Topping
• Shredded Cheese – Melts wonderfully to bind flavors together; use cheddar, Monterey Jack, or dairy-free alternatives.
• Fresh Toppings (Lettuce, Tomatoes, Onions, Cilantro) – Provide crunch and freshness; customize with avocado, jalapeños, or sour cream for added vibrancy.
Elevate your taco night with these hearty Oven-Baked Cheesy Tacos that are sure to delight every palate at the table!
Step‑by‑Step Instructions for Oven-Baked Cheesy Tacos
Step 1: Preheat the Oven
Begin by preheating your oven to 400°F (200°C). This will ensure a perfect cooking environment for your Oven-Baked Cheesy Tacos. While waiting, prepare a 9×13-inch baking dish by lightly greasing it or using non-stick spray, which helps the taco shells crisp beautifully during baking.
Step 2: Arrange the Taco Shells
Carefully place the hard taco shells upright in the prepared baking dish. Spacing them evenly allows the heat to circulate, ensuring each shell becomes perfectly crispy. Take a moment to admire the arrangement—this colorful array will soon be filled with deliciousness!
Step 3: Cook the Ground Beef
In a large skillet over medium heat, cook 1 pound of ground beef along with 1 diced onion until the meat is browned and the onion is translucent, about 5-7 minutes. Make sure to break the beef into smaller pieces while stirring. Drain any excess fat to keep the filling savory without being greasy.
Step 4: Add Flavor to the Beef
Stir in 2 minced garlic cloves and 2 tablespoons of taco seasoning into the cooked meat mixture. Cook for an additional minute until fragrant, filling your kitchen with irresistible aromas. Pour in 1 cup of tomato sauce or salsa and let the mixture simmer for 5 minutes, allowing the flavors to meld together.
Step 5: Fill the Taco Shells
Spoon the seasoned beef mixture generously into each taco shell, filling them approximately three-quarters full. Top each filled shell with a handful of shredded cheese, making sure to cover the filling thoroughly. This cheesy layer will melt into gooey perfection as the tacos bake.
Step 6: Bake the Tacos
Carefully place the baking dish in the preheated oven and bake for 10-15 minutes. Keep an eye on them as the cheese melts and begins to bubble—aim for a golden appearance on the shells for that ultimate crispiness and deliciousness in your Oven-Baked Cheesy Tacos.
Step 7: Add Fresh Toppings
Once baked to perfection, remove the dish from the oven. Let the tacos cool slightly, then top them with your choice of fresh toppings like shredded lettuce, diced tomatoes, chopped onions, and cilantro.
Step 8: Serve and Enjoy
Dig into your Oven-Baked Cheesy Tacos while they are warm and delicious! Encourage everyone to customize their tacos with sour cream, avocado, or jalapeños for a personalized touch. These hearty tacos are ready to delight your family and friends!
Helpful Tricks for Oven-Baked Cheesy Tacos
Preheat Properly: Ensure your oven is fully preheated before baking to achieve that delightful crispy texture on the taco shells.
Avoid Overcrowding: Arrange taco shells with enough space between them. Overcrowding can lead to uneven cooking, making some shells soggy.
Customize Your Protein: Feel free to mix and match proteins! Use ground turkey, chicken, or even lentils to create your ideal Oven-Baked Cheesy Tacos.
Watch the Cheese: Bake until cheese is melted and bubbling, but keep an eye on the shells to ensure they don’t burn.
Mix Up Toppings: Get creative! Adding avocado or jalapeños elevates the flavor and freshness of your tacos, making every bite satisfying.
Save Leftovers: Store any leftover tacos in an airtight container for up to three days and reheat them at 350°F (175°C) for a quick meal.
How to Store and Freeze Oven-Baked Cheesy Tacos
Fridge: Store any leftover Oven-Baked Cheesy Tacos in an airtight container for up to 3 days. This keeps them fresh while retaining their delicious flavor.
Freezer: If you want to prepare them ahead, freeze assembled but unbaked tacos individually wrapped in plastic for up to 2 months. Thaw overnight before baking.
Reheating: To reheat, place the stored tacos in a preheated oven at 350°F (175°C) for about 10-15 minutes, or until heated through and cheese is melted.
Make-Ahead Tip: You can prepare the beef filling ahead of time and store it in the fridge for up to 3 days, then assemble fresh tacos just before baking for maximum crunch.
Oven-Baked Cheesy Tacos Variations
Explore the delightful possibilities of customizing your Oven-Baked Cheesy Tacos for your family’s taste buds!
-
Ground Turkey: Swap ground beef for ground turkey for a leaner option that’s equally packed with flavor.
Enjoy the same savory goodness with a lighter twist, making these tacos perfect for health-conscious nights. -
Chicken Delight: Use shredded rotisserie chicken for a speedy, tender filling that pairs beautifully with taco spices.
It’s a great option if you’re looking to save time while still serving up delicious flavors. -
Plant-Based Option: For a vegan delight, replace meat with lentils or black beans, seasoned just like the original.
You’ll create a hearty and satisfying taco that everyone, meat-lovers included, will enjoy. -
Cheese Variety: Experiment with different cheeses—try pepper jack for a spicy kick or goat cheese for a creamy twist.
Each cheese brings its unique flair, making your tacos a delightful adventure in flavors and textures! -
Crunchy Corn: Add corn to your beef mixture for a sweet crunch that complements the savory filling perfectly.
This added texture brings another layer of satisfaction to each flavorful bite. -
Spicy Touch: Mix chopped jalapeños into the filling or top your tacos with sliced jalapeños for a little extra heat.
Elevate the spice level to suit your taste preferences and keep things exciting at the dinner table. -
Fresh Herbs: Enhance flavors further by adding fresh cilantro or even mint as a topping.
This will add a burst of freshness that brightens up the dish and elevates your taco experience! -
Saucy Switch: Try different sauces instead of tomato sauce, like barbecue sauce, to give your tacos a sweet, smoky flavor.
This creative twist can redefine your taco night, making each serving a new and unexpected delight.
With these variations, you can create a taco night that’s not only delicious but also perfectly tailored to your family’s preferences. And if you’re craving more cheesy goodness, be sure to check out the Golden Savory Cheesy Bites for another crowd-pleasing option!
Make Ahead Options
These delicious Oven-Baked Cheesy Tacos are perfect for meal prep enthusiasts! You can prepare the beef filling up to 3 days in advance, storing it in an airtight container in the refrigerator. For best quality, allow the filling to cool completely before sealing it to prevent moisture buildup. Additionally, you can assemble the tacos in the shells (but leave off the cheese) and refrigerate them for up to 24 hours. When you’re ready to bake, simply sprinkle the shredded cheese on top and follow the baking instructions, aiming for that perfect golden crust. These make-ahead strategies ensure you can enjoy a satisfying meal with minimal effort on busy nights!
What to Serve with Oven-Baked Cheesy Tacos
Looking to create a delightful dining experience that perfectly complements your sizzling tacos?
- Creamy Guacamole: The velvety texture and rich flavor elevate the fresh elements of your tacos, adding a luscious layer of indulgence.
- Crisp Garden Salad: A refreshing mix of greens and colorful veggies brightens your meal, balancing the richness of the cheesy filling.
- Spanish Rice: Flavorful and fluffy, this classic side adds heartiness while soaking up any taco drippings with every bite.
- Refried Beans: Creamy and spiced, these beans work beautifully with the crispy tacos, providing a savory protein punch with every forkful.
- Zesty Salsa: A tangy fresh salsa packs a punch of vibrant flavors, perfect for those who like to enhance their tacos with extra zest.
- Corn on the Cob: Grilled corn with a sprinkle of lime and chili brings sweetness that contrasts nicely with the savory elements of the tacos.
- Chilled Beverages: Pair with a refreshing limeade or cold Mexican beer for a casual and fun dining atmosphere.
- Coconut Flan: End the meal on a sweet note—this creamy dessert delivers a delightful contrast to the savory tacos, rounding out your feast perfectly.
Oven-Baked Cheesy Tacos Recipe FAQs
How do I choose ripe ingredients for my toppings?
Absolutely! When selecting ripe ingredients, look for vibrant colors and firm textures. For tomatoes, choose those that feel slightly soft and have a rich smell. Avocados should yield gently to pressure, indicating they are creamy inside. Fresh herbs like cilantro should be bright green and fragrant—avoid any yellowing leaves.
What is the best way to store leftover Oven-Baked Cheesy Tacos?
Very! Store any leftover Oven-Baked Cheesy Tacos in an airtight container in the fridge for up to 3 days. This method preserves their flavor and texture. Just ensure they’re completely cooled before covering to prevent condensation buildup, which could make the shells soggy.
How do I freeze them for later use?
Of course! To freeze, first prepare the tacos as directed but do not bake them. Wrap each assembled taco tightly in plastic wrap, then place them in a freezer-safe zip-top bag, removing as much air as possible. They can be frozen for up to 2 months. When ready to bake, simply thaw them overnight in the fridge and bake according to the original recipe instructions.
What should I do if my taco shells are too soft or soggy after baking?
Oh no! If your taco shells turn out soft, it might be due to overcrowding in the baking dish or not preheating the oven. Ensure the shells are spaced in the dish for even heat distribution. If they do end up soggy, try placing them back in the oven for a few minutes at 350°F (175°C) to help crisp them up again. Avoid using too much filling, as well, since moisture can seep into the shells.
Can I make these Oven-Baked Cheesy Tacos gluten-free?
Certainly! Simply opt for gluten-free taco shells and ensure any sauces or seasonings you use are labeled gluten-free. For a plant-based alternative, try using lentils or beans in place of meat, which keeps recipes wholesome and accommodating for various dietary preferences.
Are these tacos pet-friendly?
Generally, it’s best to keep these Oven-Baked Cheesy Tacos away from pets. Ingredients like onions and garlic can be harmful to dogs. However, you can make a separate, pet-friendly version using plain cooked meat without any spices or toppings—and I bet they’d love it!
Oven-Baked Cheesy Tacos: Crispy Flavor in Every Bite
Ingredients
Equipment
Method
- Preheat your oven to 400°F (200°C) and grease a 9x13-inch baking dish.
- Place taco shells upright in the baking dish, spacing evenly.
- In a skillet over medium heat, cook 1 pound of ground beef and 1 diced onion until browned, about 5-7 minutes.
- Stir in 2 minced garlic cloves and 2 tablespoons of taco seasoning, cooking for an additional minute. Pour in 1 cup of tomato sauce or salsa and let it simmer for 5 minutes.
- Fill each taco shell with the beef mixture, and top with shredded cheese.
- Bake in the preheated oven for 10-15 minutes until cheese is melted and bubbly.
- Remove from oven, top with fresh toppings, and serve warm.