Advertisement
A Magical Treat That Brings Joy
There’s something about cake pops that makes them extra special. Maybe it’s their bite-sized perfection, their rich, moist texture, or the fact that they bring back childhood memories of festive celebrations. But when you take a classic cake pop and turn it into a pot of gold, you create a dessert that’s not just delicious but also magical.
I still remember the first time I made these for a St. Patrick’s Day party. I wanted a treat that would make both kids and adults smile, something whimsical yet simple to make. As I dipped each cake pop in glossy dark chocolate and decorated them with golden candy pearls, I realized I was crafting tiny edible treasures. The moment I placed them on the dessert table, they became the star of the party. Guests loved the creativity, kids were mesmerized by the “gold coins” on top, and everyone agreed—they tasted just as good as they looked.
Now, these pot of gold cake pops have become a yearly tradition. Whether for St. Patrick’s Day, a rainbow-themed party, or simply as a fun weekend baking project, they never fail to bring joy.
Why These Cake Pops Stand Out
1. Fun and Festive for Any Occasion
These cake pops are perfect for St. Patrick’s Day, but they also work for birthdays, baby showers, and any event with a rainbow or treasure theme. Their eye-catching design makes them a standout dessert at any gathering.
Advertisement
2. The Perfect Combination of Texture and Flavor
Soft, moist cake blended with creamy frosting creates a melt-in-your-mouth texture. The smooth chocolate coating adds a satisfying crunch, while the golden sprinkles and rainbow candy add an extra burst of sweetness.
3. Easy to Make and Customize
Cake pops may look fancy, but they’re surprisingly easy to make. You can use any cake flavor you love—classic vanilla, rich chocolate, or even red velvet. The decorations can also be tailored to fit different themes, making them a versatile treat for any celebration.
4. A Great Activity for Kids
If you’re looking for a fun baking project to do with kids, this is it. They’ll love rolling the cake balls, dipping them in chocolate, and decorating them with edible gold and rainbow accents. It’s a hands-on activity that ends with a delicious reward.
Ingredients:
- Yellow cake
- White frosting
- Cake pop sticks
- Dark chocolate candy melts
- Yellow decorating icing
- Airhead rainbow candy belts
- Gold candy pearls
Directions:
- Prepare the Cake Base: Bake a yellow cake according to your preferred recipe or package instructions. Allow it to cool completely, then crumble it into fine pieces in a large bowl.
- Combine with Frosting: Add 2 to 3 tablespoons of white frosting to the crumbled cake. Mix thoroughly until the mixture reaches a dough-like consistency.
- Form Cake Balls: Using a mini ice cream scoop or a tablespoon, scoop portions of the mixture and roll them into uniform balls. Place them on a parchment-lined baking tray.
- Insert Sticks: Melt a small amount of dark chocolate candy melts in the microwave (about 30 seconds). Dip the tip of each cake pop stick into the melted chocolate, then insert it halfway into each cake ball. This helps secure the stick.
- Chill the Pops: Place the tray of cake pops in the freezer for approximately 15 minutes to firm them up.
- Coat with Chocolate: Melt the remaining dark chocolate candy melts in a tall, microwave-safe container until smooth. Dip each chilled cake pop into the melted chocolate, ensuring it is fully coated. Let any excess chocolate drip off, then gently press the top of each pop onto the parchment-lined tray to create a flat surface, resembling the top of a cauldron.
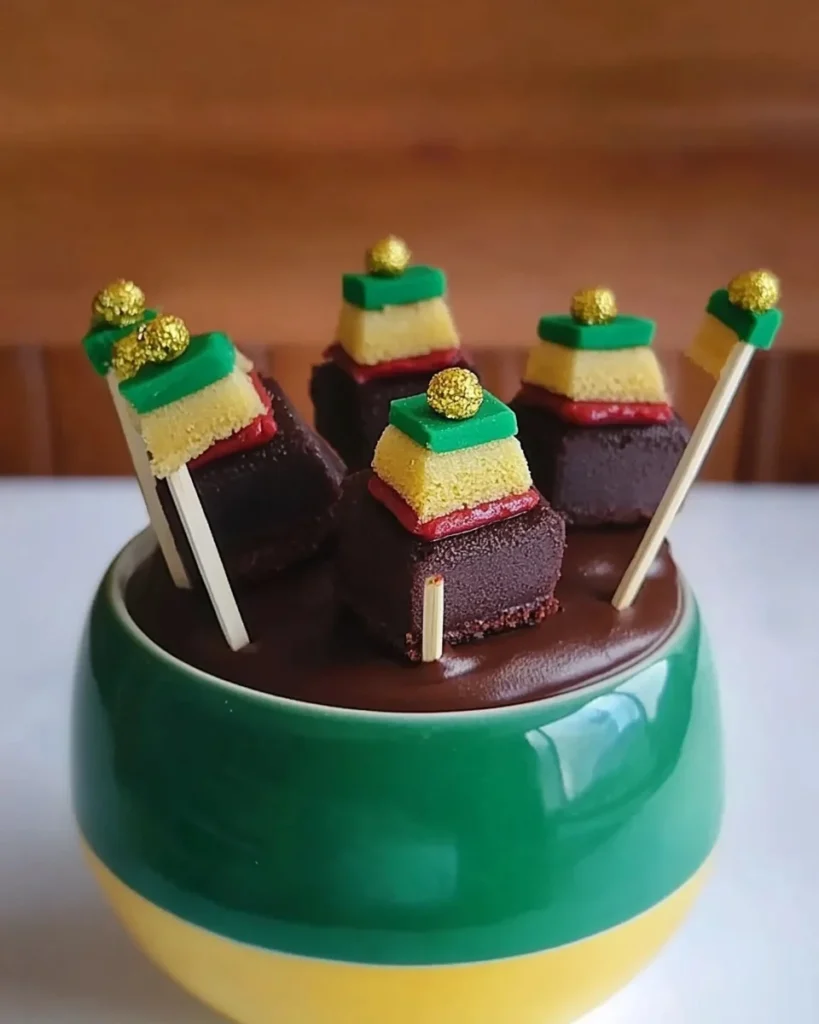
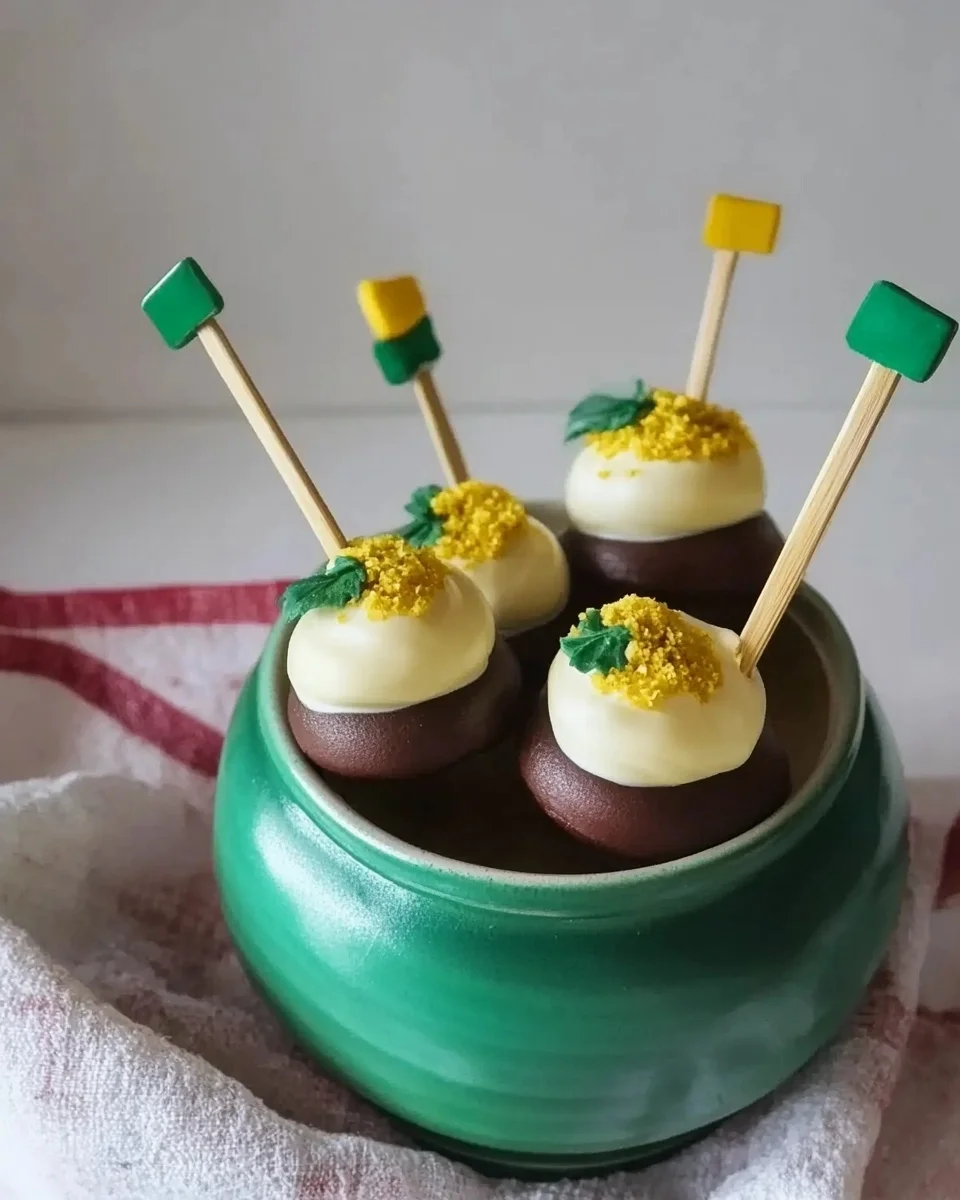
- Decorate the Pops: Once the chocolate coating has hardened, stand the cake pops upright in a stand or foam block. Pipe a generous mound of yellow decorating icing onto the flat top of each pop to mimic overflowing gold.
- Add Rainbow and Gold Accents: Cut the Airhead rainbow candy belts into small diagonal pieces. Insert one piece into the center of the yellow icing on each pop to represent a rainbow. Adorn the icing with gold candy pearls to enhance the “pot of gold” effect.
Nutritional Information (per serving):
- Calories: 220
- Total Fat: 10g
- Saturated Fat: 6g
- Cholesterol: 35mg
- Sodium: 150mg
- Total Carbohydrates: 30g
- Sugars: 22g
- Protein: 2g
Note: Nutritional values are approximate and may vary based on specific ingredients and serving sizes.
The Secrets to Perfect Cake Pops
1. Use the Right Cake-to-Frosting Ratio
The key to a perfect cake pop is the right balance of cake and frosting. Too much frosting makes them too soft, while too little makes them dry and crumbly. Start with a small amount of frosting and add more if needed. The mixture should hold together when rolled but not feel overly sticky.
2. Chill Before Dipping
Cake pops can fall apart if they’re not properly chilled before dipping. A quick 15-minute trip to the freezer helps them stay firm, making them easier to coat in melted chocolate.
3. Use High-Quality Chocolate for Coating
The chocolate coating is what gives these cake pops their smooth, glossy finish. High-quality candy melts or dark chocolate work best, as they melt evenly and set beautifully.
4. Secure the Sticks Properly
Dipping the cake pop sticks into melted chocolate before inserting them into the cake balls helps keep them in place. This simple step prevents the sticks from slipping out while dipping.
5. Work Quickly with Decorations
Once the chocolate coating starts to set, it can be difficult to add decorations. Be ready with your golden candy pearls and rainbow candy strips so you can place them before the chocolate hardens completely.
Creative Ways to Serve and Display Pot of Gold Cake Pops
1. Cake Pop Bouquet
Arrange the cake pops in a decorative jar or foam stand to create a bouquet-like display. It’s a great way to showcase them at a party.
2. Individual Gift Wraps
Wrap each cake pop in a clear cellophane bag and tie it with a gold ribbon for a perfect party favor or gift.
3. Cupcake Toppers
Place cake pops on top of cupcakes for an extra layer of fun and creativity. They add height and excitement to any dessert spread.
4. Treasure Hunt Treats
For a fun twist, hide these cake pops as “treasures” in a scavenger hunt. Kids will love searching for and discovering their edible pot of gold.
Frequently Asked Questions
1. Can I Use Store-Bought Cake Instead of Baking One?
Yes! Store-bought cake works just as well for cake pops. Simply crumble it and mix with frosting as you would with a homemade cake.
2. What’s the Best Way to Melt Chocolate for Dipping?
Use a microwave-safe bowl and heat the chocolate in 30-second intervals, stirring in between, until smooth. You can also use a double boiler for more controlled melting.
3. How Do I Keep Cake Pops from Cracking?
Cracking happens when the cake balls are too cold and the melted chocolate is too hot. Let the cake pops sit at room temperature for a few minutes before dipping to reduce temperature shock.
4. Can I Make These Ahead of Time?
Yes! Cake pops can be made in advance and stored in an airtight container in the refrigerator for up to a week. You can also freeze them for up to a month.
5. How Do I Make Cake Pops Without Sticks?
If you don’t have cake pop sticks, you can make cake truffles instead. Simply roll the cake mixture into balls, dip them in chocolate, and place them on parchment paper to set.
6. What Other Themes Can I Use for These Cake Pops?
These cake pops can easily be customized for different occasions. Swap the gold decorations for sprinkles to match any holiday or theme. Use pink and white for a princess party or blue and silver for a winter wonderland treat.
Conclusion: A Little Bite of Happiness
Pot of gold cake pops are more than just a dessert—they’re a fun, whimsical way to celebrate life’s little moments. Whether you’re making them for St. Patrick’s Day, a themed birthday party, or just as a special treat, they bring a sense of joy and creativity to any occasion.
With their rich, moist cake center, smooth chocolate coating, and eye-catching decorations, these cake pops are guaranteed to impress. They’re a reminder that sometimes, the best treasures aren’t found at the end of the rainbow—they’re made right in your kitchen.
So gather your ingredients, roll up your sleeves, and start creating your own little edible pots of gold. Whether you share them with family, friends, or keep a few for yourself, one thing is certain—these cake pops will bring smiles with every bite.
Gold-Dipped Cake Pops for St. Patrick’s Day
Ingredients
Method
- Crumble the baked cake into a large mixing bowl. Add white frosting and mix until a dough-like consistency forms.
- Roll the mixture into evenly sized balls and place them on a parchment-lined tray.
- Melt a small amount of dark chocolate candy melts. Dip the tip of each cake pop stick into the melted chocolate, then insert it into each cake ball.
- Chill the cake pops in the freezer for 15 minutes to firm up.
- Melt the remaining dark chocolate in a microwave-safe bowl, stirring until smooth. Dip each cake pop into the chocolate, ensuring even coverage.
- Press the top of each cake pop onto parchment paper to create a flat surface, resembling the top of a cauldron.
- Once the chocolate is set, pipe a small mound of yellow decorating icing on top of each pop.
- Attach a piece of rainbow candy to the icing and sprinkle gold candy pearls on top to create the “pot of gold” effect.
- Let the decorations set before serving.
Notes
- If the cake mixture is too sticky, refrigerate for 10 minutes before rolling into balls.
- Use high-quality candy melts for a smooth chocolate coating.
- Store the cake pops in an airtight container in the fridge for up to a week.
- For extra stability, let the cake pops sit at room temperature for a few minutes before dipping to prevent cracking.