Advertisement
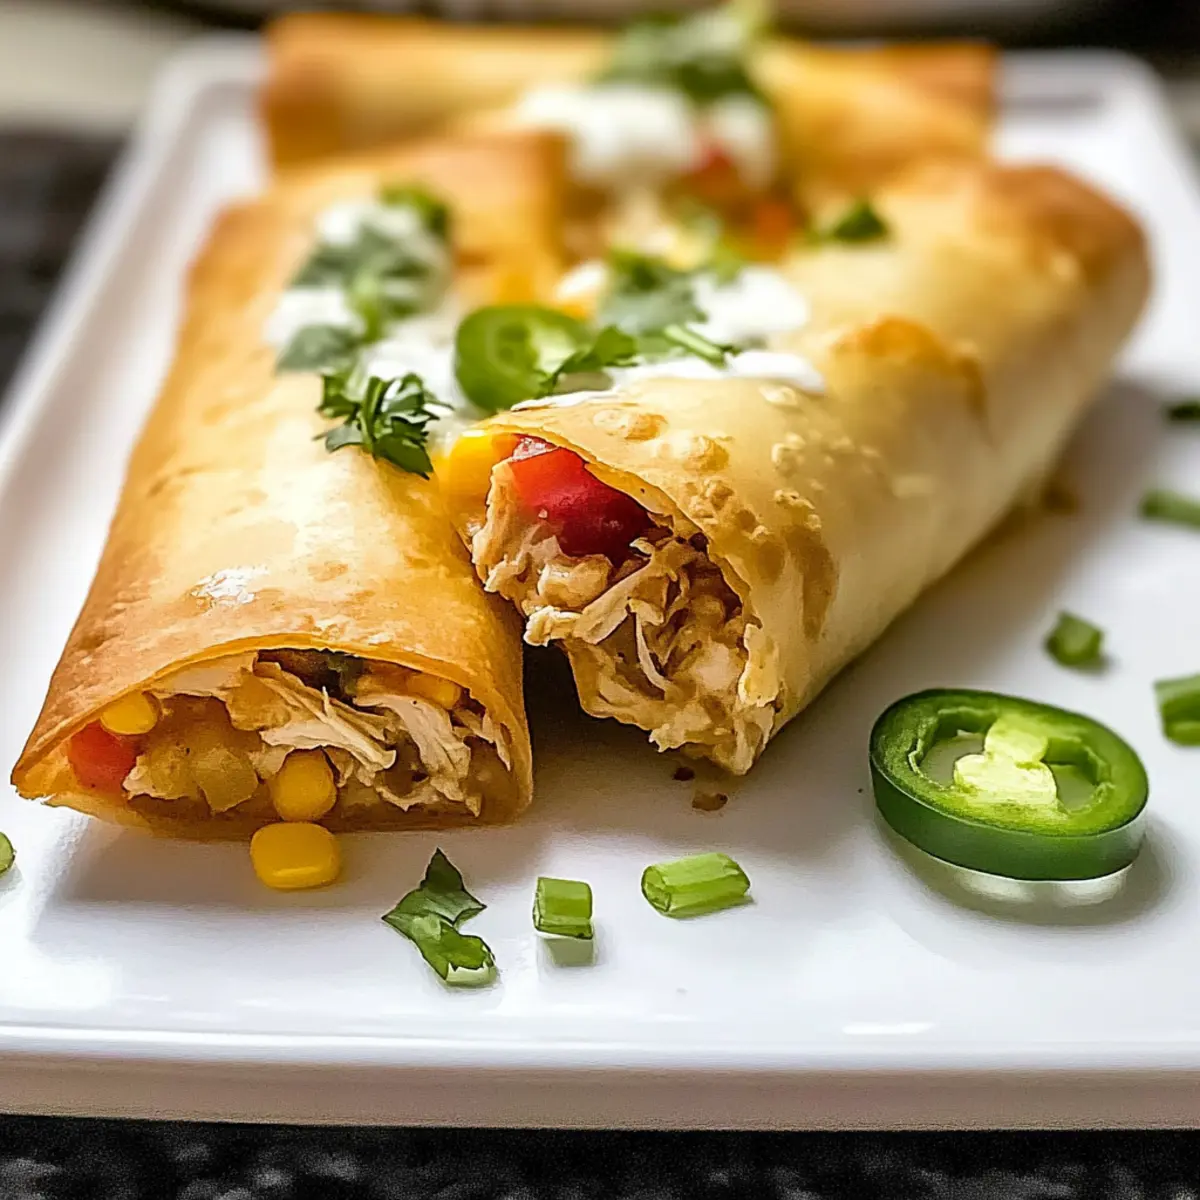
As I stood by the oven, the rich scent of spices wafted through the kitchen, and I couldn’t help but feel a wave of excitement. Today, I’m sharing my go-to recipe for Easy Baked Chicken Chimichangas—a flavorful dish that strikes the perfect balance between health and indulgence. These delightful chimichangas are not only quick to prepare, making them ideal for those bustling weeknights, but they also offer a customizable filling option that lets you cater to both meat lovers and veggie enthusiasts alike. Whether you’re aiming for a guilt-free dinner or a fun family meal, these crispy treats are sure to become a staple in your home. What would you fill yours with?
Why Will You Love These Chimichangas?
Quick Preparation: With just a few simple steps, you can have these delicious chimichangas ready in under 30 minutes, perfect for busy weeknights.
Customizable Fillings: Whether you’re in the mood for chicken, veggies, or even a spicy twist, the filling options are endless. You can easily create a combination that suits everyone’s taste.
Advertisement
Healthier Alternative: These baked chimichangas offer a guilt-free way to enjoy a classic Tex-Mex favorite without sacrificing flavor, making it a win-win for health-conscious eaters.
Crowd Pleaser: They’re great for family dinners or gatherings, and they will impress guests with their golden crunch and savory filling.
Delicious Leftovers: If you have any chimichangas left over, they reheat beautifully—perfect for packing in lunches or enjoying a quick snack! Give these a try and pair them with a side of Healthy Baked Chicken for a complete meal!
Easy Baked Chicken Chimichanga Ingredients
• Ready to assemble these mouthwatering chimichangas? Here’s what you’ll need!
For the Filling
- Cooked Shredded Chicken – The star ingredient for a filling rich in flavor and protein. Tip: Use rotisserie chicken for fuss-free prep.
- Refried Beans – Provides a creamy texture that binds everything together. Substitution: Opt for black beans if you prefer a lighter option.
- Salsa – Adds moisture and a burst of flavor in every bite. Feel free to use your favorite store-bought or homemade salsa.
- Coriander – Infuses a touch of freshness for a balanced taste. Optional: Cumin works as a great alternative.
- Chili Powder – Delivers a warm and inviting spice to the filling. You can also use a taco seasoning packet for an easy swap.
- Shredded Cheese (Cheddar/Mexican Blend) – Melts beautifully to create a deliciously rich filling. For extra heat, consider using Pepper Jack cheese.
- Green Onions – Adds a delightful crunch and mild onion flavor. Regular onions can be used if you prefer their stronger taste.
- Jalapeños – A spicy kick to elevate the flavor. Adjust according to your heat tolerance; removing the seeds will lessen the spice.
For Assembly
- Flour Tortillas – Forms the delightful shell for your chimichangas. Use large burrito-sized tortillas for the best results; avoid corn tortillas for this recipe.
For the Finish
- Butter (Melted) – Ensures a crisp, golden exterior that’s hard to resist. You can substitute with olive oil or avocado oil if desired.
Ready to dive into the delightful world of Easy Baked Chicken Chimichangas? These ingredients are not just about flavor; they’re about creating cherished moments around the dinner table!
Step‑by‑Step Instructions for Easy Baked Chicken Chimichanga
Step 1: Preheat the Oven
Begin by preheating your oven to 400°F (200°C). This ensures that your Easy Baked Chicken Chimichangas will bake uniformly and achieve that delightful crispy texture. While the oven heats, prepare a baking sheet by lining it with parchment paper for easy cleanup later.
Step 2: Prepare the Filling
In a large mixing bowl, combine the cooked shredded chicken, refried beans, salsa, coriander, chili powder, shredded cheese, chopped green onions, and diced jalapeños. Stir these ingredients together until they’re fully integrated, creating a flavorful filling. The mixture should be fragrant and cohesive, ready to fill your tortillas.
Step 3: Assemble the Chimichangas
Lay a flour tortilla flat on a clean surface and spoon a generous amount of the chicken filling along the center. Carefully roll the tortilla tightly, folding in the sides as you go to secure the filling inside. This step is crucial to ensure that each Easy Baked Chicken Chimichanga holds together beautifully during baking.
Step 4: Arrange on Baking Sheet
Place the assembled chimichangas seam-side down on the parchment-lined baking sheet. Make sure they are spaced apart to allow for even baking. Brush the tops of each chimichanga with melted butter, which will create that golden, crispy exterior everyone will love.
Step 5: Bake to Perfection
Slide the baking sheet into the preheated oven and bake the chimichangas for 15 minutes. Once they look lightly golden, carefully flip each chimichanga over to ensure even baking, and return them to the oven for an additional 10 minutes. They should emerge crispy and beautifully browned.
Step 6: Cool Before Serving
After baking, allow the Easy Baked Chicken Chimichangas to cool for about 5-10 minutes. This cooling period helps the filling settle and makes them easier to handle. Consider serving them with your favorite toppings like sour cream or guacamole for a delicious finish.
How to Store and Freeze Easy Baked Chicken Chimichangas
Fridge: Store the leftover Easy Baked Chicken Chimichangas in an airtight container for up to 3 days to maintain freshness and flavor.
Freezer: Freeze unbaked chimichangas individually wrapped in plastic wrap for up to 3 months. Thaw them overnight in the fridge before baking for the best results.
Reheating: To reheat the baked chimichangas, place them back in a preheated oven at 350°F (175°C) for about 10 minutes until warmed through and crisp again.
Cooling: Allow baked chimichangas to cool completely before storing to help maintain their crisp texture and prevent sogginess.
Expert Tips for Easy Baked Chicken Chimichangas
Tight Rolling: Ensure each chimichanga is rolled tightly. A loose wrap can cause filling to spill out during baking, ruining the crispiness.
Parchment Paper: Line your baking sheet with parchment paper. This simple step ensures easy cleanup and prevents sticking, keeping those chimichangas intact.
Cooling Time: Be patient and allow them to cool for 5-10 minutes before serving. This helps the filling set, making them easier to eat and enjoy.
Custom Fillings: Get creative with fillings! Don’t hesitate to try ground beef, pulled pork, or your favorite veggies for a personalized Easy Baked Chicken Chimichanga that suits everyone’s taste.
Adjust Spice: If you’re sensitive to heat, adjust the jalapeños. Remove the seeds for a milder flavor or leave them in for an extra kick.
What to Serve with Easy Baked Chicken Chimichangas
Pairing delicious sides and drinks elevates the experience of enjoying these mouthwatering chimichangas. Here are some fantastic ideas to complete your meal!
-
Classic Mexican Rice: A colorful side that offers a subtle flavor complement, making each bite more satisfying. The fluffy grains balance the crunchiness of the chimichangas perfectly.
-
Creamy Refried Beans: Rich and comforting, these beans provide a luscious texture that pairs effortlessly with the crispy exterior of the chimichangas. Their creamy nature enhances the overall dining experience.
-
Fresh Corn Salad: Bursting with sweetness and vibrant colors, this salad adds a refreshing crunch. Its zesty dressing beautifully contrasts the warm filling inside the chimichangas.
-
Guacamole: This creamy avocado dip enriches each bite with its rich texture and freshness. Pairing guacamole with chimichangas will surely impress your guests.
-
Spicy Salsa: A zesty salsa introduces a delightful kick that complements the flavors of the chimichangas. Whether chunky or smooth, it adds layers of flavor to every mouthful.
-
Margaritas: To sip alongside these chimichangas, a refreshing margarita brings a lively vibe to your meal, perfectly harmonizing with the Tex-Mex flavors.
-
Churros: For dessert, indulge in warm churros dusted with cinnamon sugar. Their crispy texture and sweet flavor make a delightful finish to your meal.
-
Watermelon Agua Fresca: This fresh, hydrating drink will cleanse your palate, leaving you feeling light and satisfied after enjoying your chimichangas.
-
Fruit Sorbet: Add a sweet twist with a light sorbet, providing a refreshing coolness that pairs wonderfully after a savory meal.
These pairing ideas not only enhance the flavors of your Easy Baked Chicken Chimichangas but also create a joyful, satisfying dining experience. Enjoy exploring these delightful combinations!
Make Ahead Options
These Easy Baked Chicken Chimichangas are perfect for meal prep enthusiasts! You can prepare the filling (shredded chicken, refried beans, and spices) up to 24 hours in advance. Simply mix the ingredients, cover the bowl, and refrigerate. Then, when you’re ready to serve, lay out your tortillas, spoon in the prepped filling, roll them up, and bake. If you’d like to assemble the chimichangas completely, you can also do that and store them in the fridge for up to 3 days. Just remember to brush them with melted butter before baking to achieve that crispy outer layer. Enjoy the convenience of a delicious meal without sacrificing quality, making busy weeknights a breeze!
Easy Baked Chicken Chimichanga Variations
Feel free to get creative with these chimichangas! Each variation offers a unique twist that will excite your taste buds.
- Veggie Delight: Replace chicken with sautéed bell peppers, zucchini, and black beans for a hearty vegetarian option. The fresh veggies add a delightful crunch, making every bite a joy.
- Spicy Kick: Add diced jalapeños or a spoonful of diced chipotle peppers in adobo sauce to the filling for a flavor explosion. This brings a smoky heat that elevates the enjoyment of each chimichanga.
- Cheesy Goodness: For an extra cheesy delight, mix in some cream cheese or mozzarella along with the shredded cheese. This addition creates a gooey filling that will have everyone reaching for seconds.
- Southwest Shrimp: Swap the chicken for cooked shrimp seasoned with taco spices for a coastal twist. The shrimp adds a unique flavor that surprises and delights, perfect for seafood lovers.
- Chili-Infused: Incorporate a tablespoon of chili powder or cayenne pepper for a spicy chimichanga. This is a simple way to turn up the heat and satisfy those who crave a kick in their meals.
- Baked Breakfast Version: Stuff the chimichangas with scrambled eggs, sausage, and cheese for a hearty breakfast option. These can be a fun weekend brunch fare the whole family will love.
- Creamy Avocado: Include mashed avocado in the filling for a creamy texture. The smooth avocado complements the crunch beautifully, while also providing healthy fats.
- Savory BBQ Chicken: For a sweet and tangy twist, mix shredded chicken with your favorite BBQ sauce. This creates a different flavor profile that is perfect for those who love barbecue.
Experiment with these variations and enjoy your culinary journey. And for more delicious chicken ideas, don’t forget to check out this recipe for Crispy Oven Baked Chicken or the flavorful Baked Hot Honey that perfectly pairs with your chimichangas!
Crispy Easy Baked Chicken Chimichangas Recipe FAQs
How do I choose ripe ingredients for the filling?
Absolutely! When picking avocados for guacamole, look for ones that are slightly soft to the touch but not mushy. For salsa, pick ripe tomatoes that are brightly colored and have no dark spots; they should feel heavy for their size. Fresh green onions should be firm with vibrant, green tops, indicating freshness and flavor.
What’s the best way to store leftover chimichangas?
Store leftover Easy Baked Chicken Chimichangas in an airtight container in the fridge for up to 3 days. Be sure to let them cool completely before sealing to maintain their crispy texture. When reheating, a quick zap in the oven is preferable to keep them from becoming soggy.
Can I freeze unbaked chimichangas?
Very much! To freeze, individually wrap each unbaked chimichanga tightly in plastic wrap and then place them in a freezer-safe bag. They can be stored for up to 3 months. When you’re ready to enjoy, simply thaw them in the fridge overnight and bake them directly from the fridge for a delicious dinner.
What if my chimichangas aren’t crispy after baking?
If your chimichangas turn out soggy, try increasing your baking time slightly. Ensure they are spaced apart on the baking sheet, allowing the hot air to circulate around them. If they still lack crunch, a quick reheat in the oven at 350°F (175°C) for about 10 minutes should help crisp them up again.
Are these chimichangas safe for those with gluten allergies?
For guests with gluten sensitivities, I recommend using gluten-free flour tortillas. Most brands offer a great texture and flavor without the gluten. Additionally, check your salsa and cheese for any hidden sources of gluten, ensuring a safe and delicious meal.
Can I use different proteins in the filling?
Certainly! The beauty of Easy Baked Chicken Chimichangas lies in their versatility. Replace the shredded chicken with cooked ground beef, pulled pork, or even a medley of sautéed vegetables for a delightful vegetarian version. Just remember to adjust your seasonings to match the filling!
Crispy Easy Baked Chicken Chimichangas for Family Fun
Ingredients
Equipment
Method
- Preheat your oven to 400°F (200°C) and prepare a baking sheet with parchment paper.
- In a large mixing bowl, combine the cooked shredded chicken, refried beans, salsa, coriander, chili powder, shredded cheese, green onions, and jalapeños.
- Lay a flour tortilla flat and spoon a generous amount of the chicken filling along the center. Roll tightly, folding in the sides.
- Place the chimichangas seam-side down on the baking sheet, brush with melted butter.
- Bake for 15 minutes, flip each chimichanga, and return to the oven for an additional 10 minutes.
- Allow to cool for 5-10 minutes before serving.