Advertisement
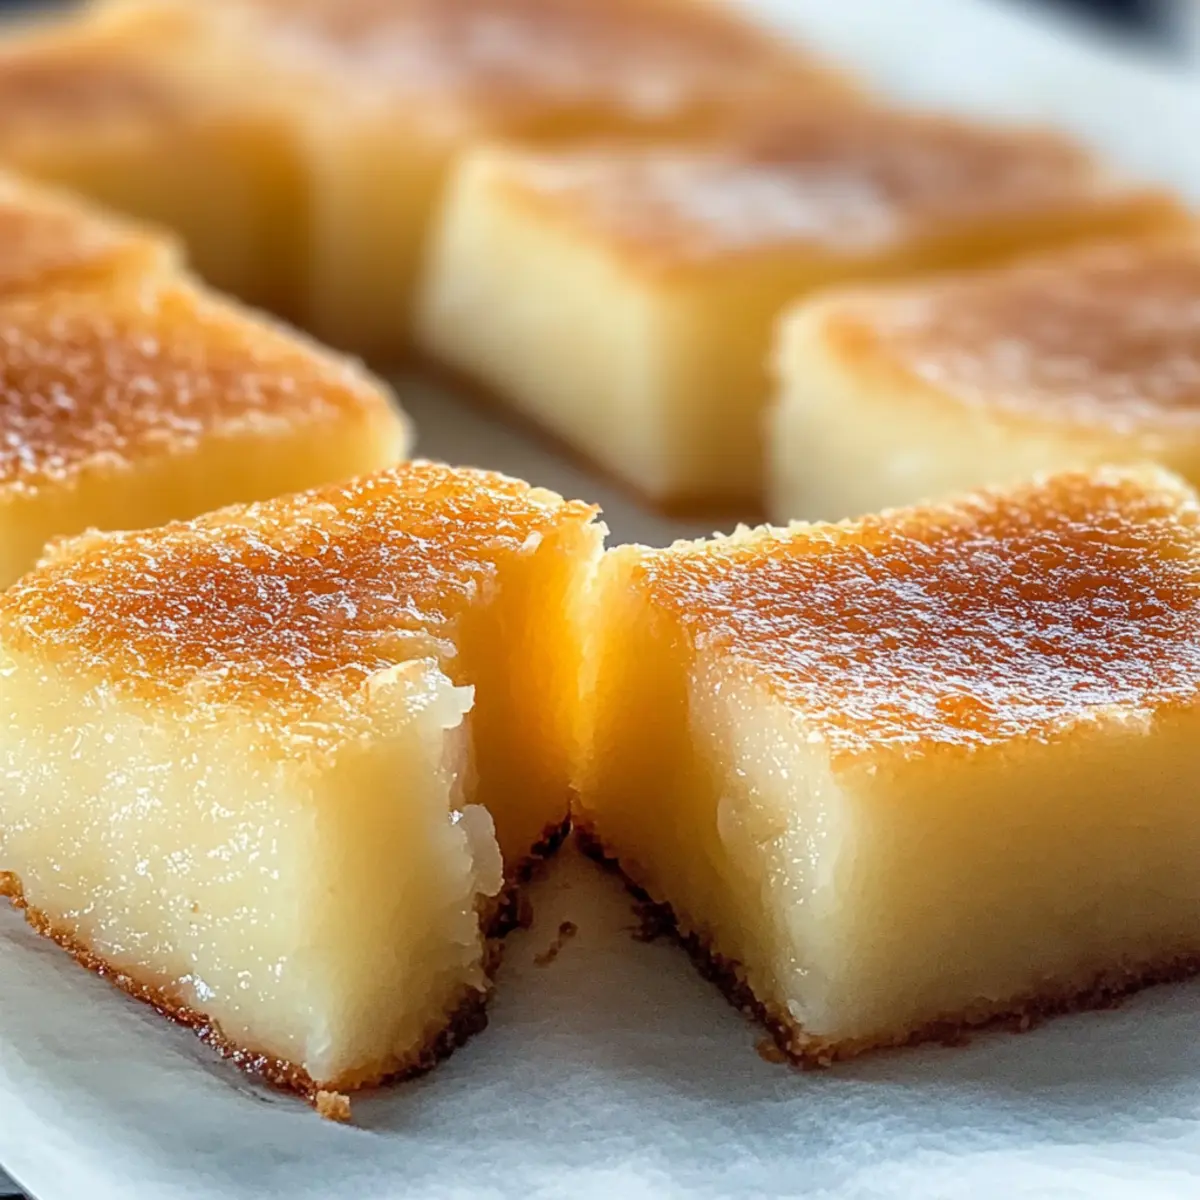
As I was stirring a smooth, creamy coconut concoction, the aroma instantly whisked me away to the vibrant shores of Hawaii. That’s when I decided to make Hawaiian Butter Mochi, a dessert that’s as delightful as it is unique. This gluten-free treat is not just a dessert; it’s an experience packed with the tropical goodness of coconut milk, delivering a chewy texture that will leave everyone at your table wanting more. Best of all, this recipe requires only a handful of simple ingredients and comes together in no time, making it perfect for spontaneous gatherings or cozy afternoons at home. So, are you ready to dive into this blissful bite of the tropics?
Why is Hawaiian Butter Mochi so special?
Irresistible Texture: The chewy goodness of Hawaiian Butter Mochi is unlike any other dessert, offering a delightful bounce that keeps you coming back for more.
Tropical Flavor Explosion: With coconut milk as the star ingredient, each bite transports you straight to paradise.
Quick to Prepare: This dessert can be whipped up in no time, perfect for those last-minute gatherings!
Versatile Variations: Feel free to get creative by adding ube extract or matcha powder for a colorful twist.
Gluten-Free Delight: It’s a fantastic option for gluten-sensitive friends, ensuring everyone can enjoy a slice.
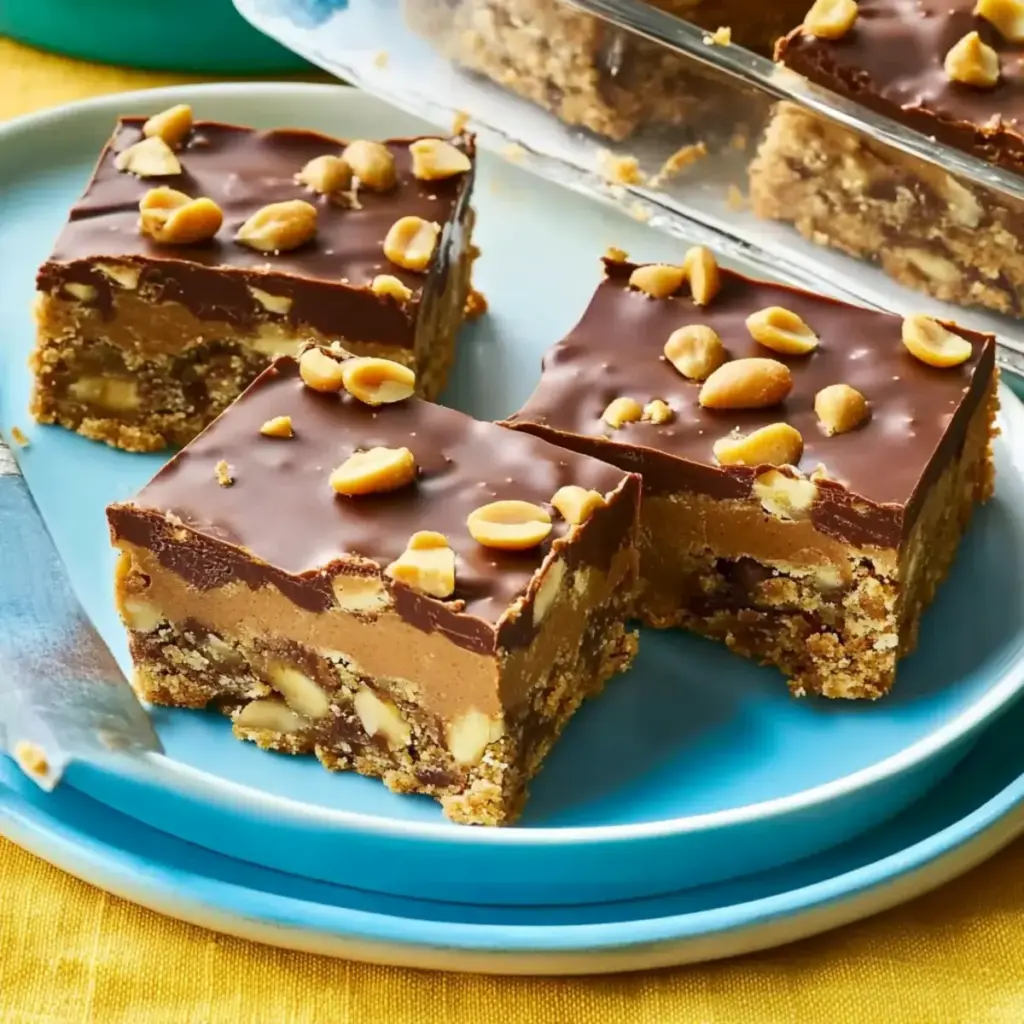
Crowd-Pleasing Treat: Bring this dish to your next get-together, and watch it disappear in minutes! For more delightful recipes, don’t miss my Peanut Butter Chocolate or Buttercream Icing Every creations.
Hawaiian Butter Mochi Ingredients
• Let’s gather what you need!
Advertisement
For the Batter
- Sweet Rice Flour – Essential for achieving the signature chewy texture; regular rice flour won’t work.
- Coconut Milk – Adds a rich, tropical flavor that makes each bite an island getaway.
- Salted Butter – Enhances creaminess and contributes to the dessert’s richness.
- Granulated Sugar – Sweetens the mochi perfectly, balancing the flavors beautifully.
- Large Eggs (3) – They bind the ingredients together and provide structure to your mochi.
- Vanilla Extract (1 tsp) – Optional but recommended for an extra layer of flavor.
- Baking Powder (1 tbsp) – Important to give a slight rise and fluffiness to the mochi.
- Shredded Coconut (1 cup) – Optional for extra coconut goodness and delightful texture.
This Hawaiian Butter Mochi recipe is a true tropical delight that’s bound to impress!
Step‑by‑Step Instructions for Hawaiian Butter Mochi
Step 1: Preheat the Oven
Begin by preheating your oven to 350°F (175°C). While the oven heats up, prepare an 8×8-inch baking pan by lining it with parchment paper and greasing it with a bit of butter. This will prevent the delicious Hawaiian Butter Mochi from sticking and make for easy removal later.
Step 2: Mix Wet Ingredients
In a large mixing bowl, whisk together three large eggs and granulated sugar until the mixture is frothy and pale. Next, pour in the rich coconut milk and the melted salted butter, along with vanilla extract if you choose to use it. Mix everything smoothly, ensuring all the wet ingredients are well combined, creating a luscious tropical base for your mochi.
Step 3: Combine Dry Ingredients
Gradually sift in the sweet rice flour and baking powder into the wet mixture, taking care to fold the ingredients gently. Use a spatula to mix until just combined, ensuring you do not overmix, as this could affect the chewy texture of the Hawaiian Butter Mochi. You want a smooth batter with no dry patches left.
Step 4: Bake the Mochi
Pour the batter into the prepared baking pan, then spread it out evenly with a spatula. Place the pan in the preheated oven and bake for about 1 hour and 25 minutes. You’ll know it’s done when the top is golden brown and a toothpick inserted in the center comes out clean. The aroma will fill your kitchen with tropical delight!
Step 5: Cool and Cut
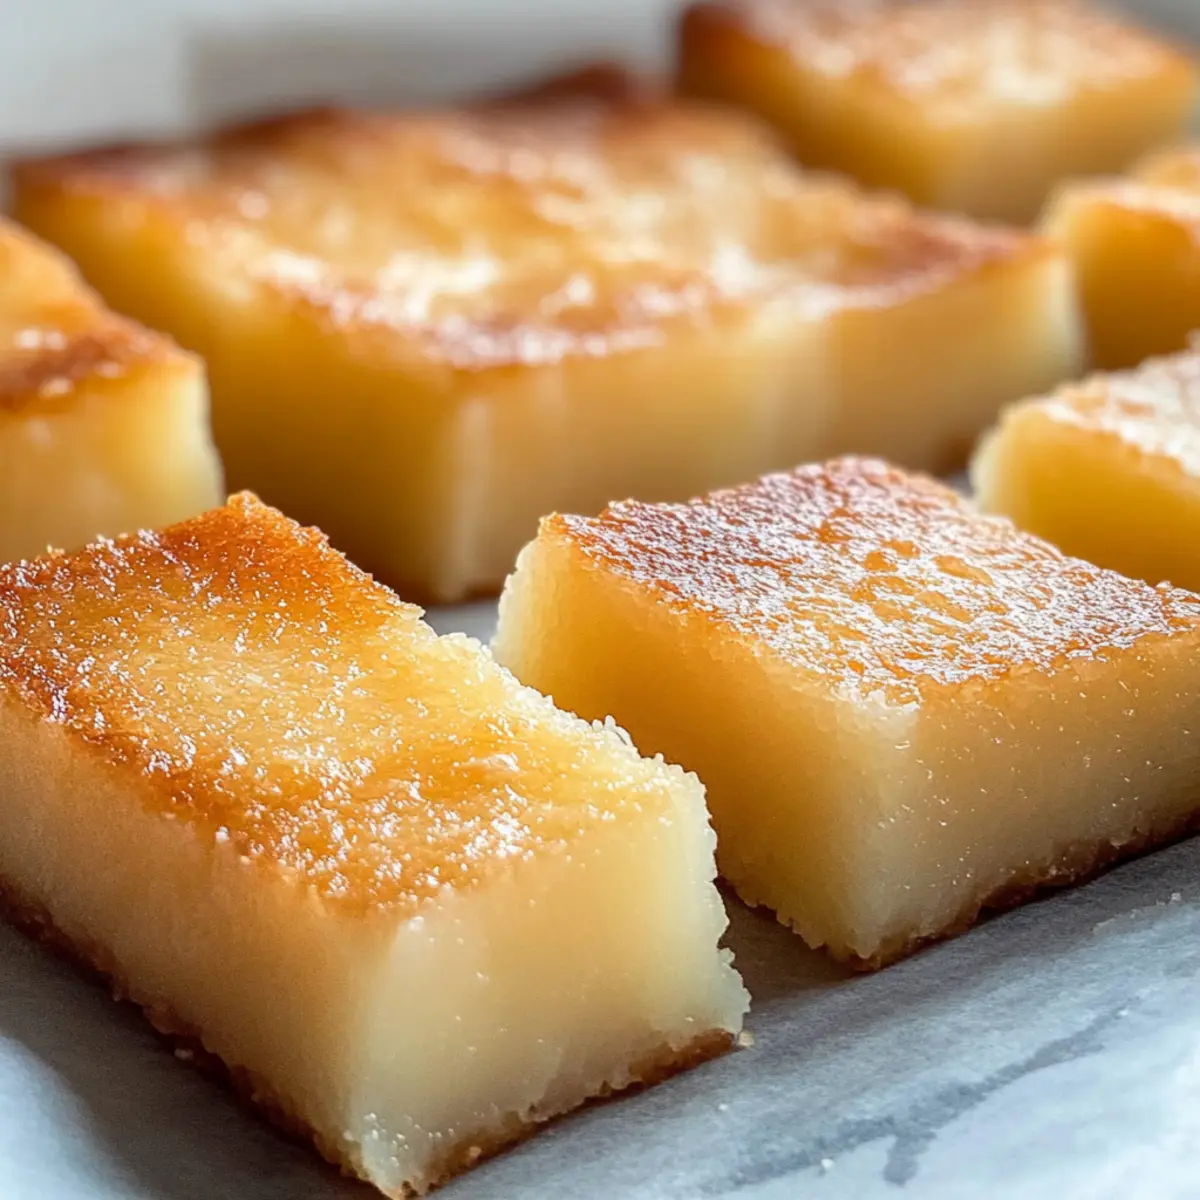
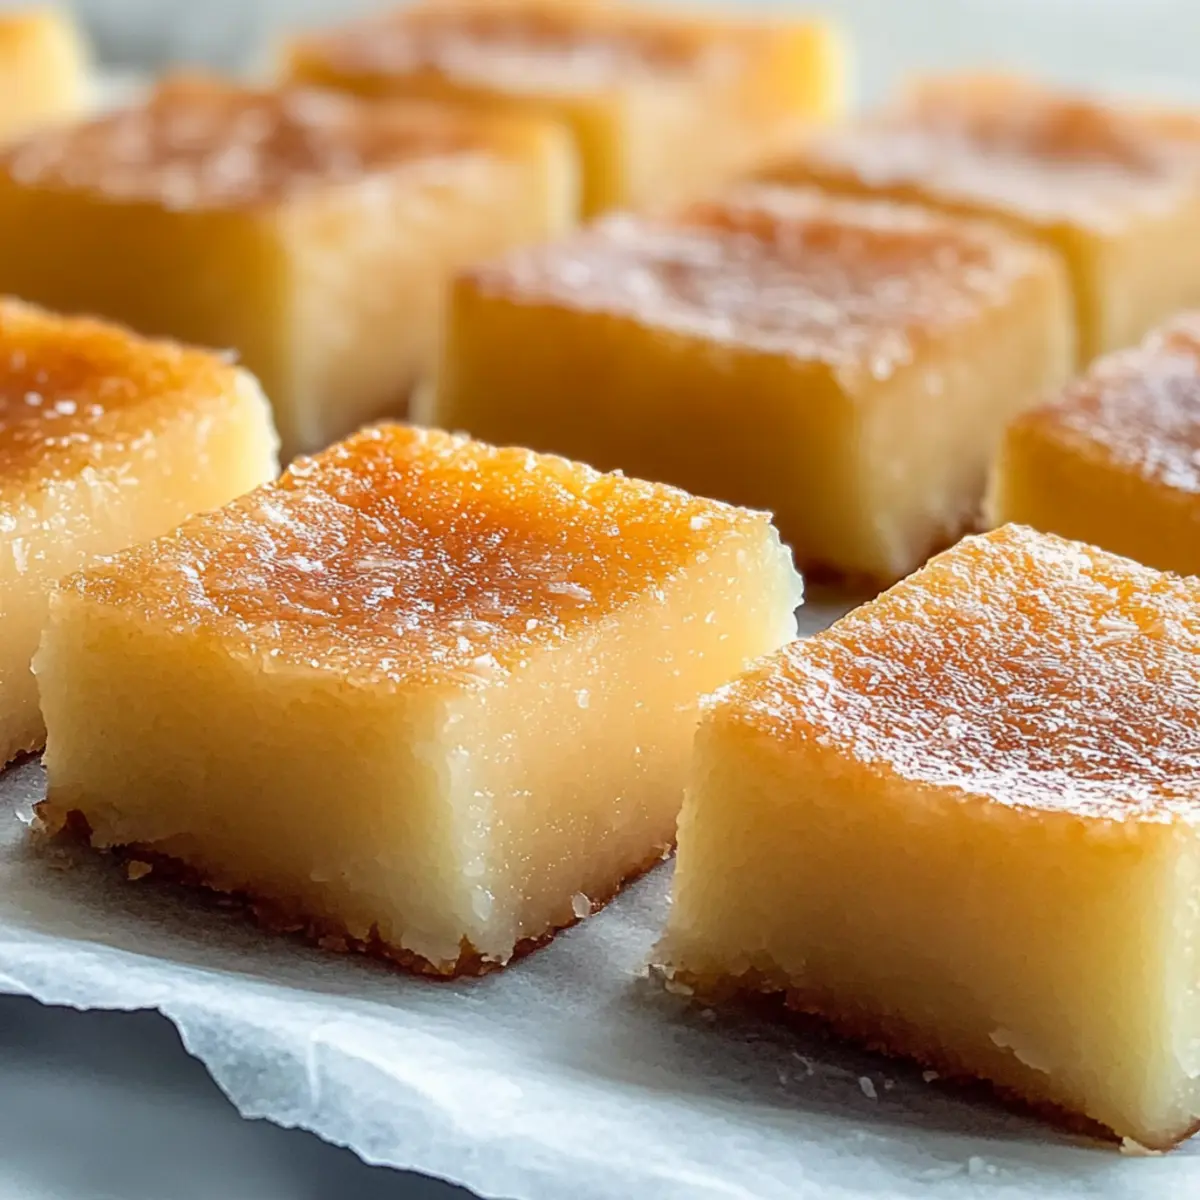
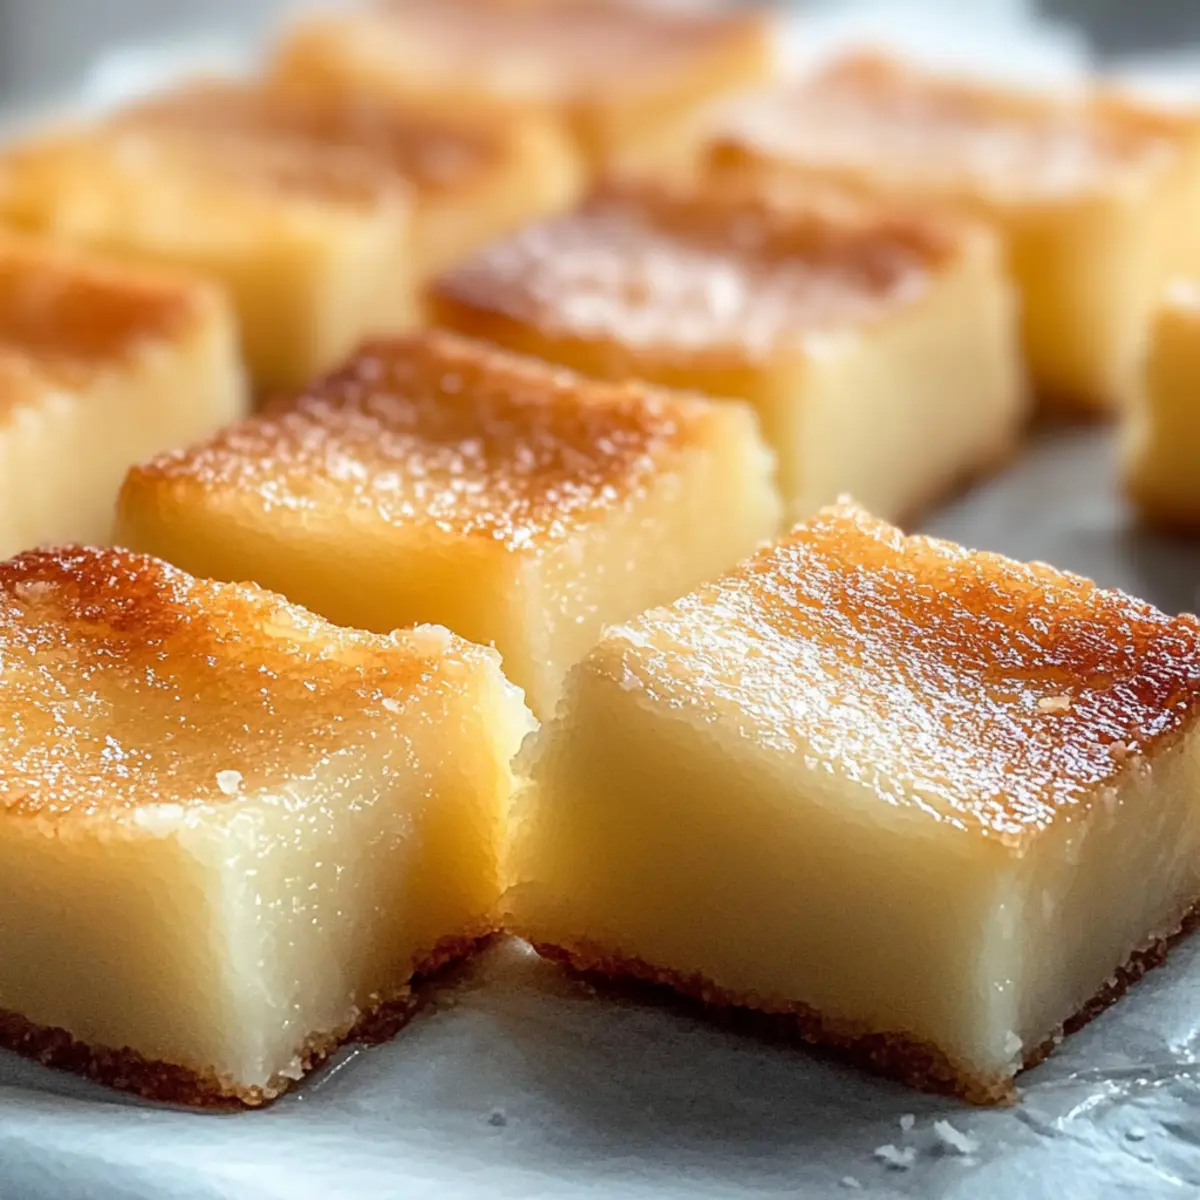
Once your Hawaiian Butter Mochi is baked to perfection, remove it from the oven and let it cool in the pan at room temperature for 20-30 minutes. After it has cooled, use a sharp knife to cut the mochi into squares. This cooling step is crucial as it helps set the chewy texture, making it easier to slice.
Step 6: Serve and Enjoy
Now that your Hawaiian Butter Mochi is cut into delightful squares, it’s ready to serve! Enjoy it as-is or pair it with fresh fruit salad or a scoop of vanilla ice cream for a refreshing treat. Enjoy this tropical dessert that showcases the chewy and flavorful goodness of Hawaiian Butter Mochi!
What to Serve with Hawaiian Butter Mochi
Indulging in this delightful dessert opens the door to a world of complementary flavors and textures that will elevate your dining experience.
- Fresh Fruit Salad: A mix of tropical fruits like mango, pineapple, and kiwi adds a refreshing brightness that balances the rich mochi.
- Coconut Whipped Cream: This light, airy topping enhances the coconut flavor, creating a creamy contrast to the chewy texture of the mochi.
- Vanilla Ice Cream: The smooth creaminess of vanilla ice cream beautifully contrasts with the mochi’s unique chew, making every bite heavenly.
- Matcha Green Tea: A warm cup of matcha has an earthy flavor that pairs well, providing a delightful balance with the sweetness of the dessert.
- Toasted Macadamia Nuts: The crunch from toasted nuts adds texture and nutty depth, enriching the overall taste experience.
- Mango Sticky Rice: Enjoying mochi alongside this Thai classic creates a fusion of textures and flavors, bringing tropical flair to your table.
- Tropical Pineapple Punch: A chilled, fruity beverage complements the mochi’s sweetness and keeps the tropical vibes flowing.
- Dark Chocolate Drizzle: A simple drizzle of melted dark chocolate over the mochi adds luxurious richness, making it an elegant dessert choice.
- Coffee or Espresso: The robust flavors of coffee create a delightful contrast with the sweetness of Hawaiian Butter Mochi, perfect for a post-meal treat.
- Lemon Sorbet: This zesty sorbet can cleanse the palate, refreshing your taste buds between bites of chewy delight.
Hawaiian Butter Mochi: Endless Customization
Feel free to let your creativity shine and customize this lovely dessert to suit your taste and dietary needs!
- Dairy-Free: Substitute coconut milk with almond or oat milk for a lighter twist while keeping the tropical vibe.
- Nutty Surprise: Add ½ cup of chopped macadamia nuts to the batter; they provide a delightful crunch and complement the coconut flavor beautifully.
- Matcha Magic: Incorporate 2 teaspoons of matcha powder into your wet ingredients for a vibrant green color and earthy flavor.
- Fruity Delight: Toss in some diced mango or pineapple to the batter to add a juicy burst that perfectly pairs with the mochi’s chewy texture.
- Chocolate Lover’s Dream: Replace the shredded coconut with chocolate chips for a sweet, decadent alternative that will satisfy any chocolate cravings.
- Ube Experience: Swirl in 1 tablespoon of ube extract for a colorful and delicious twist, creating an exquisite purple hue that’s irresistible.
- Coconut Raisins: Mix in dried coconut and raisins for a sweet surprise in every bite; it adds texture and a hint of sweetness to your mochi.
- Spicy Kick: Feel adventurous? Try adding a pinch of cayenne pepper to the batter for a subtle heat that complements the sweet coconut flavor.
With these variations, you can make your Hawaiian Butter Mochi a personalized masterpiece! For further recipe inspiration, check out my delightful Baked Lemon Butter or indulge in my Buttermilk Pancakes Breakfast. Enjoy experimenting!
Make Ahead Options
Hawaiian Butter Mochi is perfect for busy weeknights and meal prepping! You can prepare the batter up to 24 hours in advance by mixing the wet and dry ingredients separately and storing them in airtight containers in the refrigerator. Just before you’re ready to bake, combine them in one bowl, pour the batter into your prepared pan, and bake as instructed. This method keeps all the flavors fresh while saving you precious time. Additionally, you can bake the mochi ahead and store it at room temperature for up to 3 days. To keep it chewy, ensure it’s in an airtight container. When ready to serve, simply slice and enjoy this delightful treat anytime you crave a taste of Hawaii!
Expert Tips for the Best Hawaiian Butter Mochi
- Sweet Rice Flour Only: Ensure to use sweet rice flour (also known as glutinous rice flour); standard rice flour will result in a rubbery texture rather than the desired chewiness.
- Avoid Overmixing: Gently fold your dry ingredients into the wet mix until just combined. Overmixing can lead to dense mochi instead of light and chewy Hawaiian Butter Mochi.
- Check Early: Start checking for doneness a few minutes before the suggested 1 hour and 25 minutes; each oven may vary, and you want it just right!
- Cooling Is Key: Allow the mochi to cool completely before cutting to enhance its chewy quality and prevent crumbling.
- Reheat for Freshness: If storing, microwave slices for 10-15 seconds before serving to bring back their delightful chewiness!
How to Store and Freeze Hawaiian Butter Mochi
Room Temperature: Store in an airtight container at room temperature for up to 3 days to maintain its chewy texture.
Fridge: If you prefer a longer shelf life, refrigerate for up to 1 week in an airtight container. This helps keep the Hawaiian Butter Mochi fresh and delicious.
Freezer: For long-term storage, freeze cut squares in a single layer then transfer to an airtight container or freezer bag. They can last up to 3 months.
Reheating: Thaw at room temperature or simply microwave for 10-15 seconds before serving to restore the delightful chewiness of your Hawaiian Butter Mochi.
Hawaiian Butter Mochi Recipe FAQs
What type of rice flour should I use for Hawaiian Butter Mochi?
Absolutely, for the perfect chewy texture, you must use sweet rice flour (also known as glutinous rice flour). Regular rice flour won’t give you that signature bounce and chewiness that makes Hawaiian Butter Mochi so special. I recommend brands like Mochiko, which you can find in most Asian grocery stores.
How should I store leftover Hawaiian Butter Mochi?
You can store Hawaiian Butter Mochi in an airtight container at room temperature for up to 3 days. If you want to extend its shelf life, refrigerate it for up to 1 week and keep it sealed tightly. Just remember, it’s best enjoyed at room temperature to maintain that delightful chewiness!
Can I freeze Hawaiian Butter Mochi?
Yes, you can absolutely freeze Hawaiian Butter Mochi! After cutting it into squares, arrange them in a single layer on a baking sheet and place it in the freezer until firm. Then, transfer them to an airtight container or freezer bag, where they can be stored for up to 3 months. When ready to enjoy, simply thaw them at room temperature or microwave them for about 10-15 seconds to regain their chewy goodness.
What do I do if my Hawaiian Butter Mochi comes out too dry?
If your Hawaiian Butter Mochi turns out dry, it may be due to overbaking. Make sure to start checking for doneness a few minutes before the full baking time (1 hour and 25 minutes). If it’s done, a toothpick should come out clean but the top shouldn’t be overly browned. If you find yourself in the unfortunate situation of having dry mochi, consider warming it slightly in the microwave; this might help restore the moisture and chewiness!
Is Hawaiian Butter Mochi gluten-free?
Yes, Hawaiian Butter Mochi is naturally gluten-free as it’s made with sweet rice flour, which contains no wheat. This makes it an excellent dessert option for those with gluten sensitivities. Just be sure to check the labels on any additional ingredients to ensure they are also gluten-free.
Can I add different flavors to the Hawaiian Butter Mochi?
Very! Hawaiian Butter Mochi is a wonderfully versatile dessert. You can enhance its flavor by adding ingredients like ube extract or matcha powder to the batter. Just make sure to adjust the amount and sweetness according to your taste preferences. You could also mix in chocolate chips or nuts for added texture delight!
Hawaiian Butter Mochi: A Chewy Slice of Paradise
Ingredients
Equipment
Method
- Preheat your oven to 350°F (175°C) and prepare an 8x8-inch baking pan with parchment paper.
- In a large bowl, whisk together the eggs and granulated sugar until frothy. Add coconut milk and melted butter, mix until smooth.
- Gradually sift in sweet rice flour and baking powder, folding gently until just combined. Do not overmix!
- Pour the batter into the prepared pan and bake for about 1 hour and 25 minutes until golden brown.
- Once baked, let it cool in the pan at room temperature for 20-30 minutes before cutting into squares.
- Serve as is or with fresh fruit or ice cream. Enjoy your Hawaiian Butter Mochi!